
Connecting Microsoft Entra ID (formerly Azure AD) to CallHippo lets your team sign in through your organization’s identity provider with a single, secure set of credentials.
The setup happens in three parts: activate the integration inside CallHippo, configure a SAML application in the Entra ID portal, and optionally enable user synchronization. Follow the sections in order.
Step 1: Activate the Entra ID SSO integration in CallHippo
- Log in to your CallHippo account.
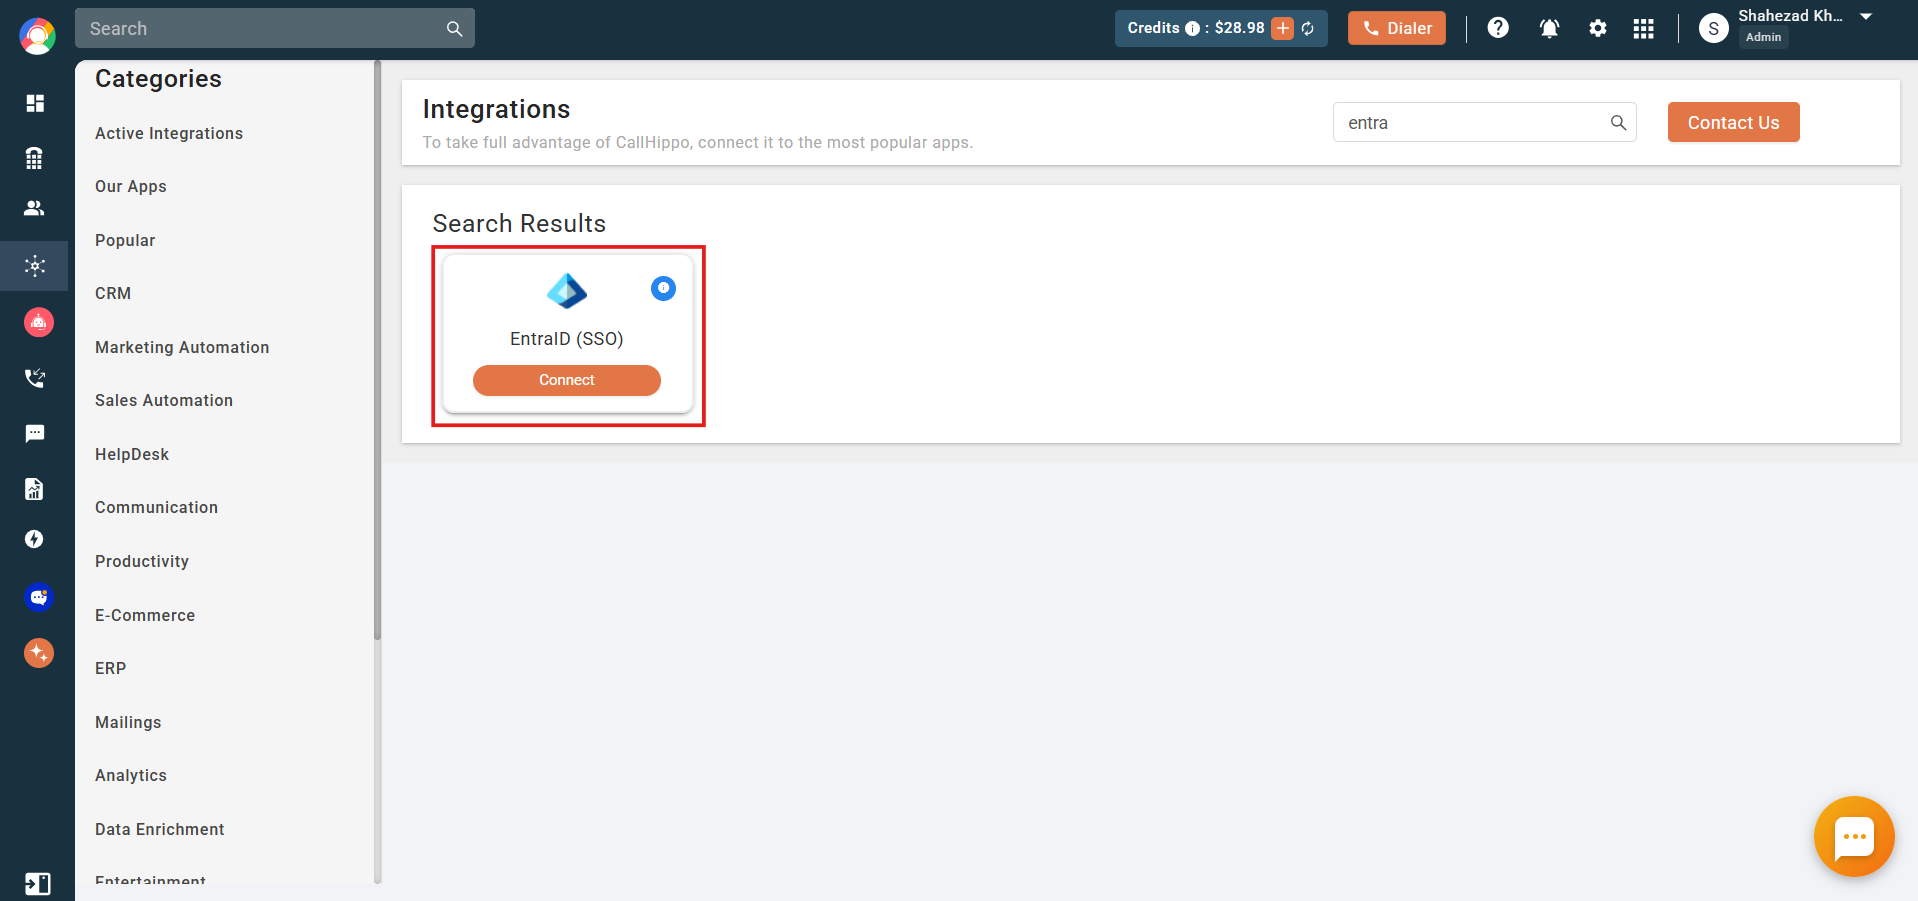
- Open Integrations from the side menu, search for Entra ID SSO, and click Connect.
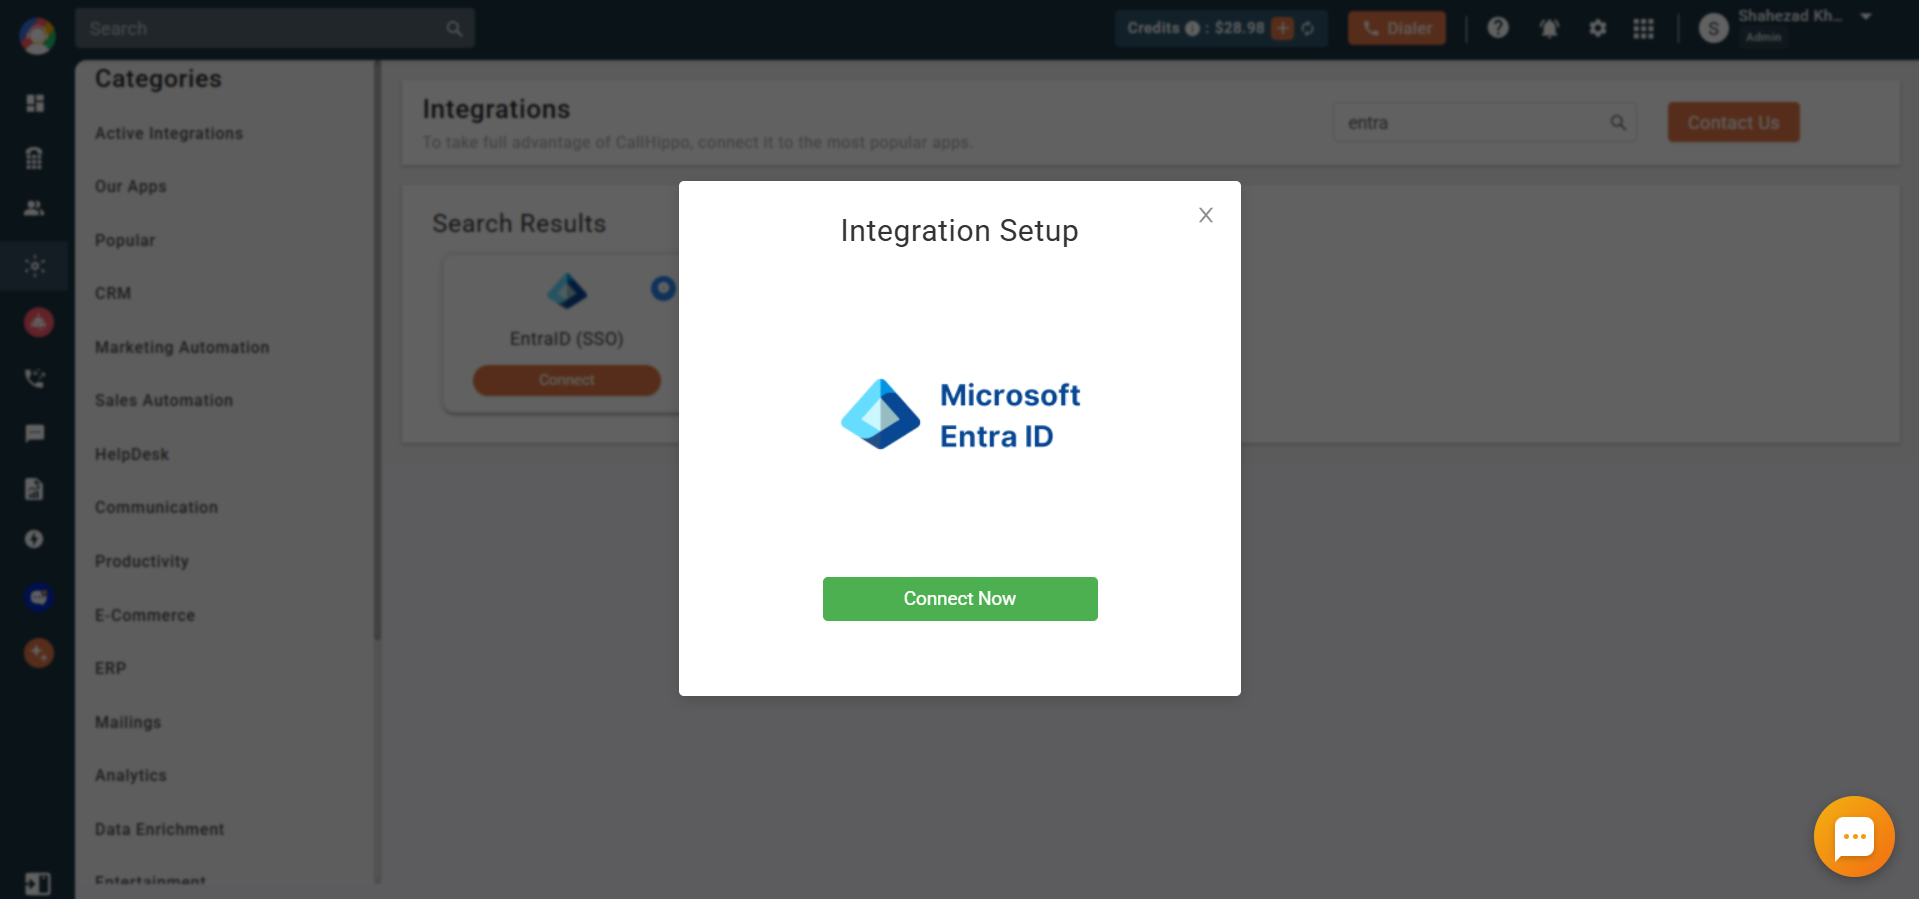
- In the pop-up that appears, click Connect Now.
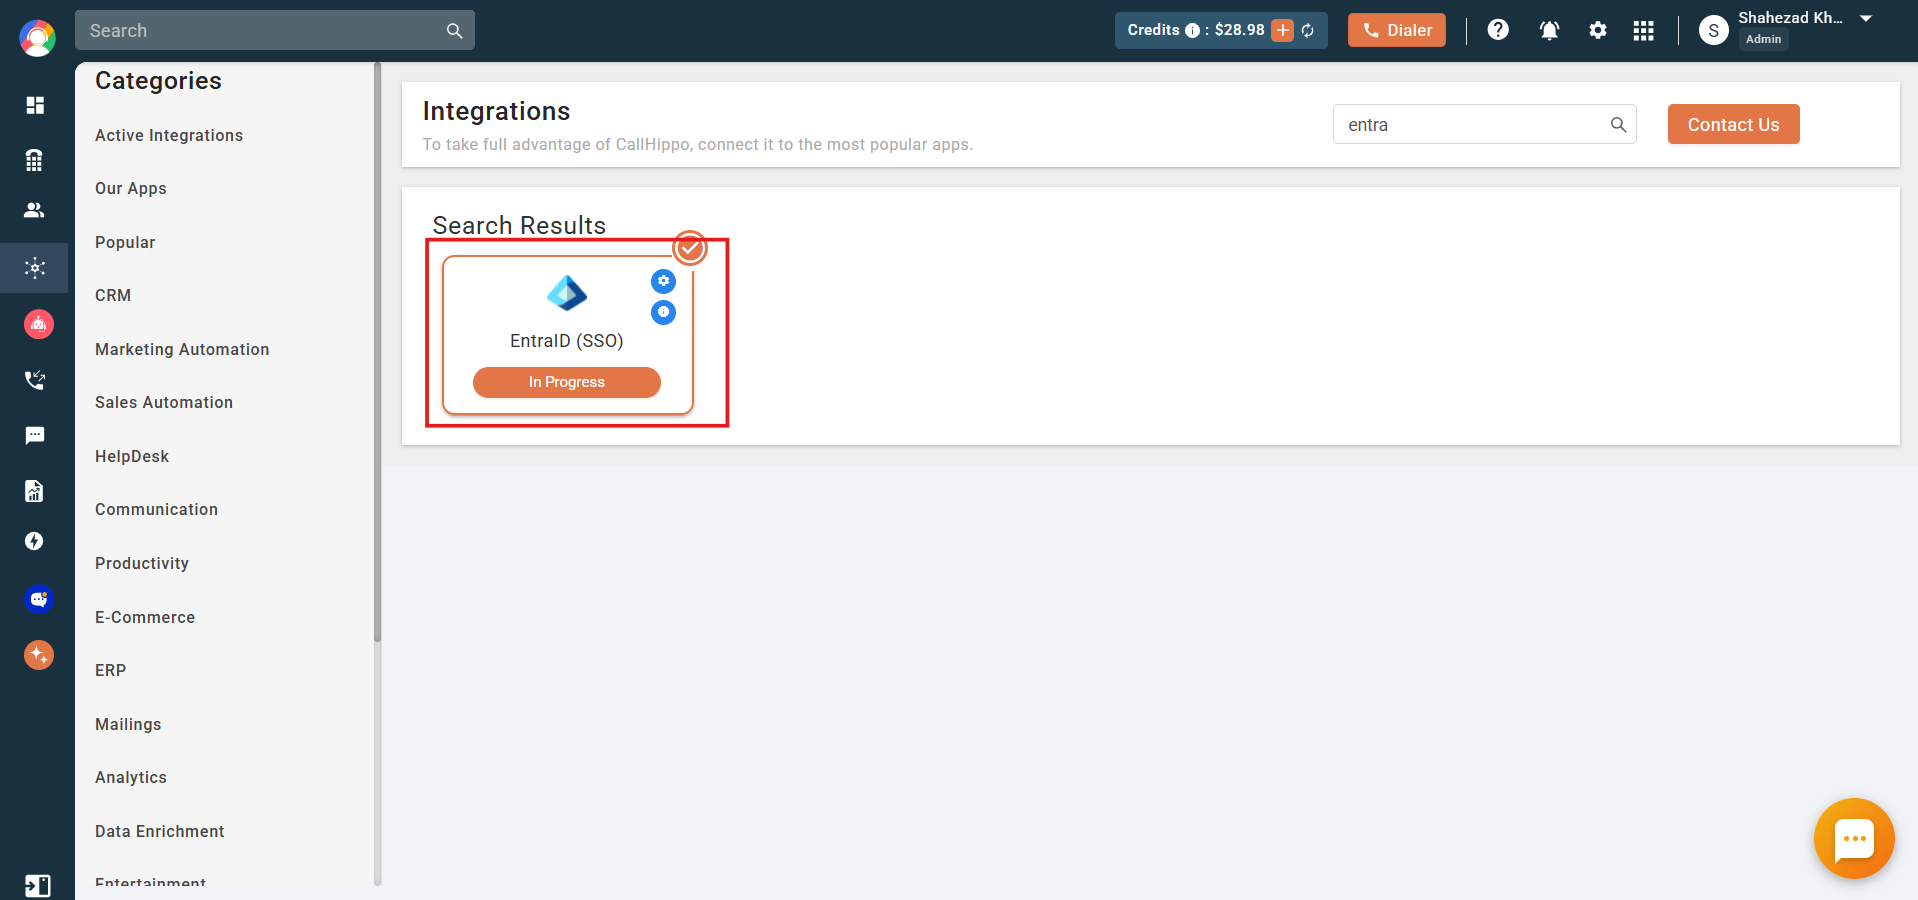
- The integration moves to an In Progress state.
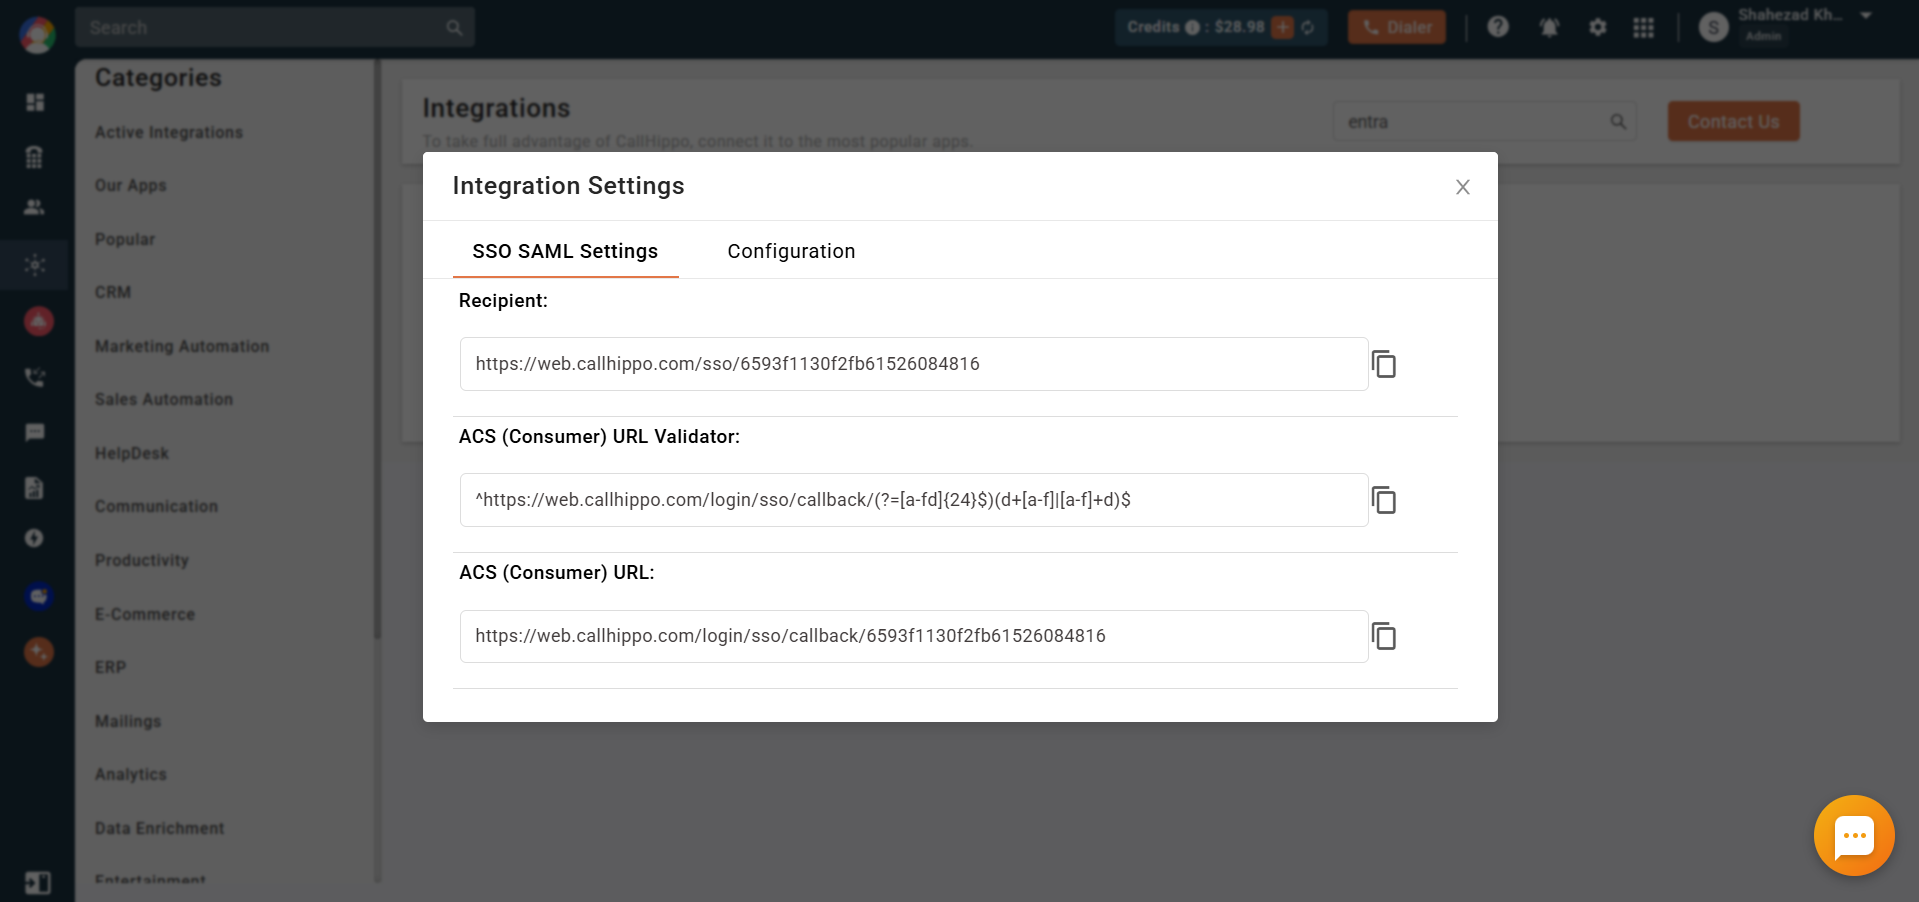
- The Integration Settings pop-up opens. The SSO SAML Settings tab shows the Recipient, ACS URL Validator, and ACS (Consumer) URL you will need in the Entra ID portal.
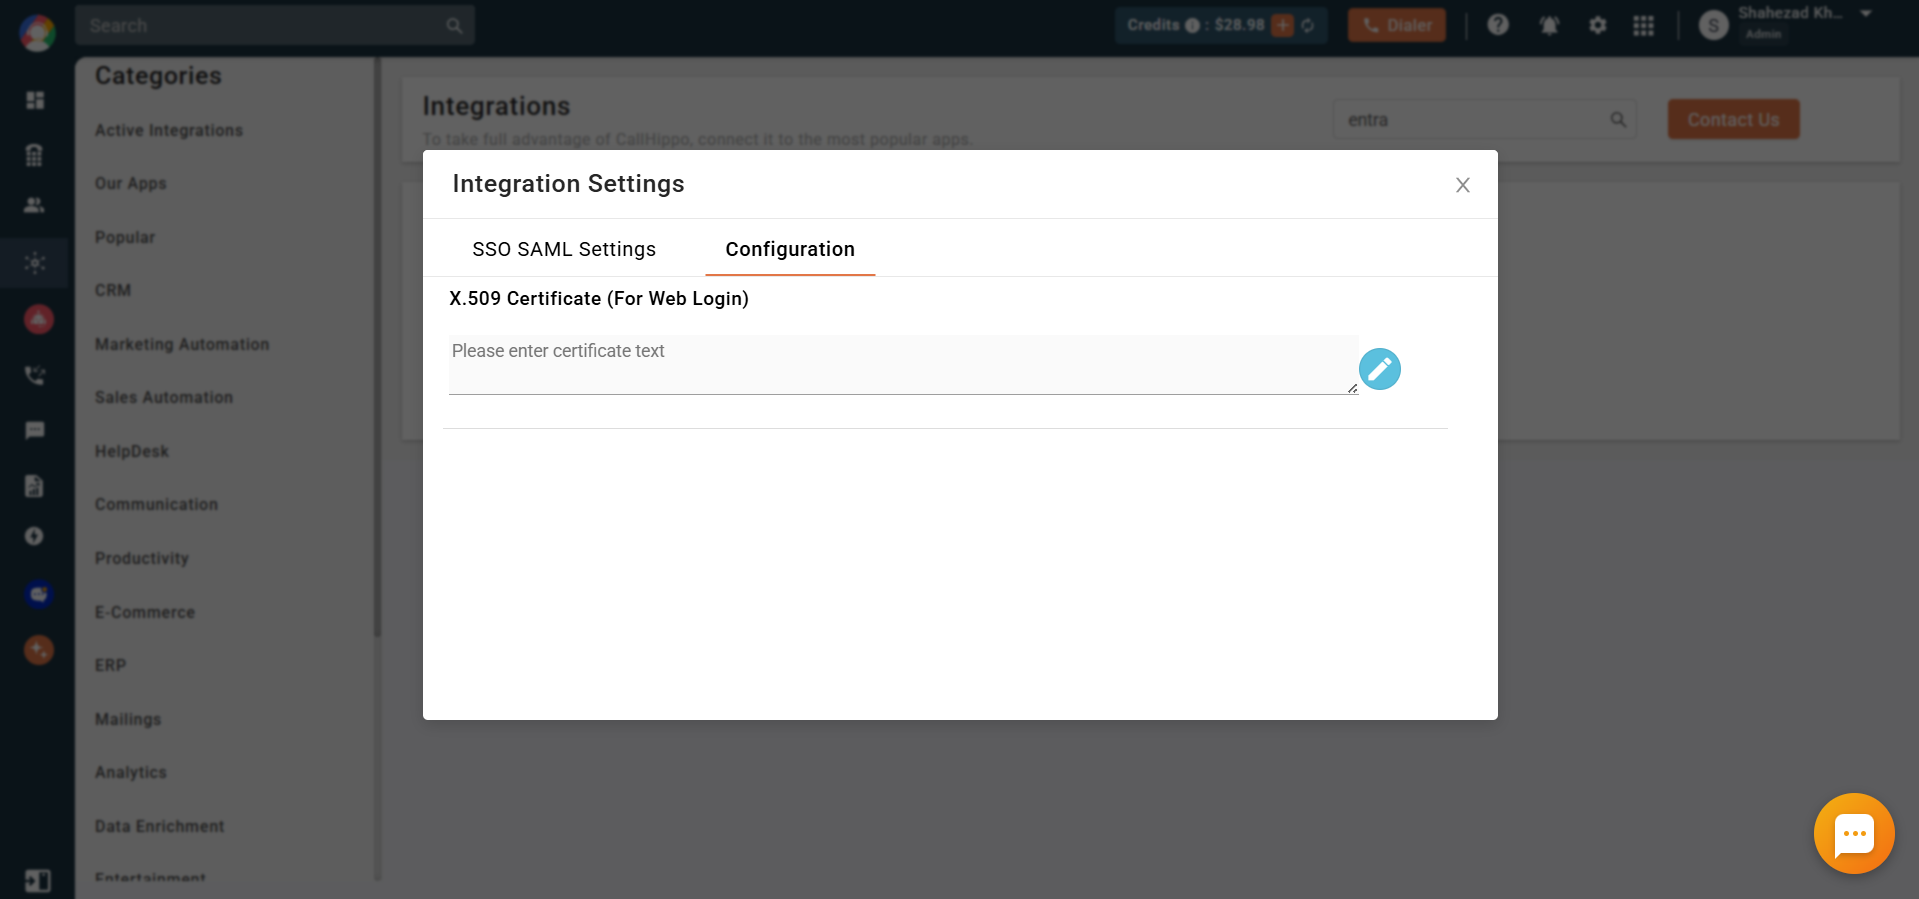
- The Configuration tab is where you will later paste the X.509 certificate text.
Step 2: Configure SSO in Microsoft Entra ID
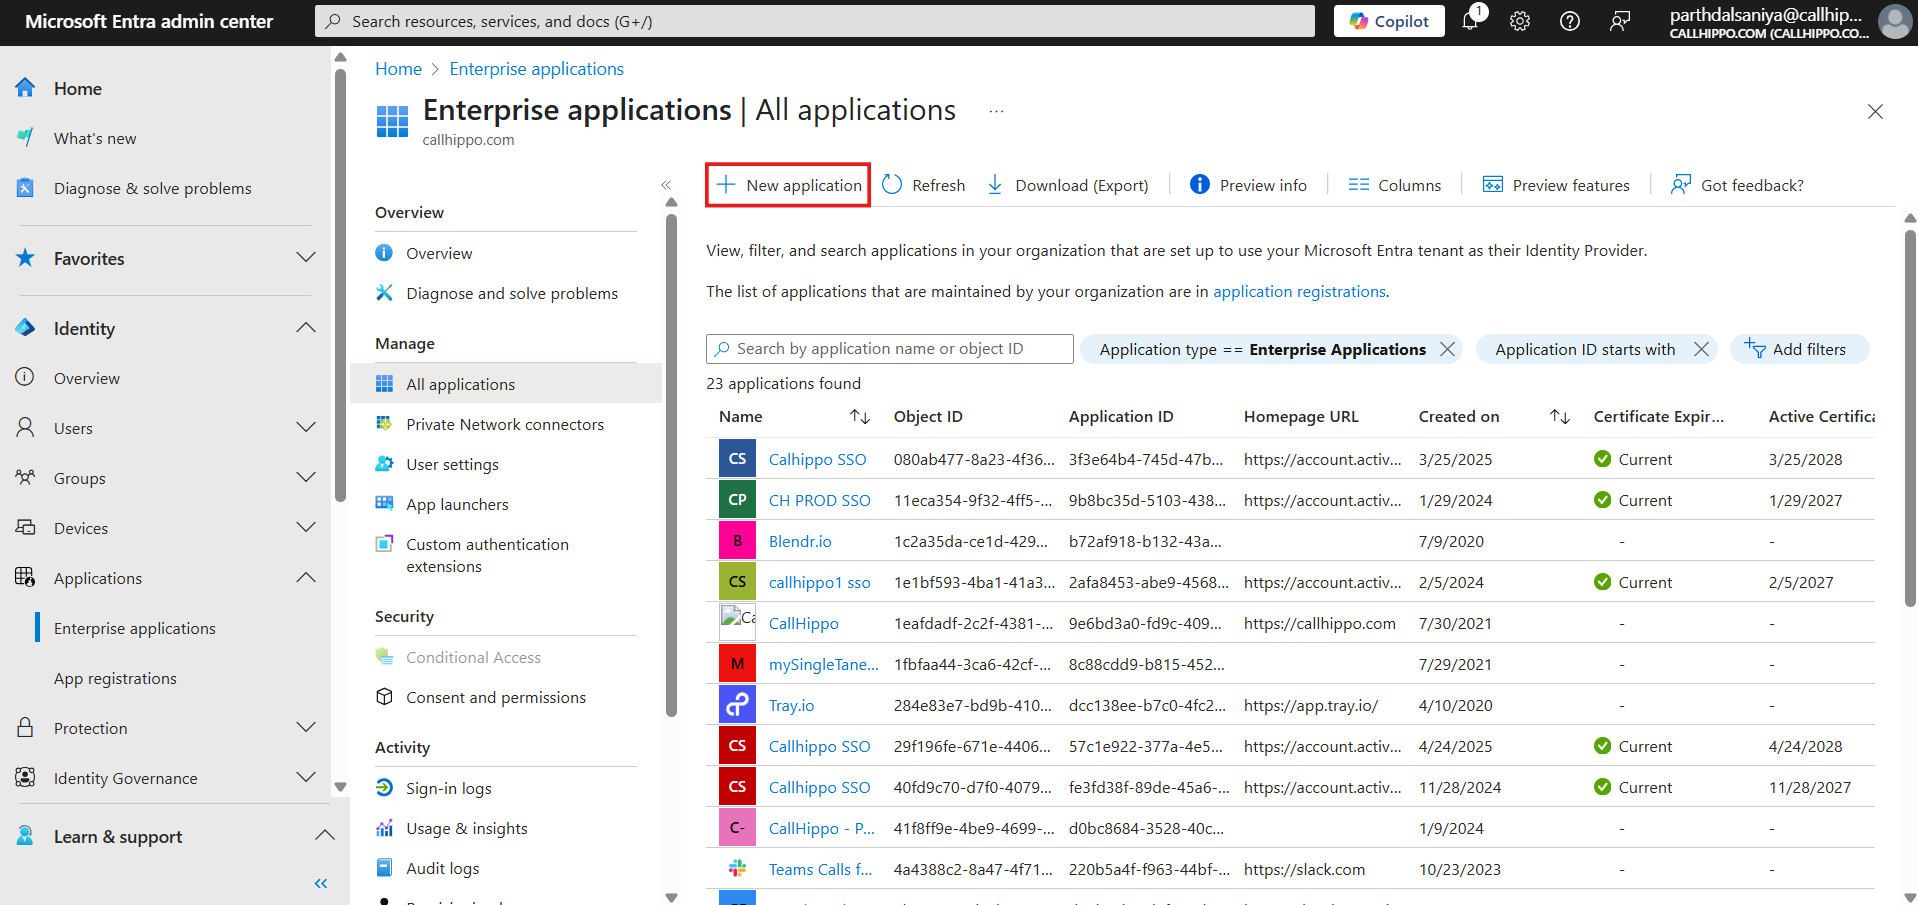
- Log in to the Entra ID portal with an administrator account, go to Enterprise applications, and click New application.
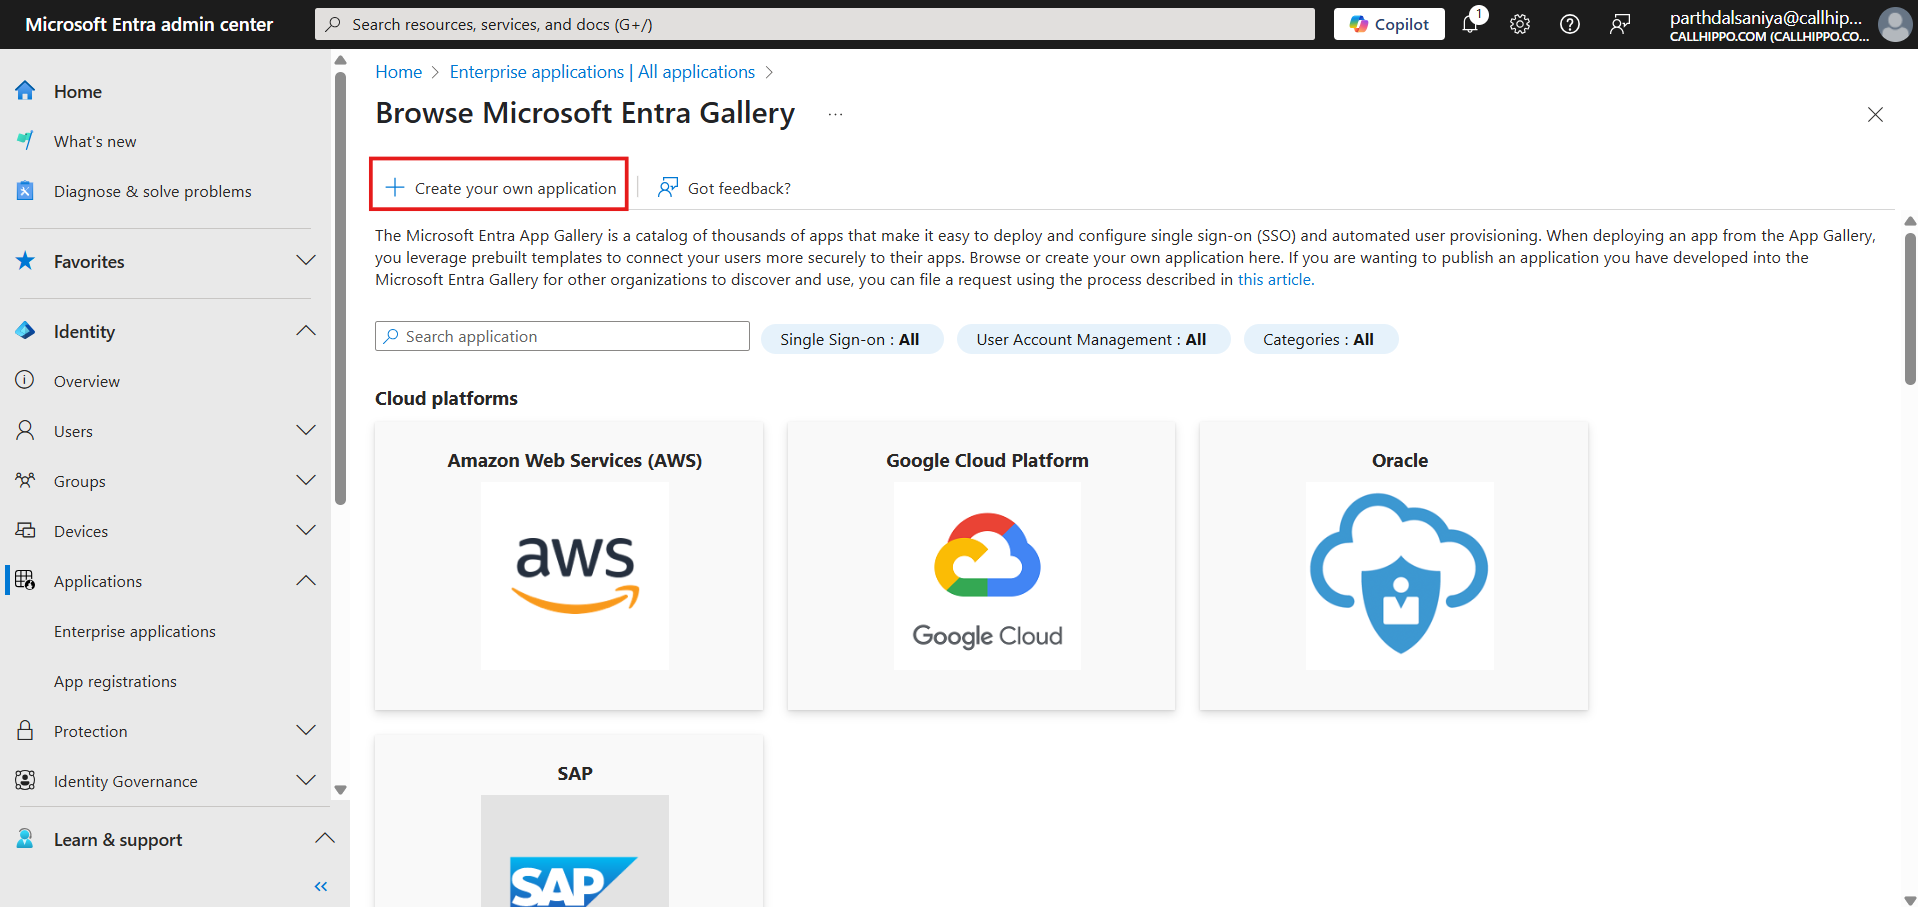
- Click Create your own application at the top of the gallery.
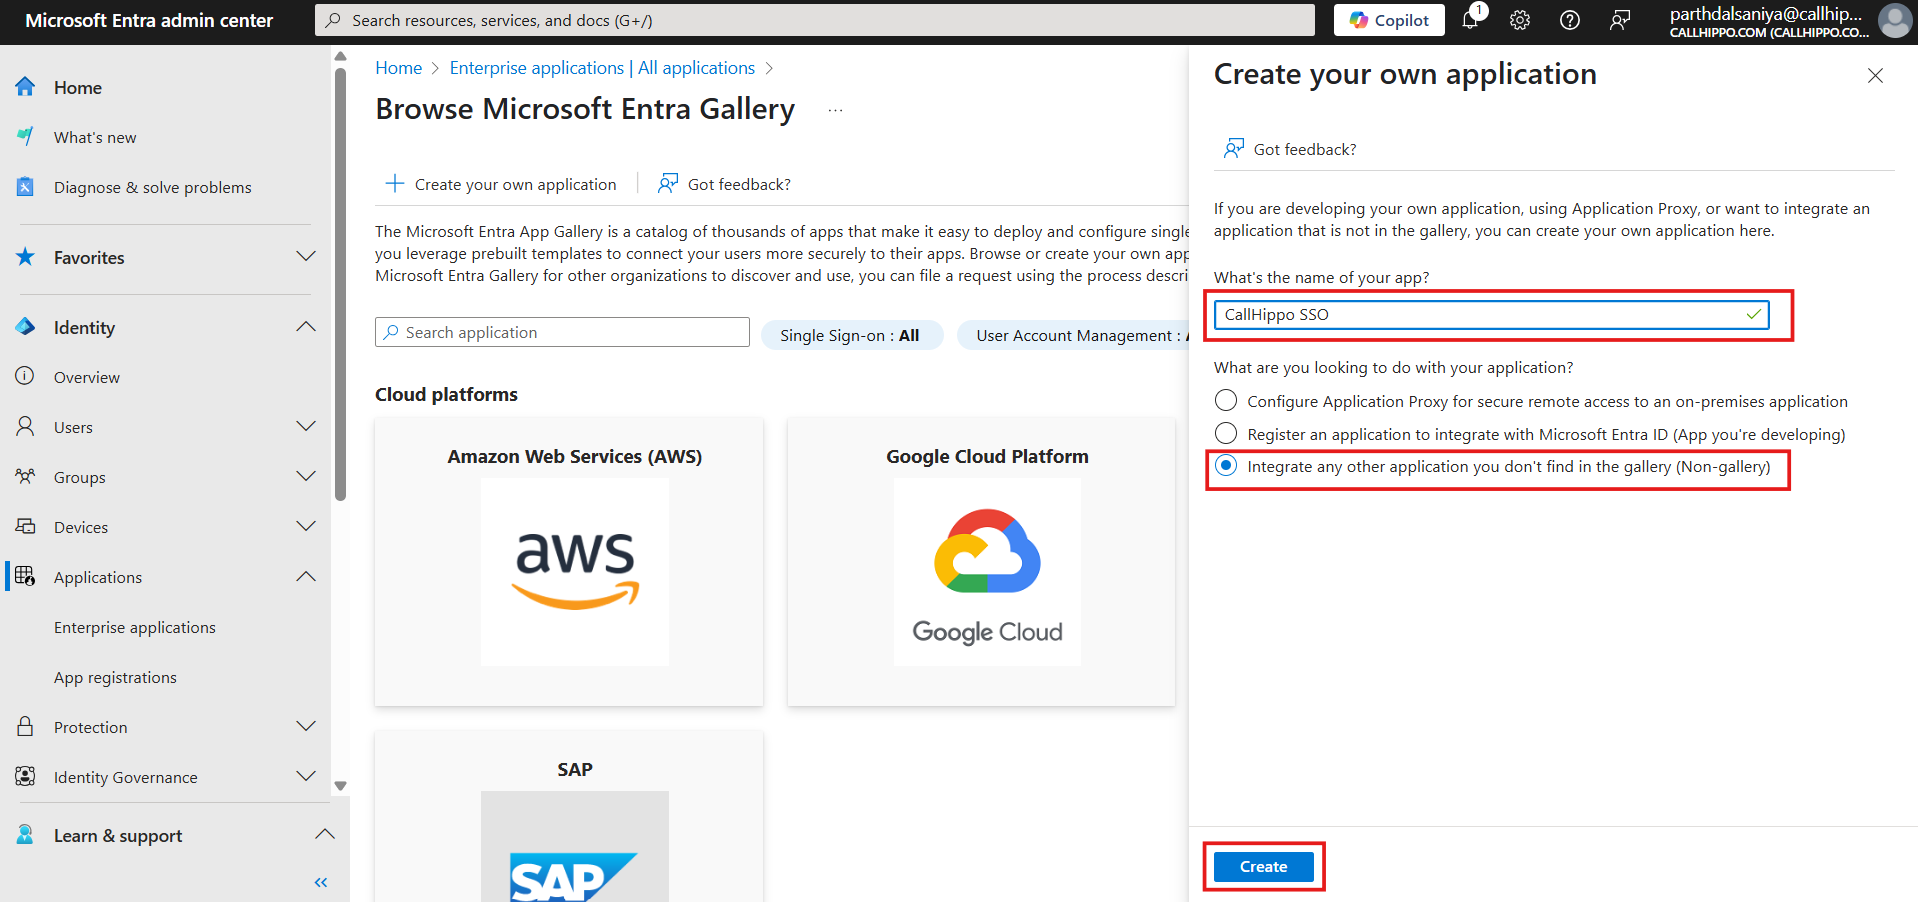
- Enter a name for the application, select Integrate any other application you don’t find in the gallery (Non-gallery), and click Create.
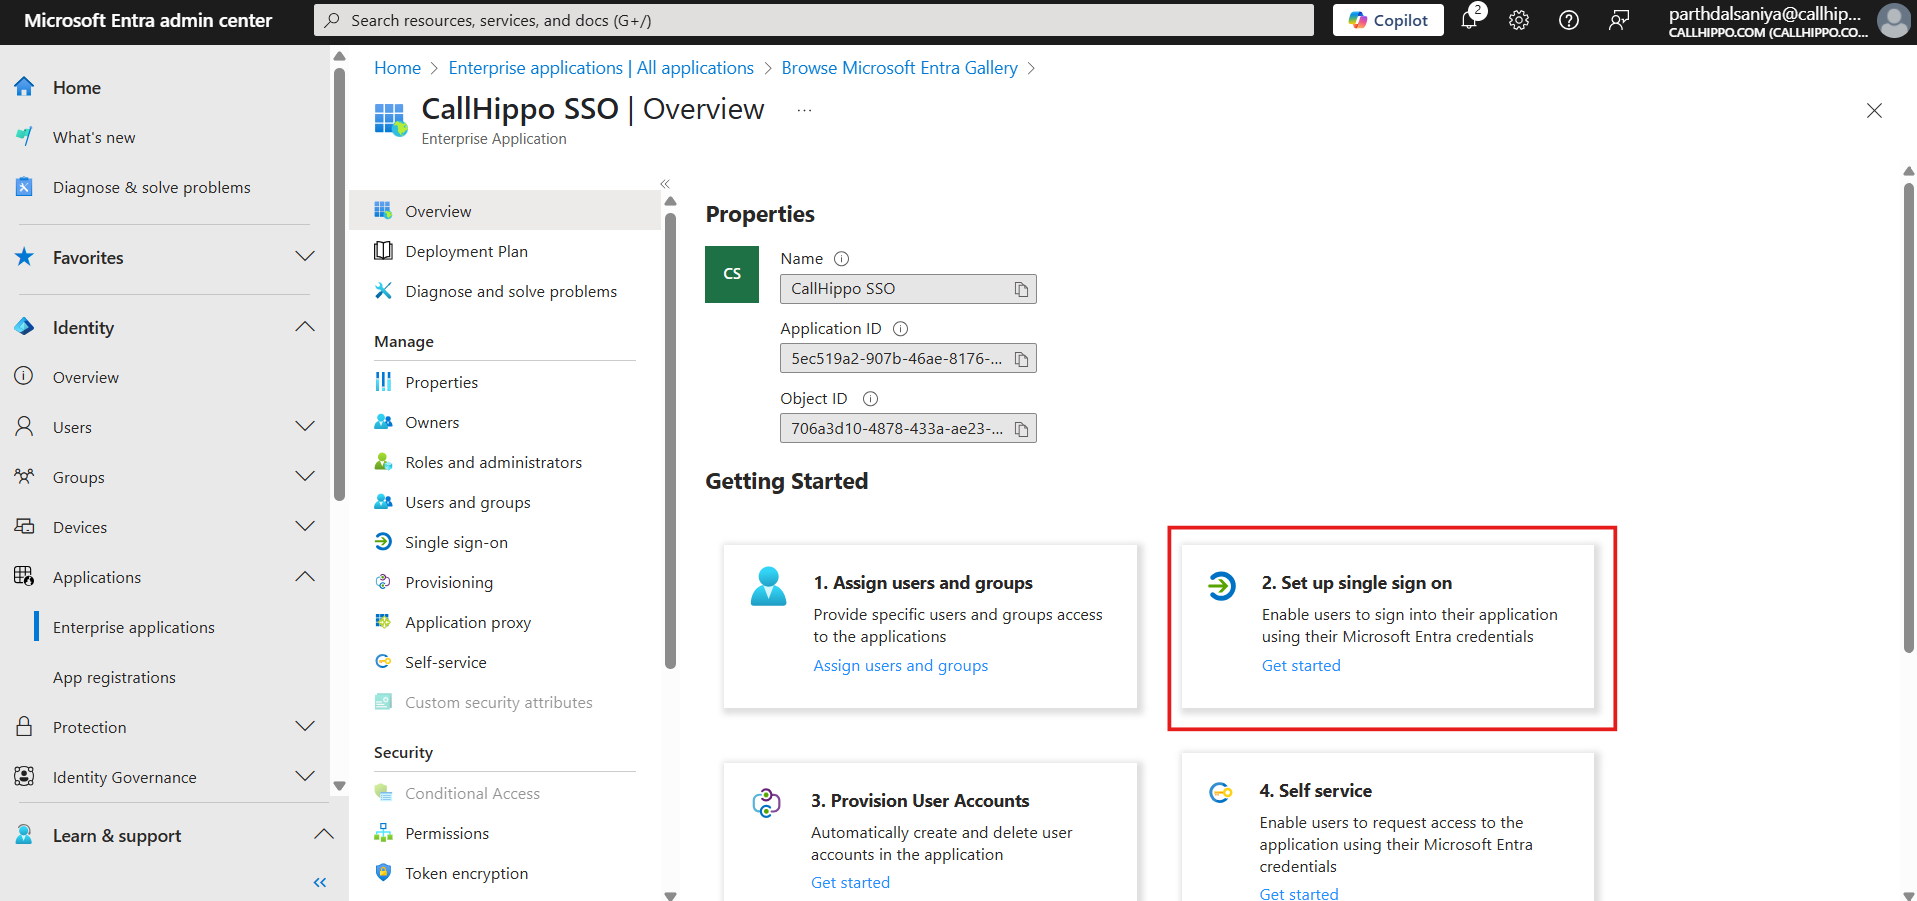
- On the application’s Overview page, open the Set up single sign on tile.
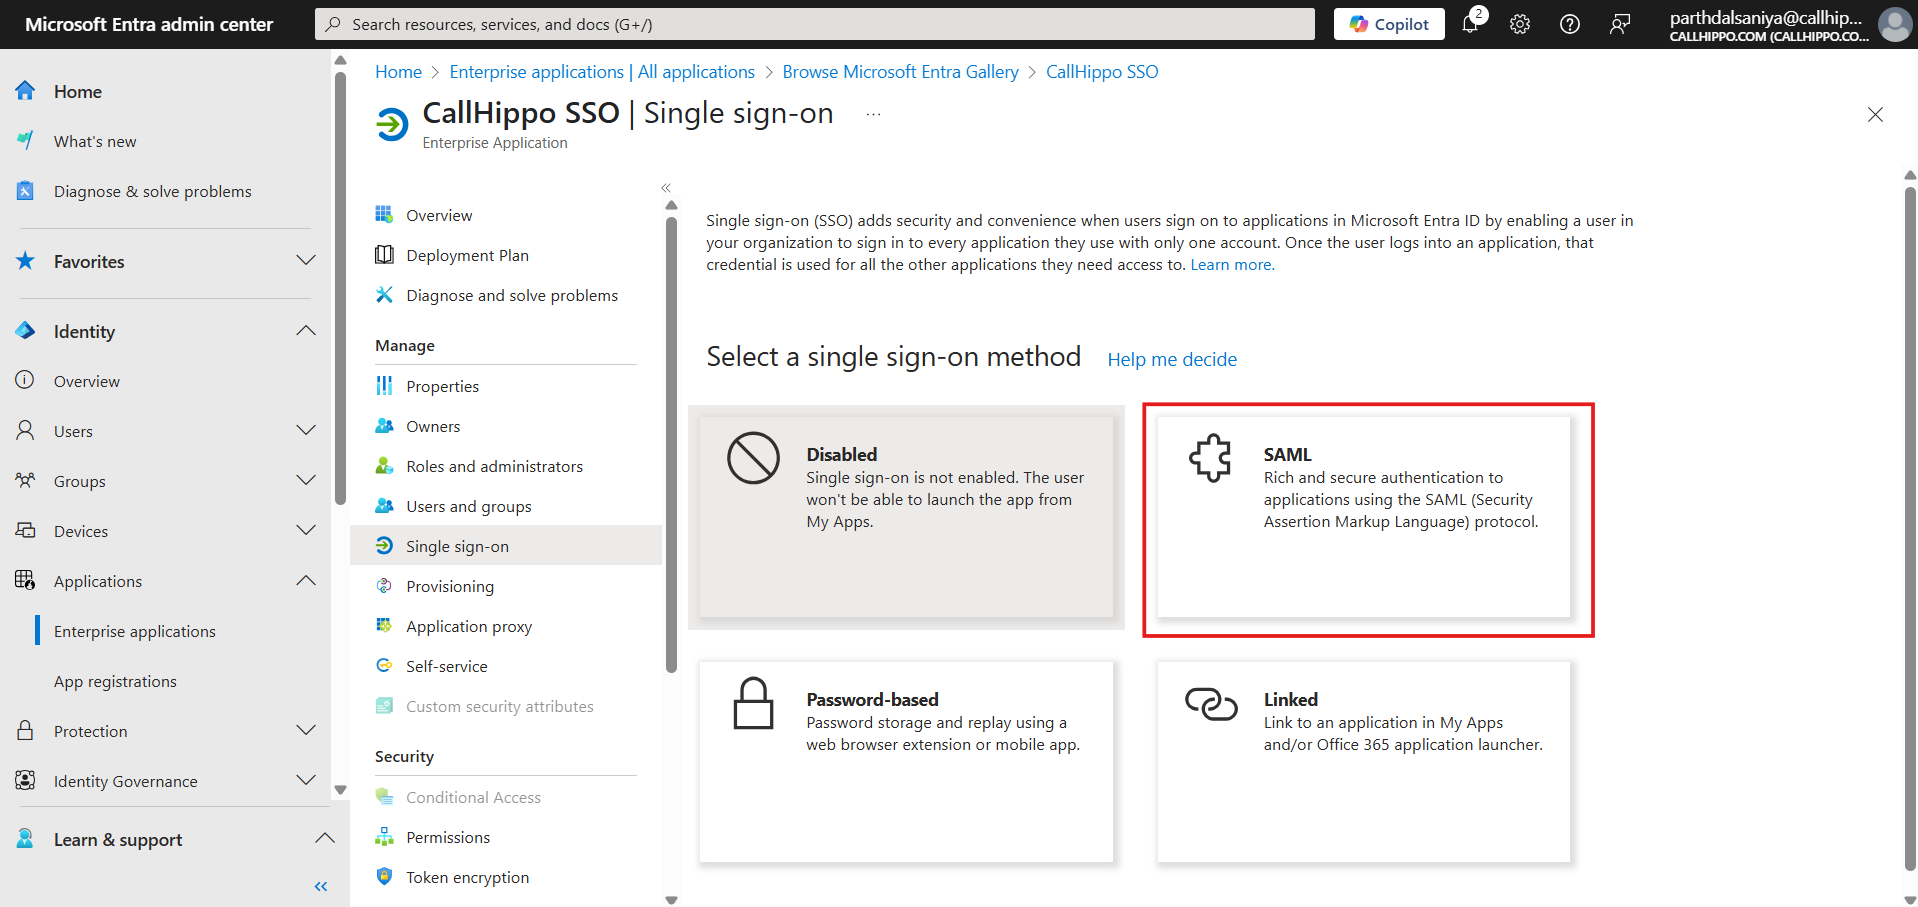
- Choose the SAML single sign-on method.
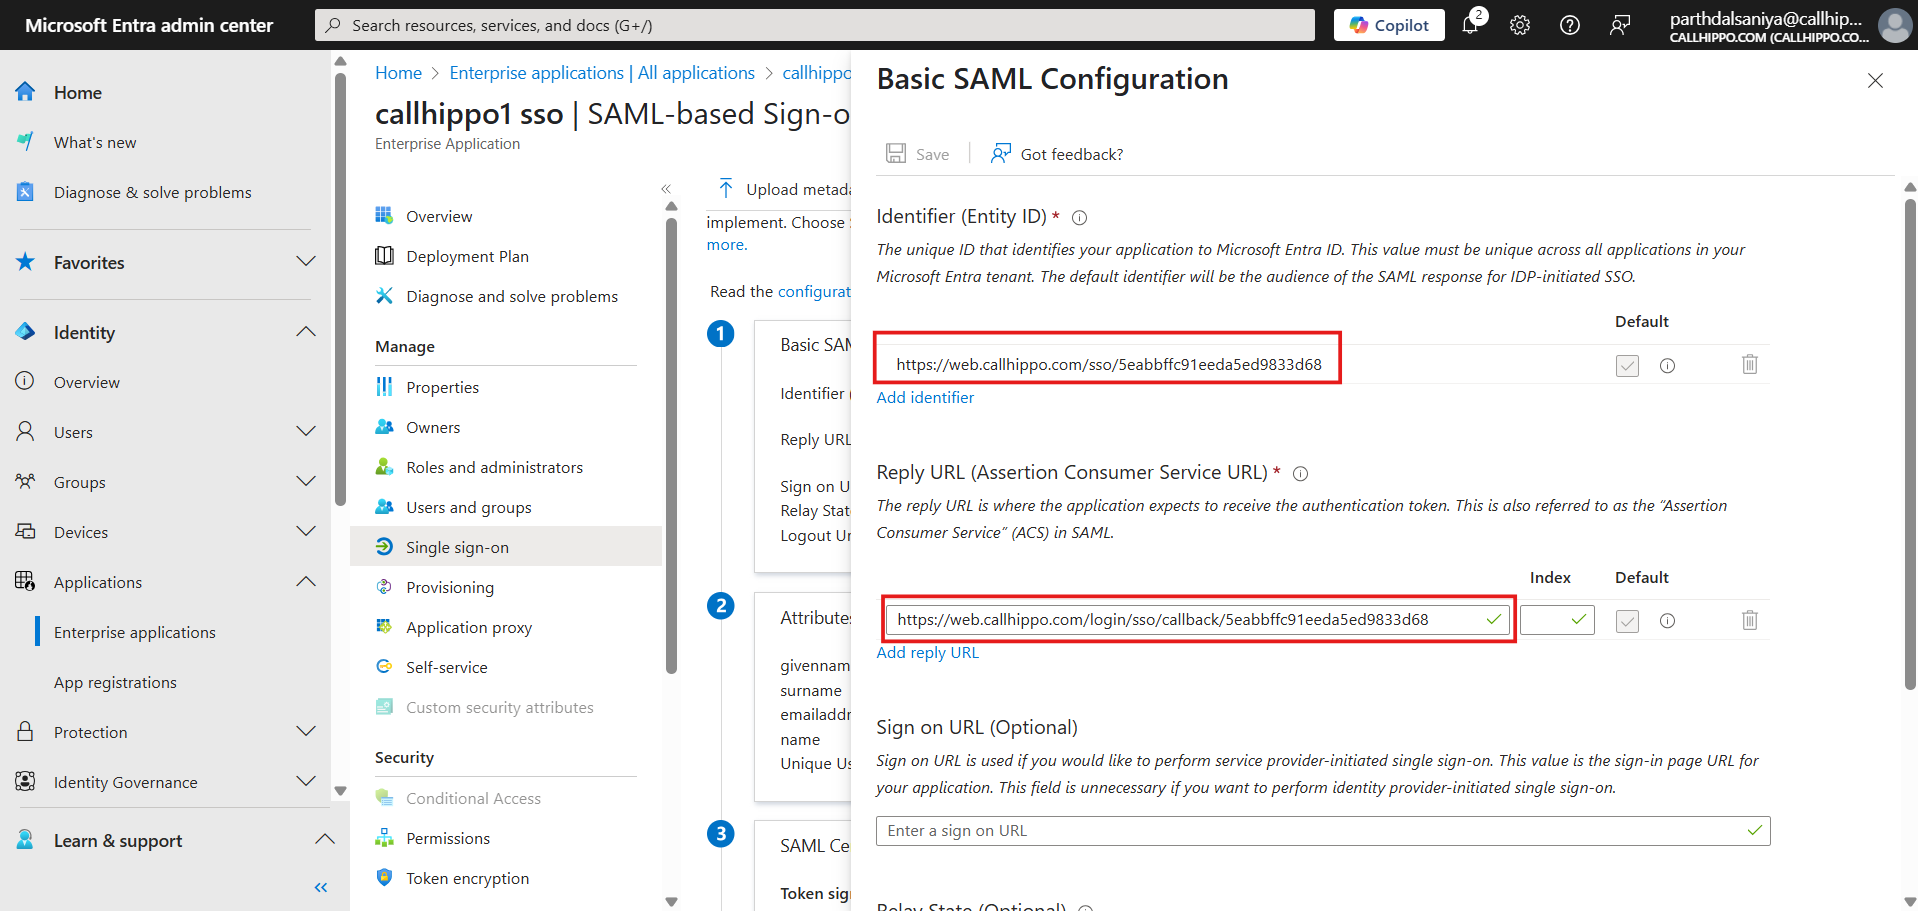
- In Basic SAML Configuration, set the Identifier (Entity ID) and Reply URL (ACS URL) using the values shown in the CallHippo SSO SAML Settings, then save.
- Under SAML Certificates, download the Certificate (Base64).
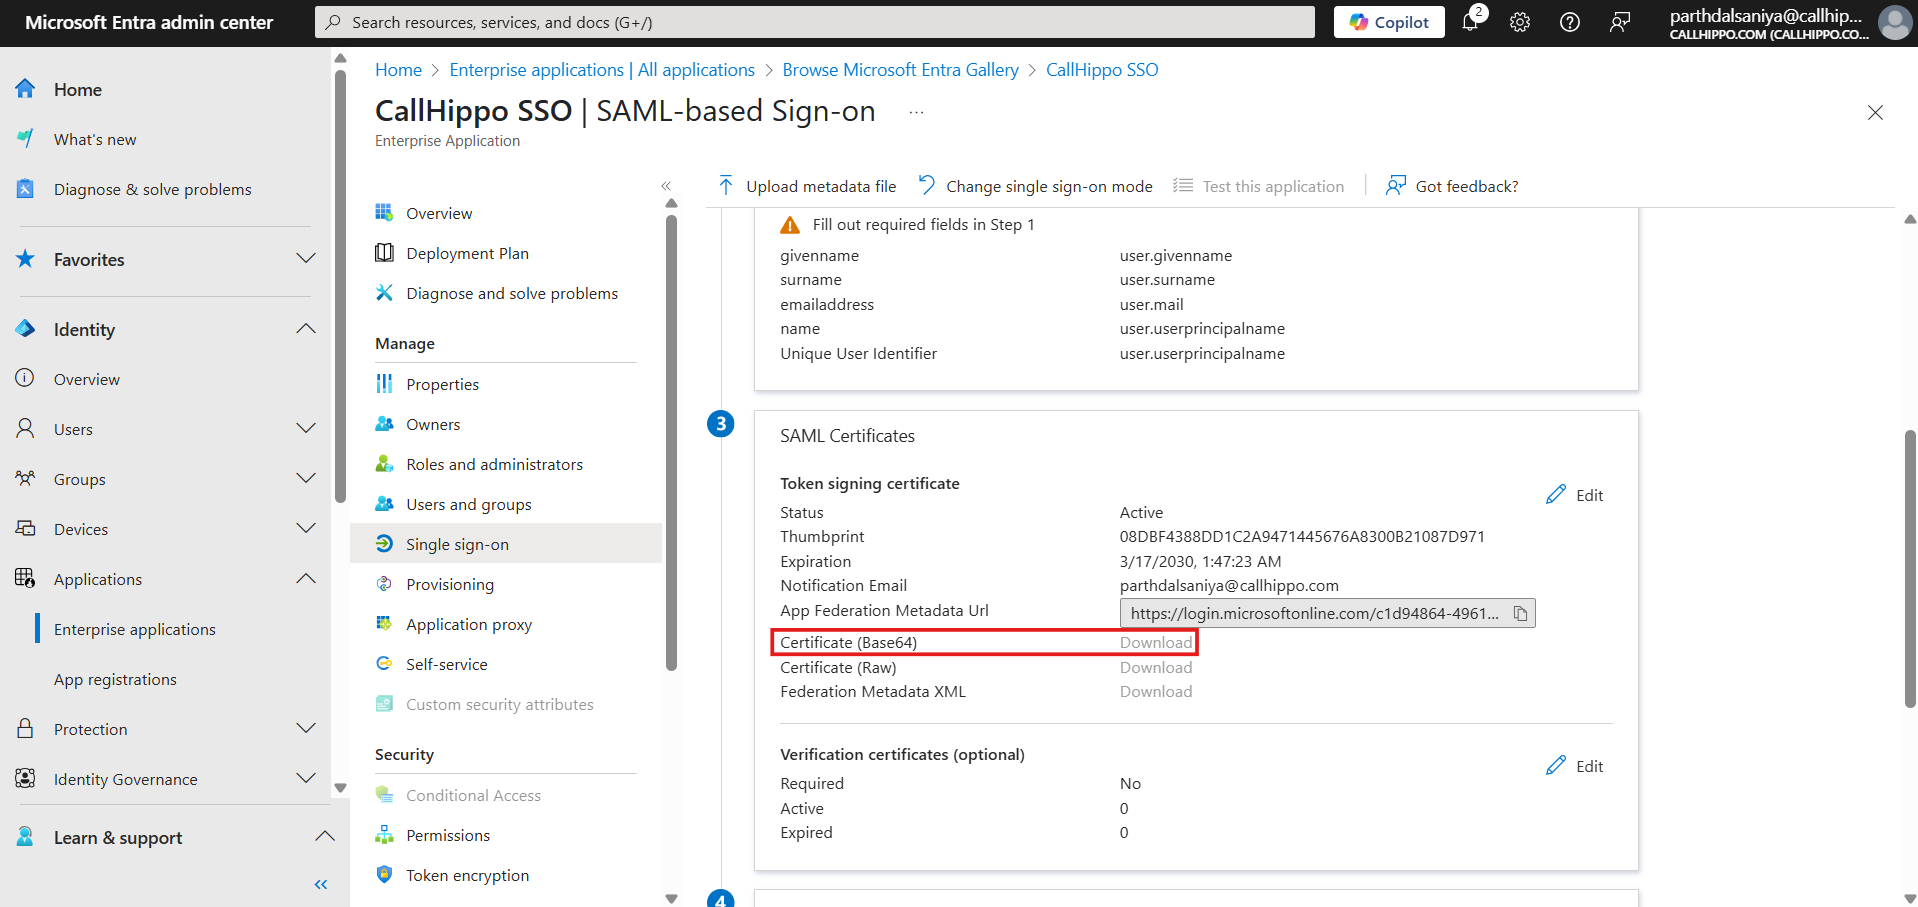
- Open the downloaded certificate in a text editor, copy the certificate text, then return to the CallHippo Configuration tab, paste it into the X.509 certificate field, and save.
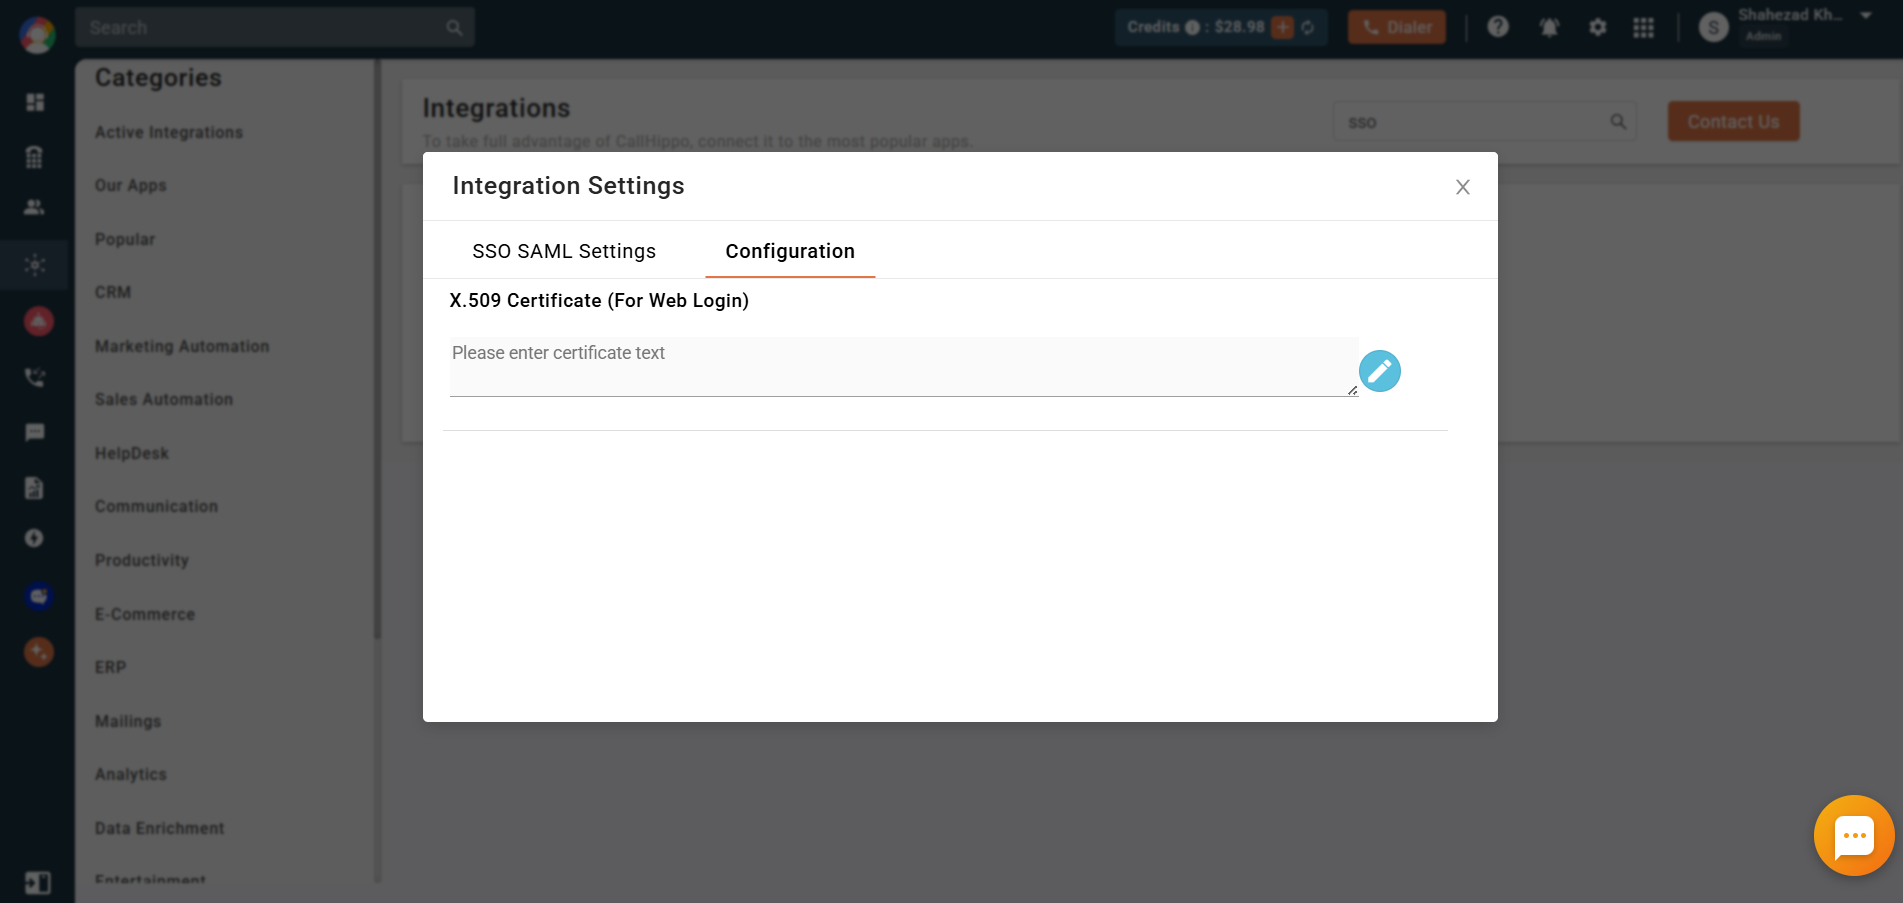
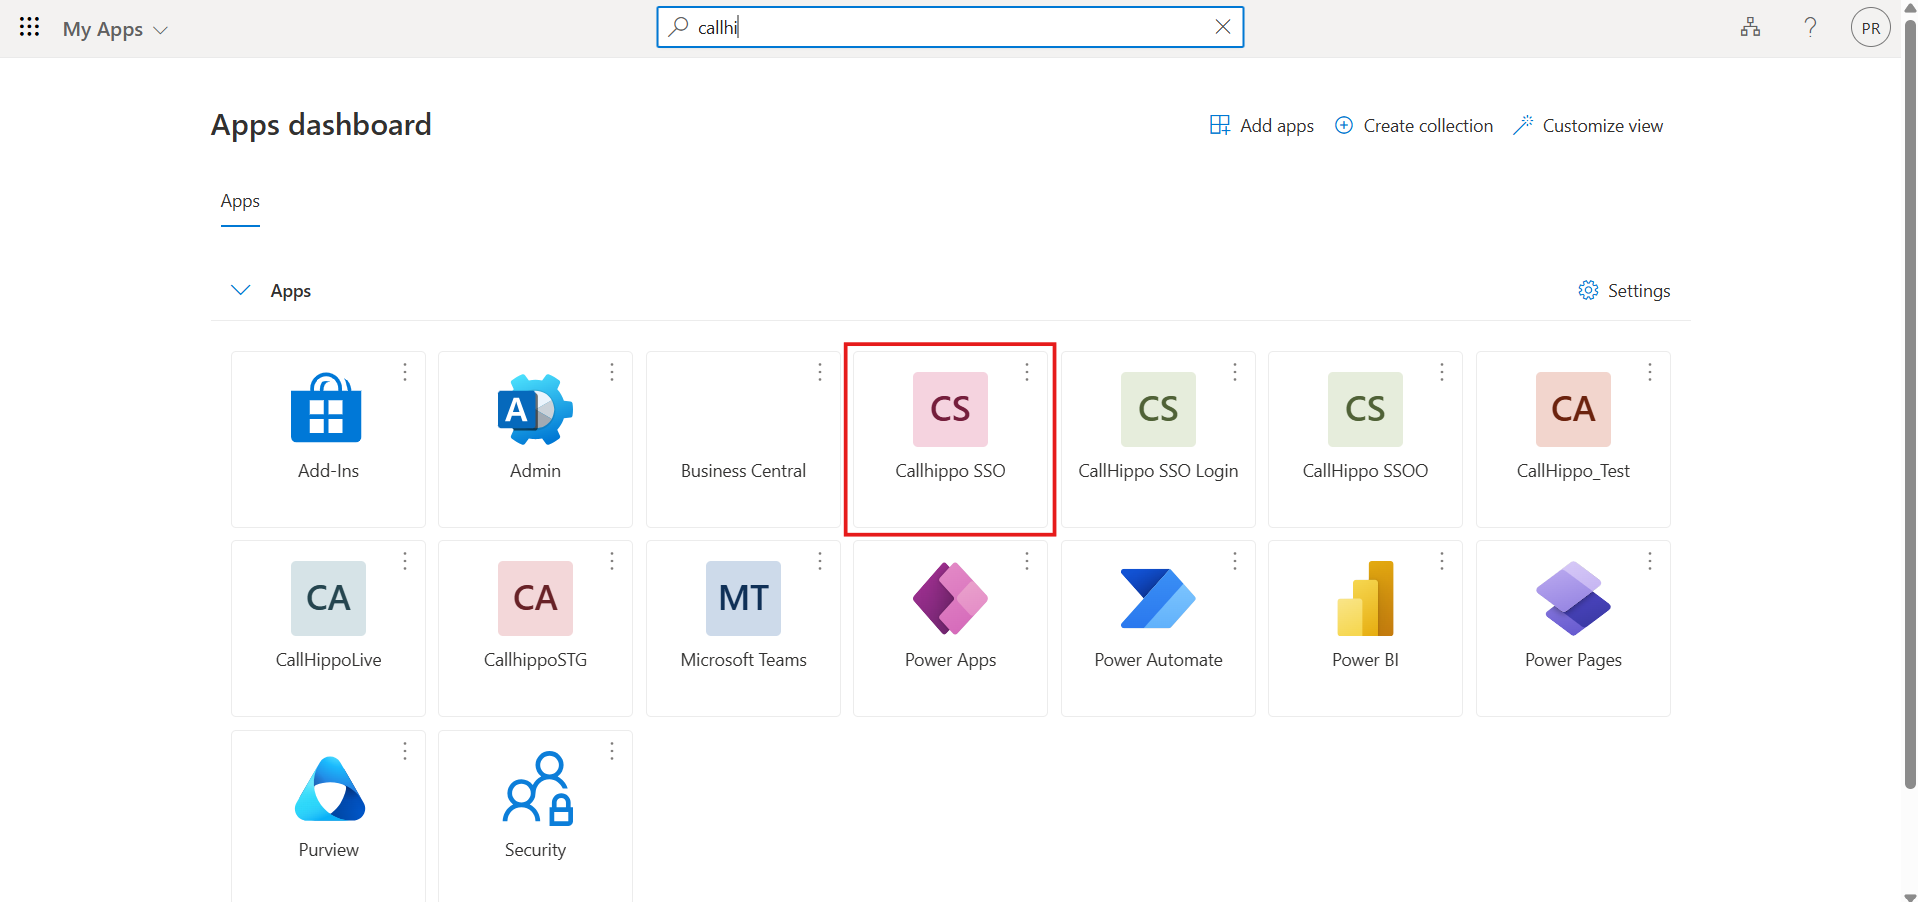
Once the certificate is saved, the integration is successful. You can now assign the SSO application to CallHippo users in Entra ID, and it will appear in their app list.
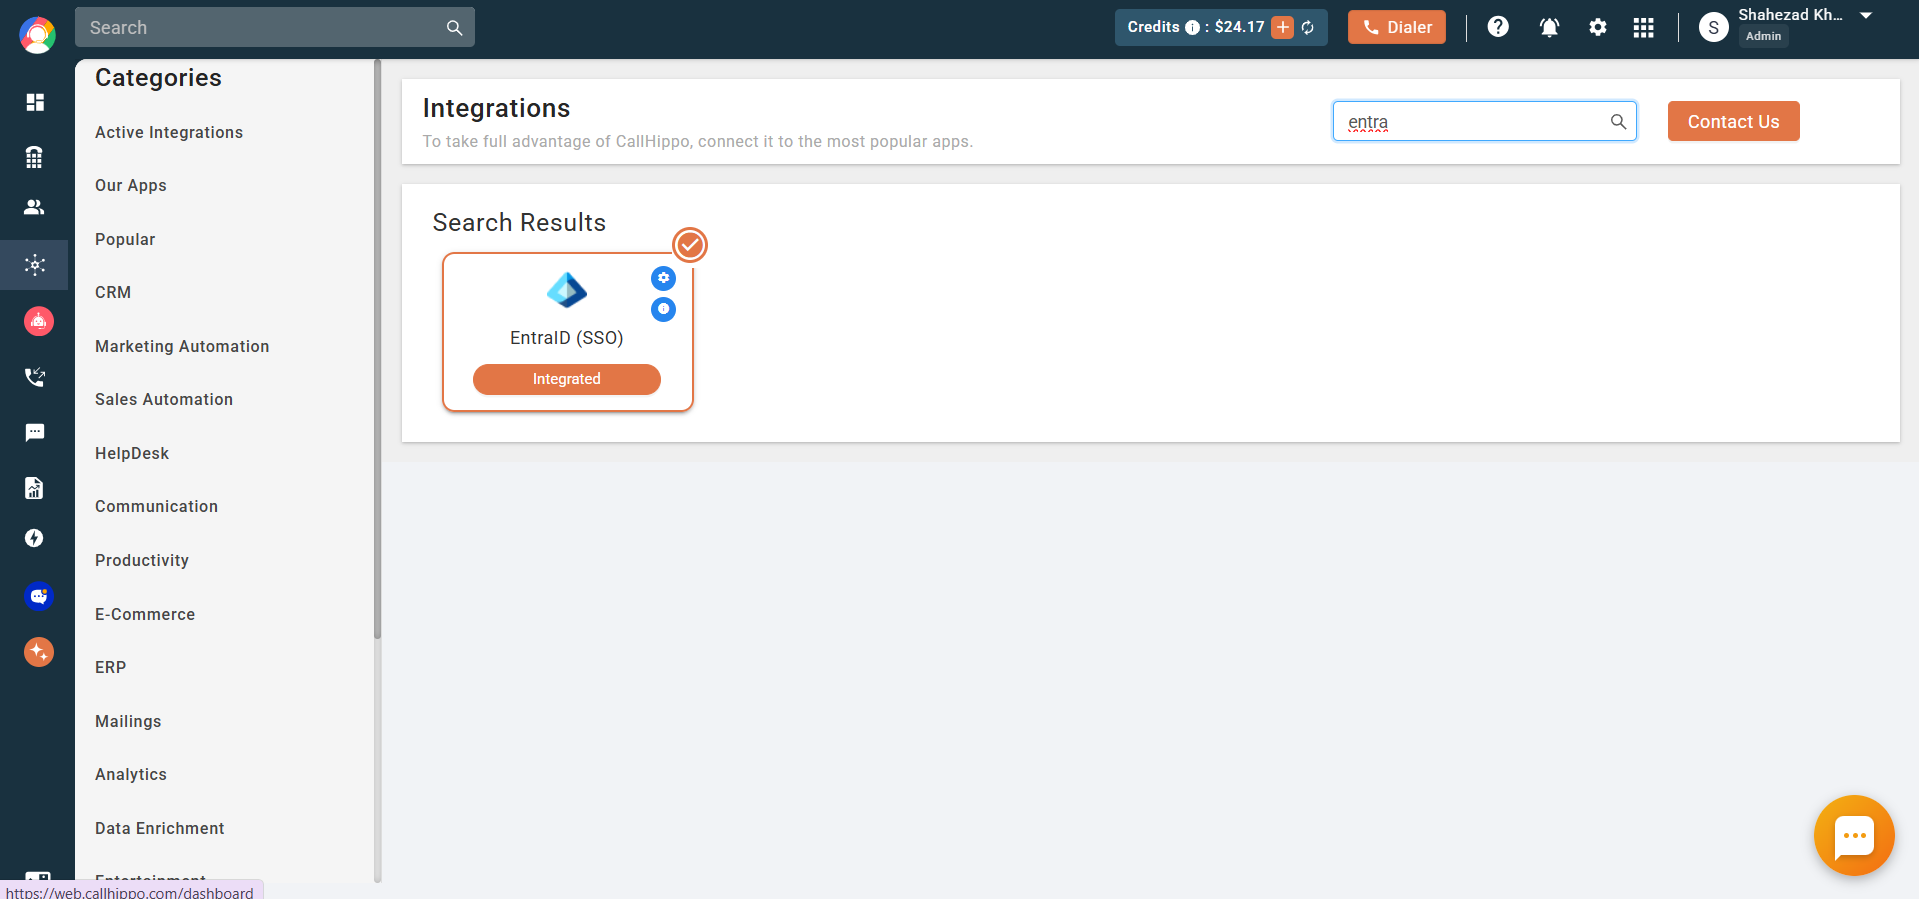
When all configuration is complete and the required information is filled in, the CallHippo integration status shows as Integrated.
Important notes on login behavior
- Once the CallHippo and Entra ID integration is performed, sub-users cannot log in manually and must use SSO. This applies to the web, desktop, and mobile applications.
- Only the Owner and Admins retain the ability to log in both manually and with SSO.
Step 3: Sync users between Entra ID and CallHippo (optional)
If you want to synchronize users, configure provisioning in Entra ID:
- Select your application from the application list.
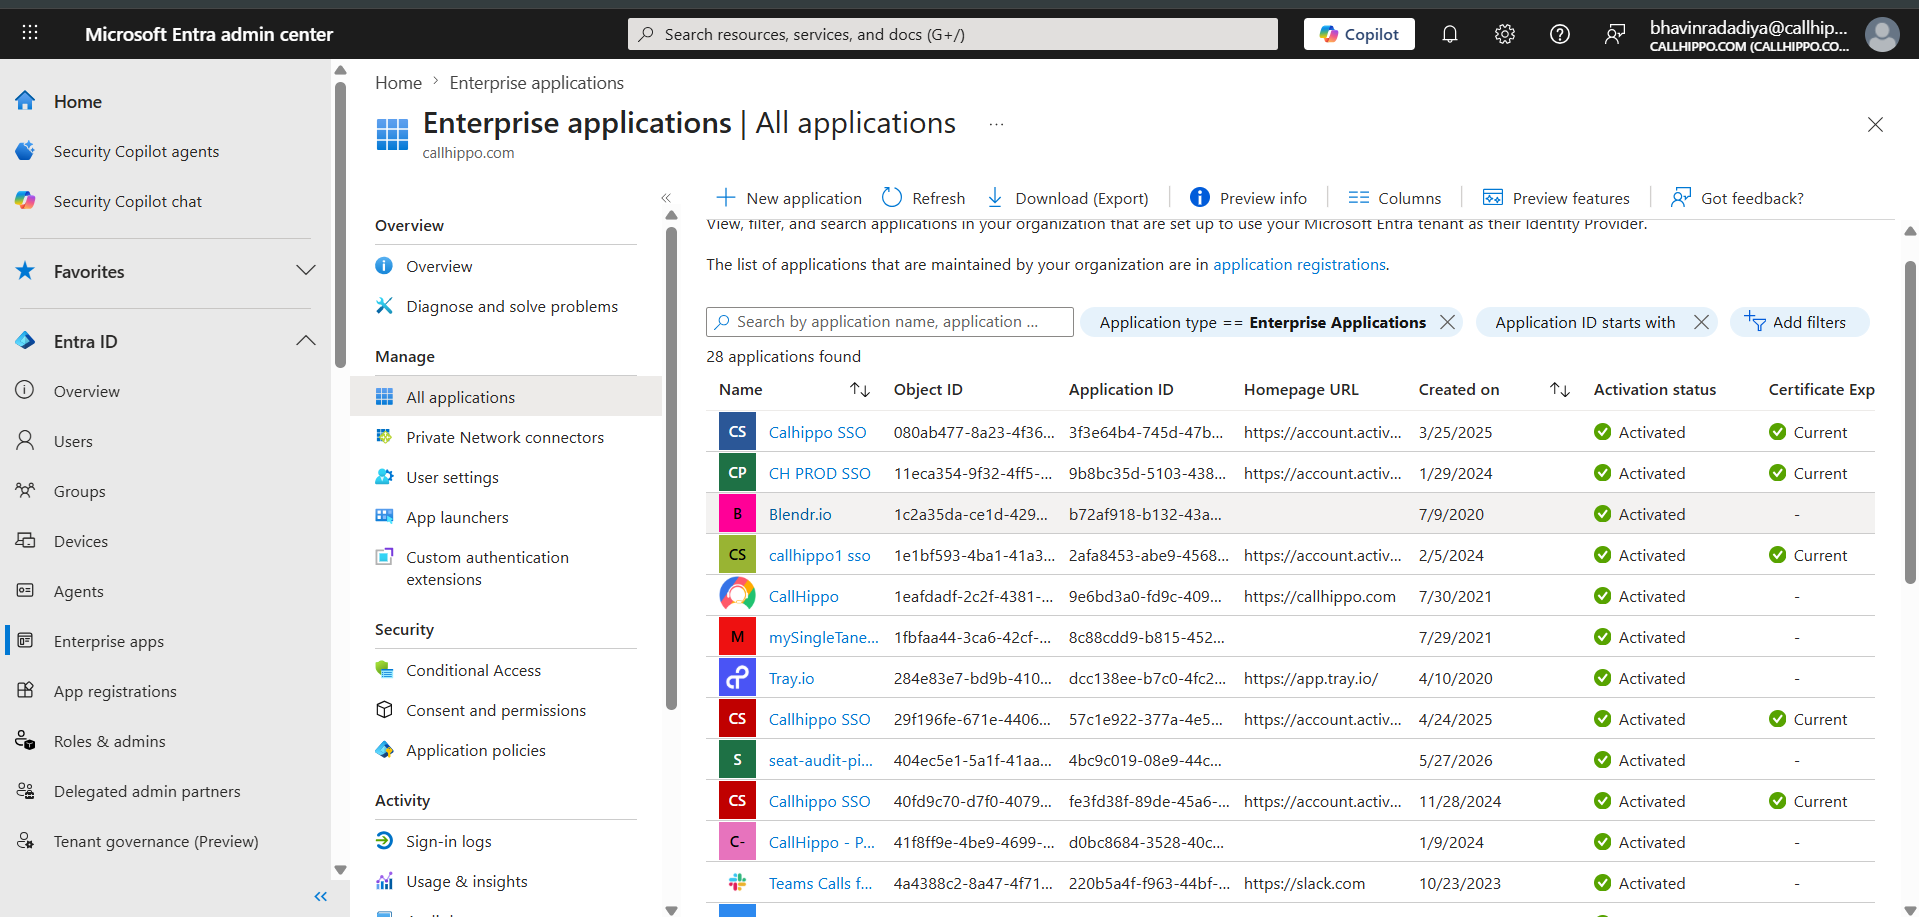
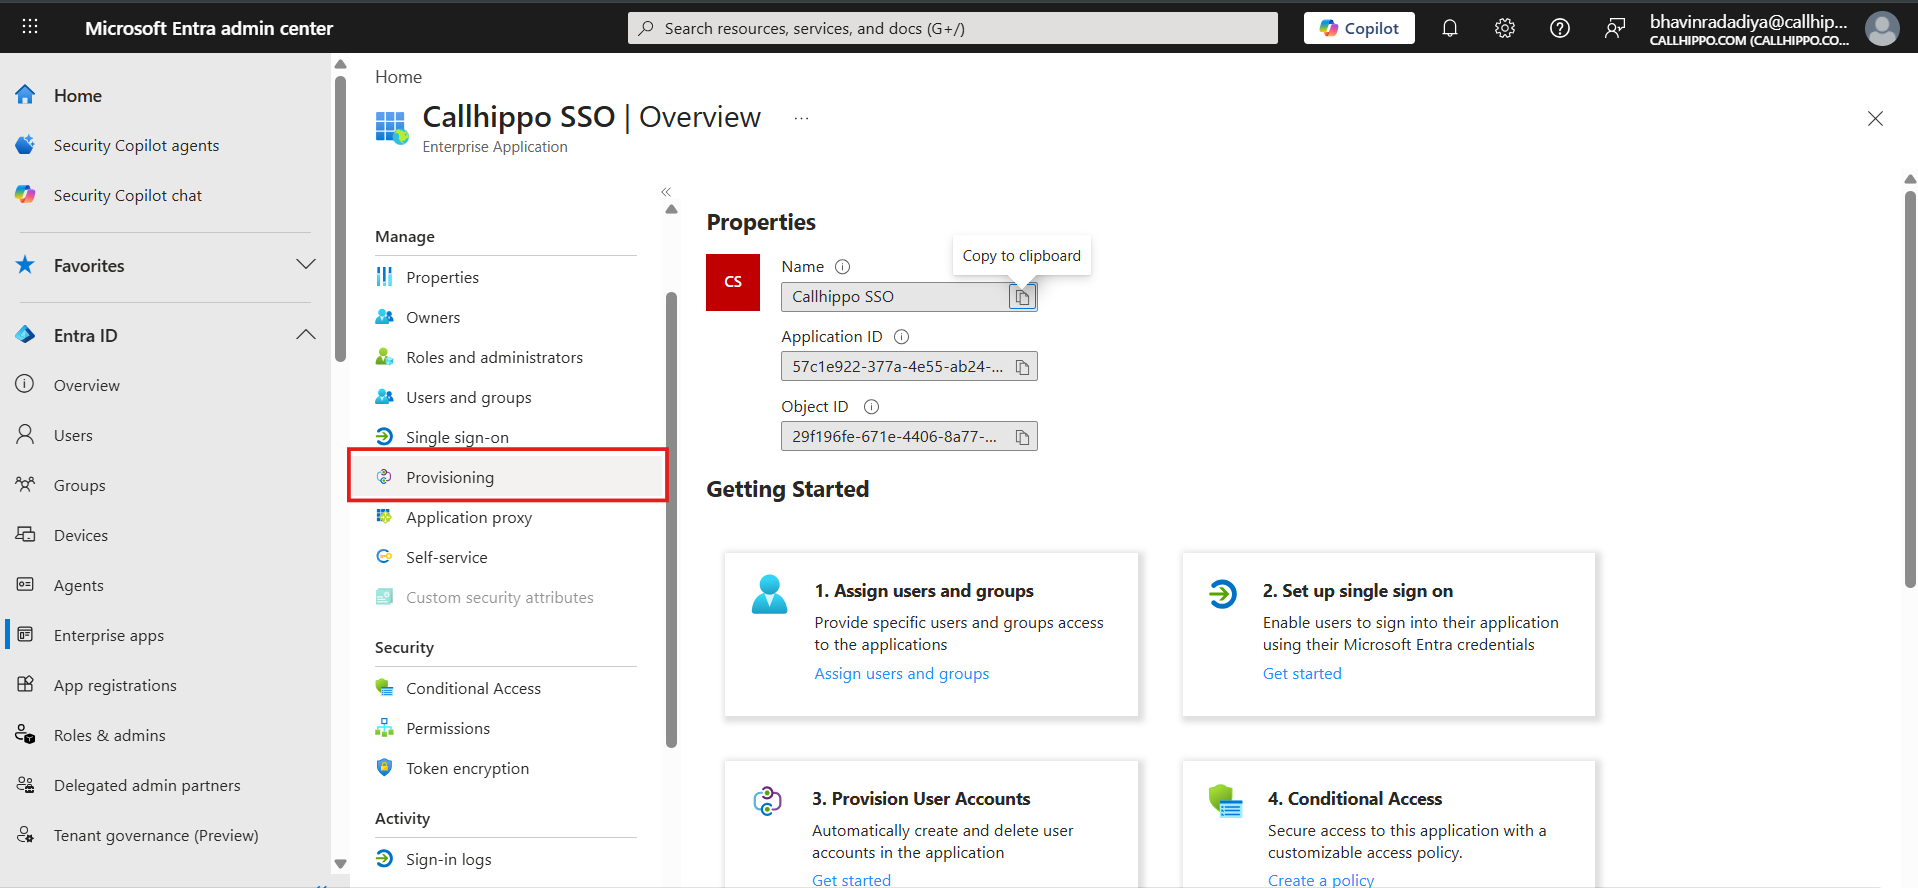
- Open the Provisioning section.
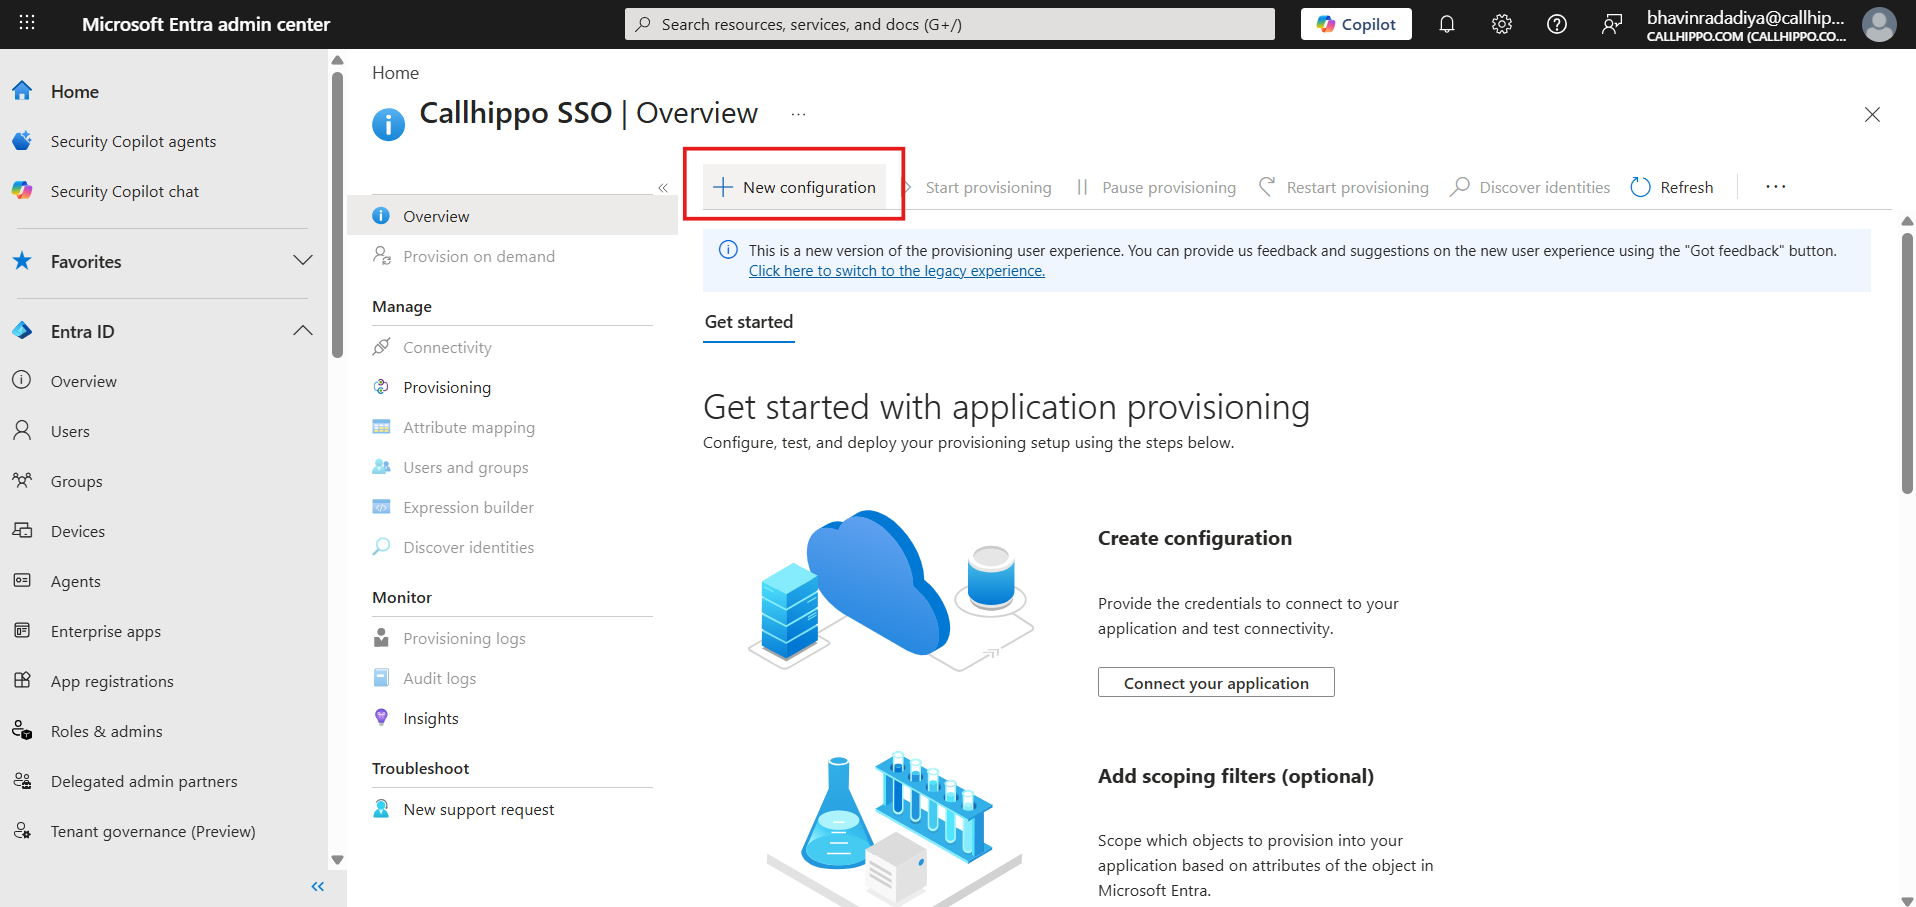
- Click New Configuration.
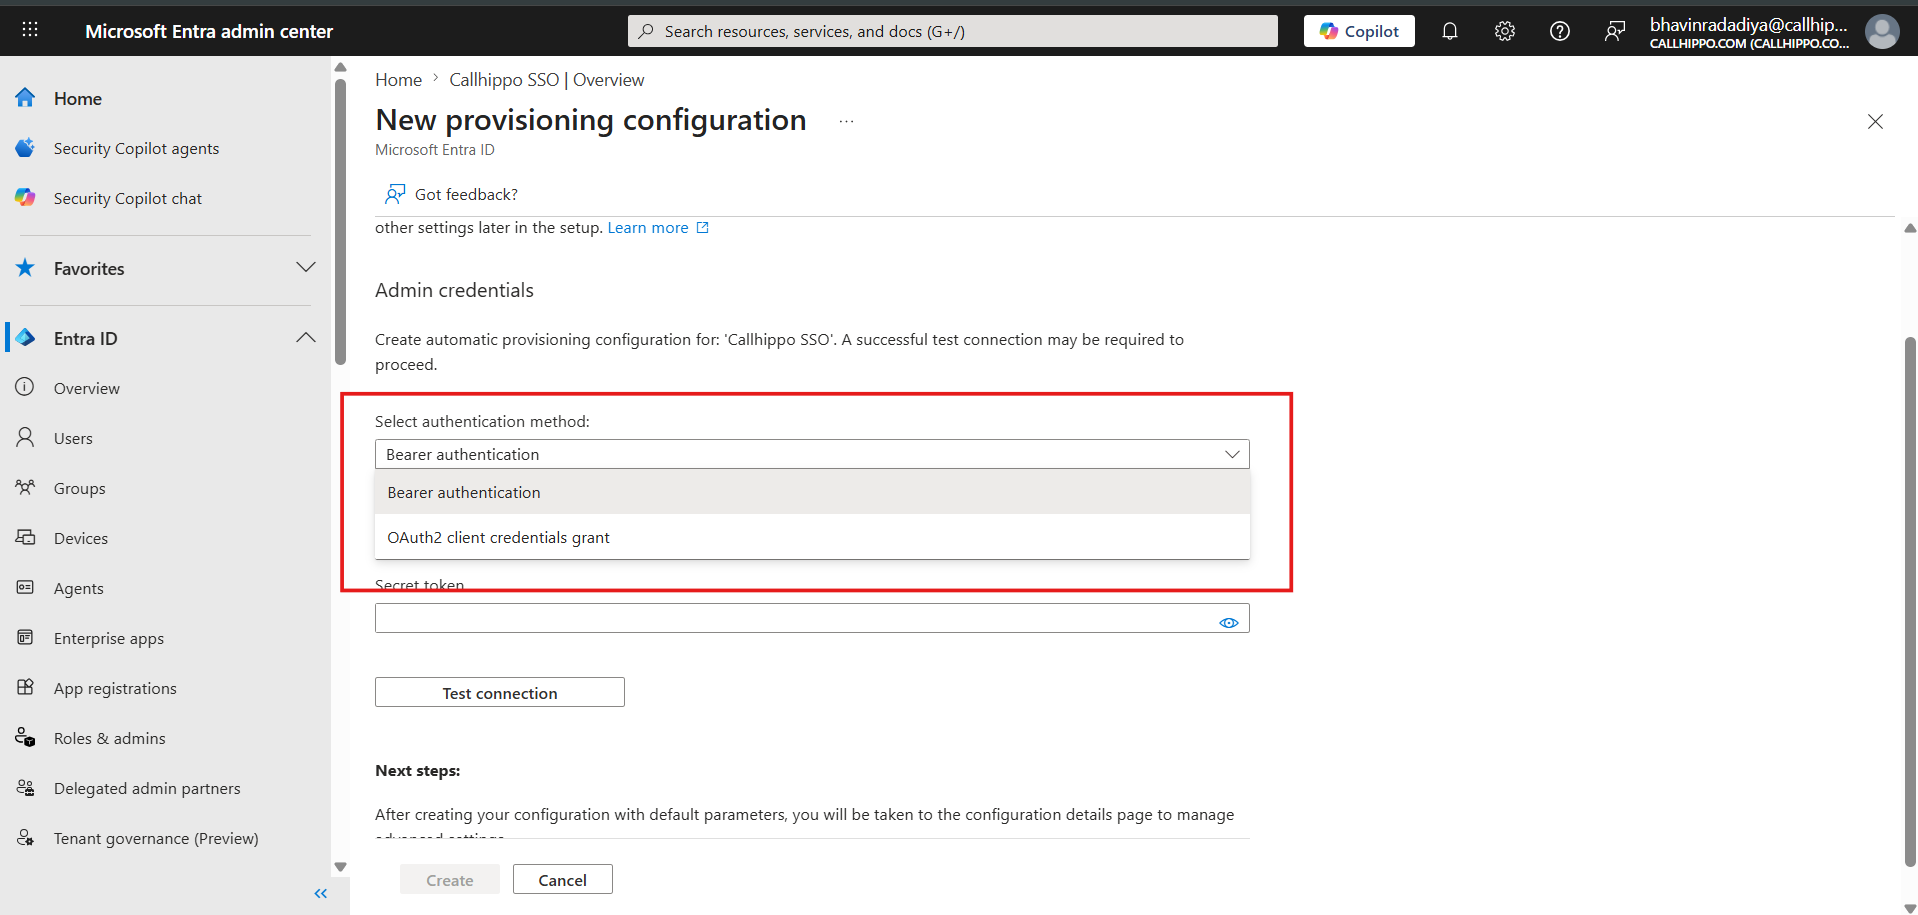
- Set the authentication method to Bearer Authentication.
- Copy the Tenant URL and Secret Token from the CallHippo Configuration pop-up.
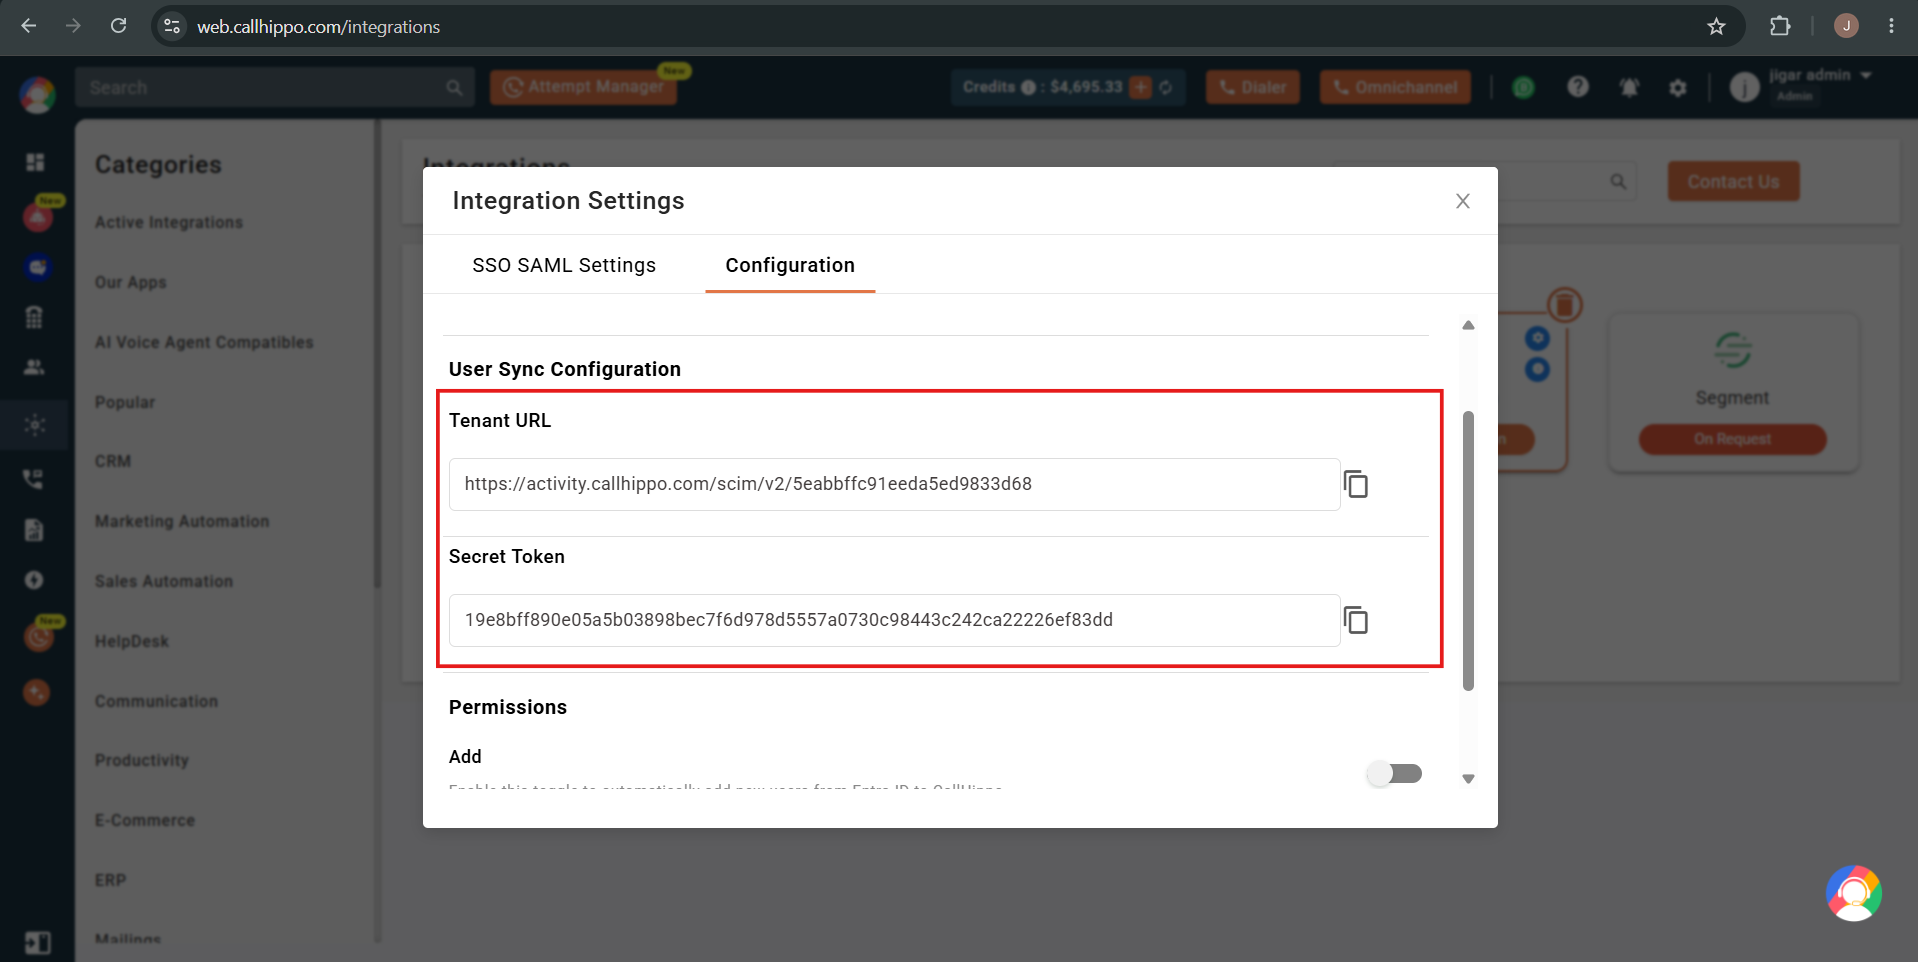
- Paste them into the Tenant URL and Secret token fields in Entra ID.
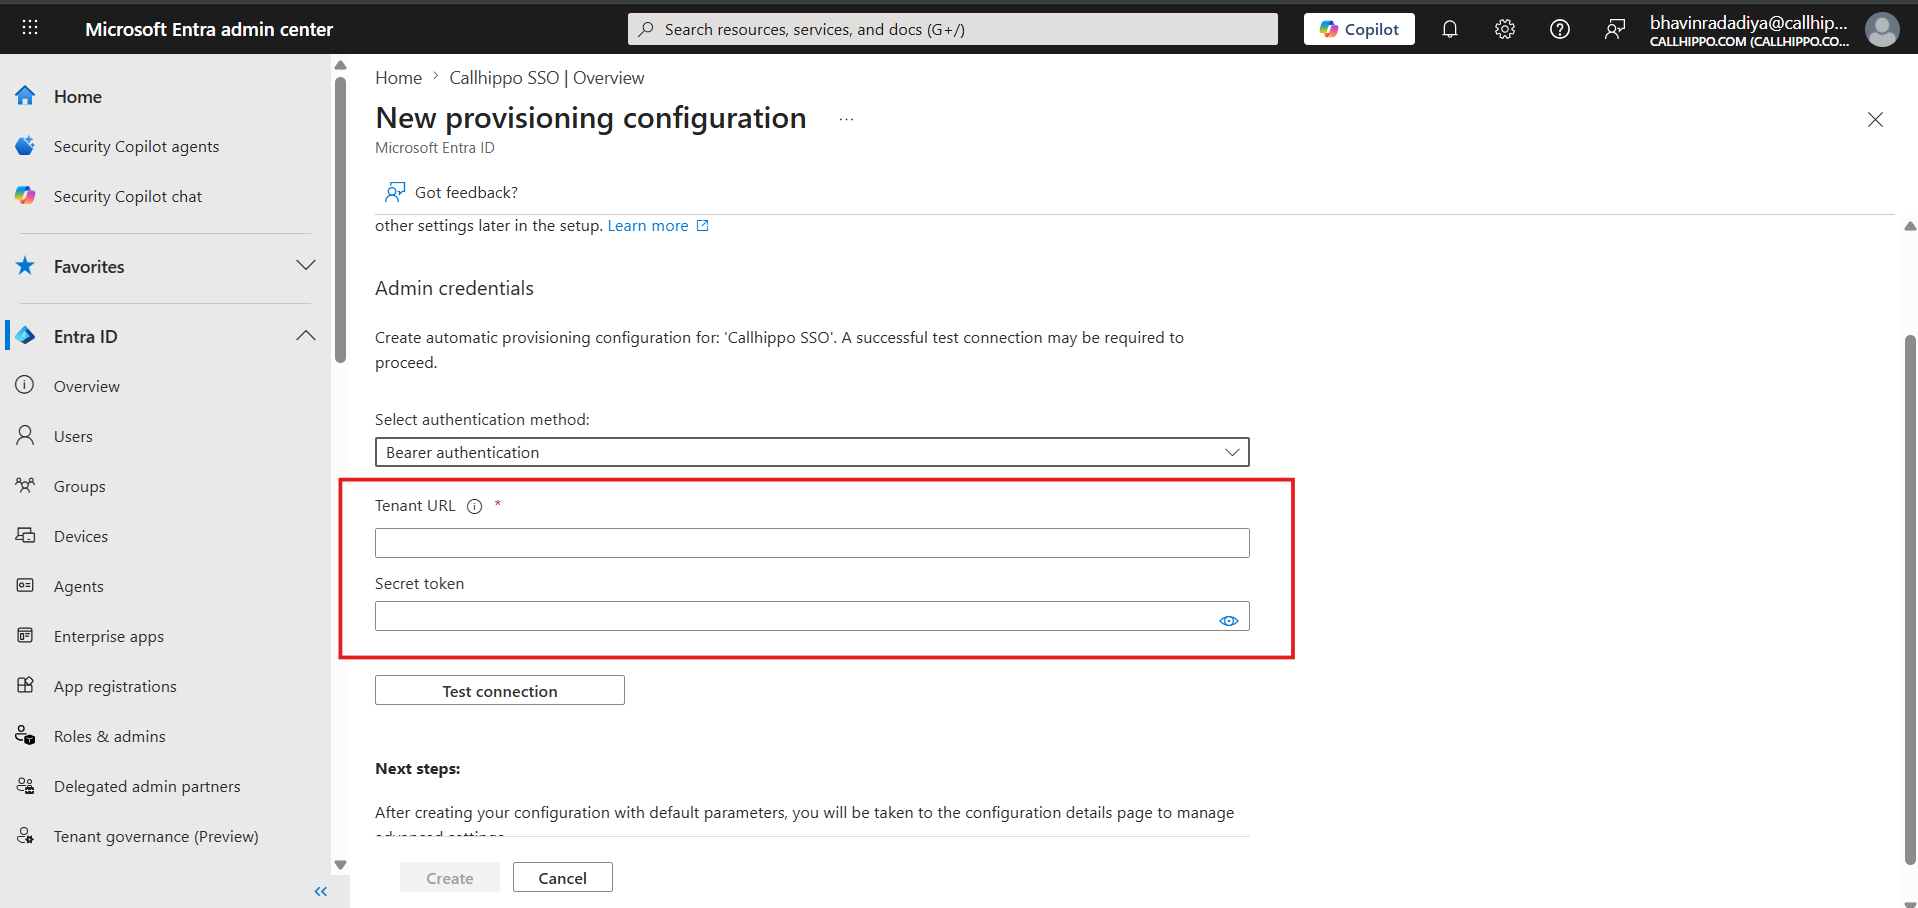
- Click Test Connection, then click Create.
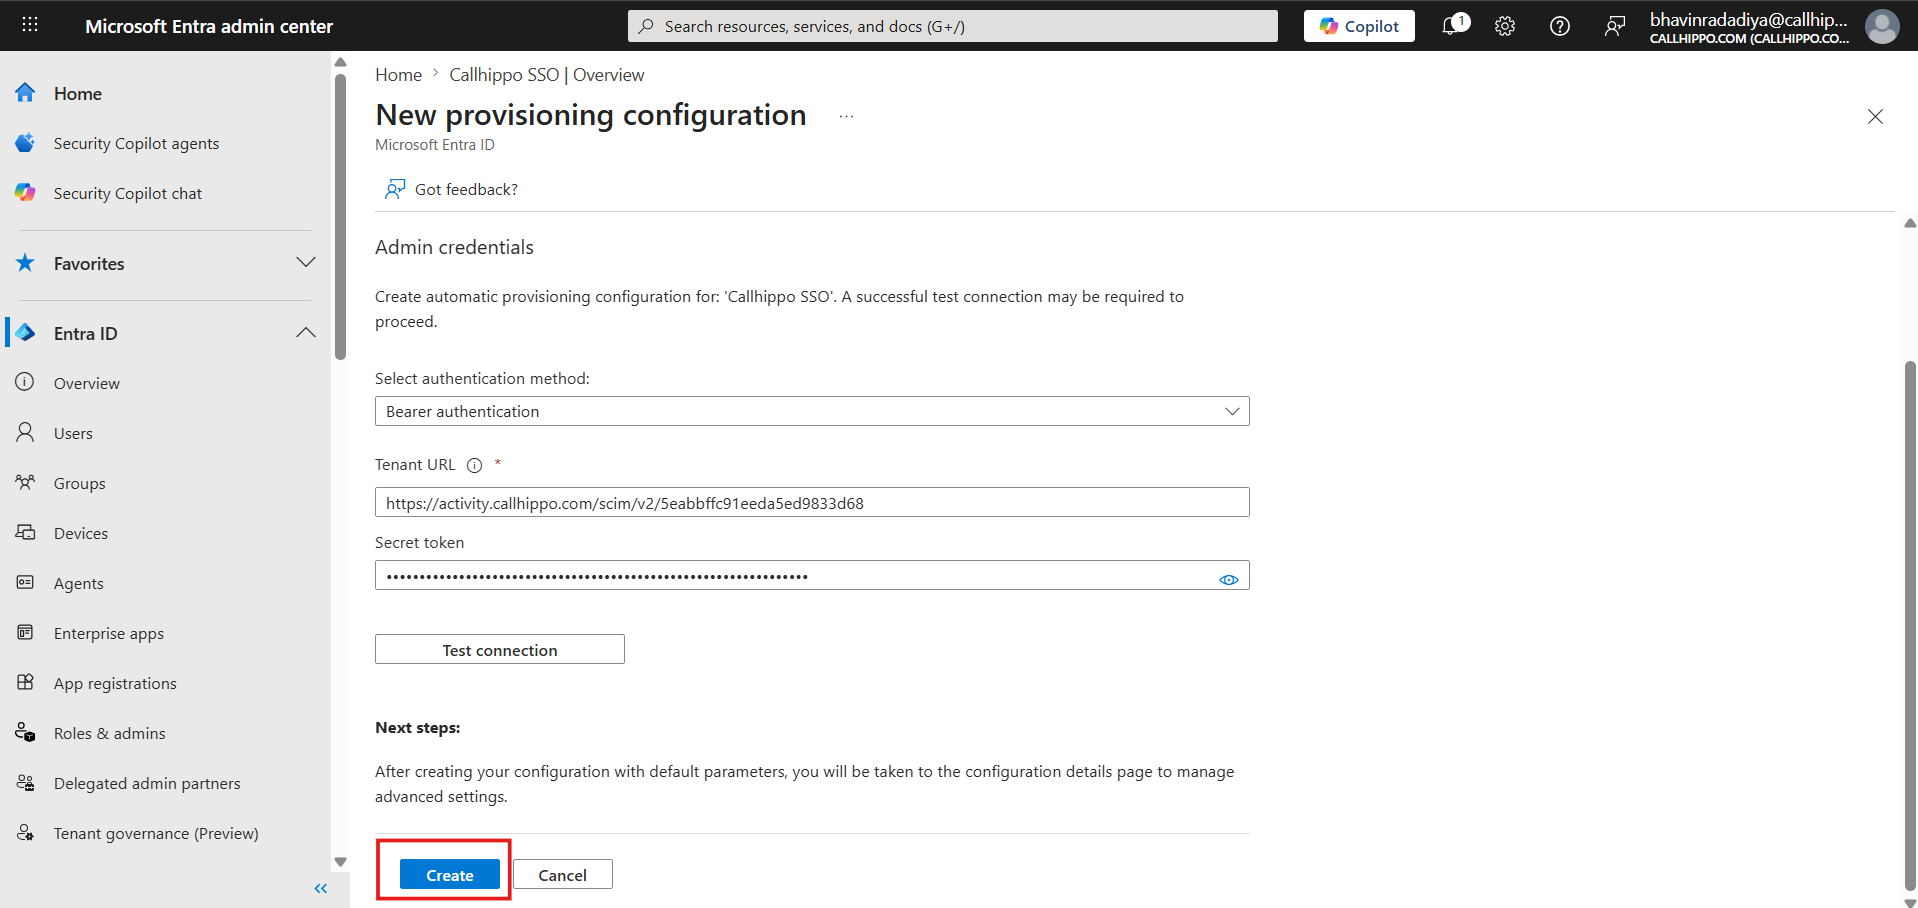
- Open Provisioning again and expand the Mappings section.
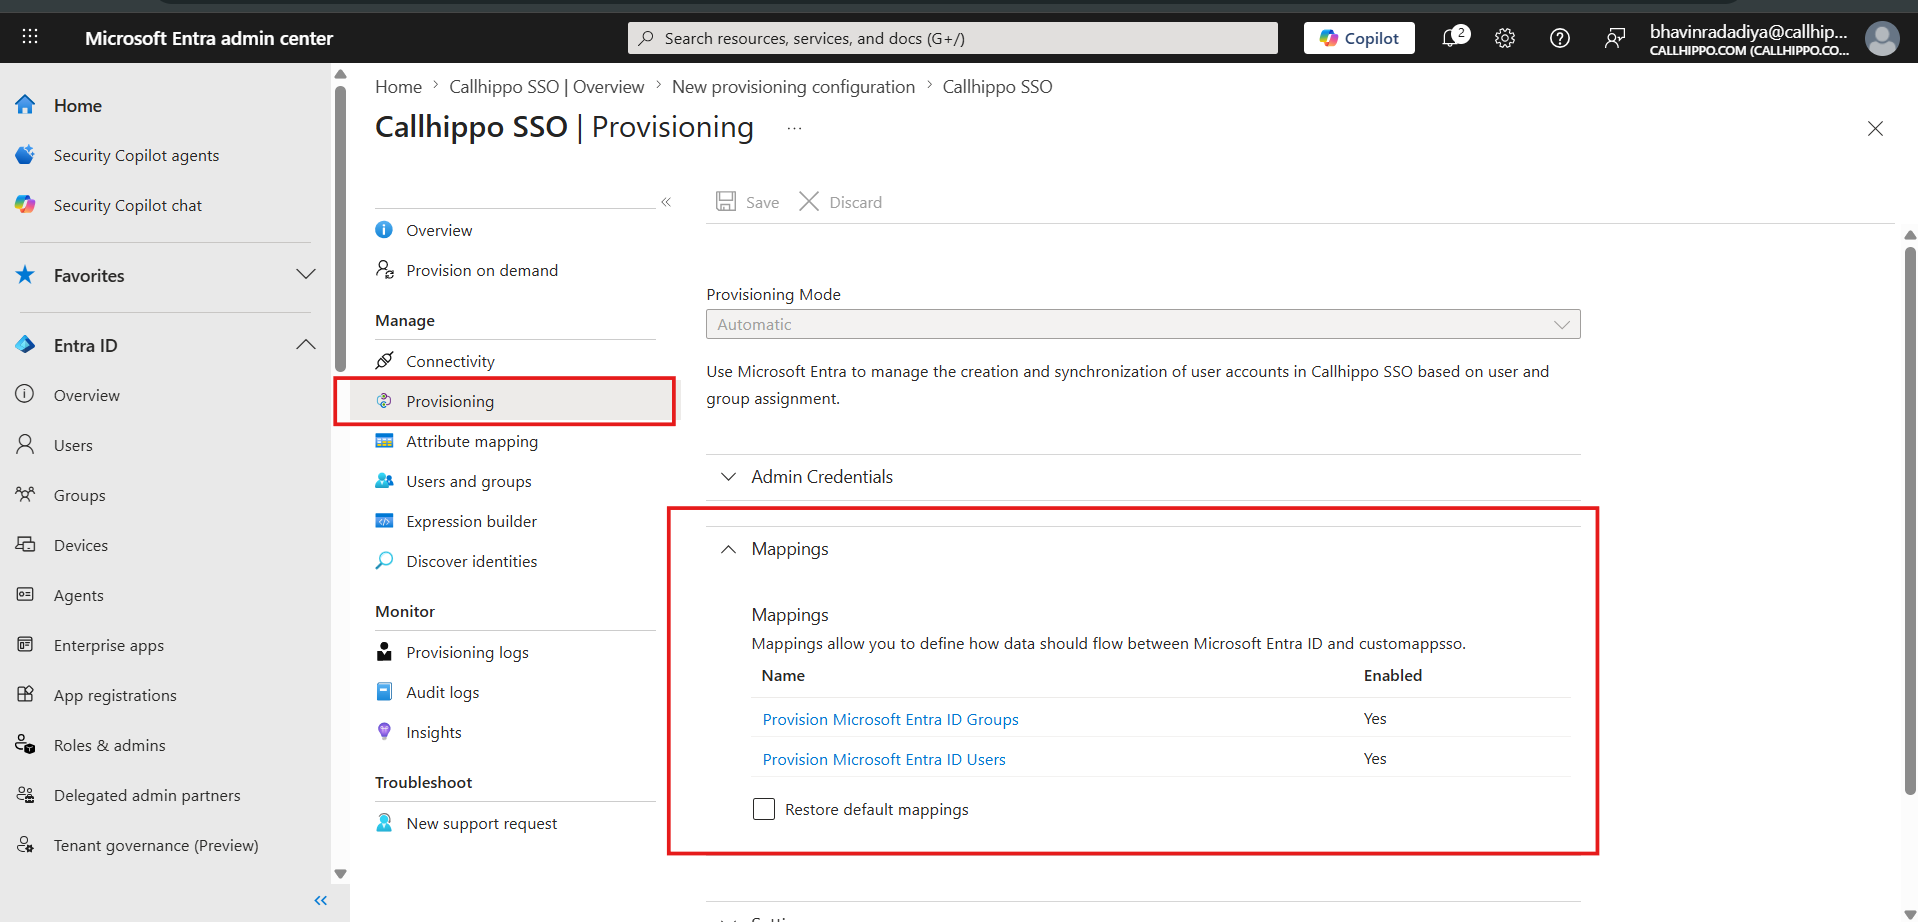
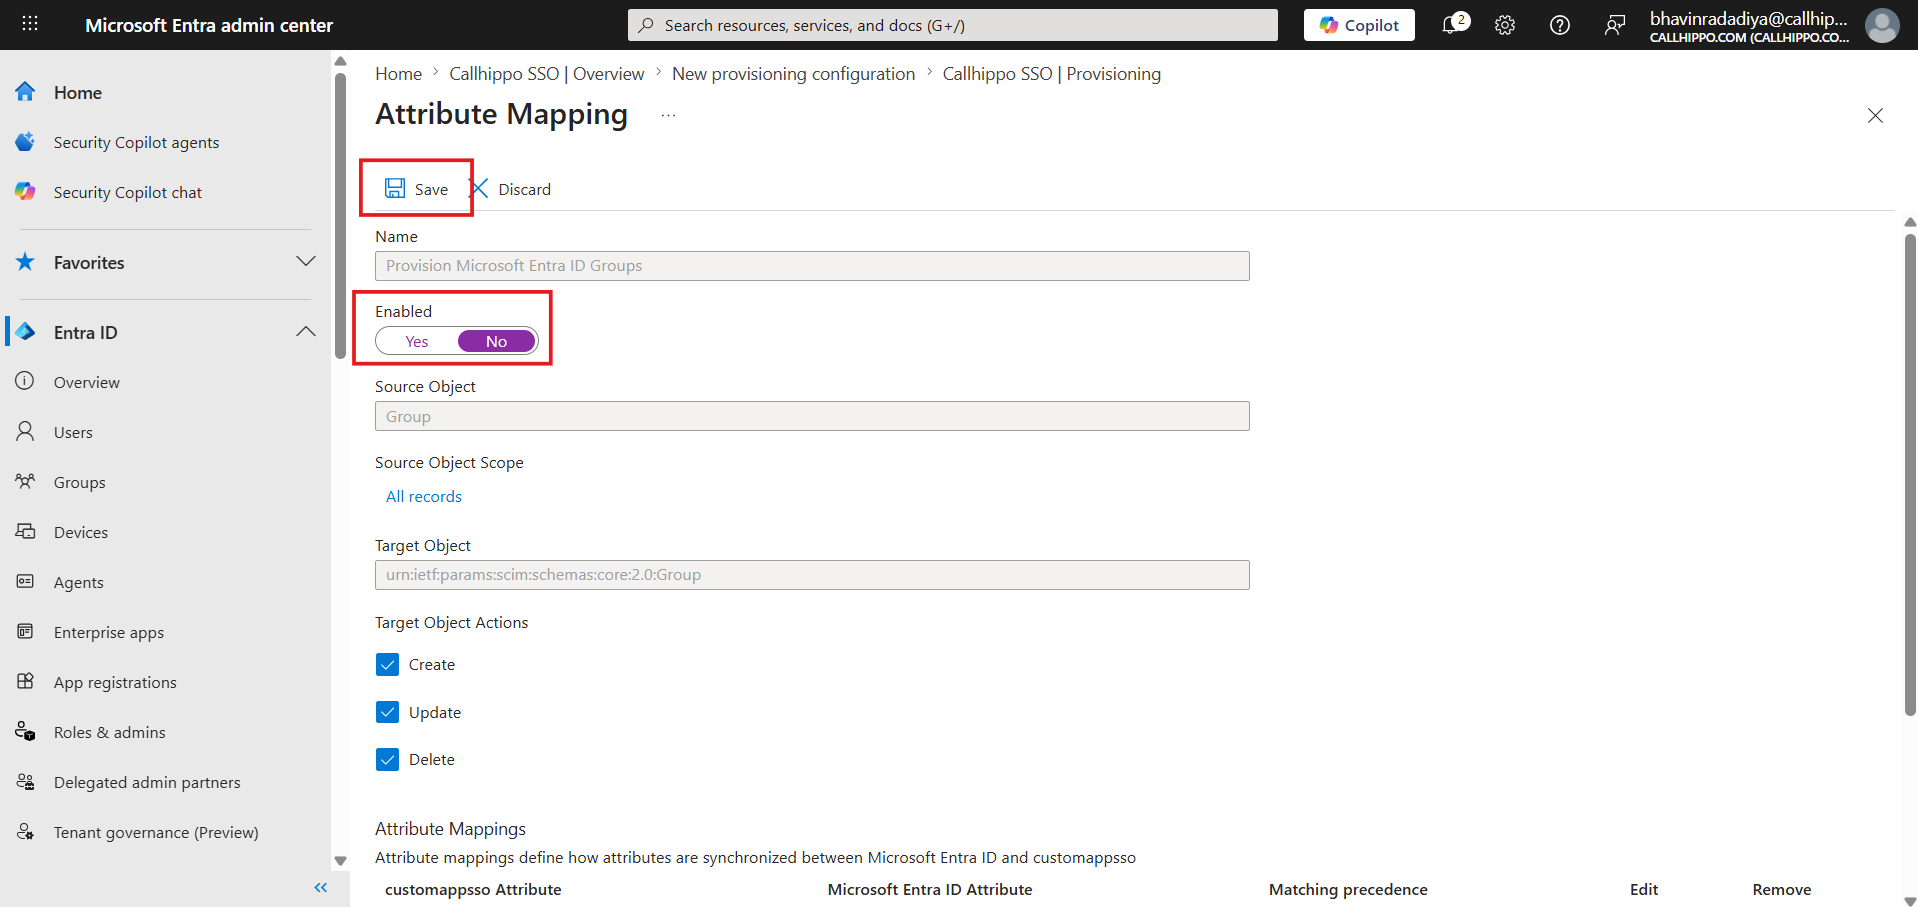
- Open Provision Microsoft Entra ID Groups, set Enabled to No, click Save, then close the panel.
- Open Provision Microsoft Entra ID Users and configure the settings as shown (Enabled set to Yes).
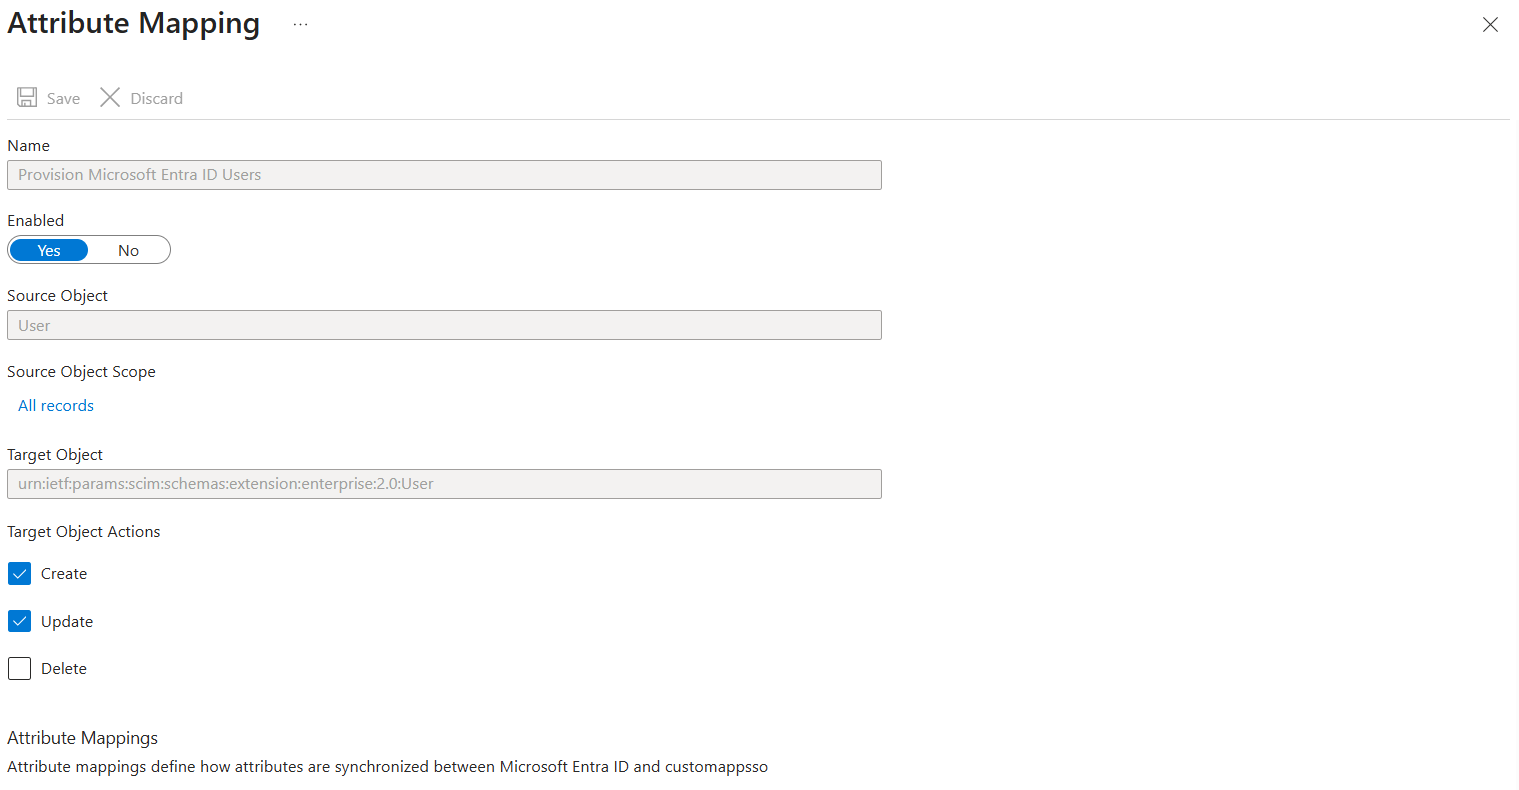
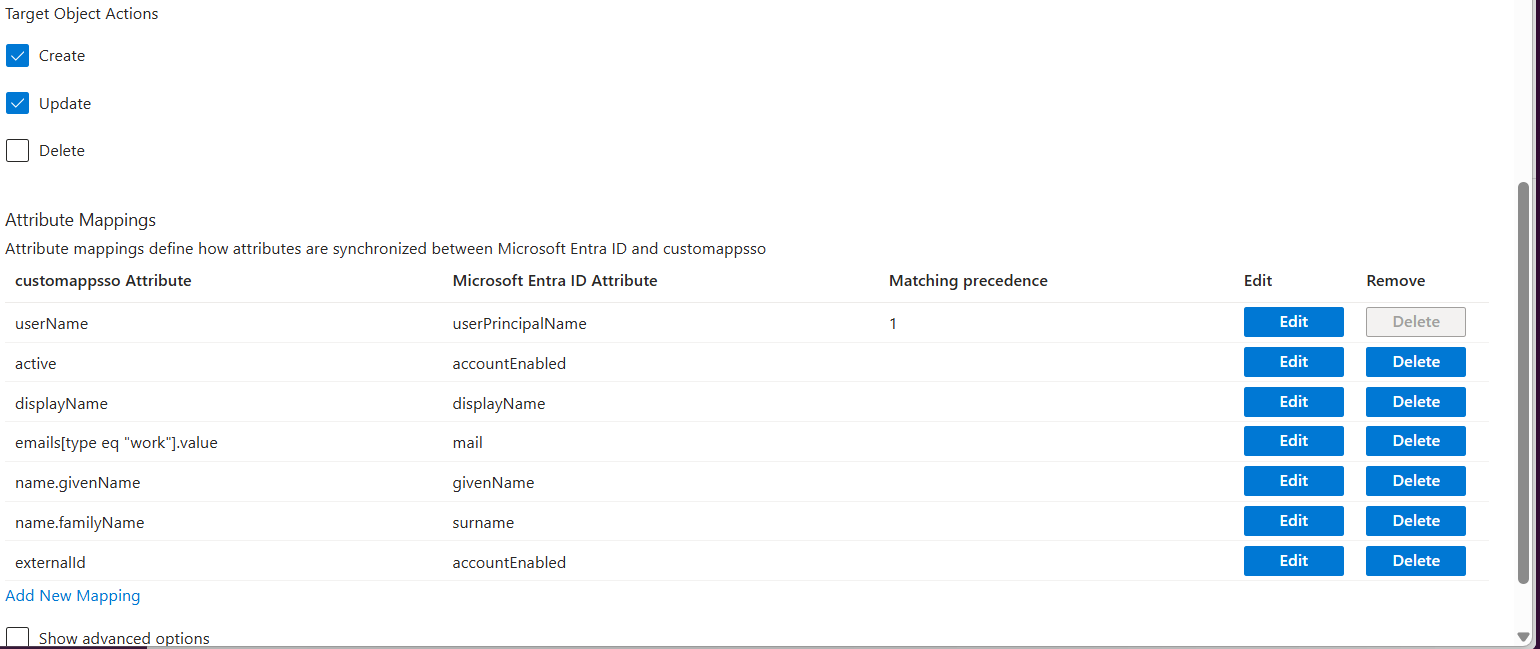
- Review the attribute mappings between the SCIM attributes and Microsoft Entra ID attributes, then click Save and close the panel.
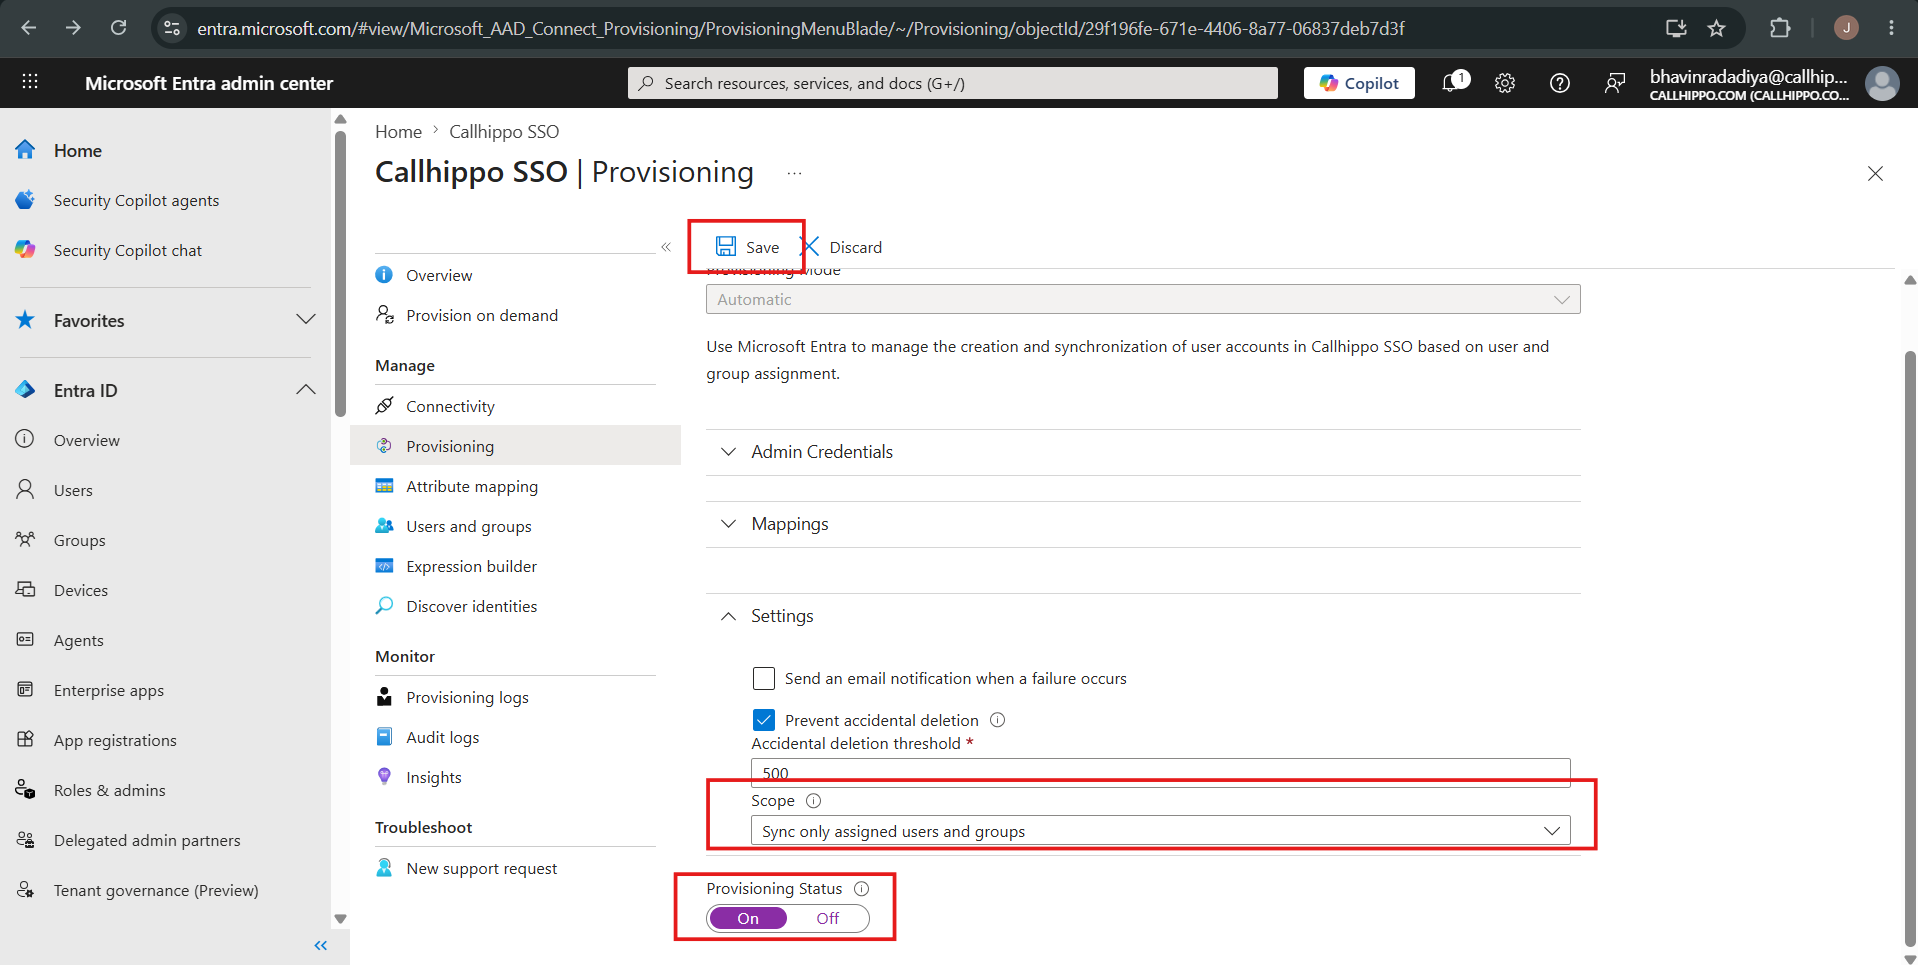
- Open the Settings section, set the Scope to Sync only assigned users and groups, set Provisioning Status to On, and click Save.
Auto-add and auto-remove users
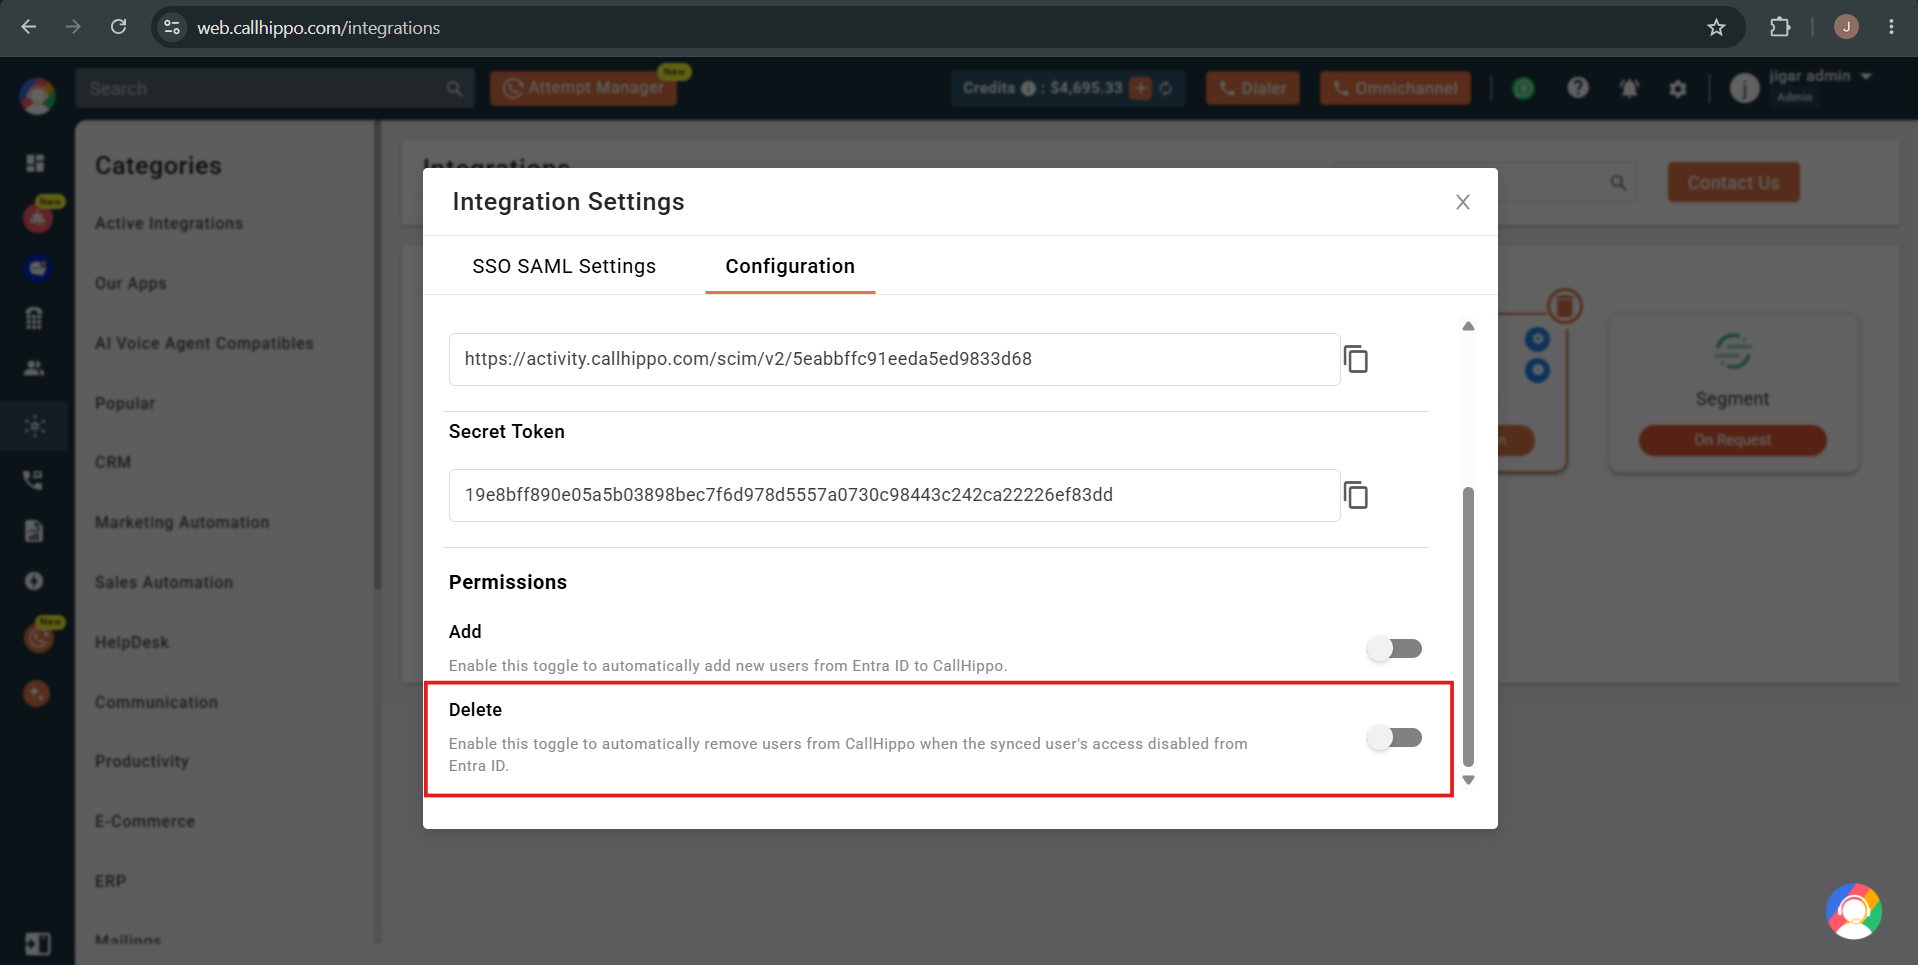
Two toggles in the CallHippo integration pop-up control automatic user management:
- Add: Enable this toggle so newly added Entra ID users are automatically created in CallHippo. Only users added to Entra ID after enabling the toggle are added automatically. Standard CallHippo user charges apply to additional users.
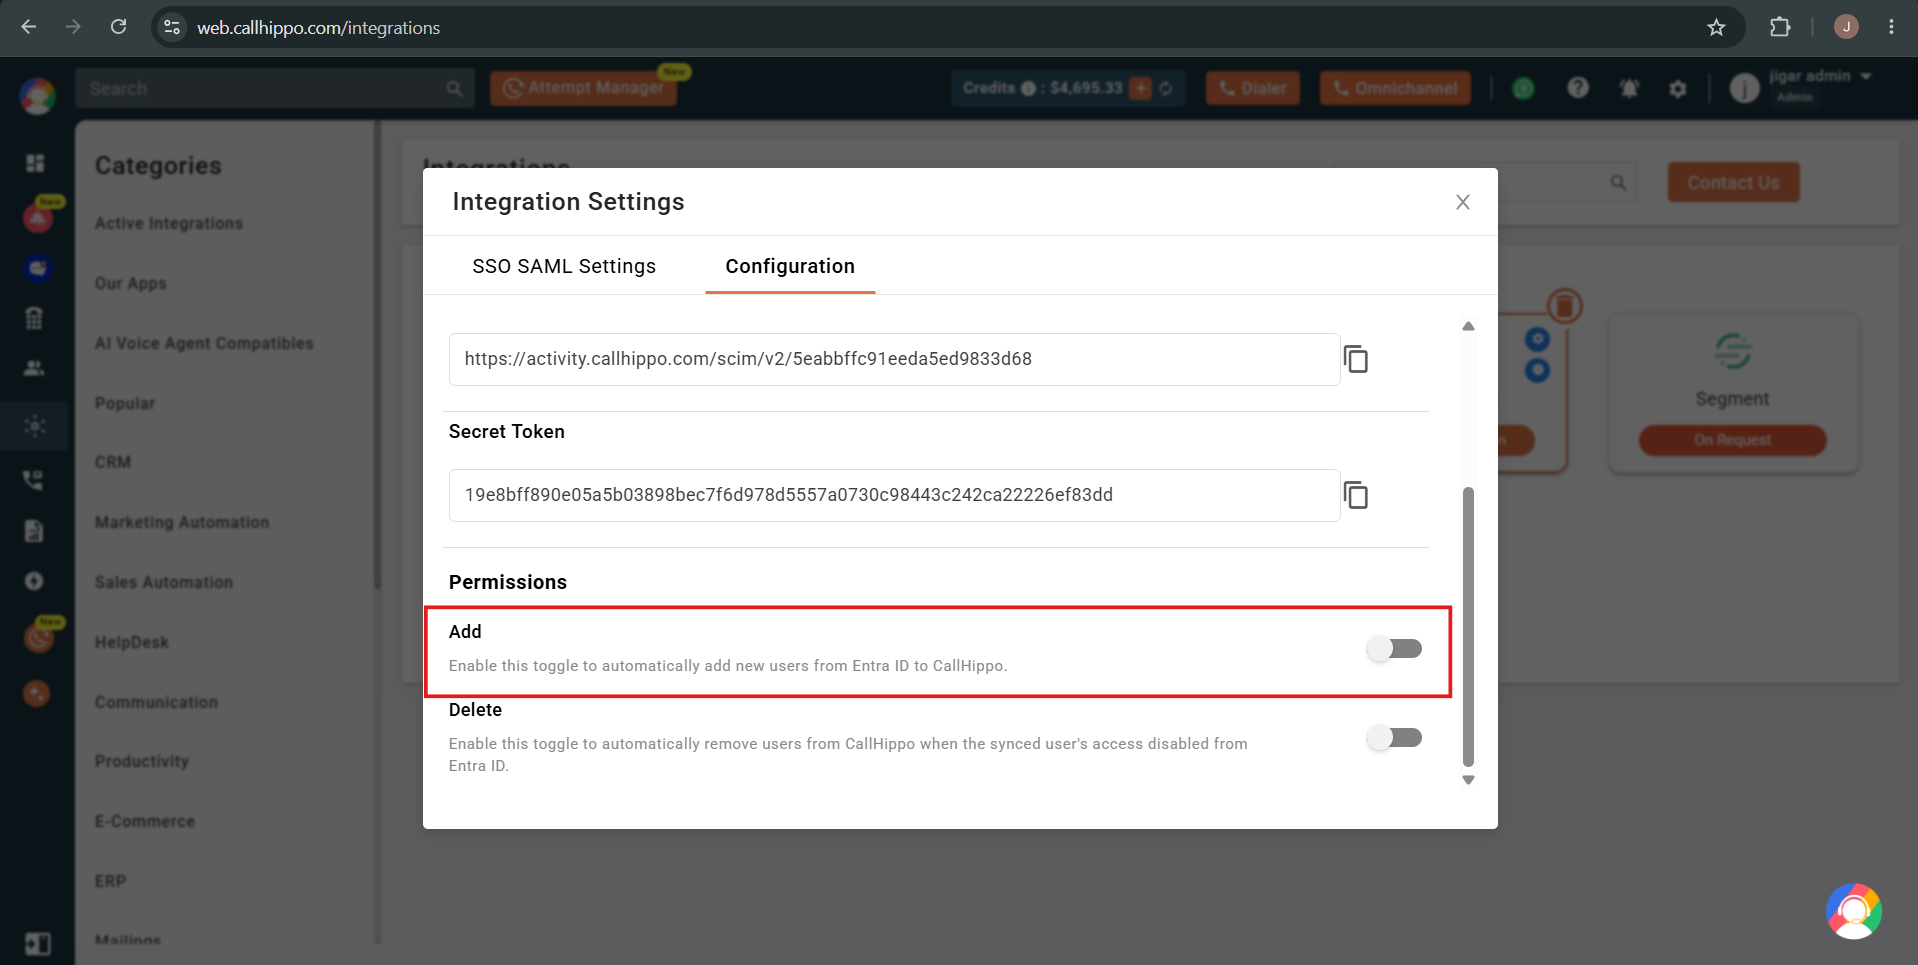
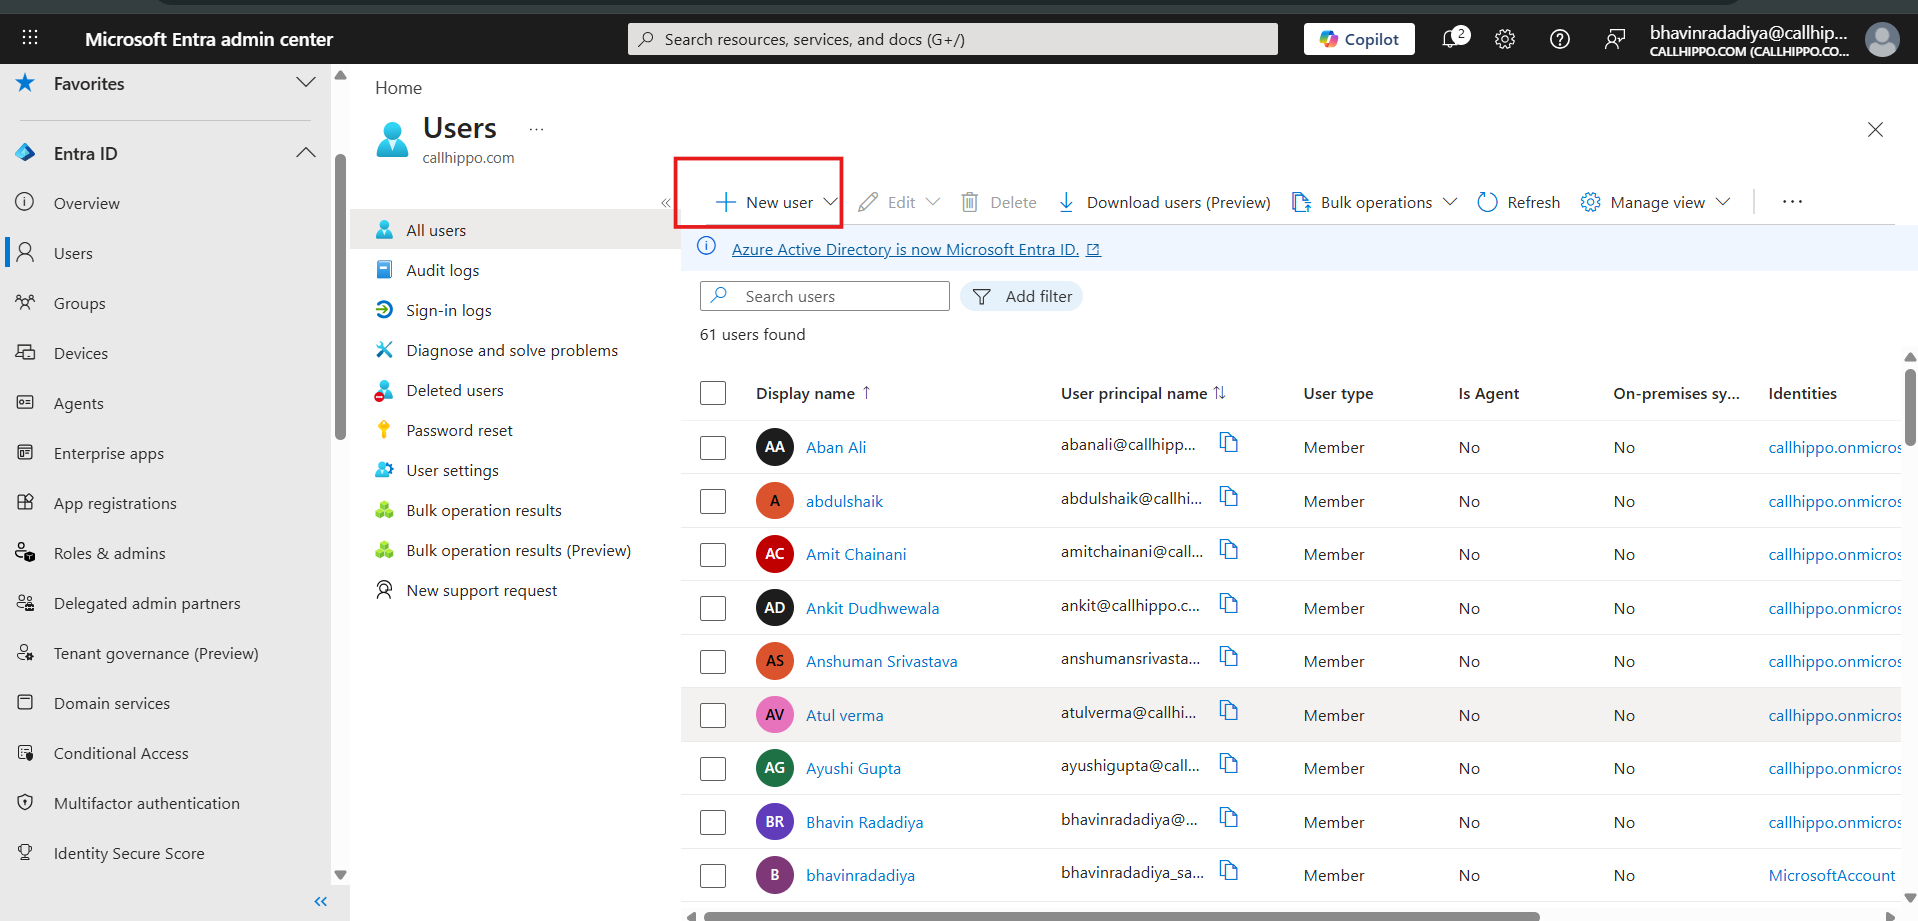
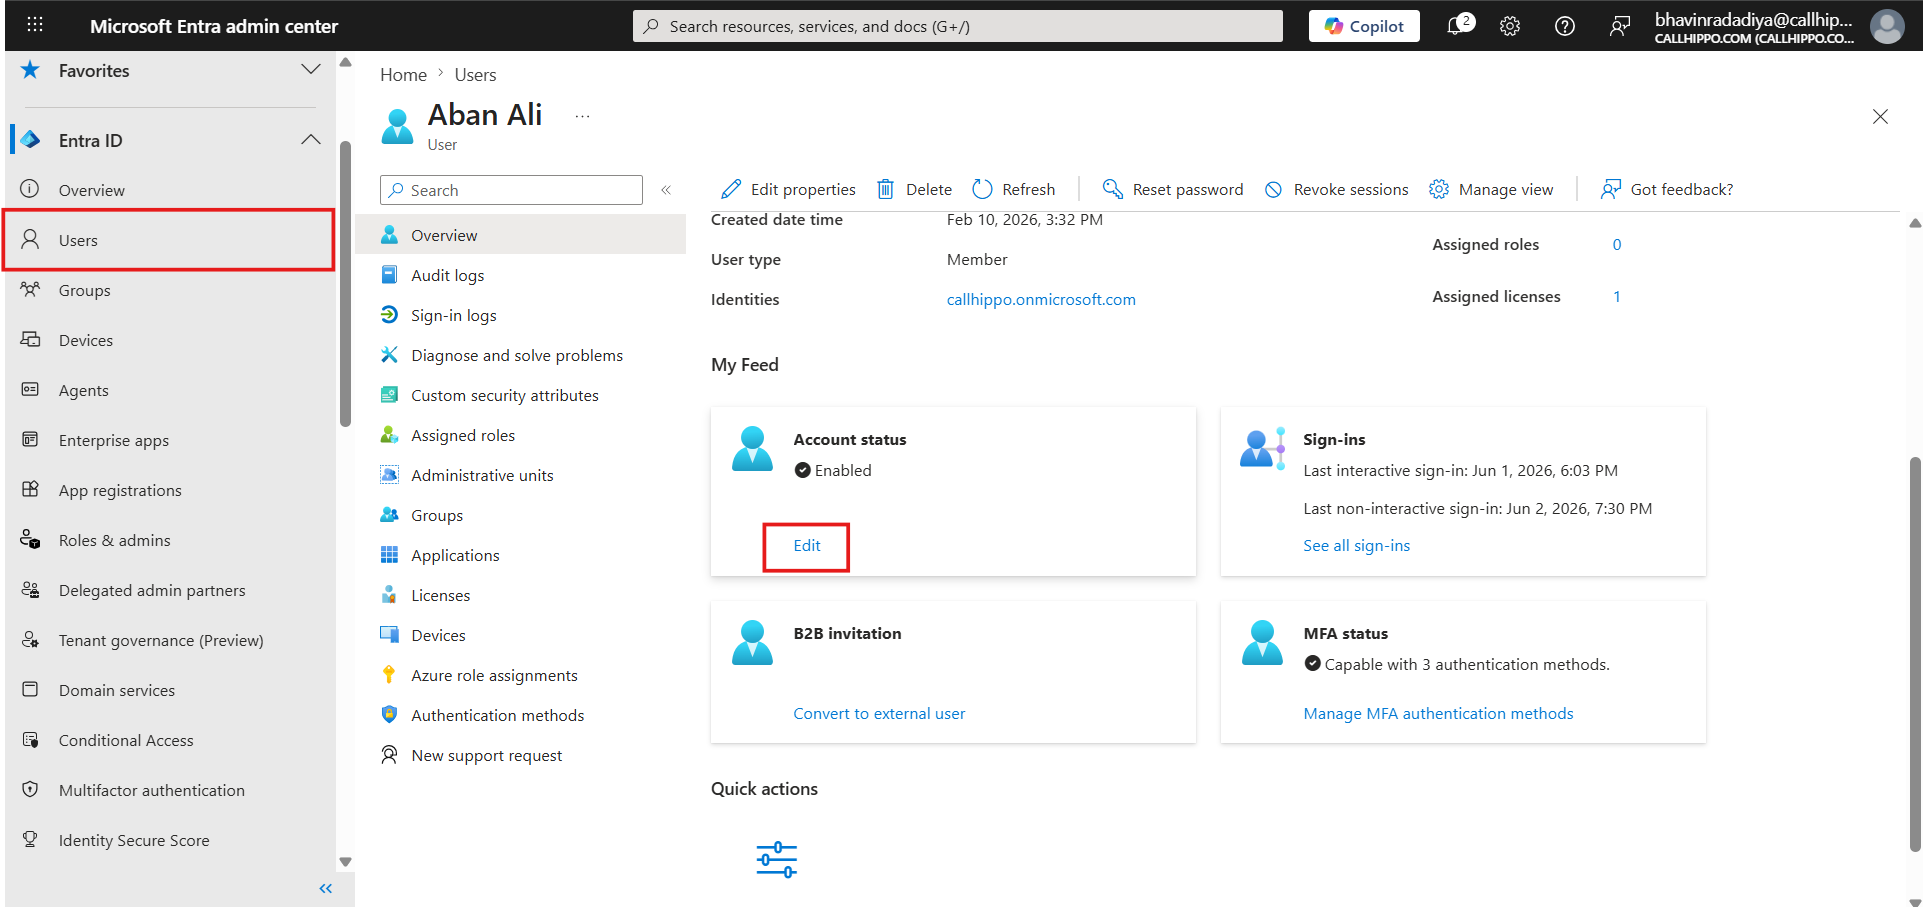
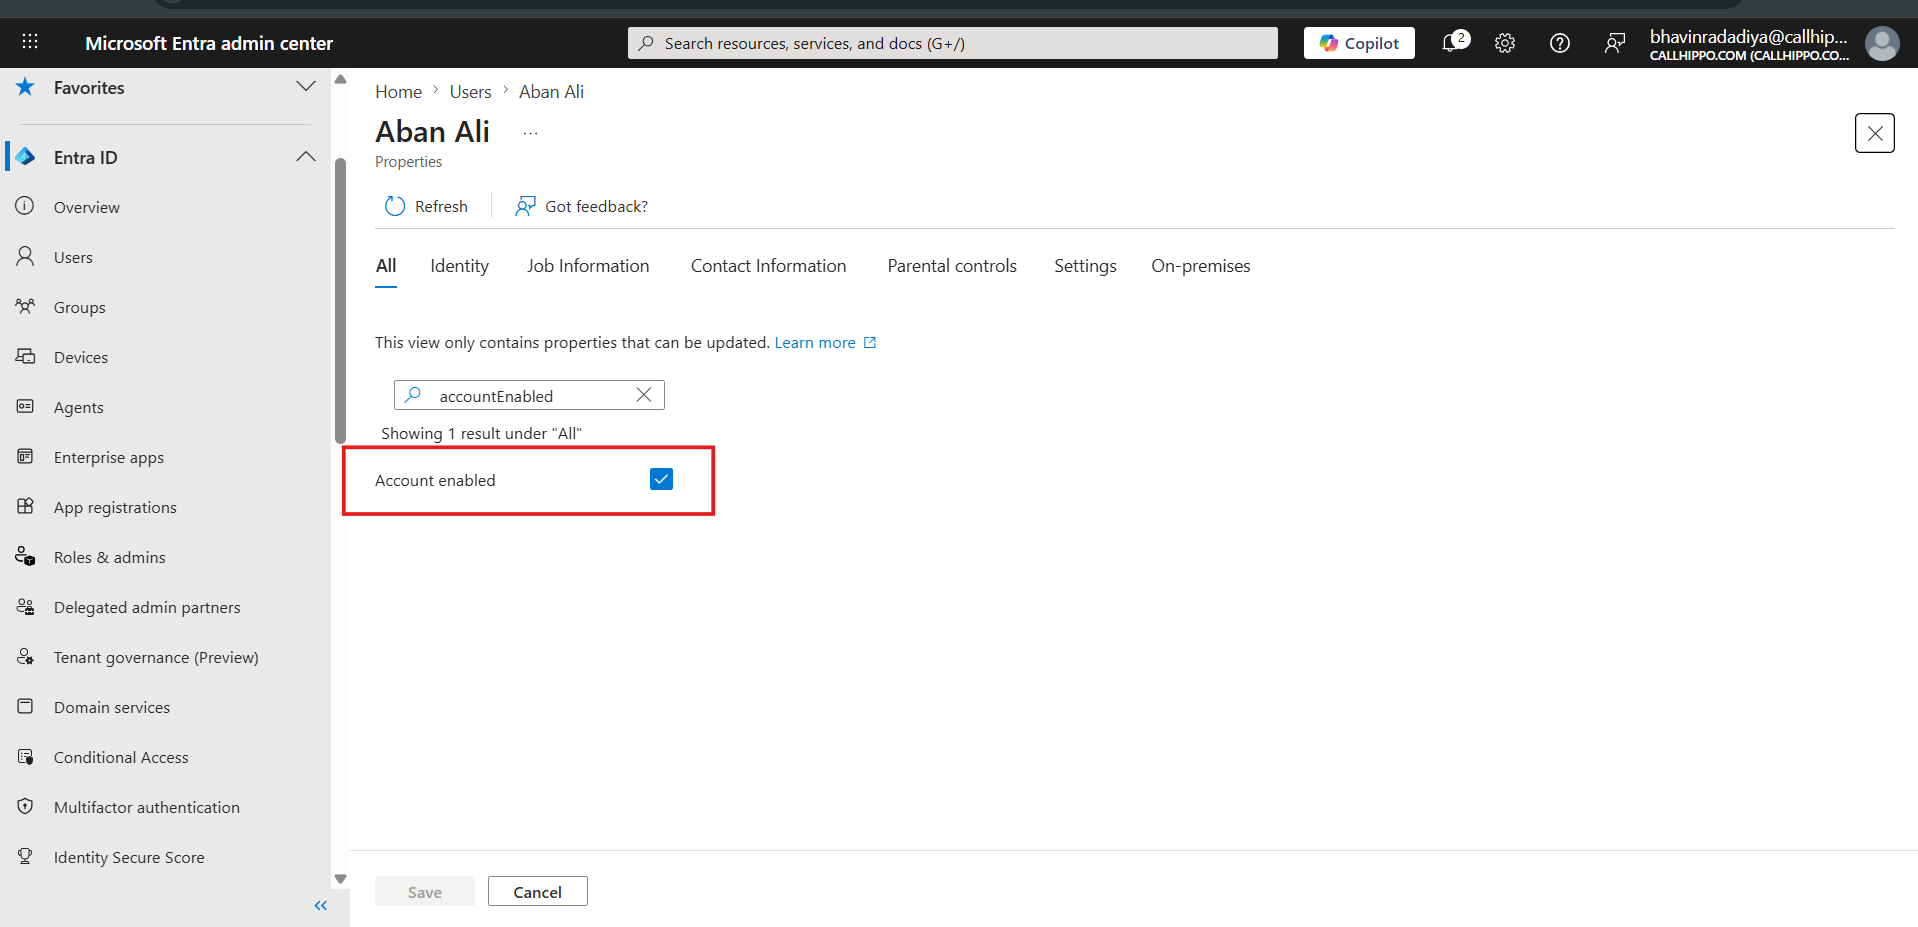
- Delete: Enable this toggle so users are automatically removed from CallHippo when they are deactivated in Entra ID.
Note: User synchronization from Entra ID follows Entra ID’s provisioning schedule. Changes such as user additions and updates may take up to 40 minutes to reflect in CallHippo.