
Integrating Bitrix24 with CallHippo lets you call directly from your CRM, log every call to the contact timeline, and keep your contacts in sync automatically.
Before You Start
- Enable Telephony in your Bitrix24 account before you begin.
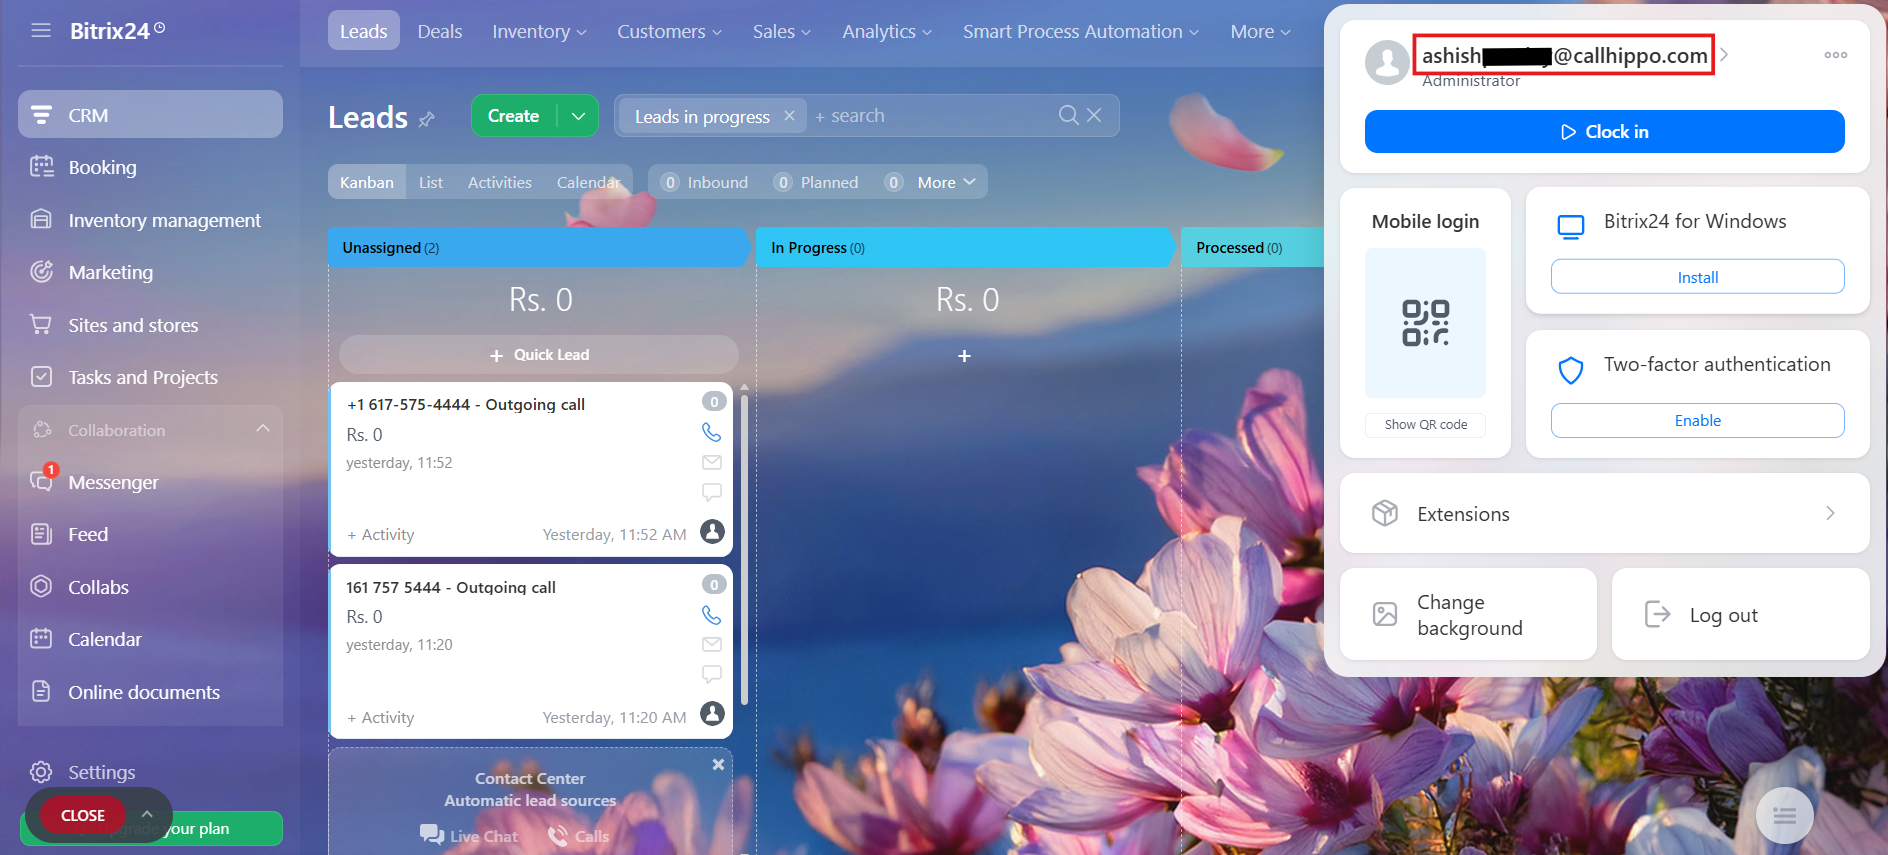
- Same email required: Bitrix24 telephony calling works only for Bitrix24 users who also exist in CallHippo with the same email address.
Step 1: Set Up the Bitrix24 App
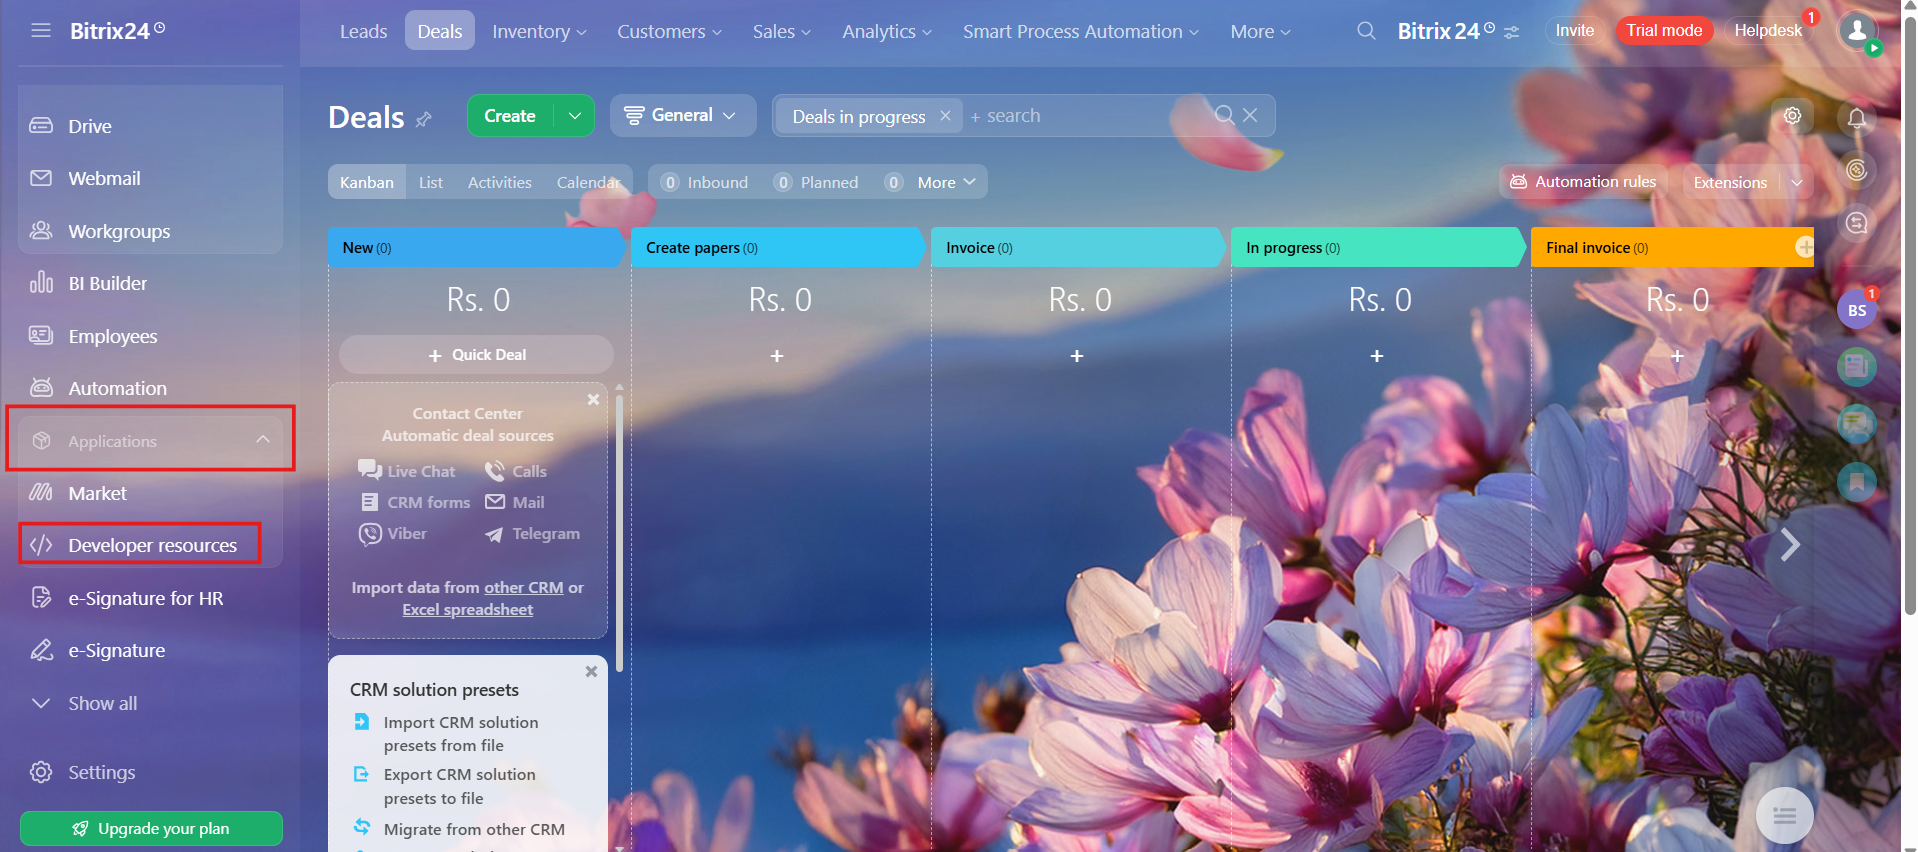
- Log in to your Bitrix24 account, open the left panel and go to Applications → Developer resources.
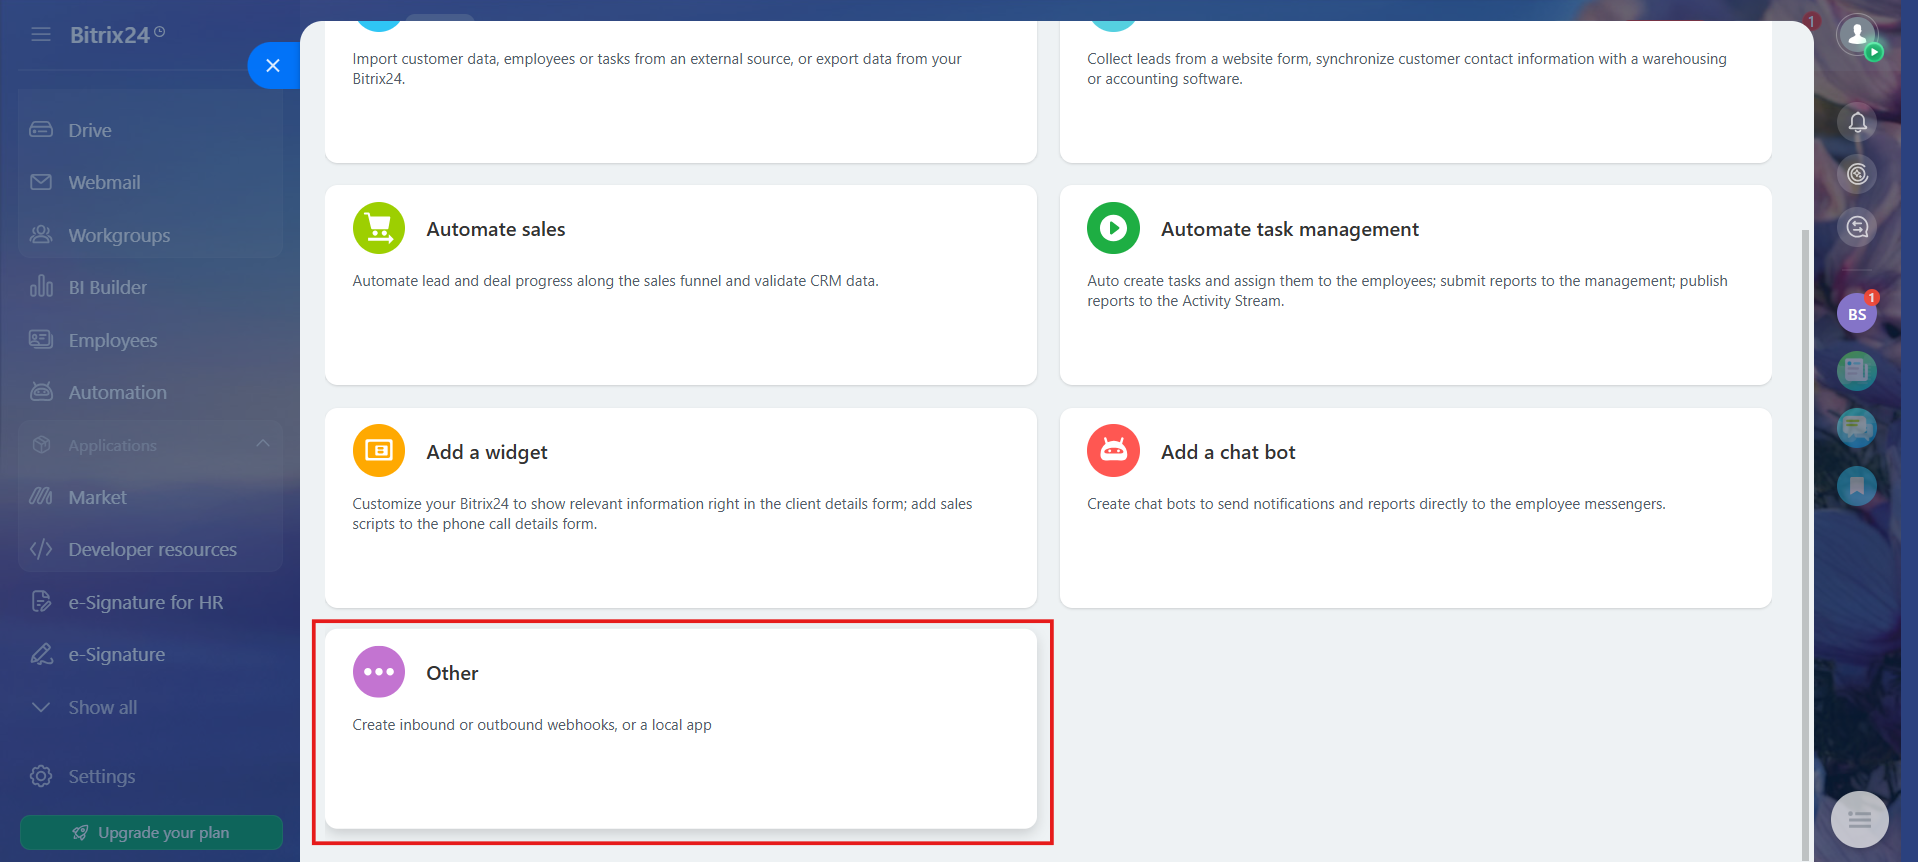
- Click Other in the pop-up window.
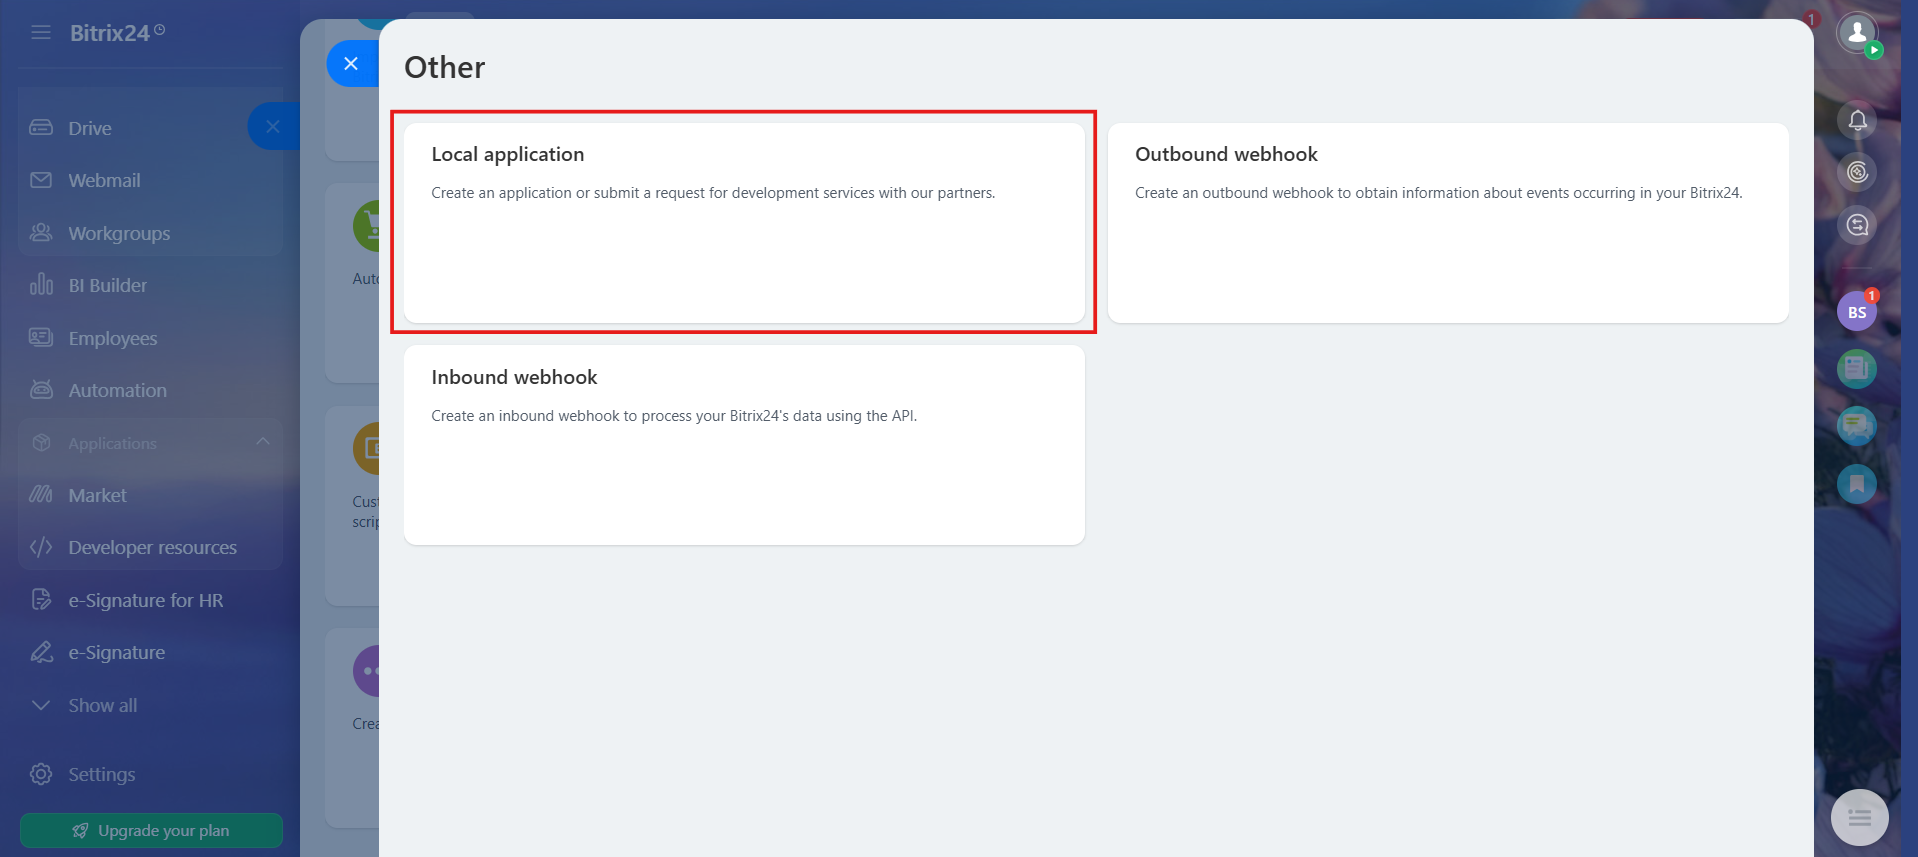
- Click Local application.
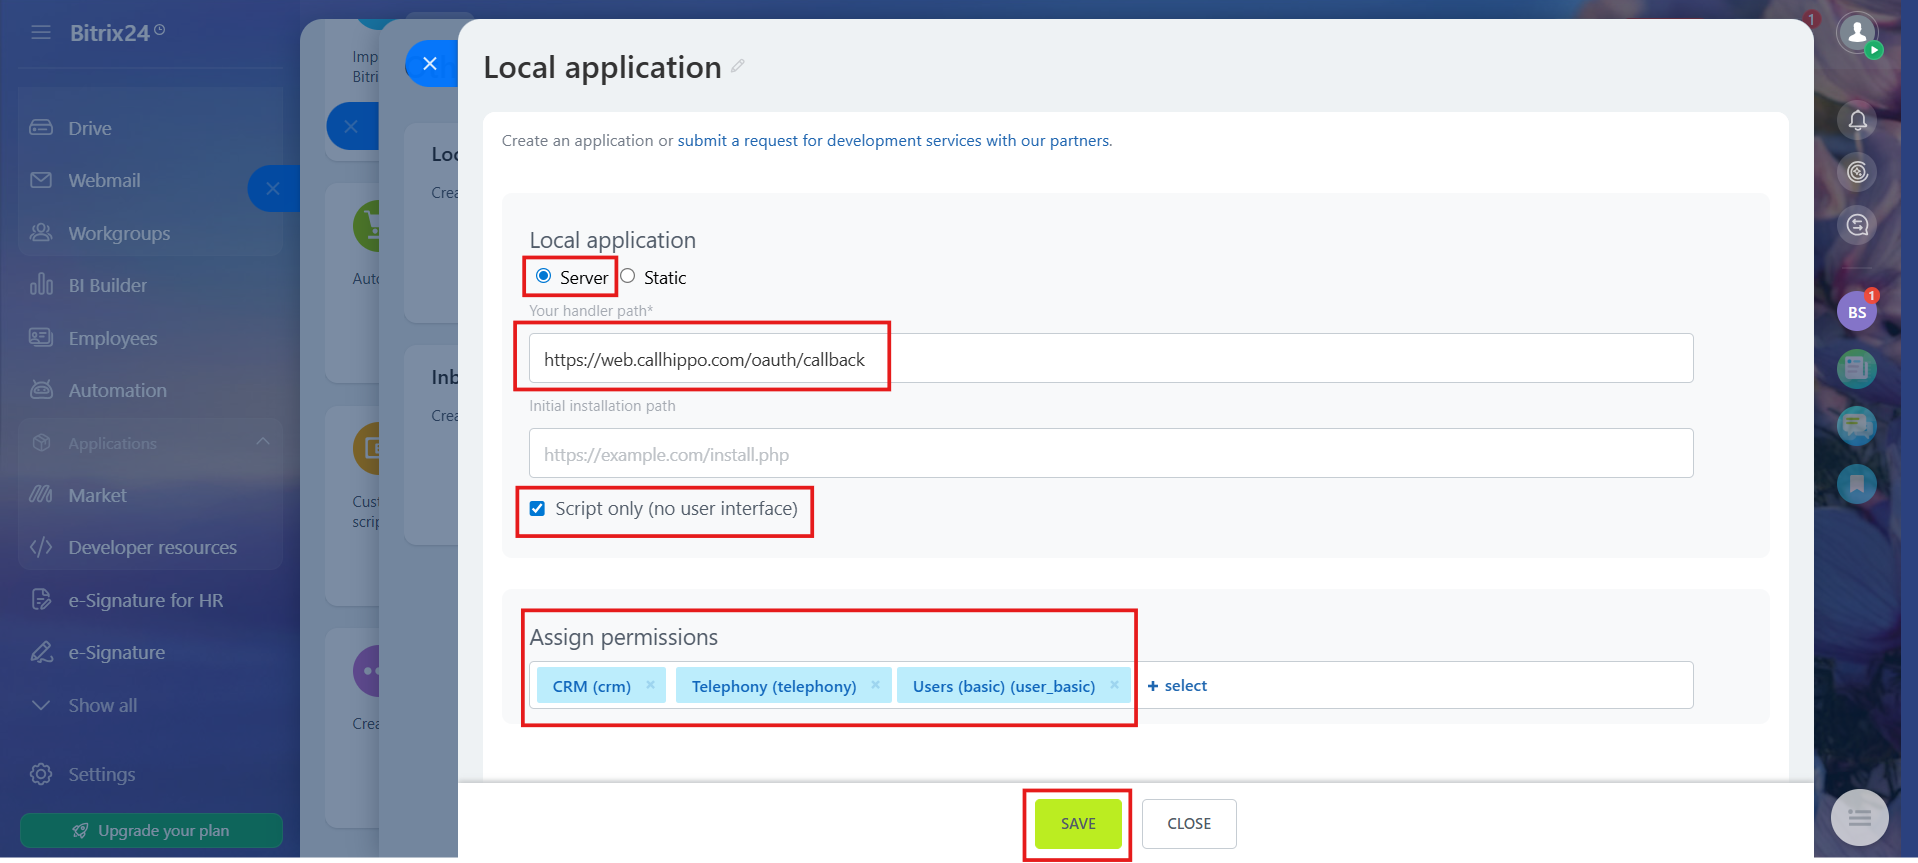
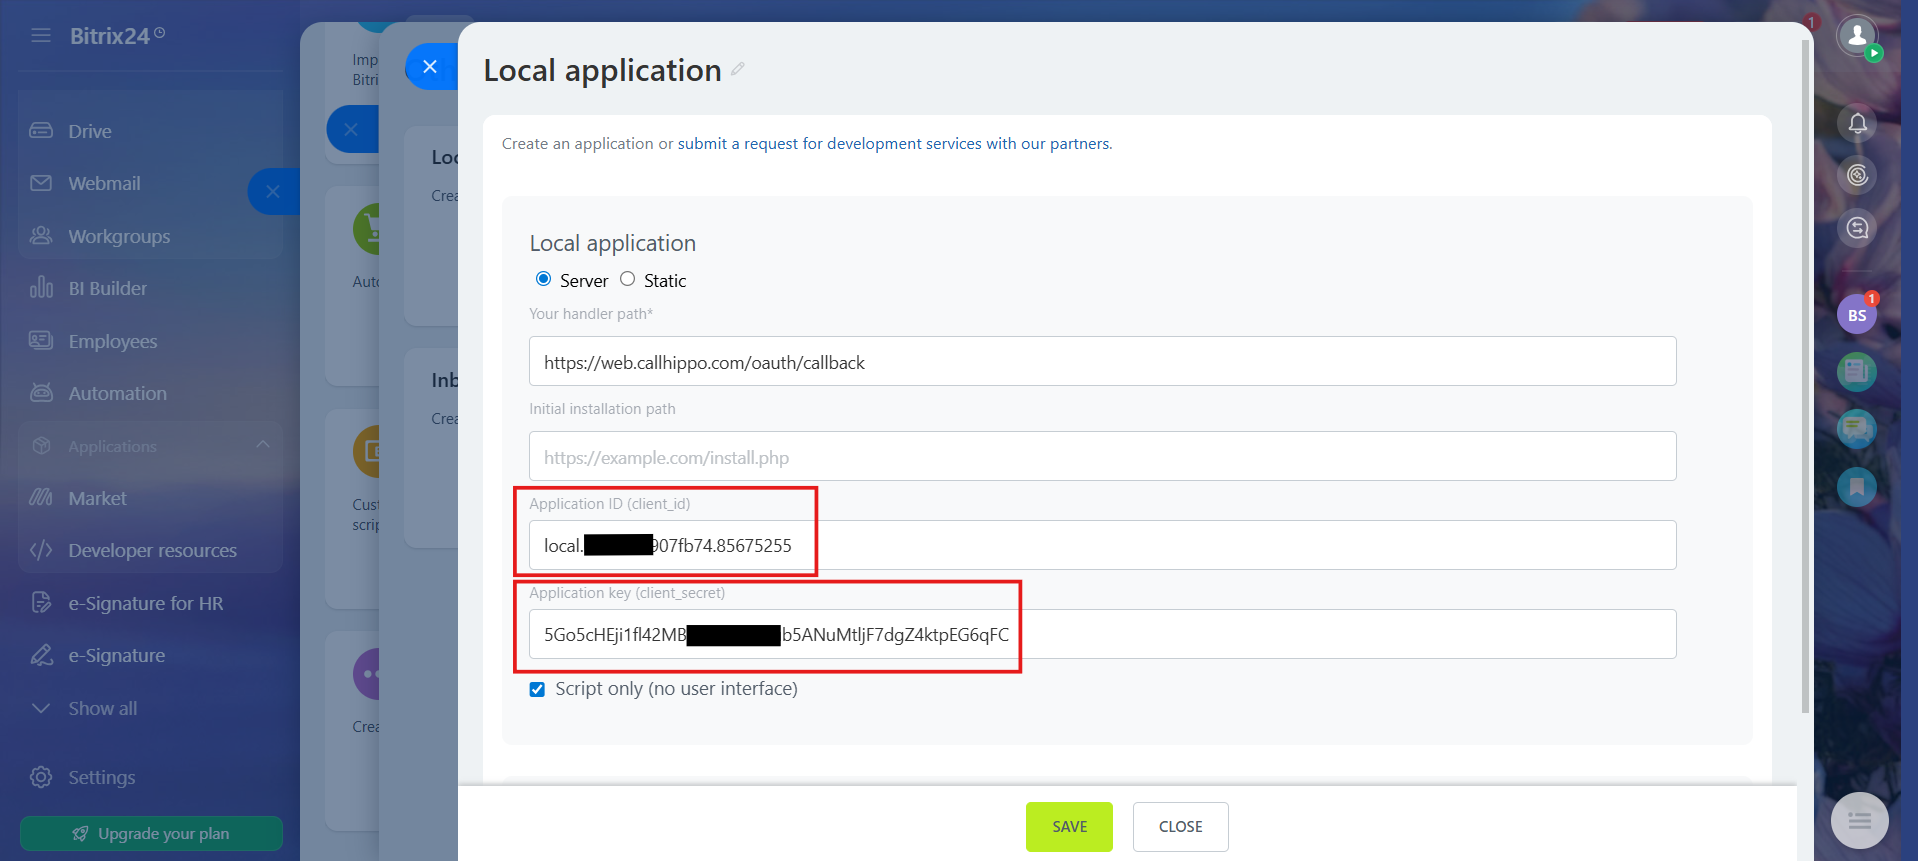
- Fill in the details and click Save:
- Application type must be Server.
- In the handler path enter https://web.callhippo.com/oauth/callback
- Leave the initial installation path empty.
- Select the Script only checkbox.
- In Assign permissions, select CRM, Telephony and Users (basic) (user_basic).
- After saving, Bitrix24 generates a client_id and client_secret. Copy and securely save both values.
Step 2: Connect Bitrix24 in CallHippo
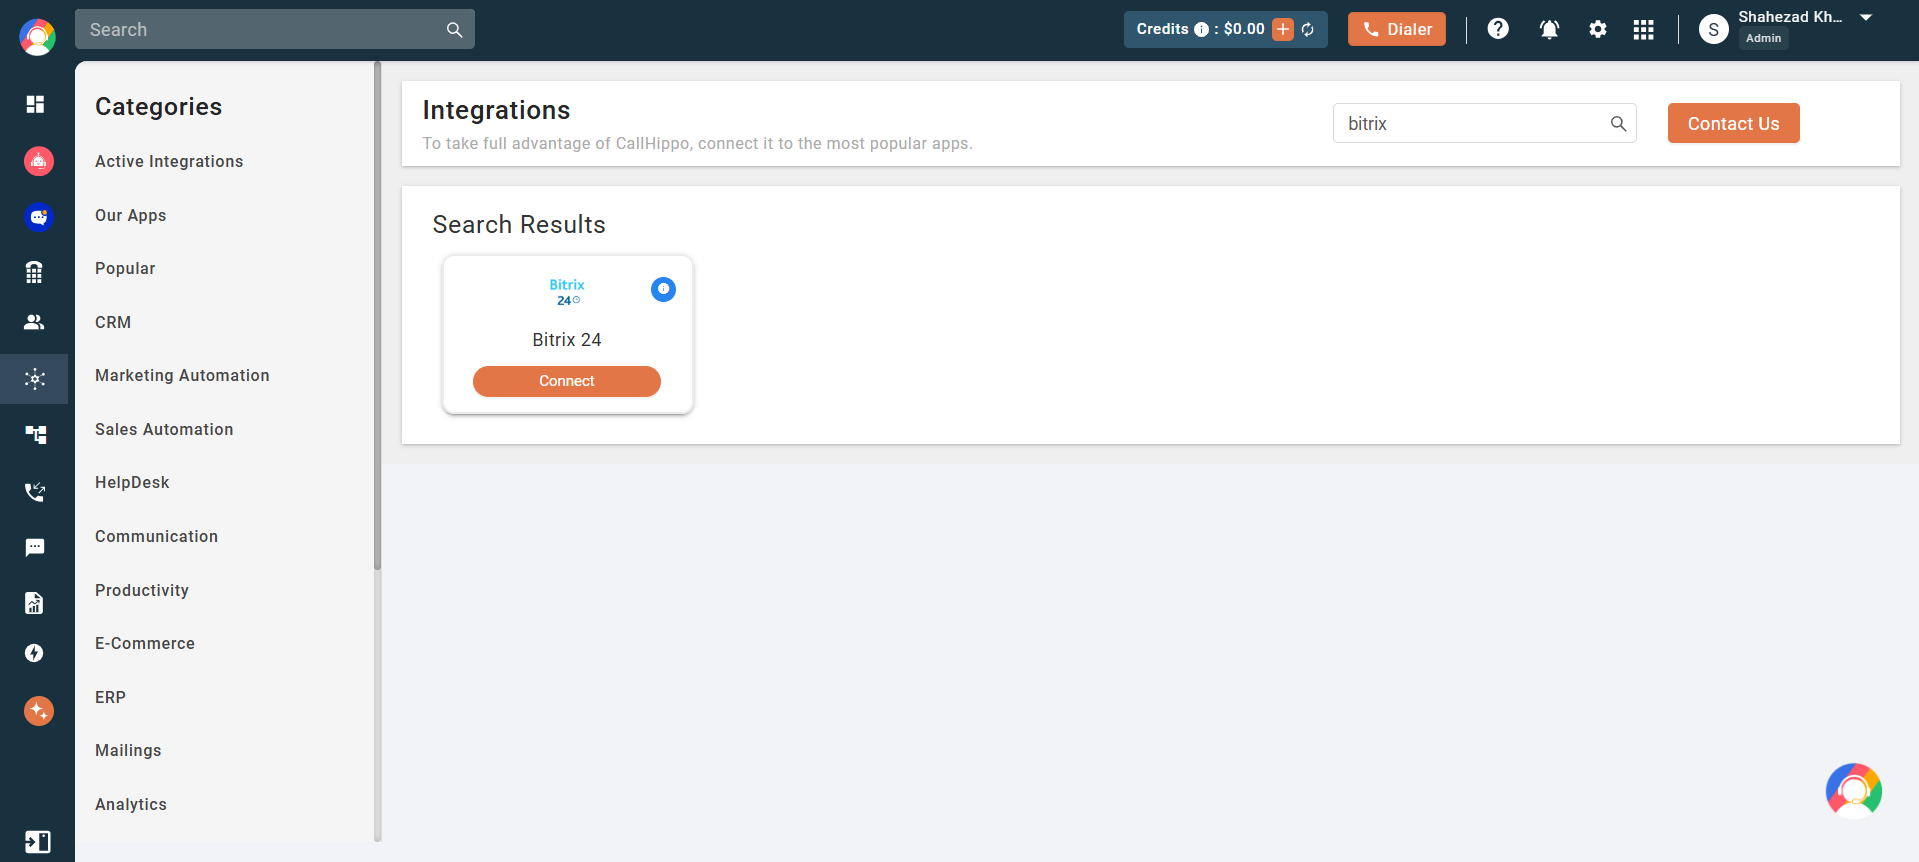
- Log in to CallHippo, open Integrations from the left panel, find Bitrix24 and click Connect.
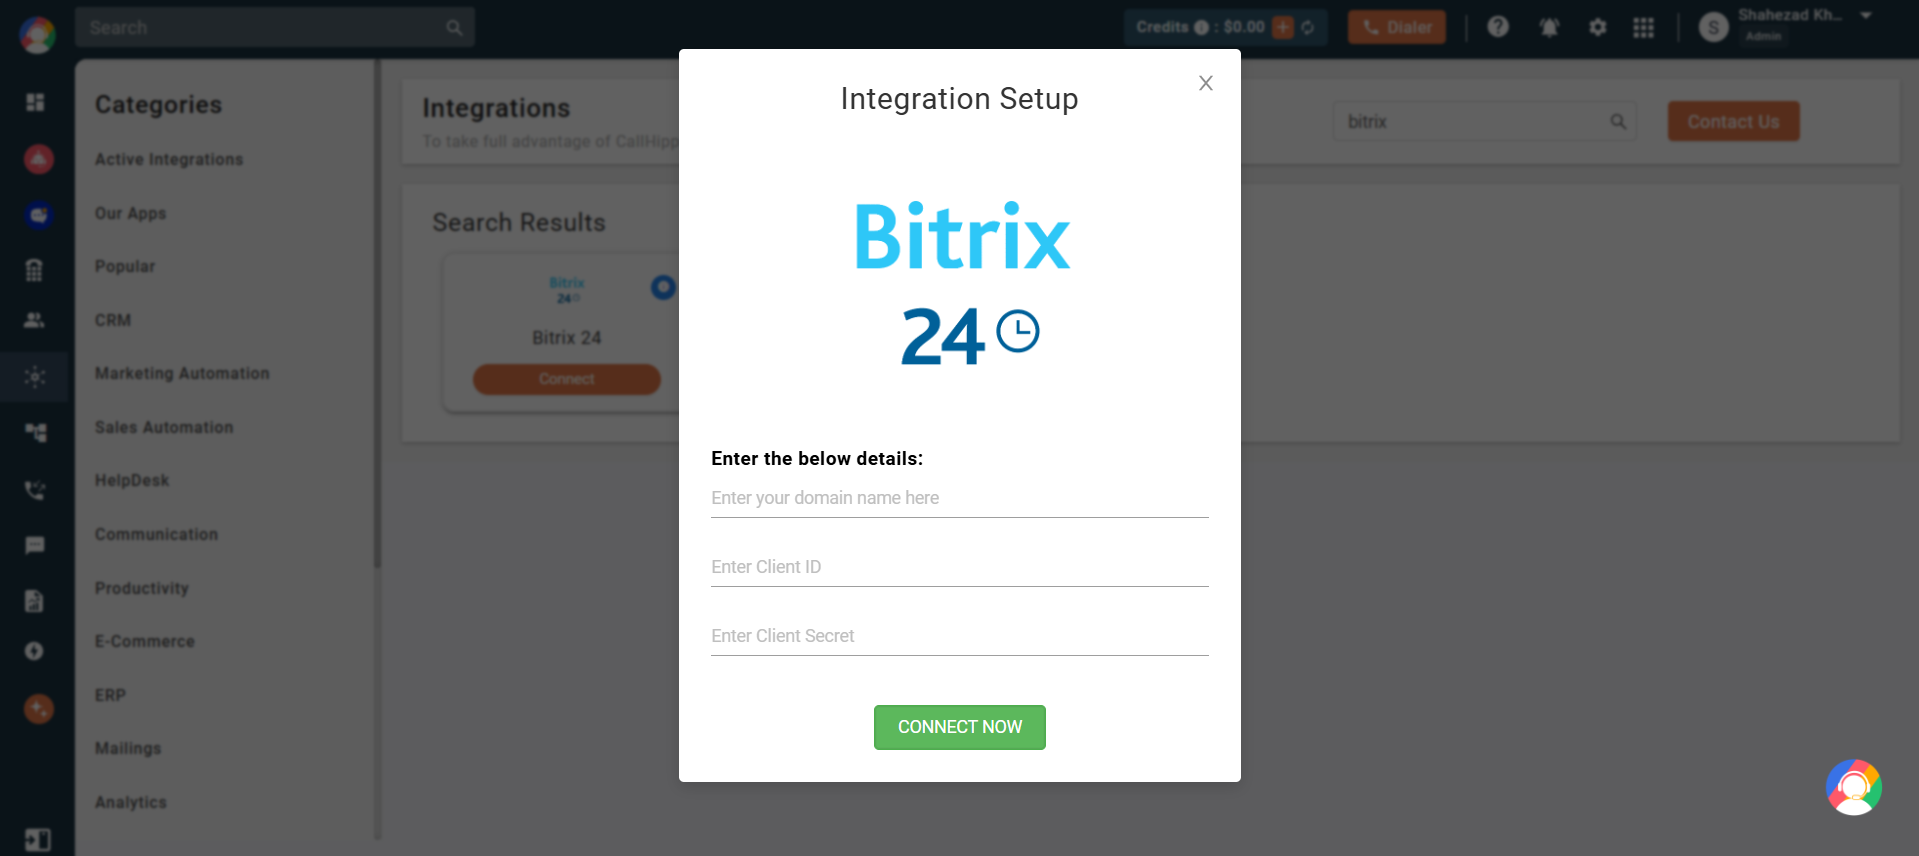
- In the pop-up, enter your Bitrix24 domain, client_id and client_secret, then click Connect Now. Note: the domain should not include https:// — for example, enter callhippo.bitrix24.in.
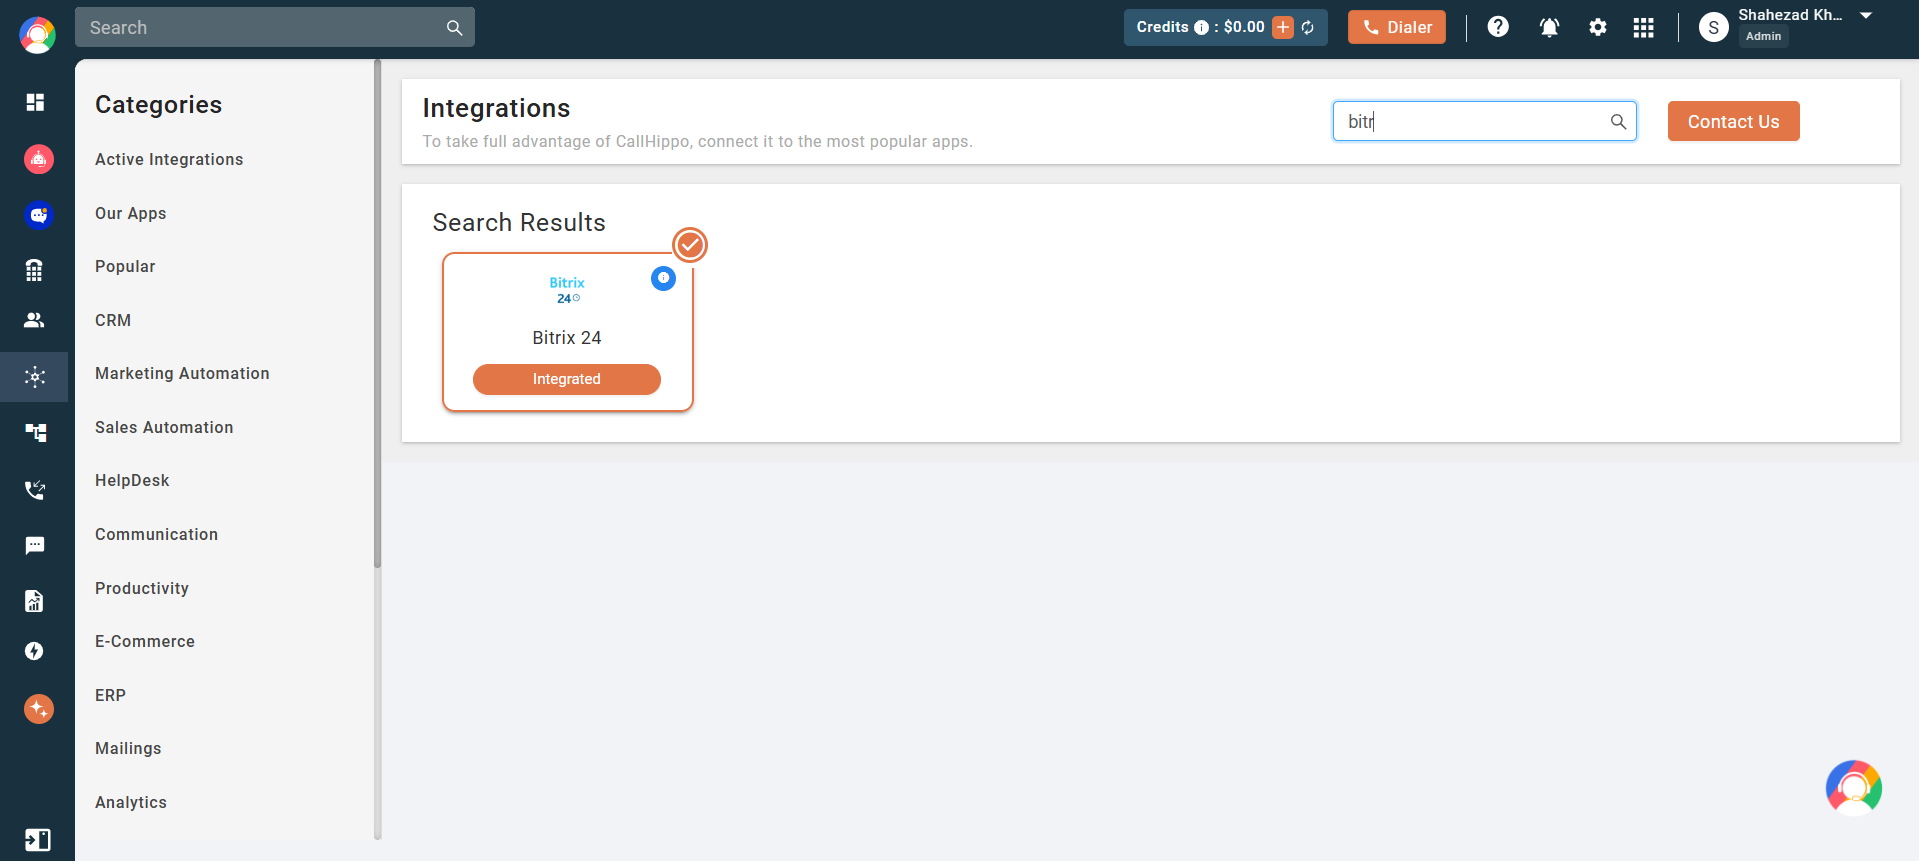
- You are redirected to the Bitrix24 login page. If you are already logged in, the integration starts automatically and returns you to CallHippo with a success message. The status then shows Integrated.
Step 3: Set Up the Data Sync Webhook
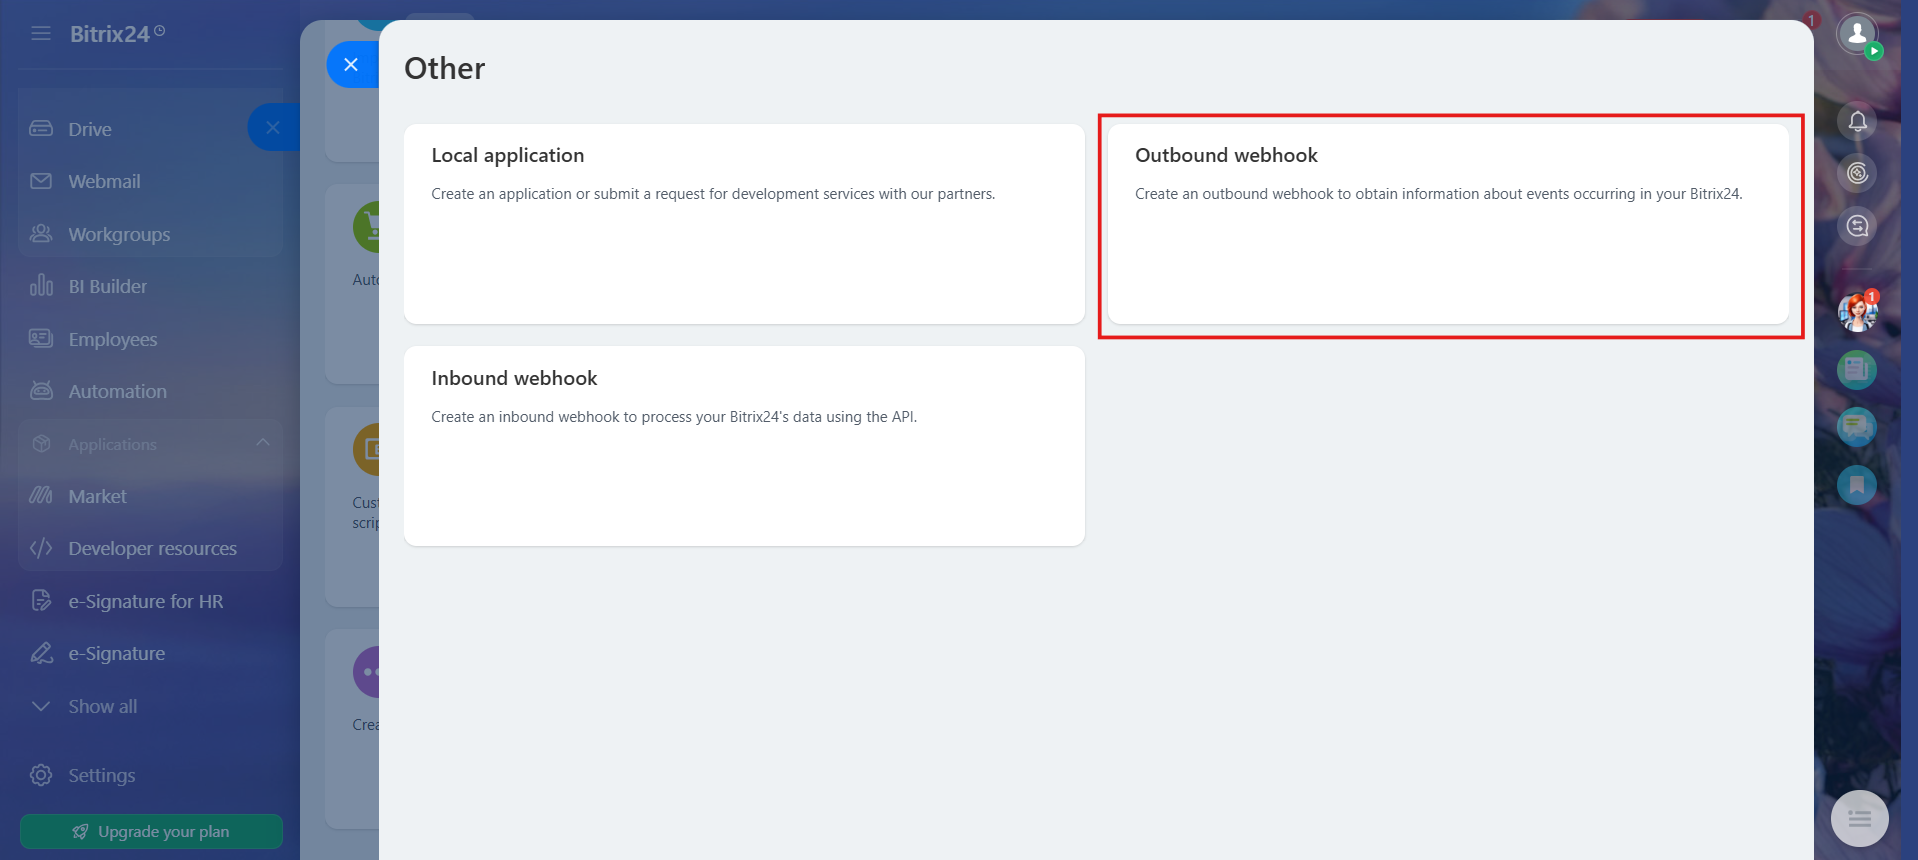
- In Bitrix24, go to Applications → Developer resources → Other → Outbound webhook.
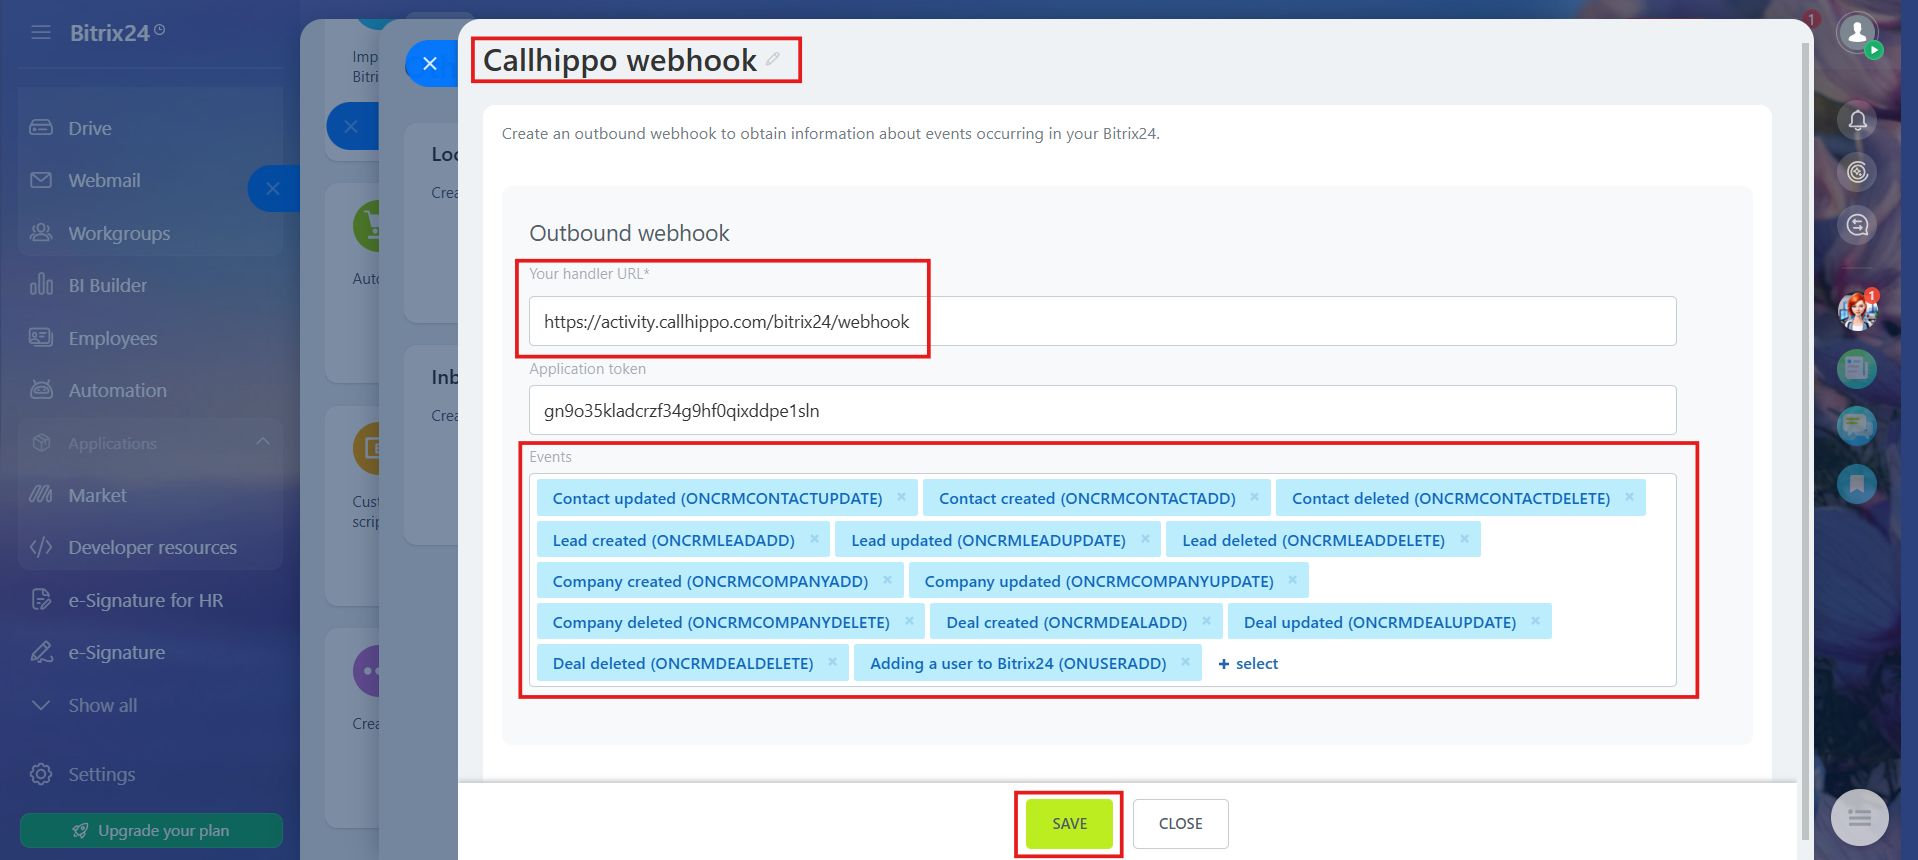
- Fill in the details and click Save:
- Webhook name: CallHippo webhook
- URL: https://activity.callhippo.com/bitrix24/webhook
- Select these events: Contact created/updated/deleted, Lead created/updated/deleted, Company created/updated/deleted, Deal created/updated/deleted, and Adding a user to Bitrix24 (ONUSERADD).
Step 4: Set Up the Click to Call Webhook
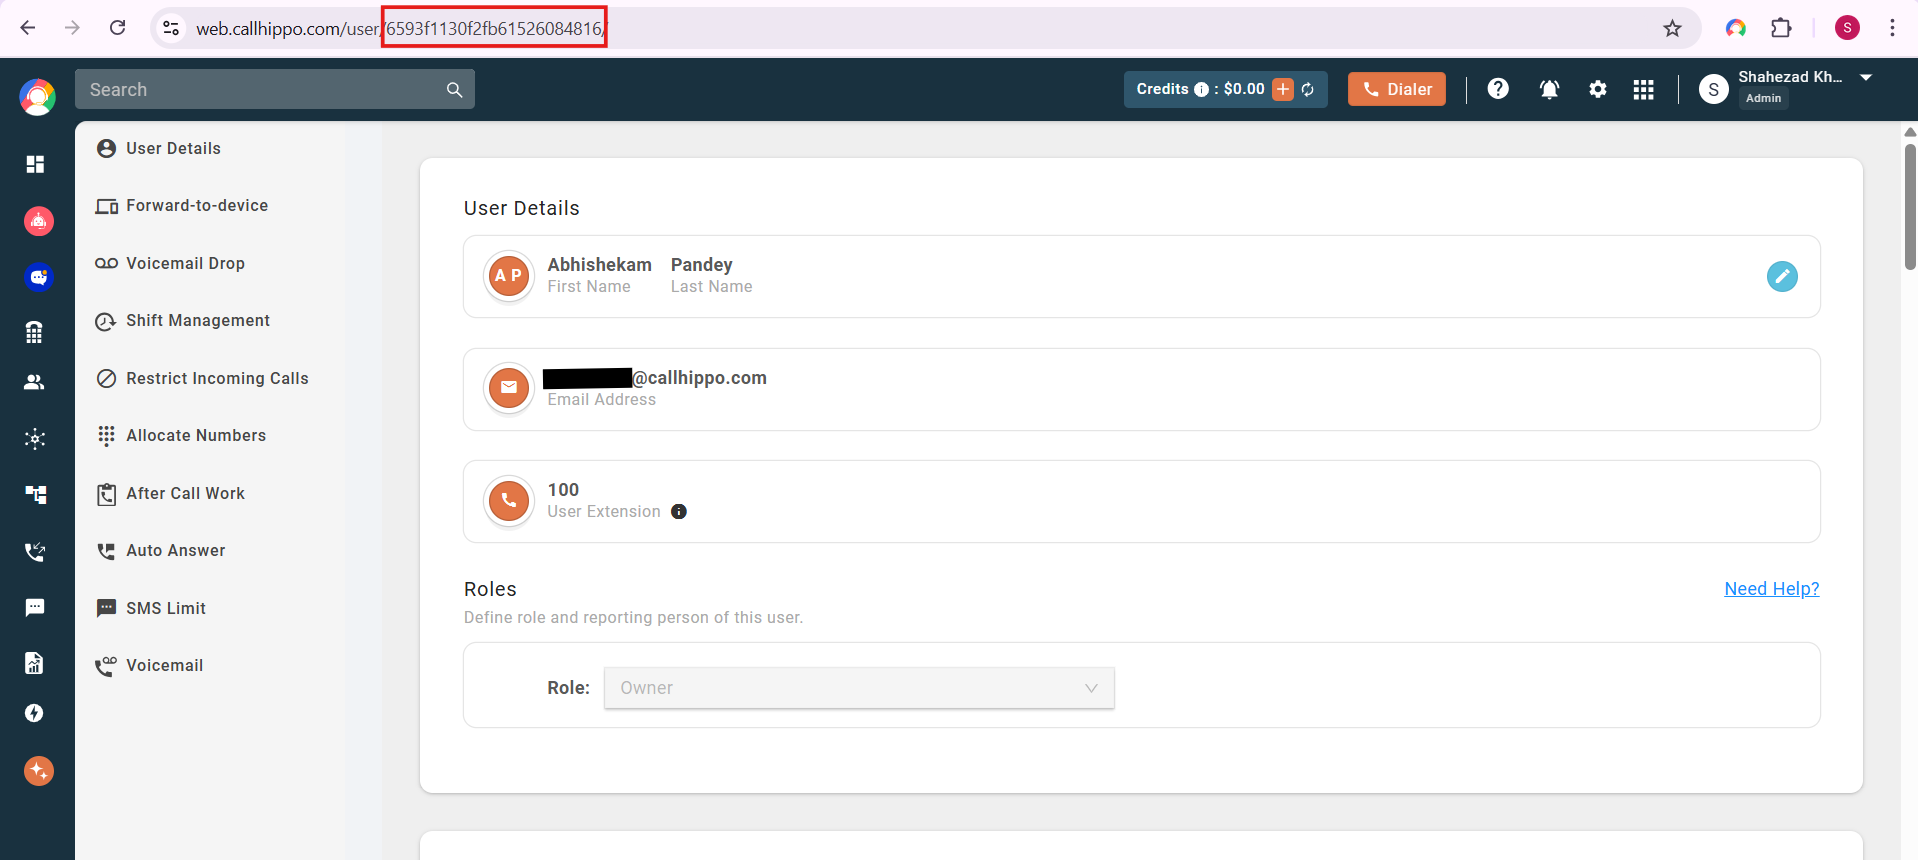
- First, find your CallHippo Owner User ID. In the CallHippo web app, go to Users, select the user whose type is Owner, and copy the last part of the browser URL.
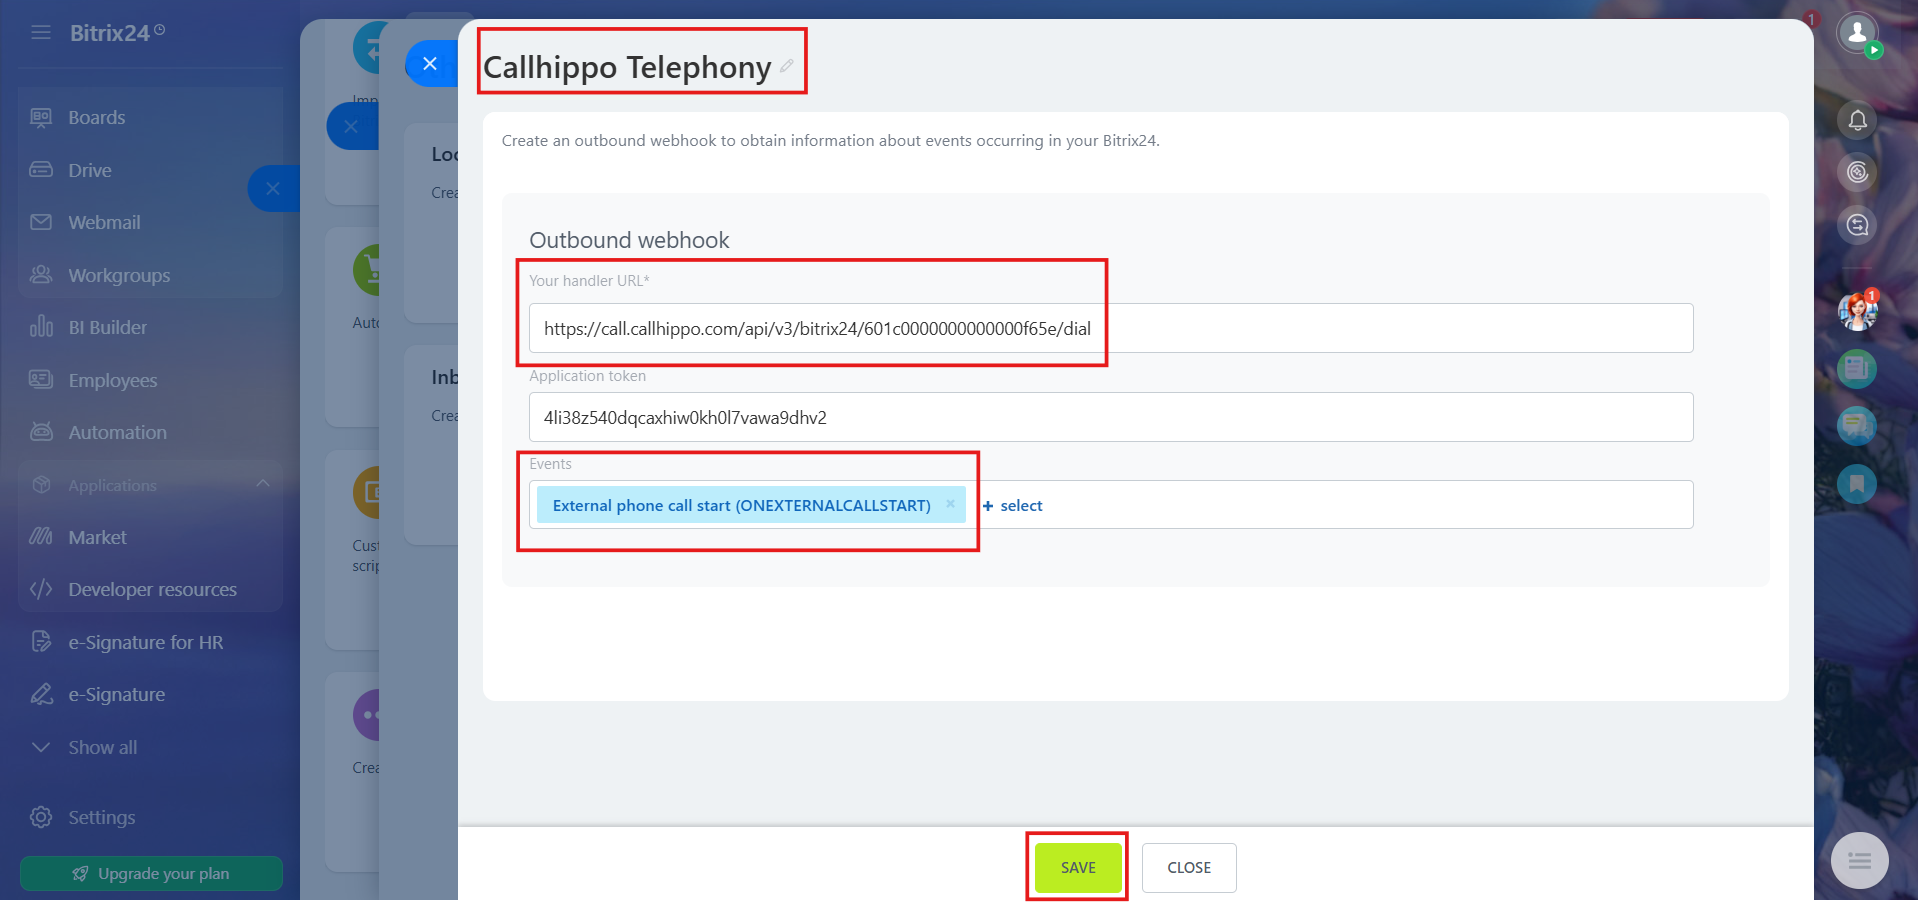
- Back in Bitrix24, create another Outbound webhook and fill in the details, then click Save:
- Webhook name: CallHippo Telephony
- URL: https://call.callhippo.com/api/v3/bitrix24/<Owner User ID>/dial — replace the ID segment with your actual Owner User ID.
- Select the event: External phone call start (ONEXTERNALCALLSTART).
How It Works
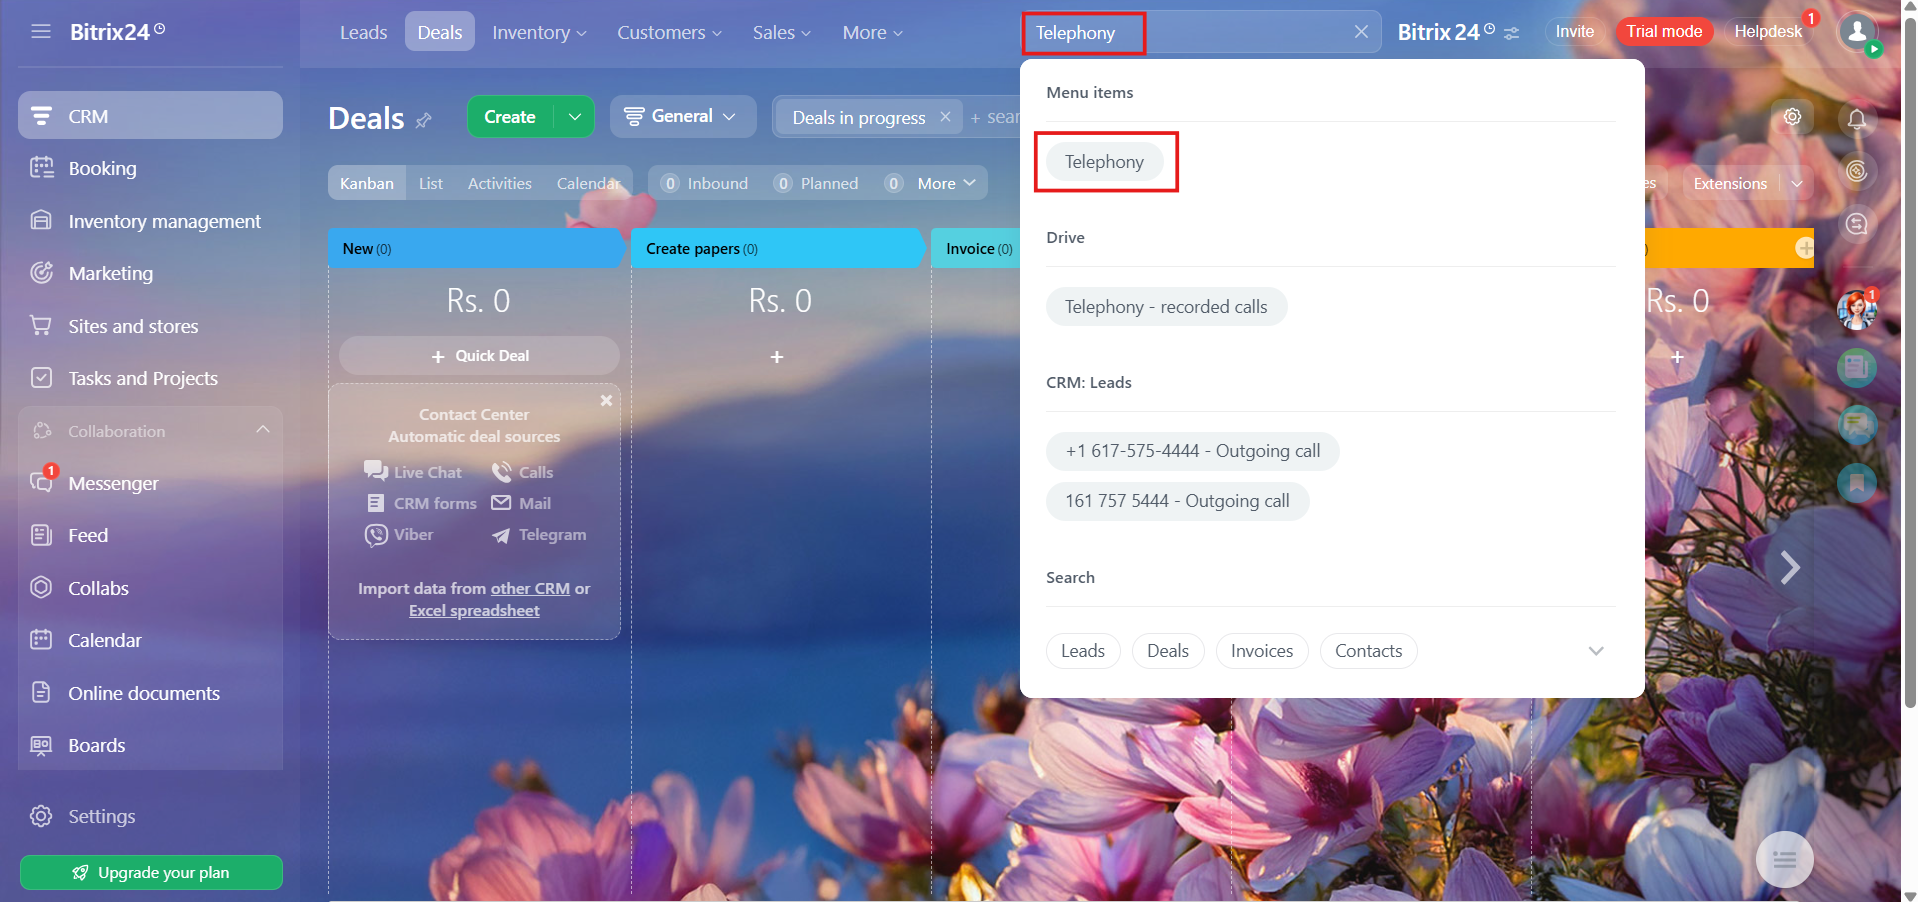
- In Bitrix24, search for Telephony and open the Telephony menu.
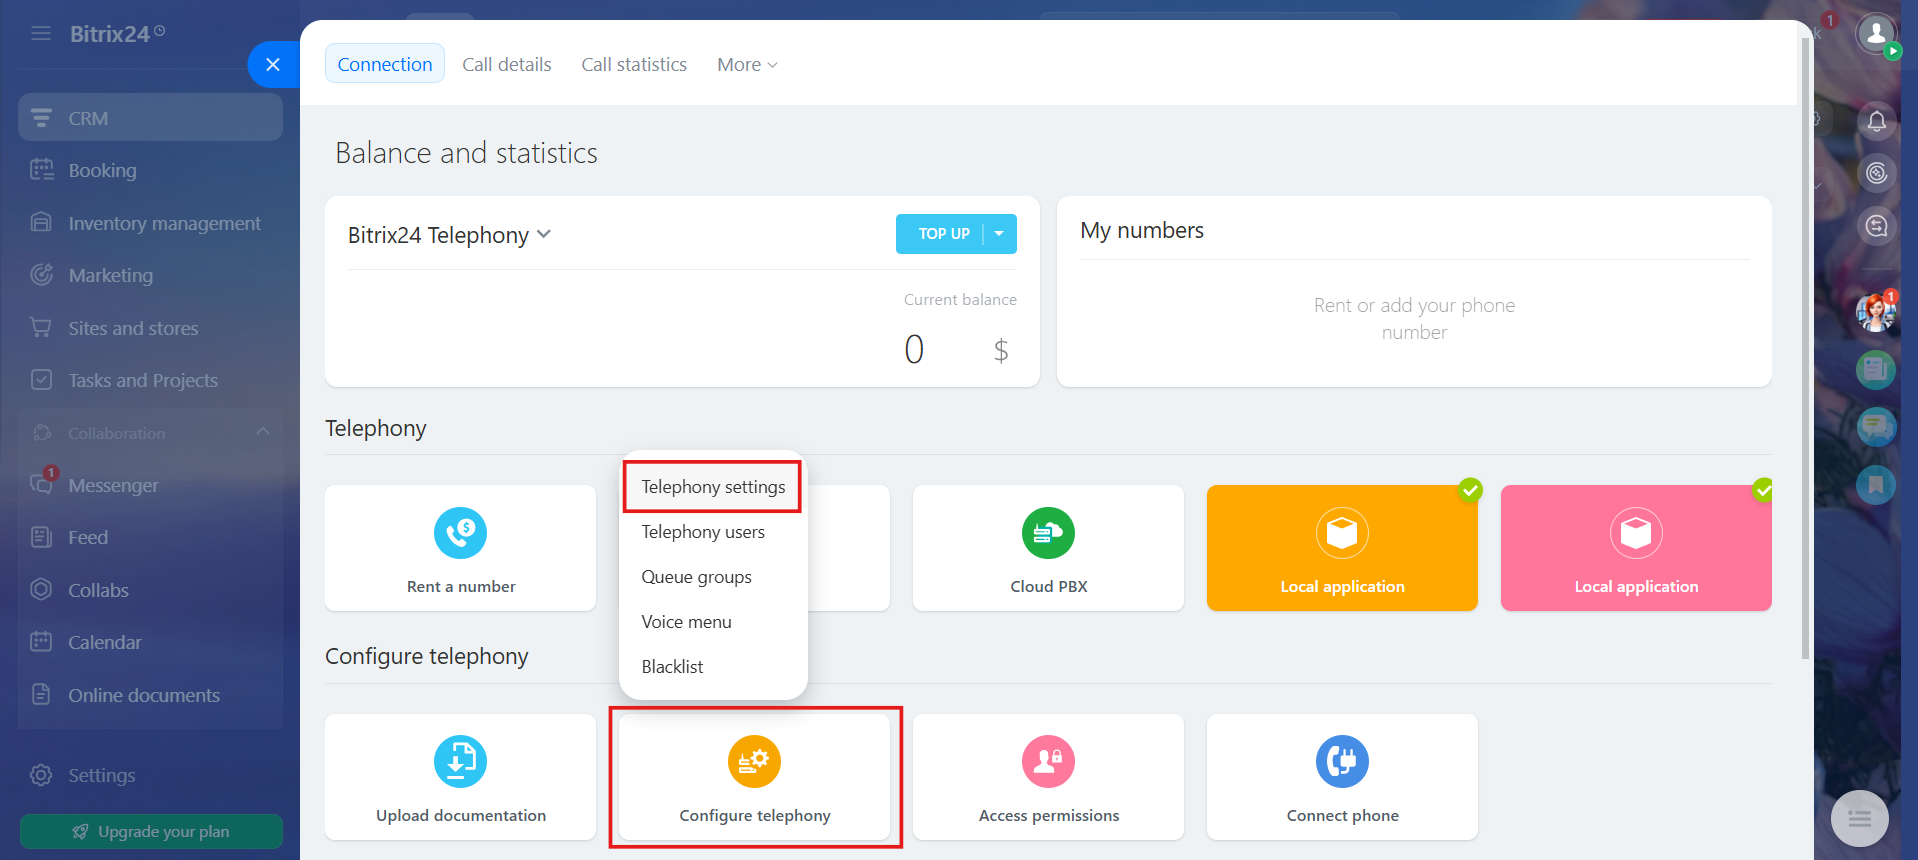
- Go to Configure telephony → Telephony settings.
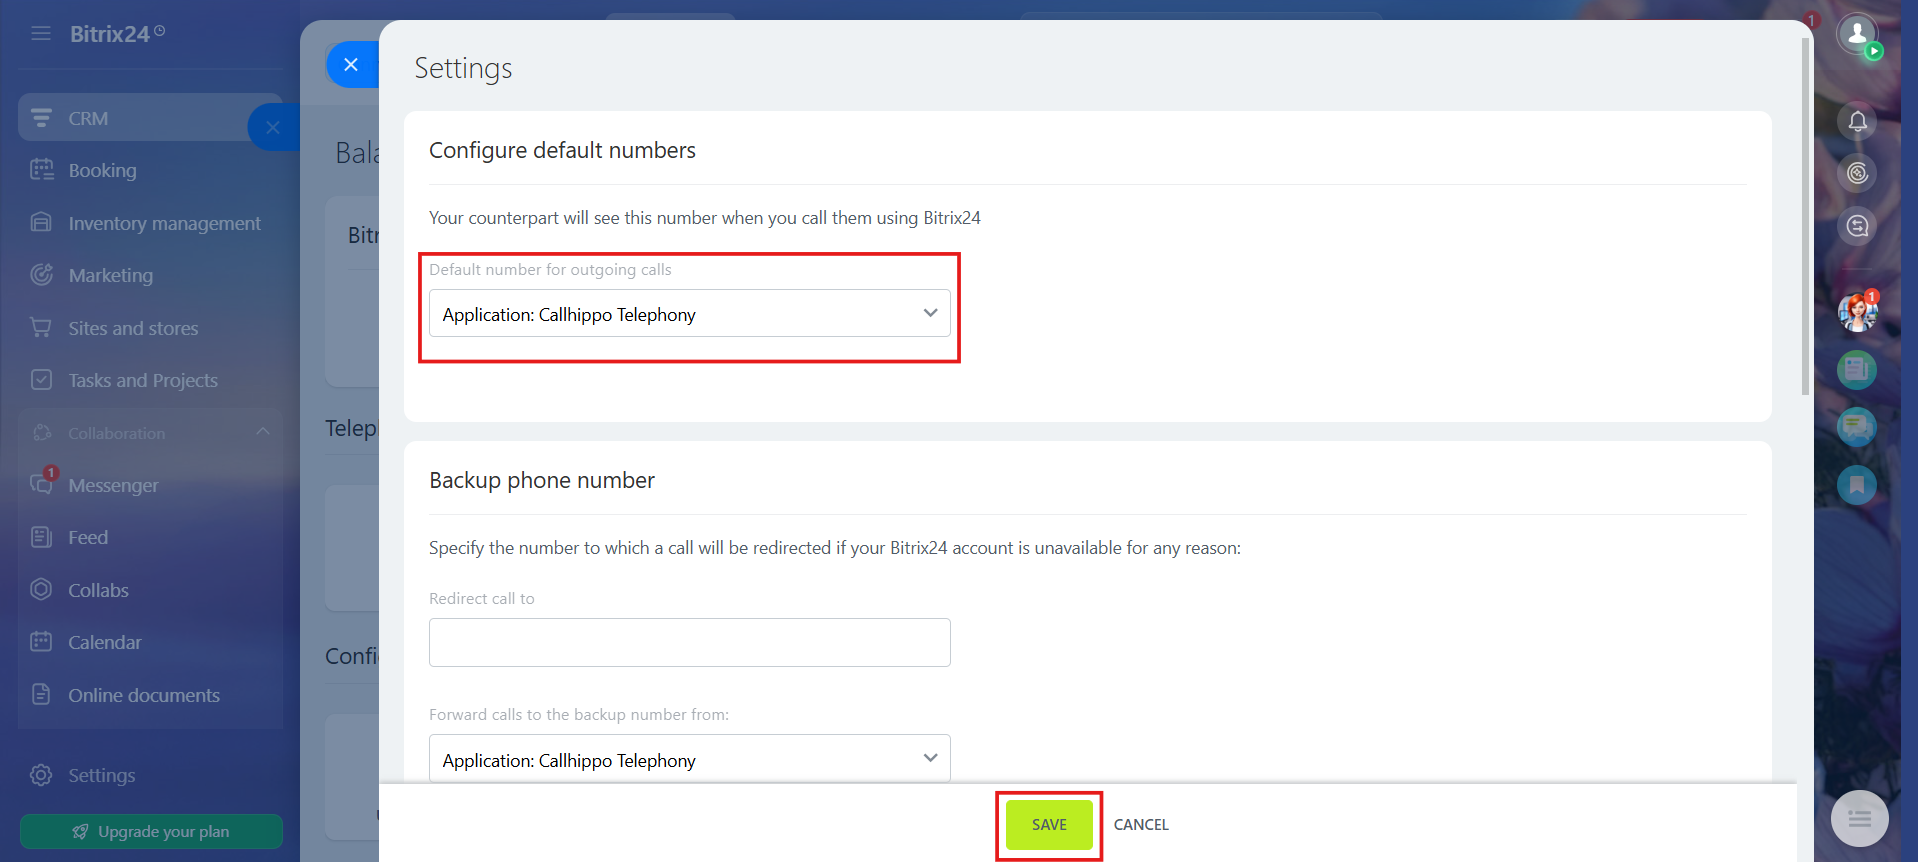
- Set the Default number for outgoing calls to CallHippo Telephony and save.
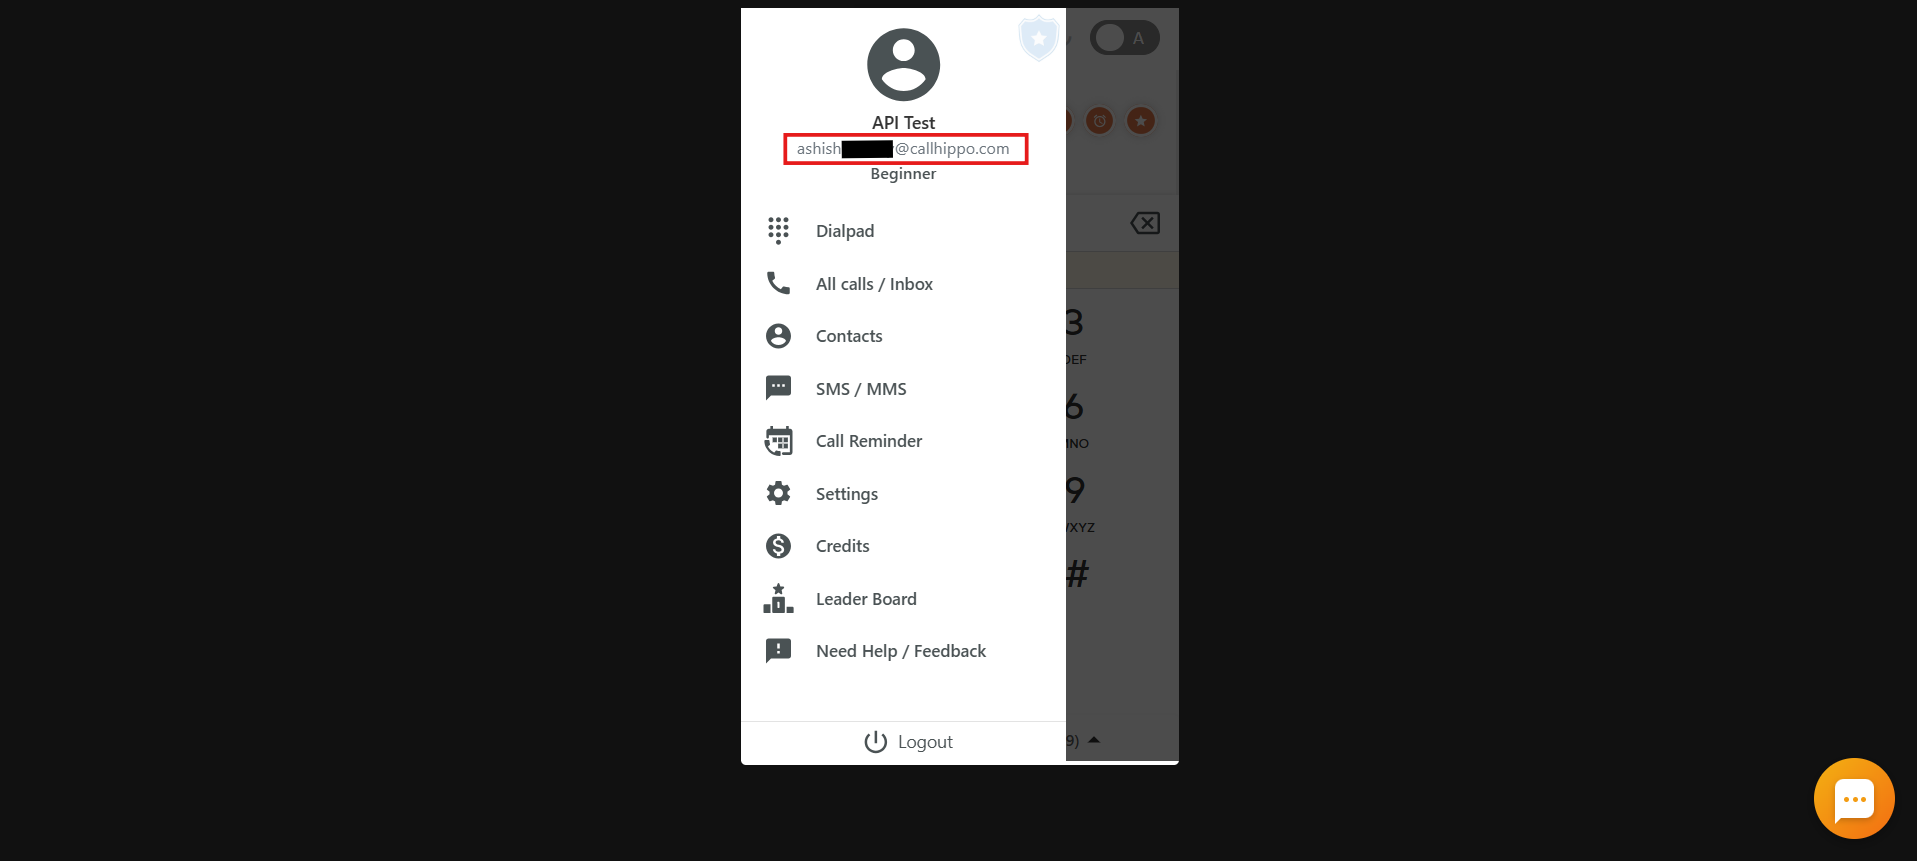
- Make sure you are logged into the CallHippo web dialer with the same account you use in Bitrix24. If you signed into Bitrix24 with a given email, log into the CallHippo dialer with the same email.
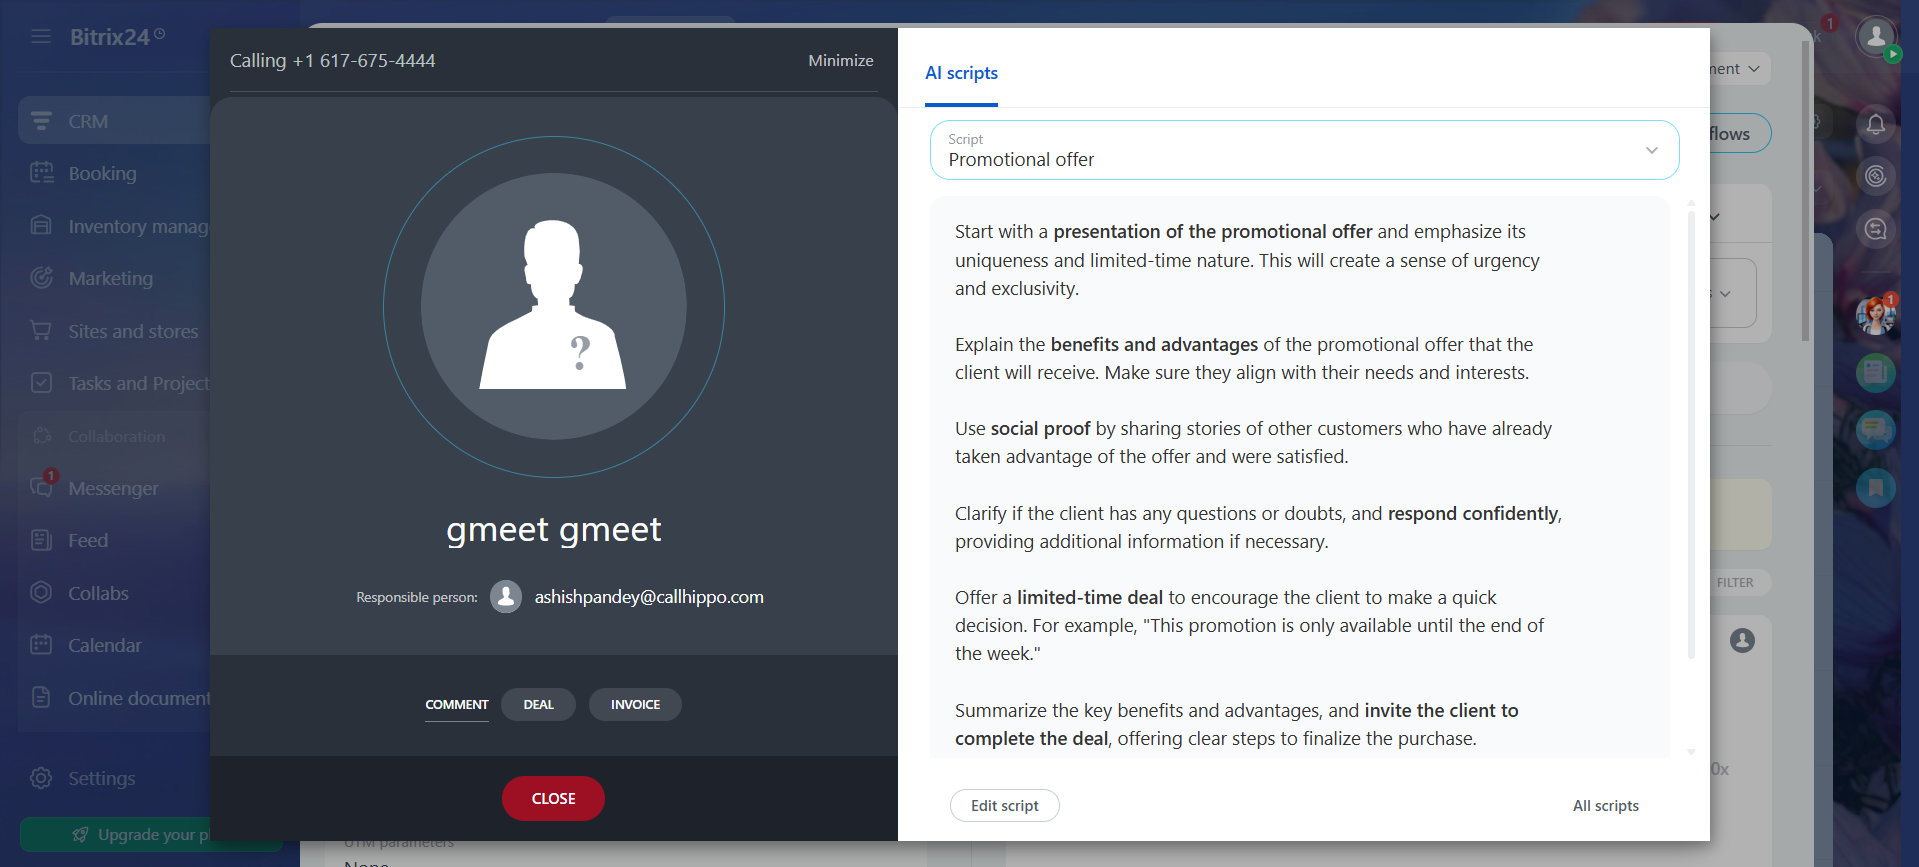
- Click a phone number on any contact or lead page to place a call. The first call is routed to the CallHippo dialer, and once the agent answers, it connects to the dialed contact.
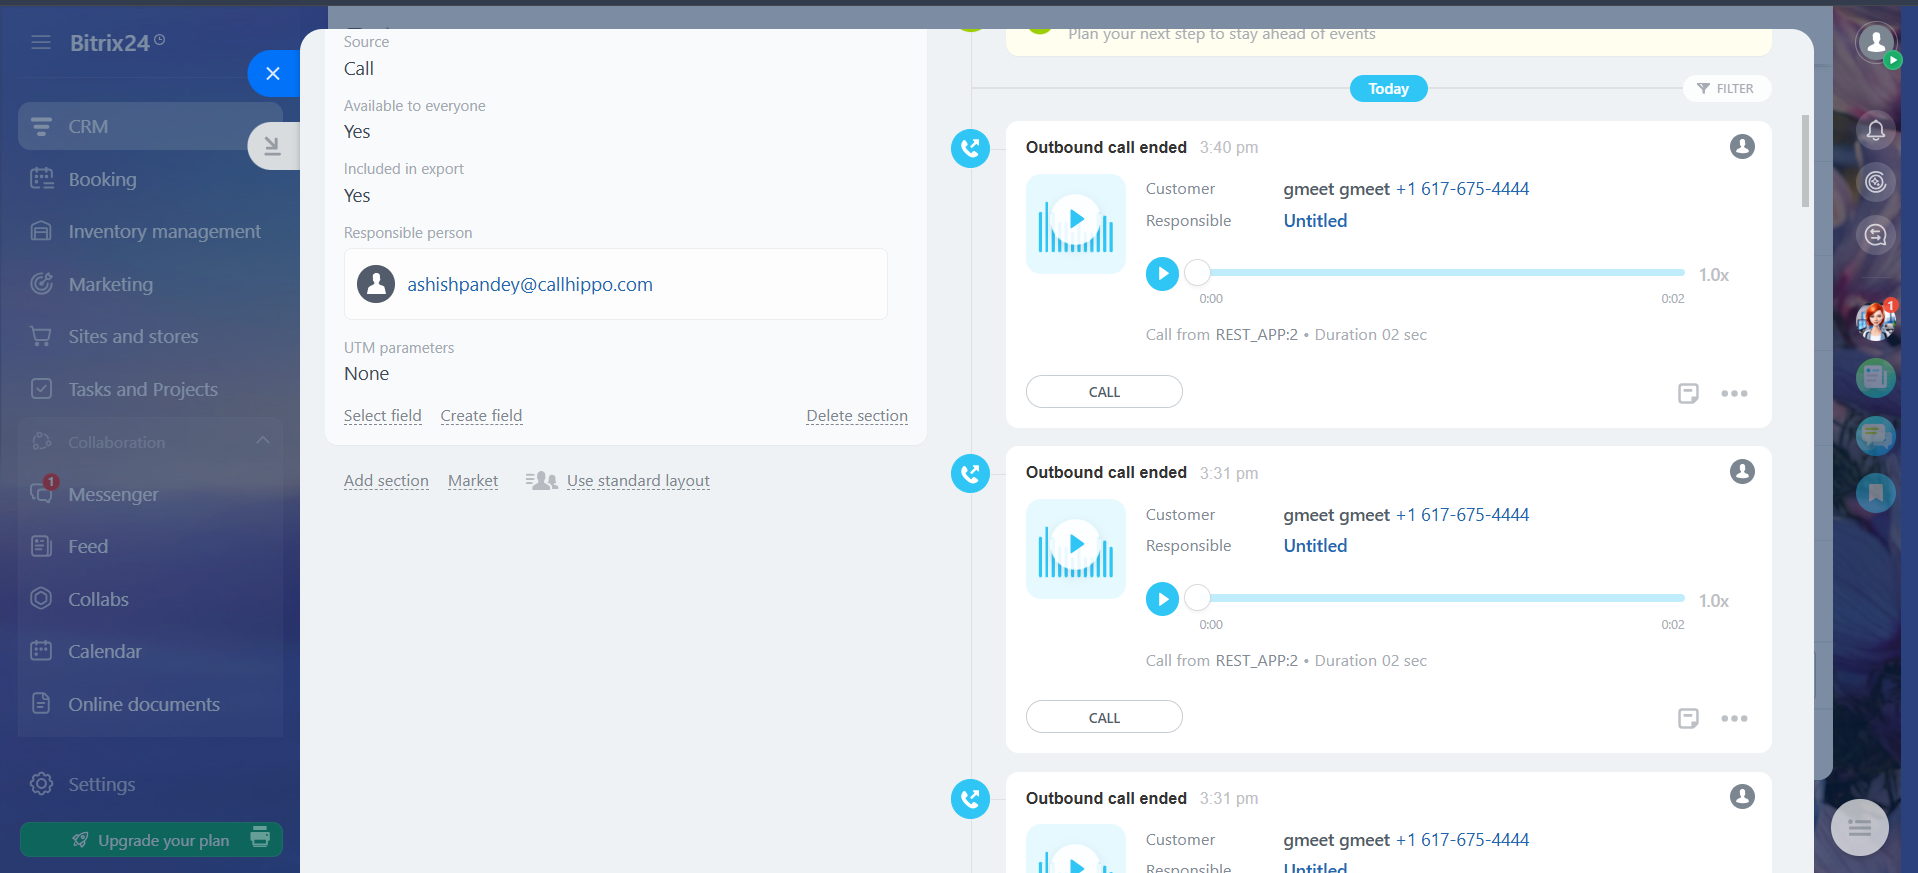
- Once you hang up, the call activity is automatically pushed to the respective contact or lead timeline.
Does the integration support SMS activity?
No. Bitrix24 does not support SMS activity. If you need SMS activity, please contact [email protected].
Is there a Click to Call browser extension?
Yes. You can install the CallHippo Virtual Phone System (Click to Call) extension from the Chrome Web Store to dial numbers from any web page.
Need help setting up Bitrix24? Reach our team at [email protected].