
CallHippo’s Parallel Dialer dials several numbers at once and uses AI to predict agent availability, so agents spend more time talking to live prospects and less time waiting for calls to connect.
What Is a Parallel Dialer?
A Parallel Dialer is an advanced outbound calling system that automatically dials multiple numbers at once, using AI and call algorithms to predict agent availability. It boosts efficiency by keeping agents connected to live conversations instead of waiting for calls to connect.
How Does a Parallel Dialer Work?
- Dials multiple numbers simultaneously – calls several leads at once so at least one connects.
- Call screening – detects busy signals, voicemails, unanswered calls, and disconnected numbers to avoid wasting agent time.
- Connects only answered calls – once a call is answered, it is immediately routed to an available agent.
- Adjusts the dialing rate – dynamically changes how many calls are dialed based on agent availability and past connection rates.
Key features: AI-based dialing, maximized agent talk time, call filtering, high call-volume handling, and an adjustable dialing ratio (fixed or auto pacing).
Business Use Cases
- Call centers with large teams – optimizes agent efficiency and reduces downtime.
- Mass customer outreach – runs promotional campaigns at scale with minimal manual effort.
- Cold calling with AI prioritization – uses AI to determine the best time to call prospects.
- Fraud prevention and security alerts – used by banks for high-speed fraud alert calls.
- Emergency and crisis communication – rapid emergency notifications.
- Utility service notifications – outage alerts and payment reminders.
How to Use the Parallel Dialer
- Log in to your CallHippo dashboard at web.callhippo.com.
- Go to the Auto Dialer module on the left, then click Parallel Dialer.
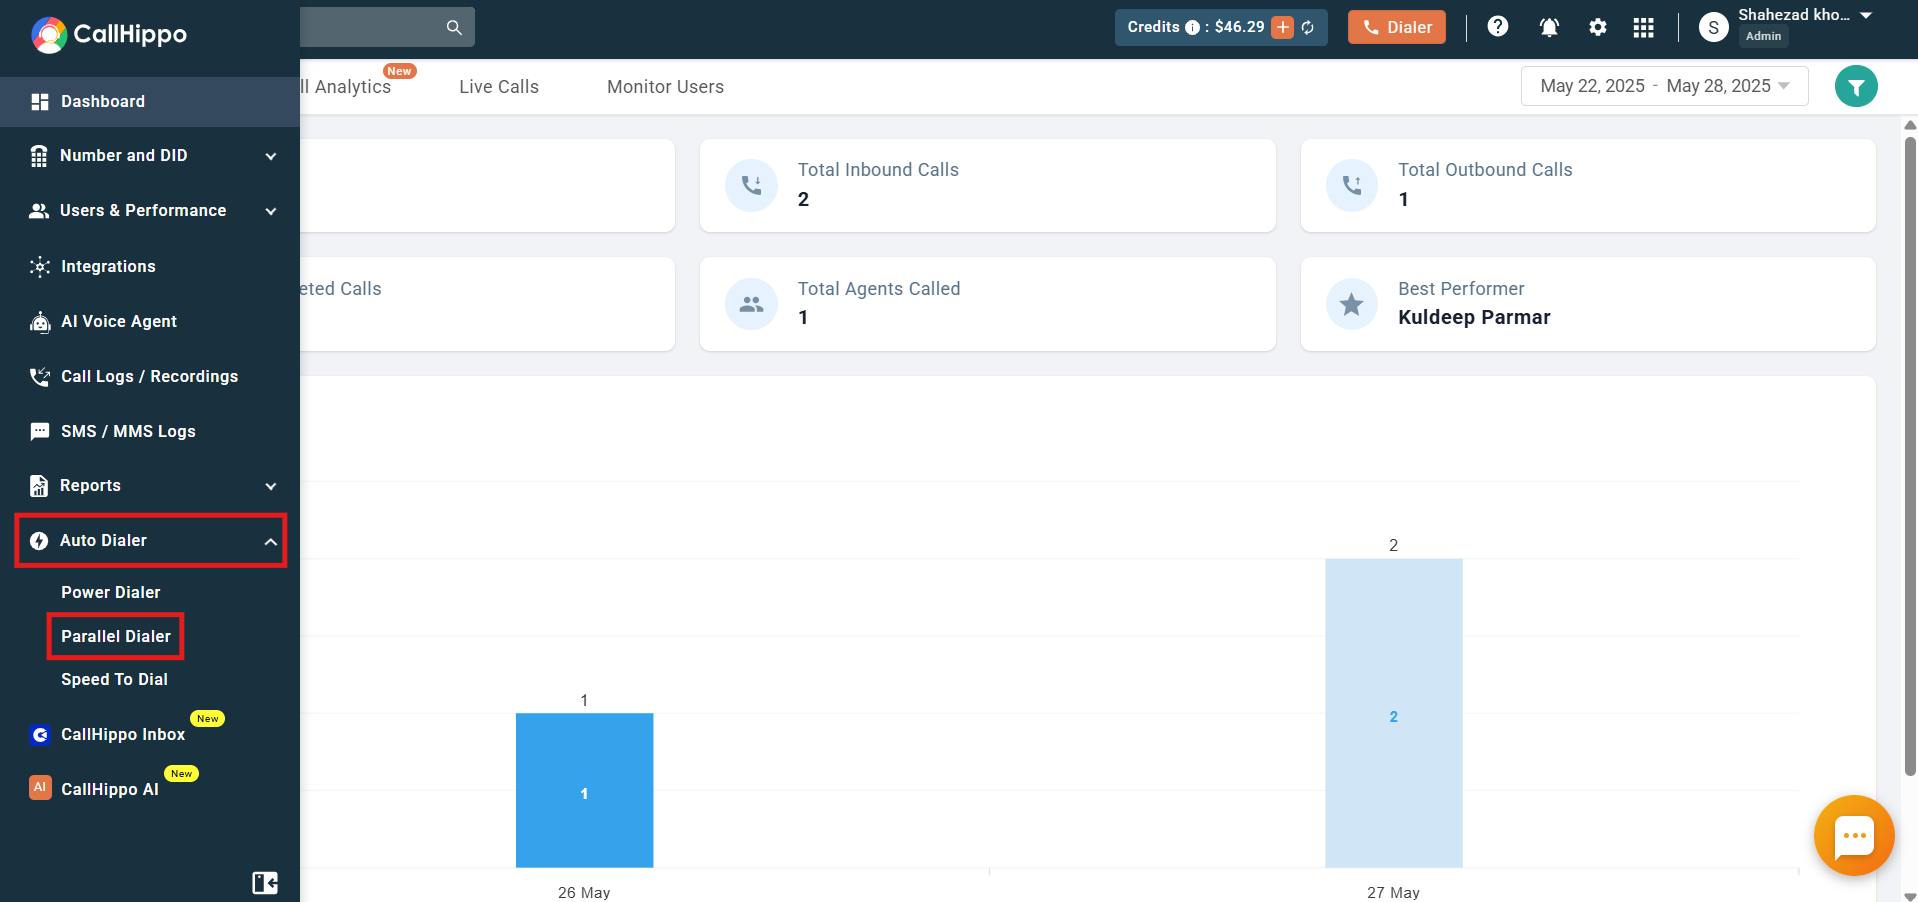
Inside the Parallel Dialer you will find four tabs: Data, Create Campaign, Campaign List, and Live Calls.
Data Tab: Import Your Contacts
You can import phone-number lists into the Data tab in two ways.
Automatic import from supported integrations
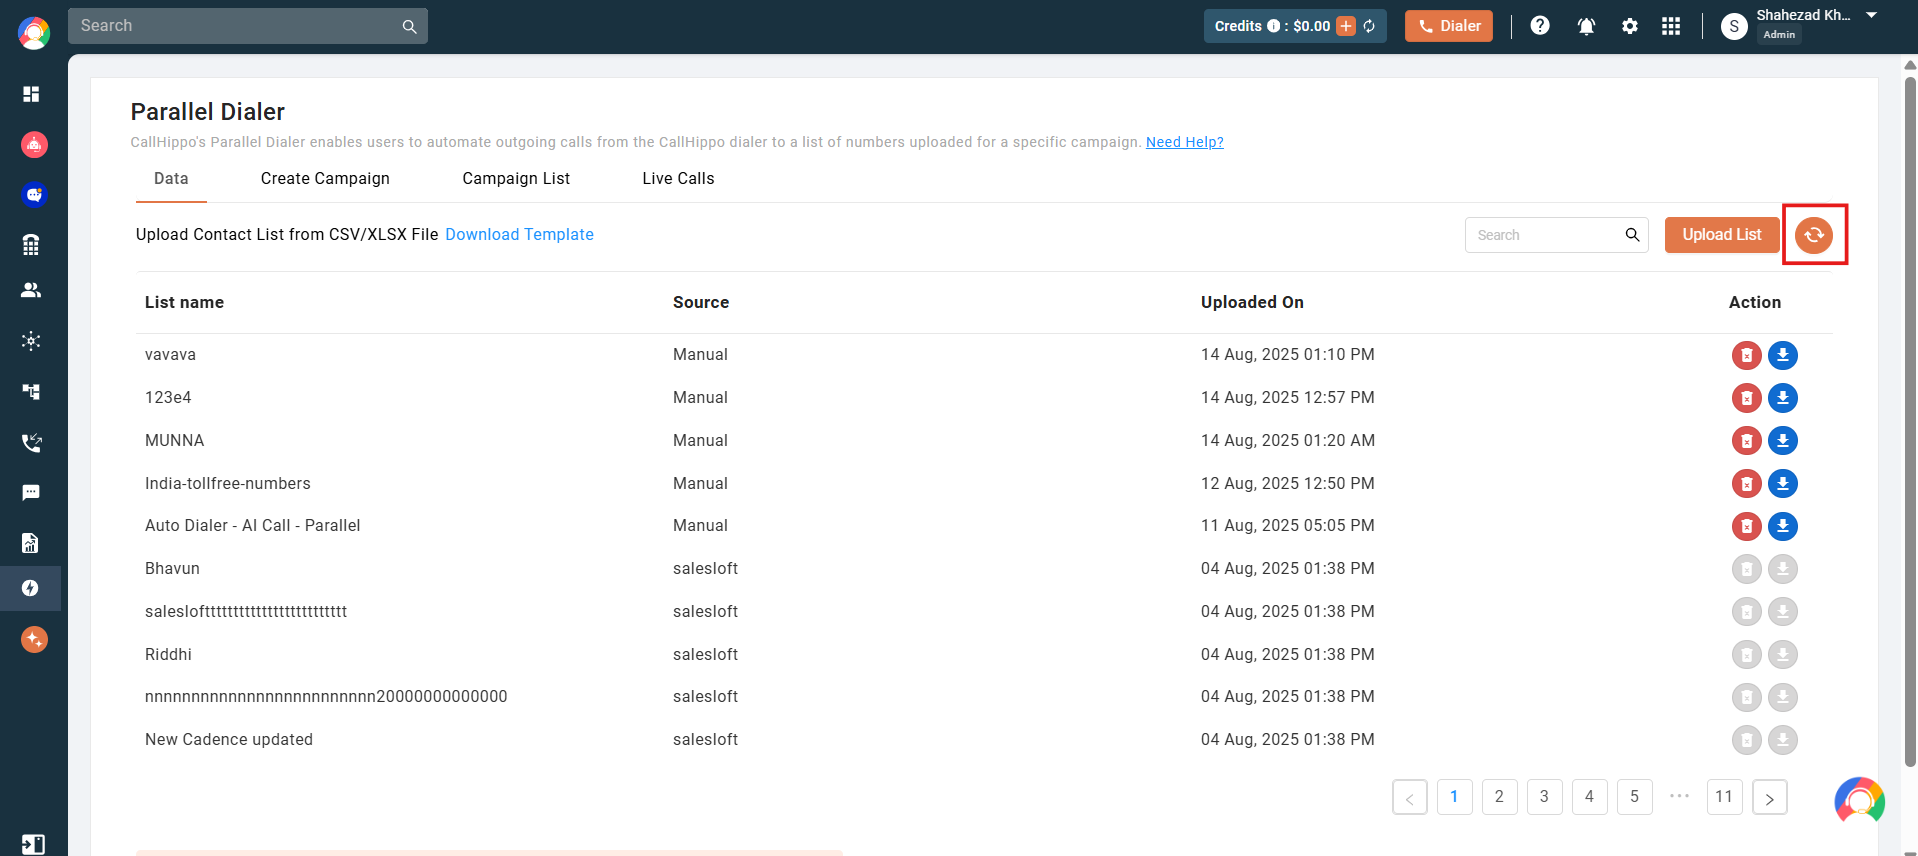
The Parallel Dialer can fetch lists or campaigns from HubSpot, Zoho CRM, and Salesloft. First make sure the integration is connected, then click the Refresh button to fetch the latest lists.
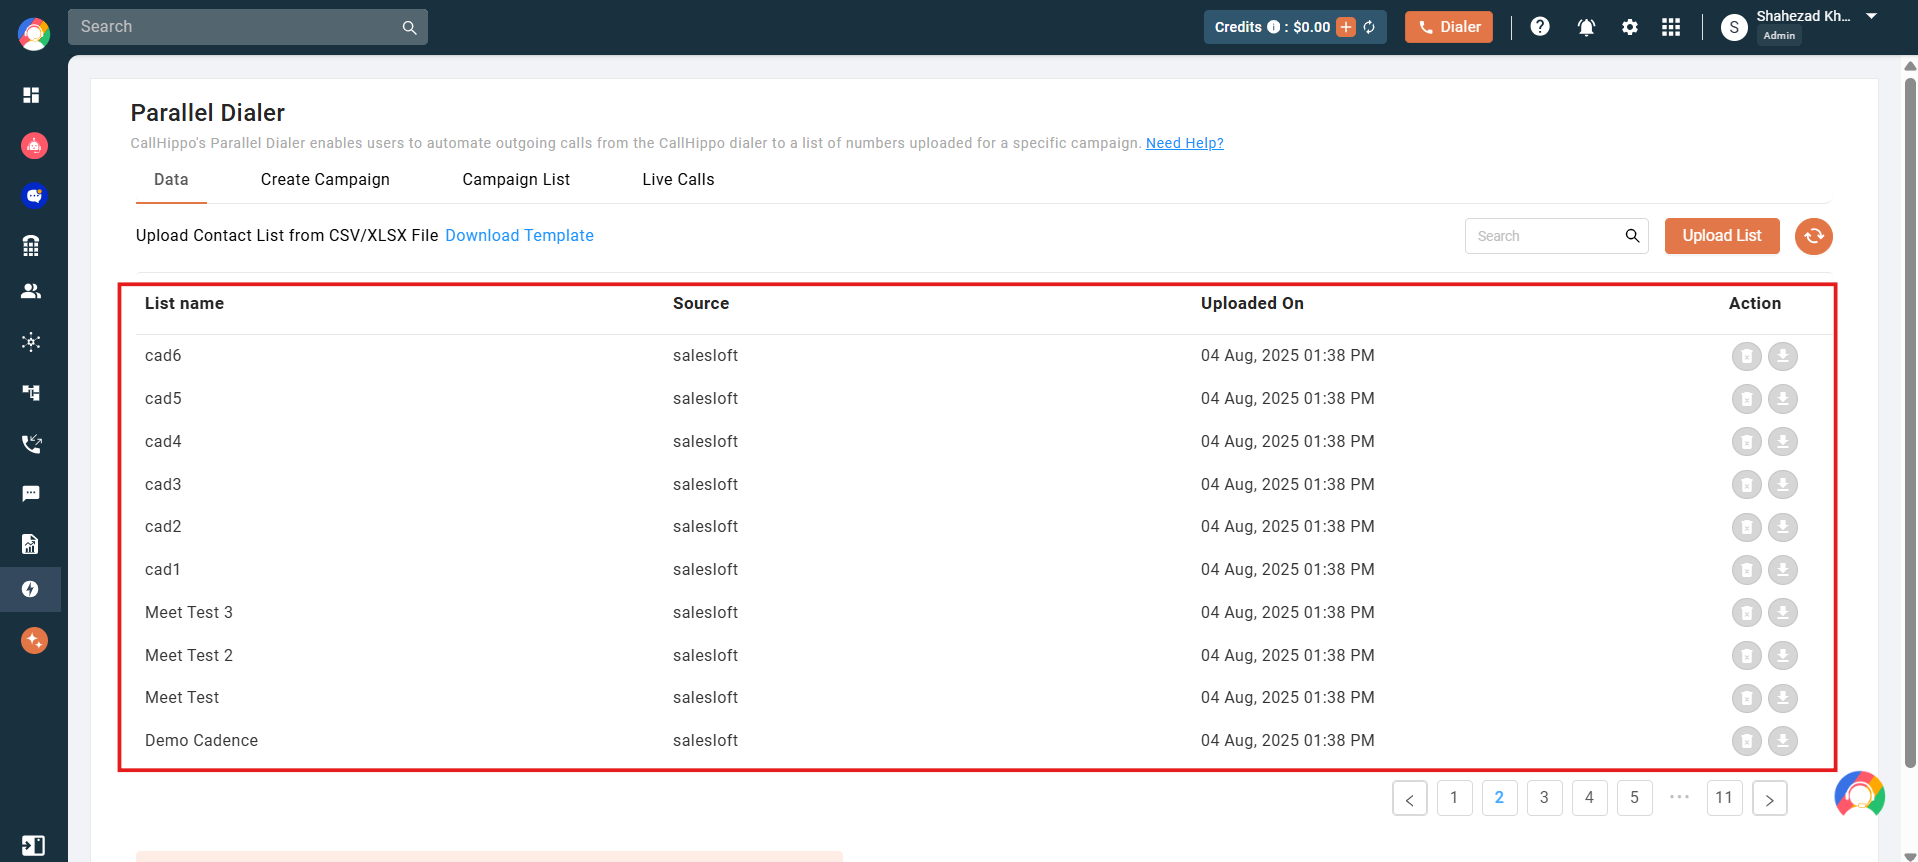
All lists and campaigns from the integration appear with the integration name as the source and the import date and time.
Manual upload
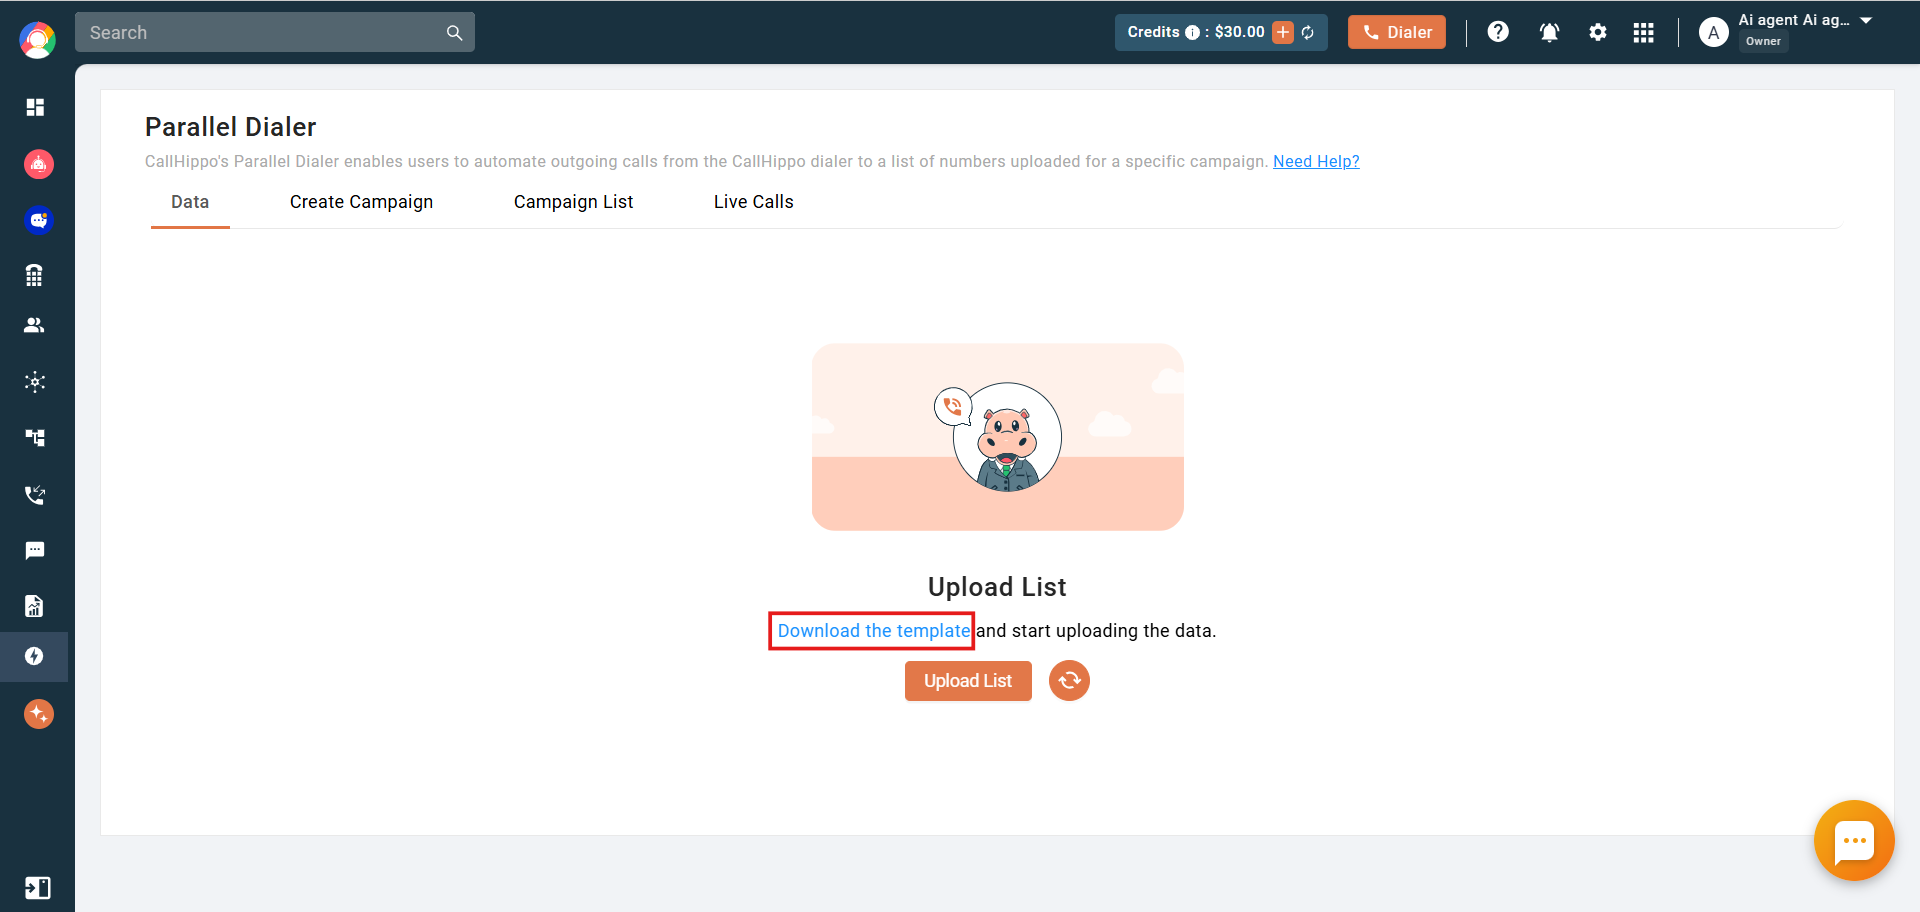
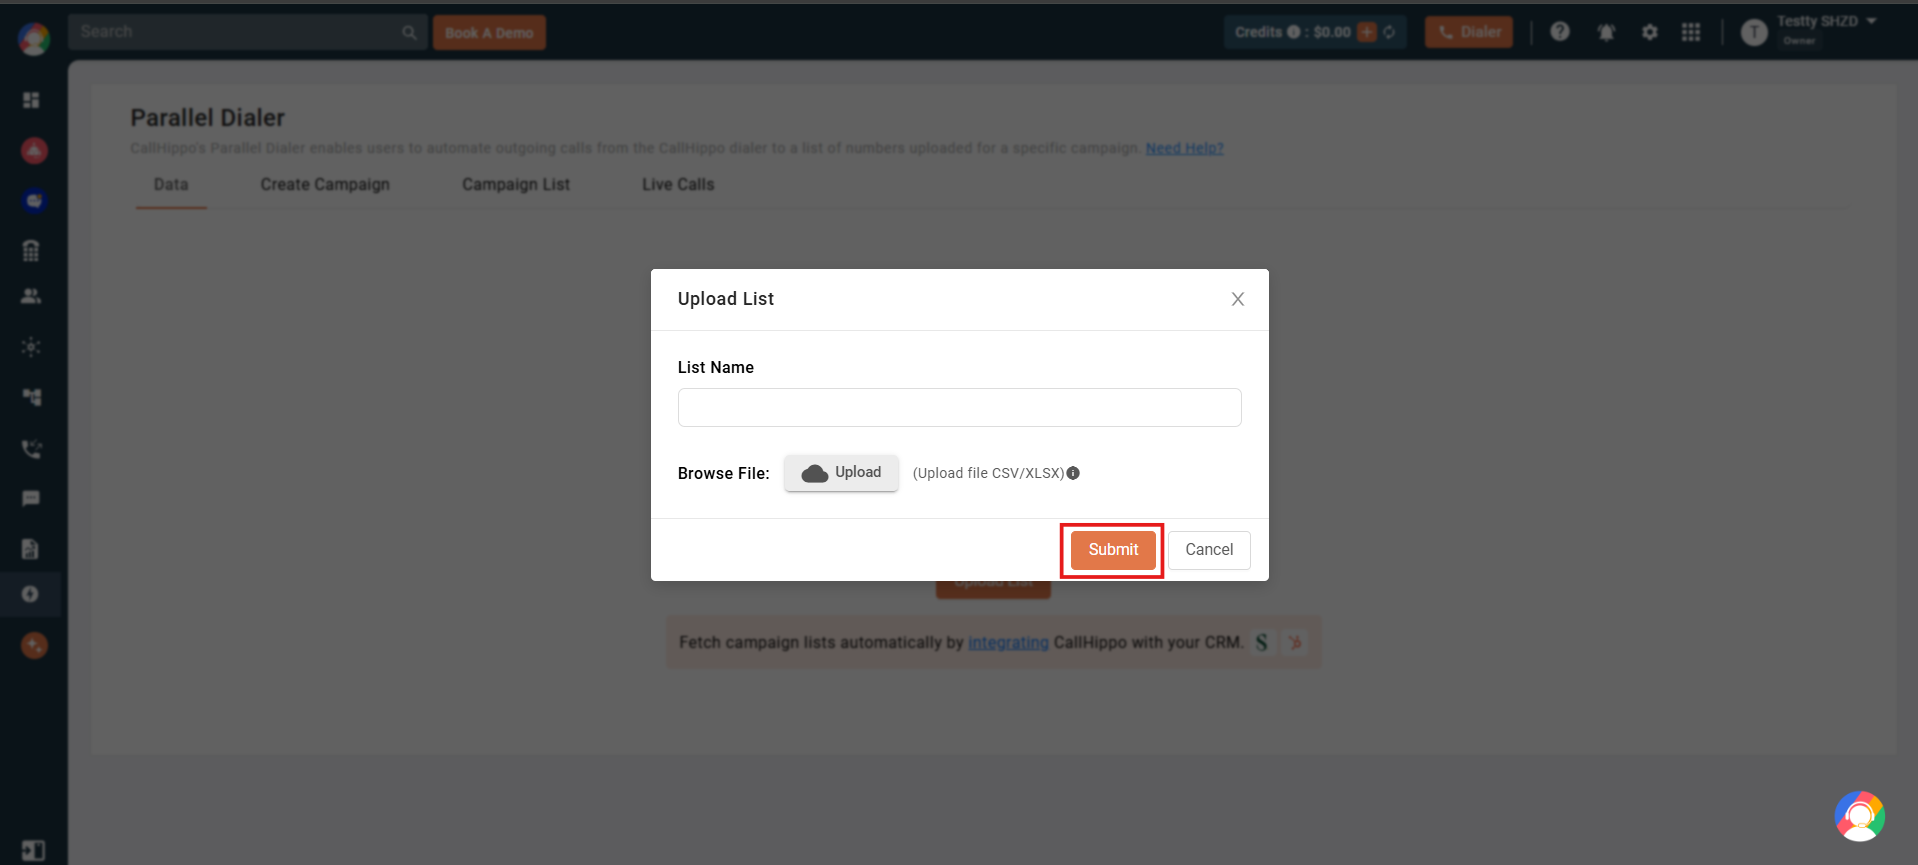
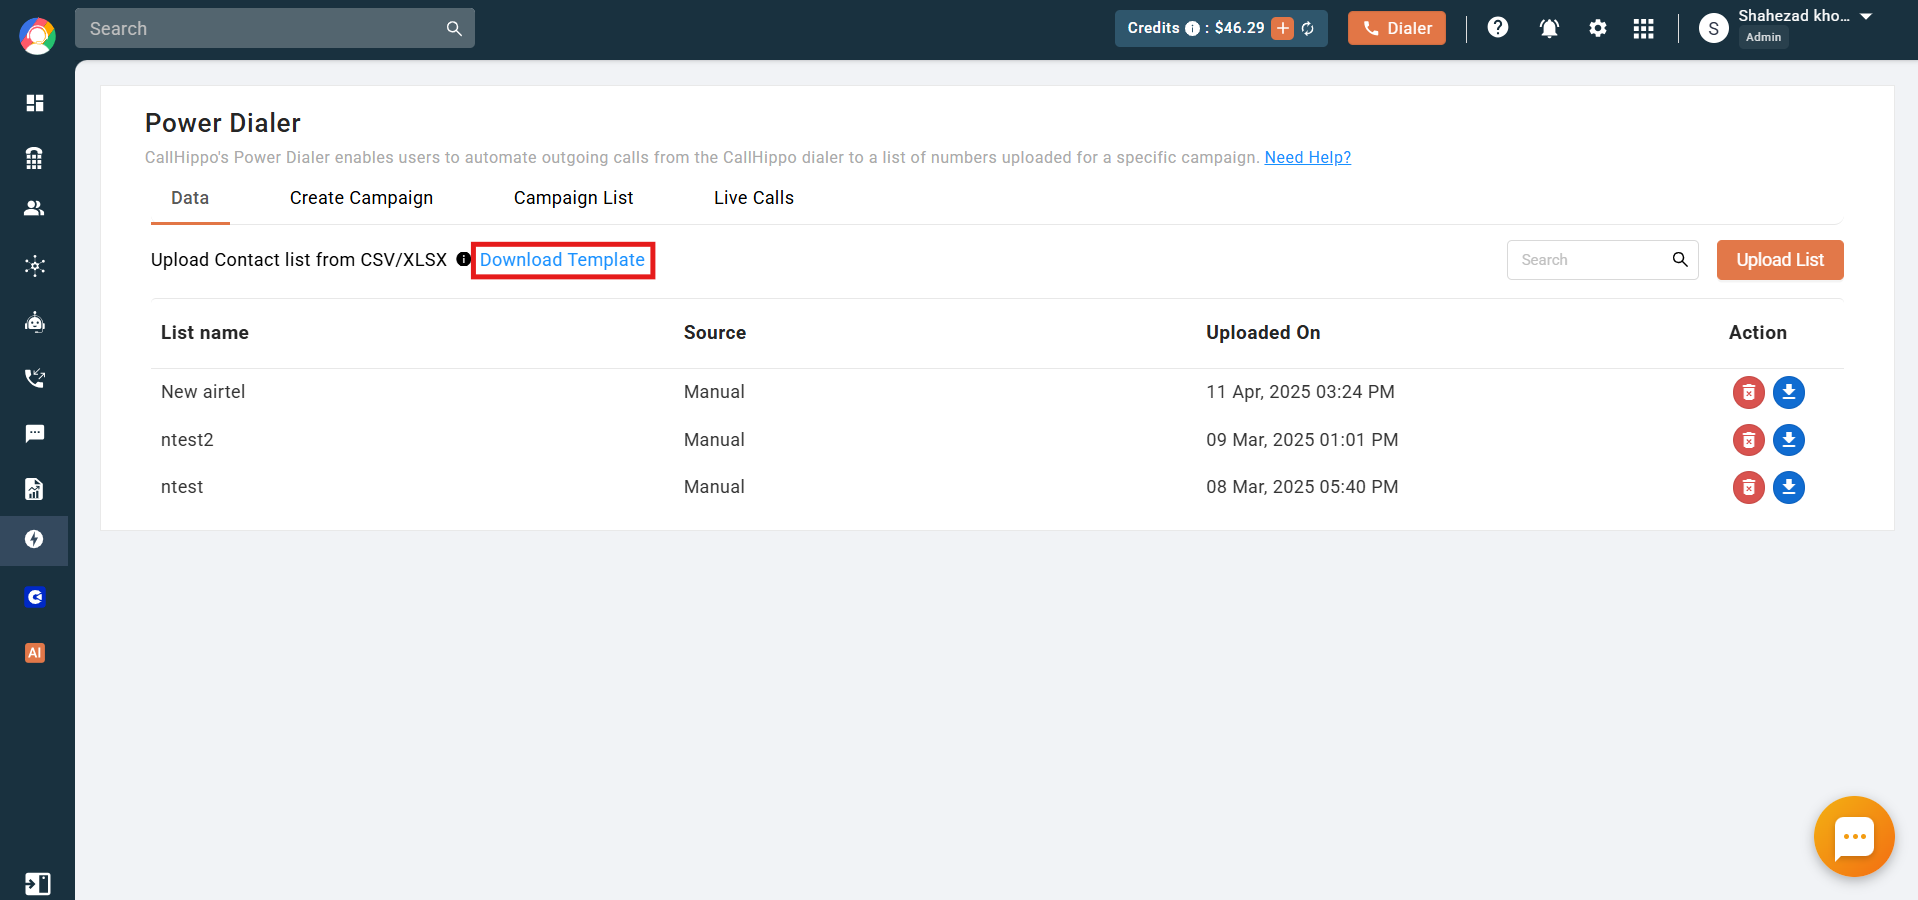
Click Download the template to get the correct format, then click Upload List.
Enter a List Name, upload your data file in the predefined format, and click Submit.
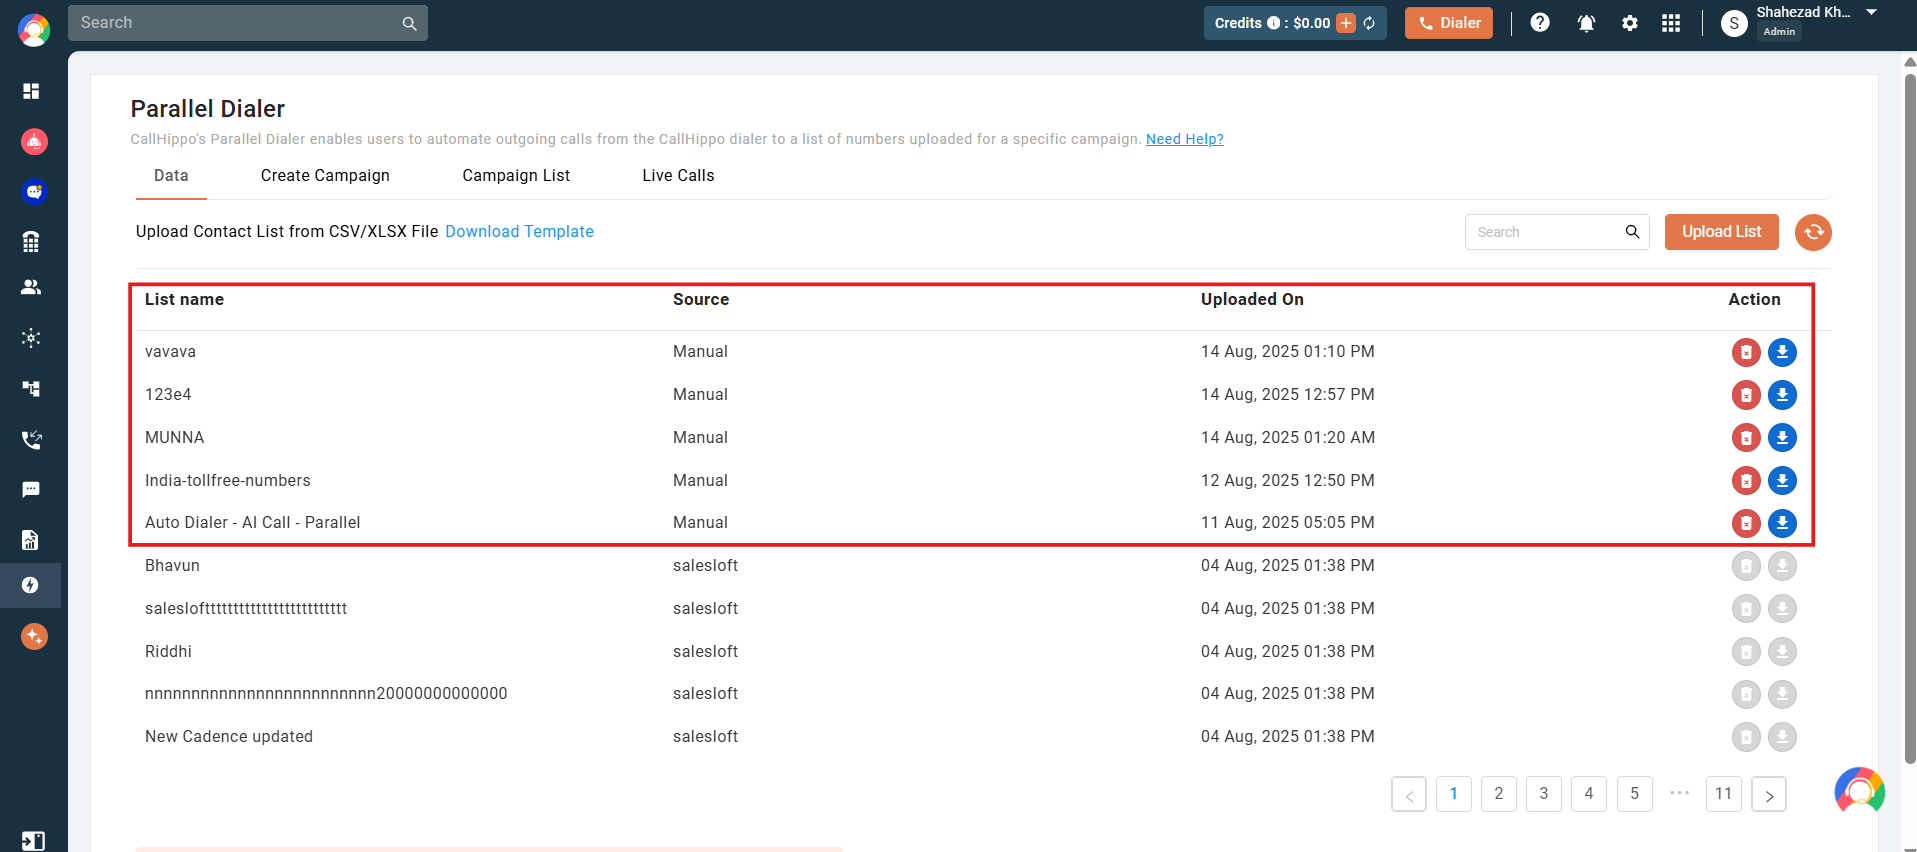
The list is added with Manual as the source. You can also delete or download a manually uploaded list.
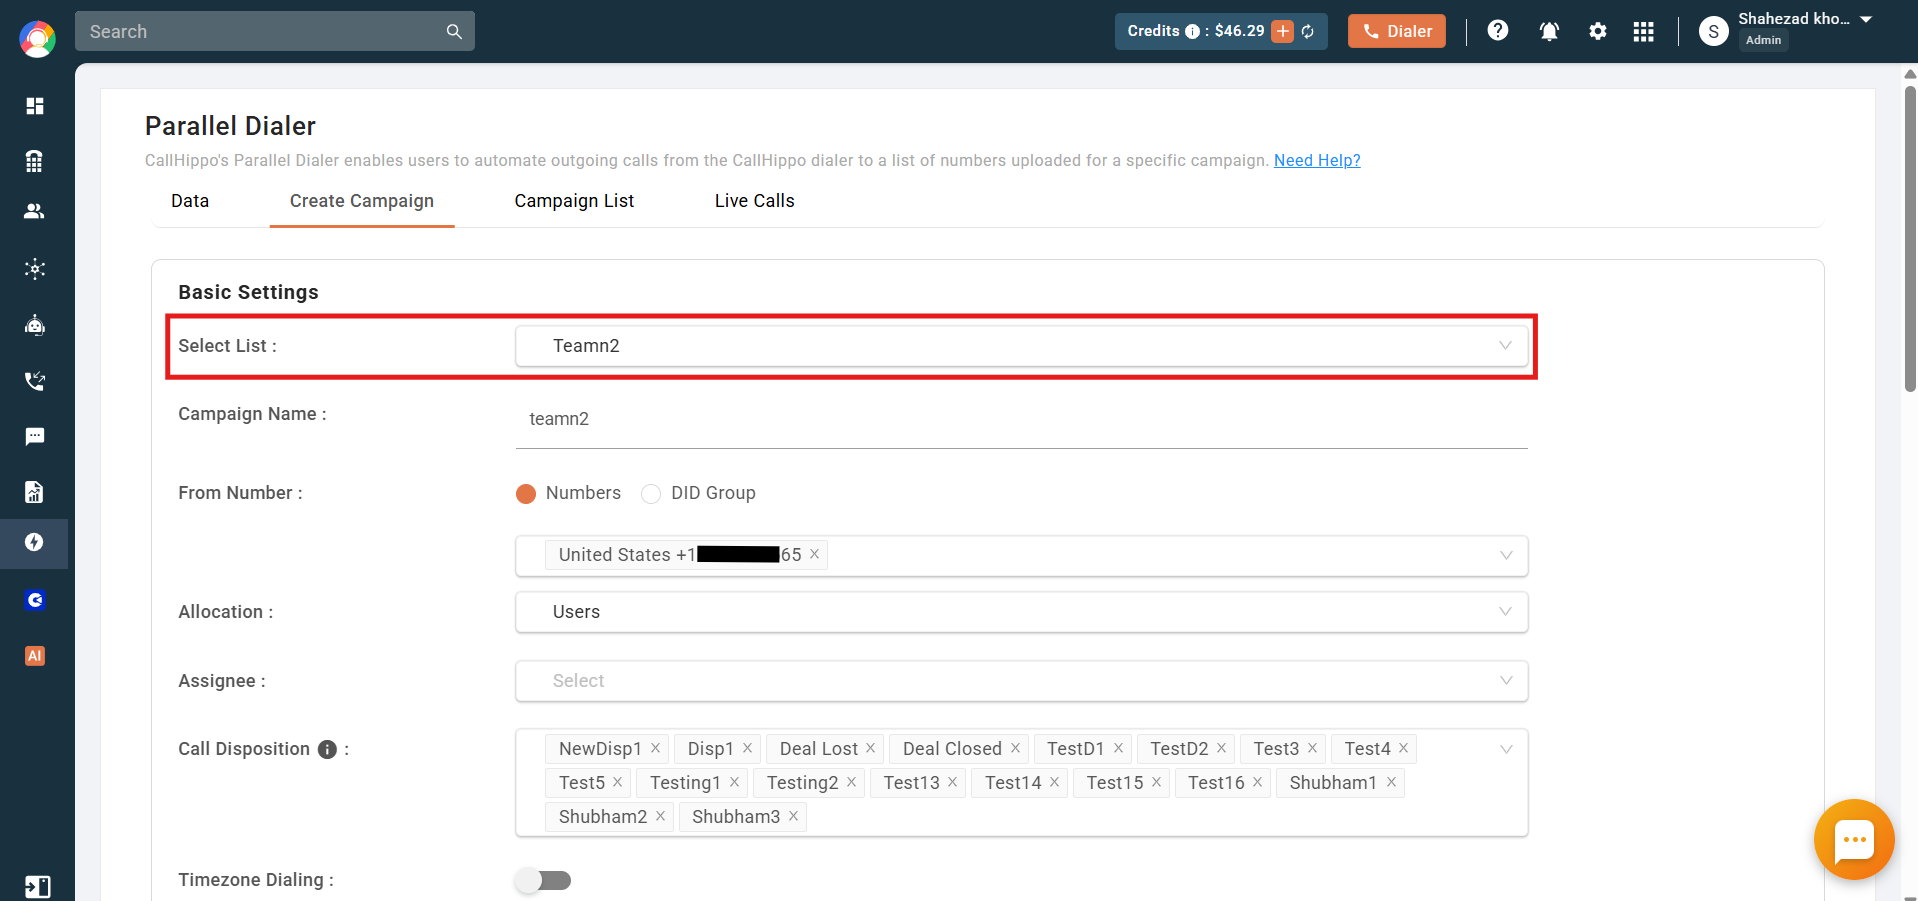
Create Campaign
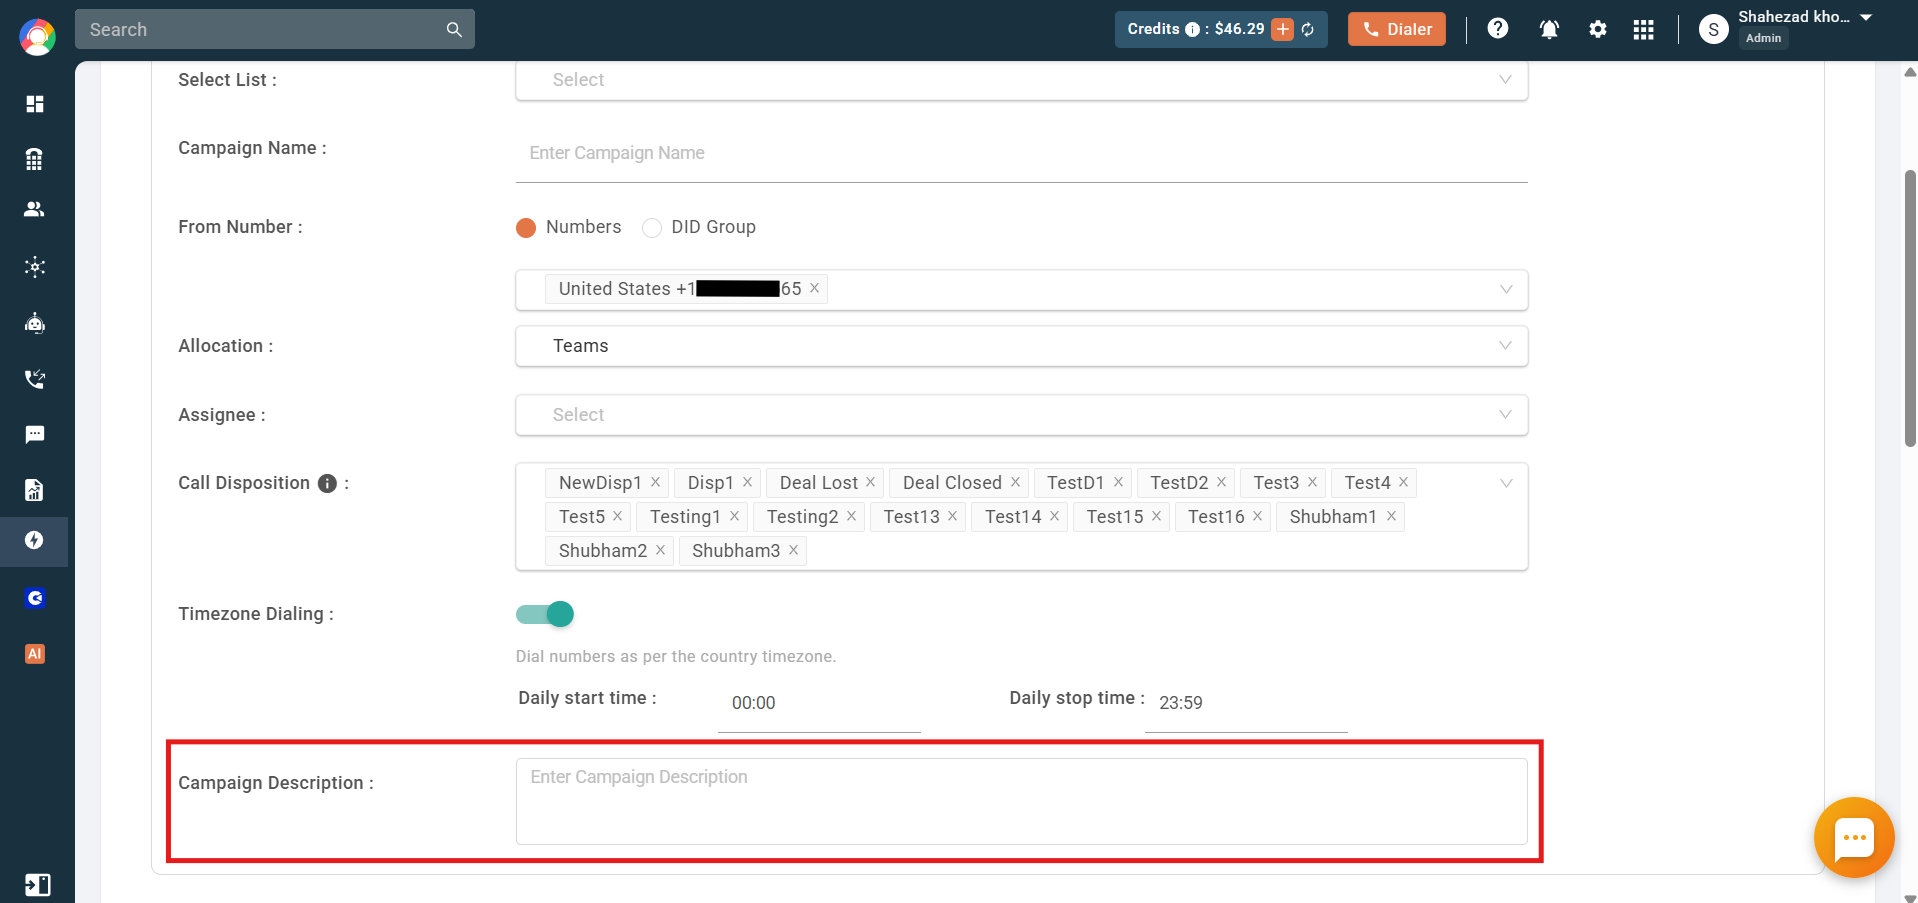
- Select the list you want to run the campaign on.
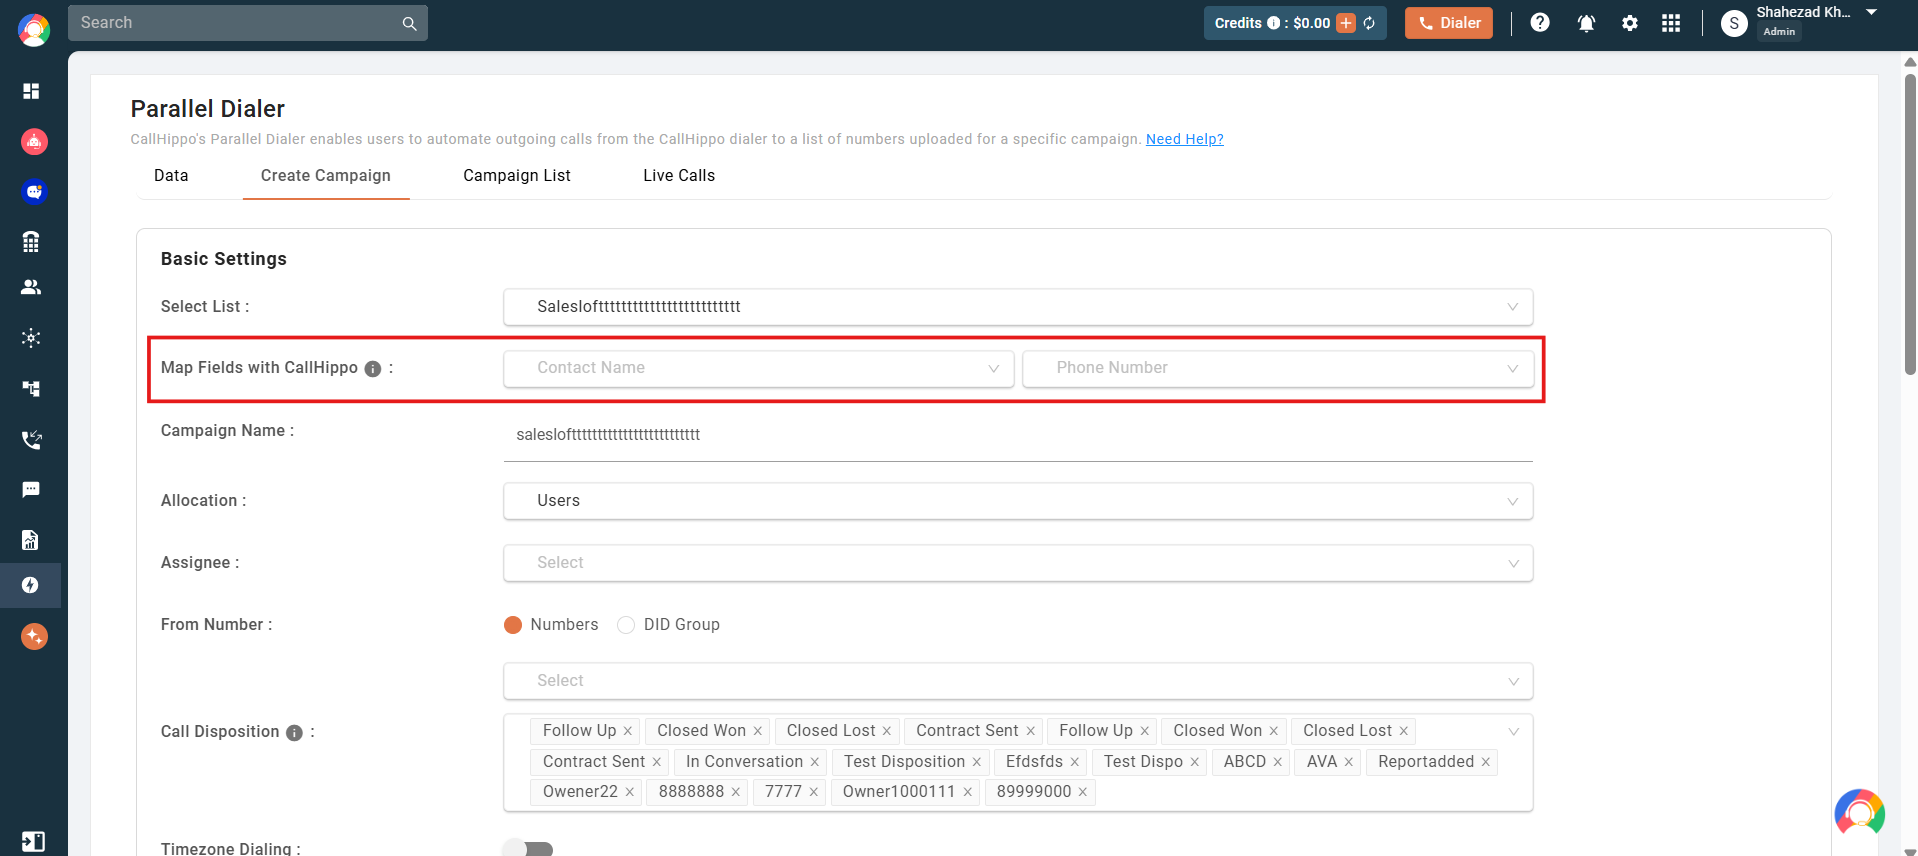
- If you select a list fetched from an integration, a Map Fields with CallHippo option appears. Choose the field that holds the contact name in the first dropdown and the phone number in the second.
- The Campaign Name is auto-filled from the list, but you can change it.
- Choose the From Number – Numbers or a DID Group.
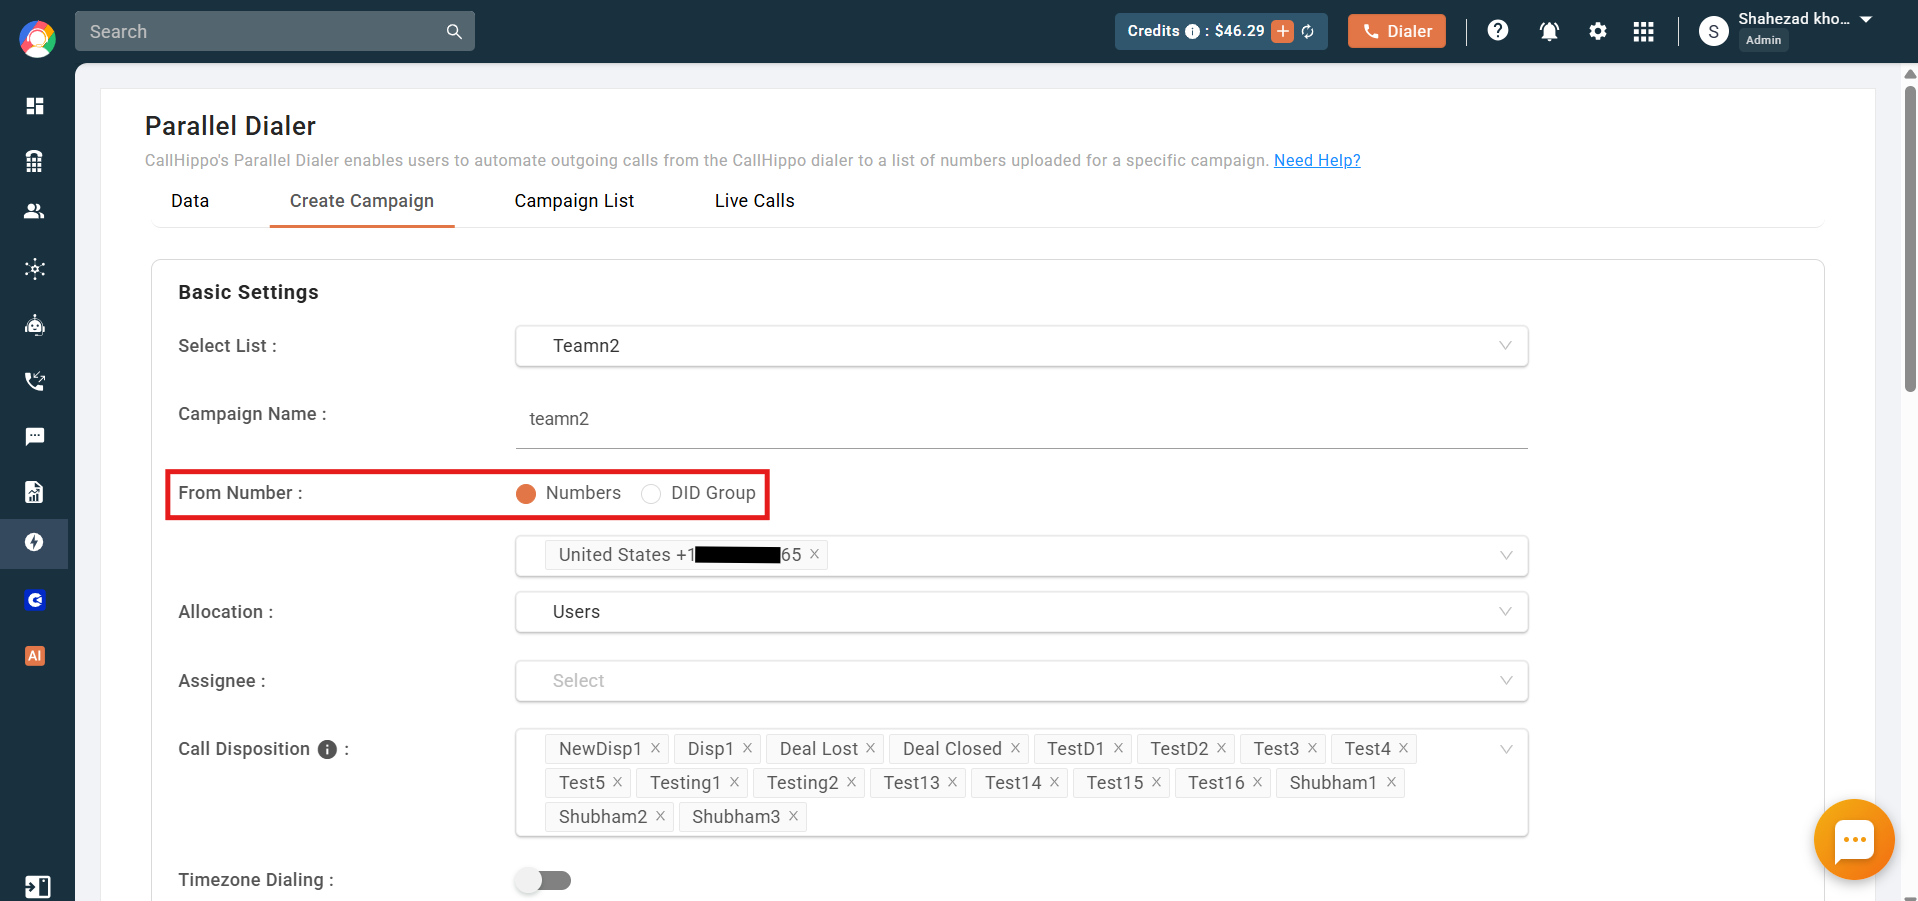
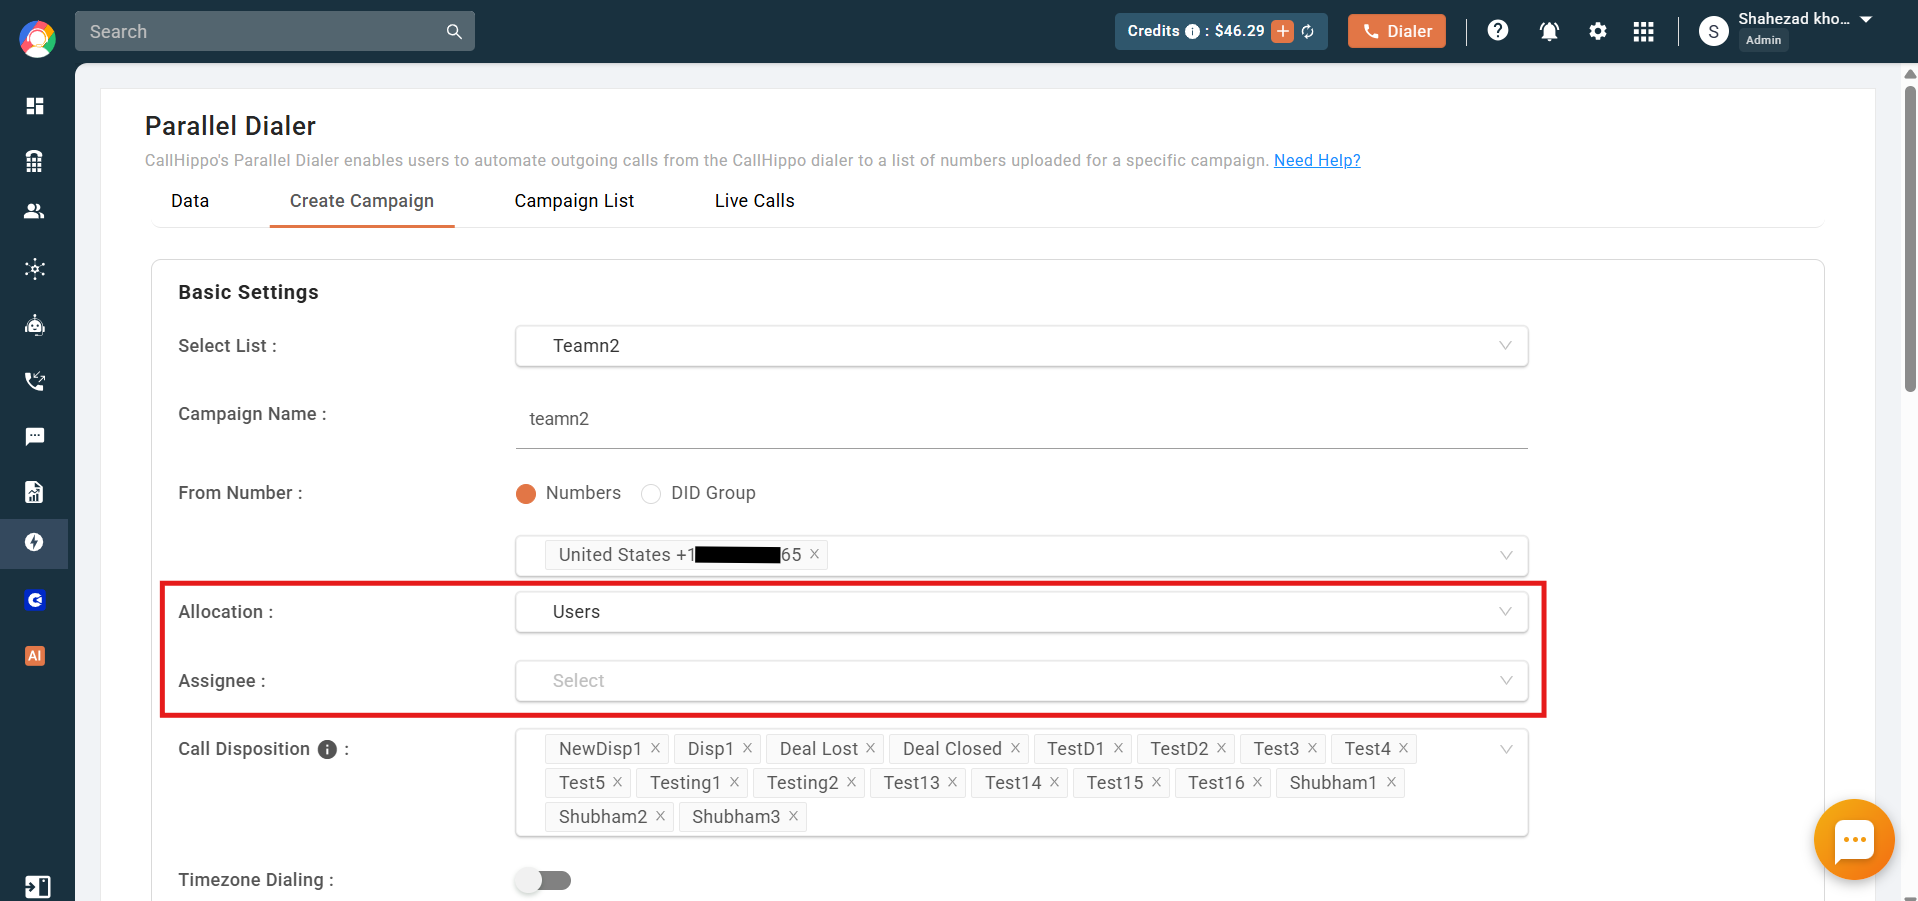
- Select the allocation type – Users, Teams, or AI Voice Agents – and choose the assignees.
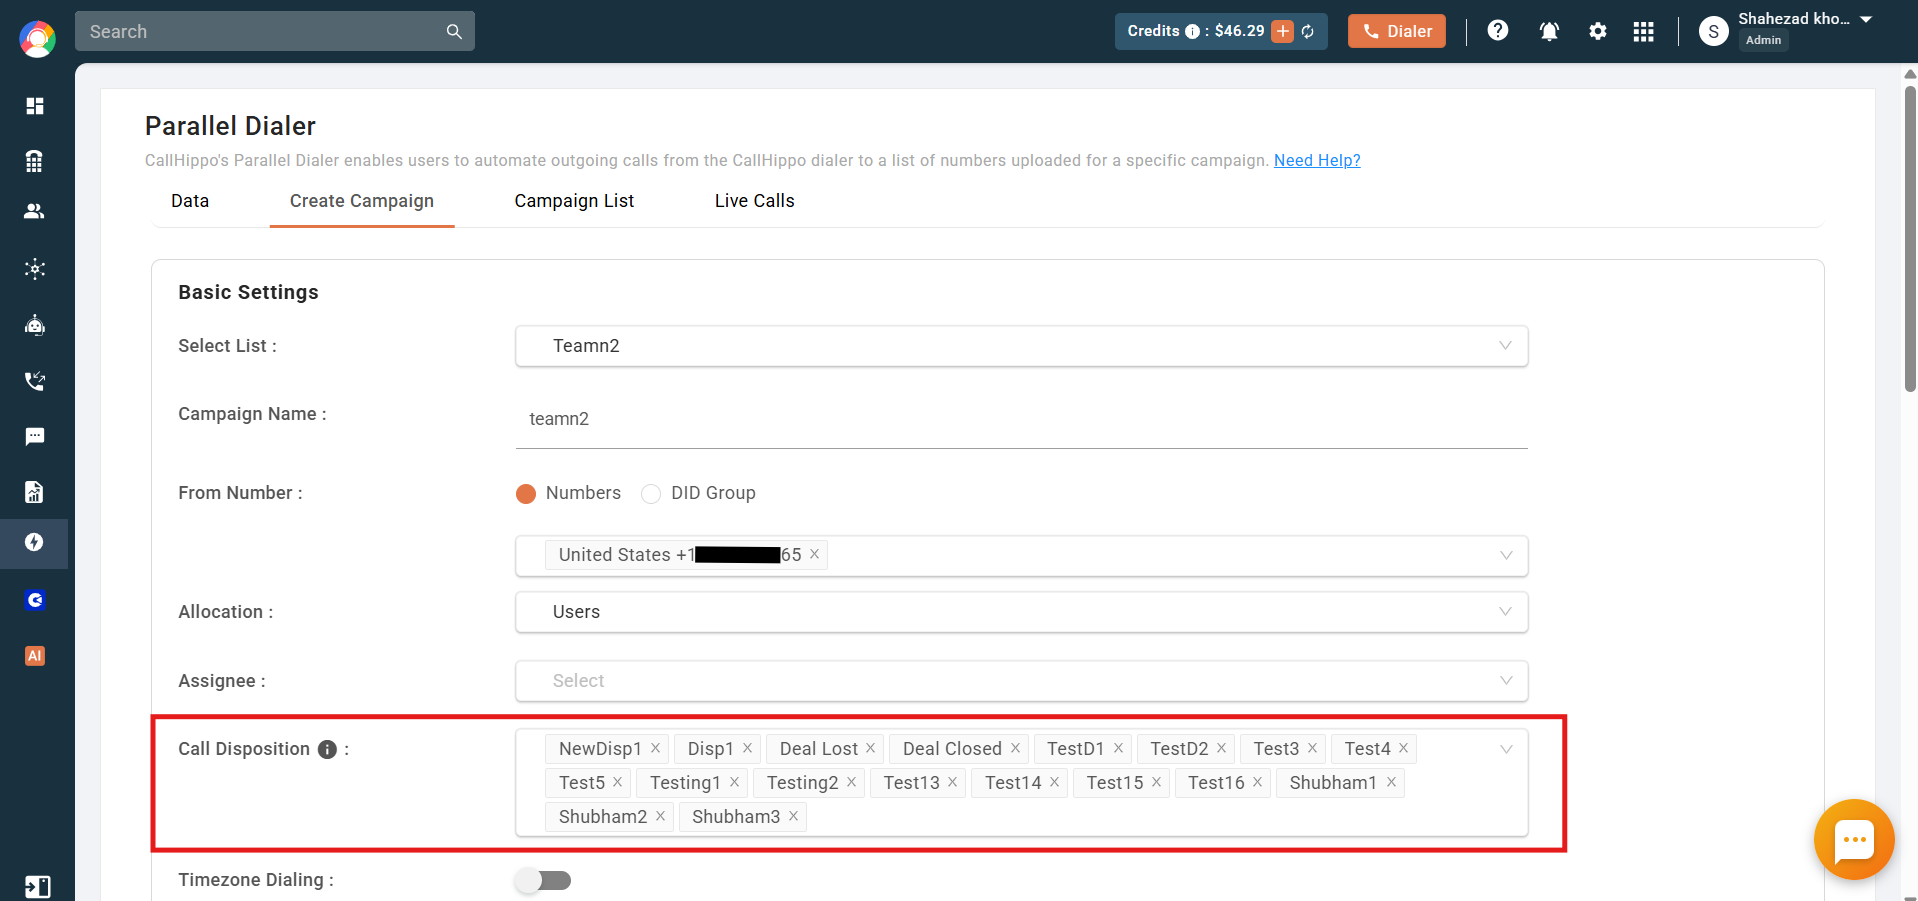
- Choose call dispositions for this campaign. They appear on the After Call Work (ACW) screen; by default all system-defined dispositions are selected.
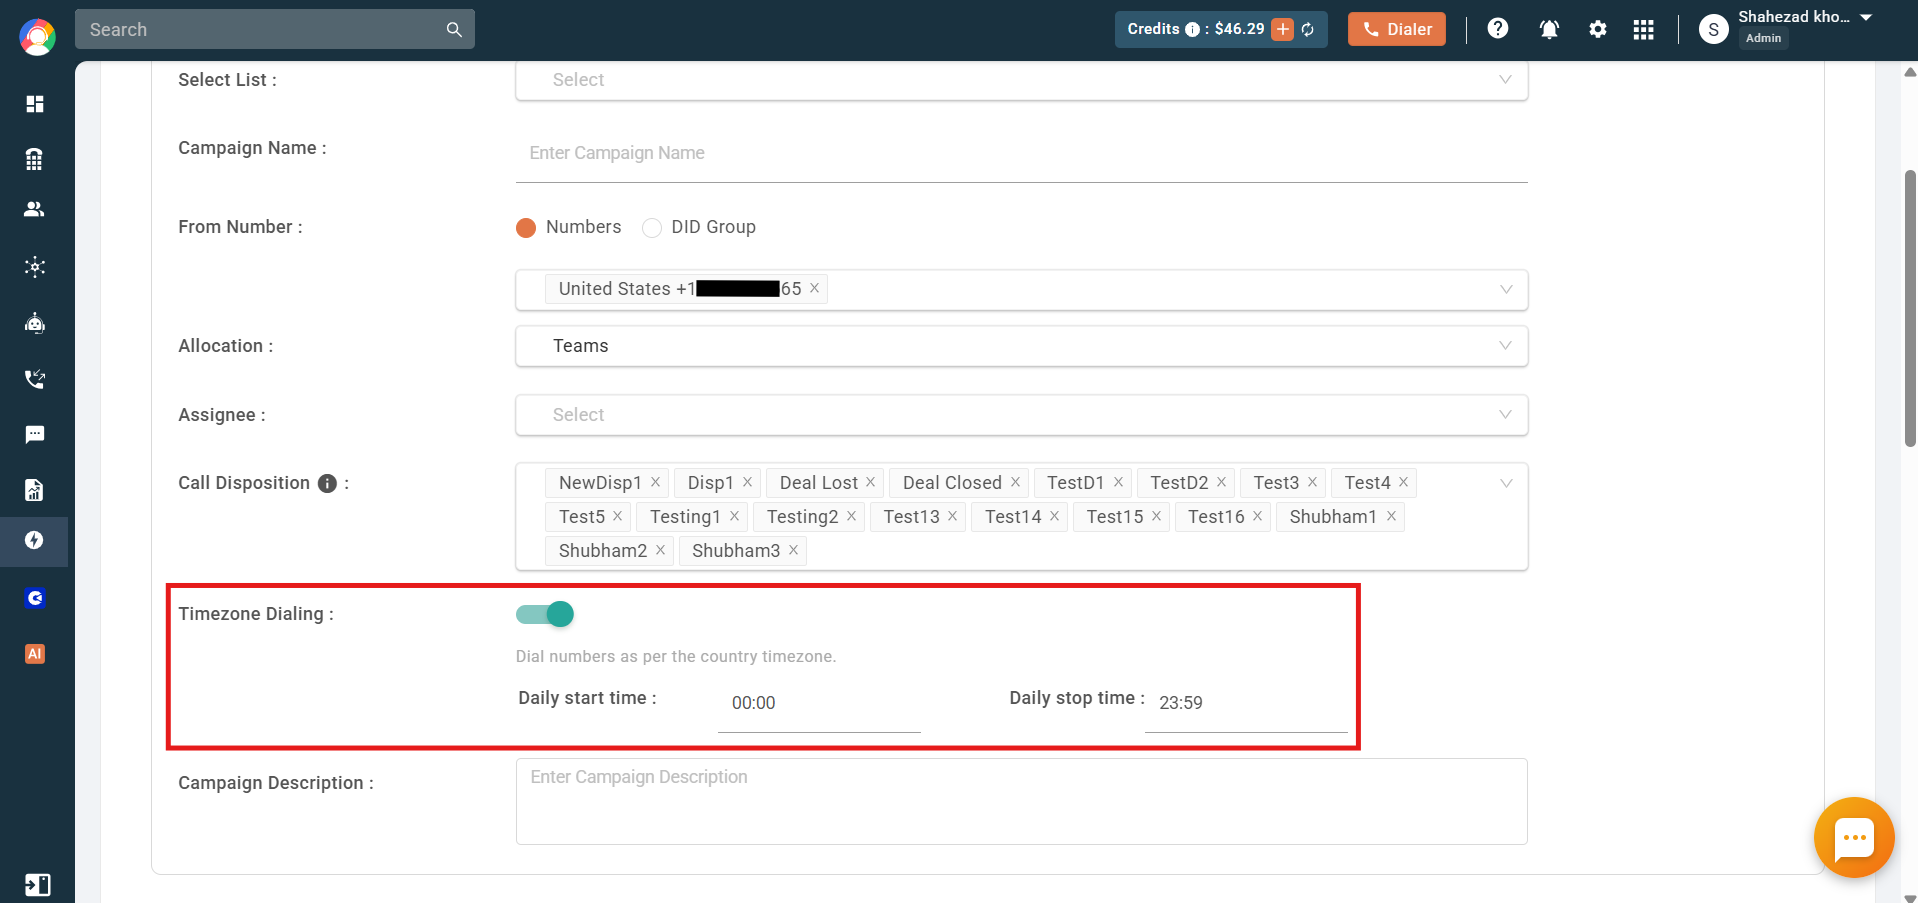
- Optionally enable Timezone Dialing to set a start and stop time so customers are only called within the defined hours in their own time zone.
- Add an optional campaign description.
Advanced Settings:
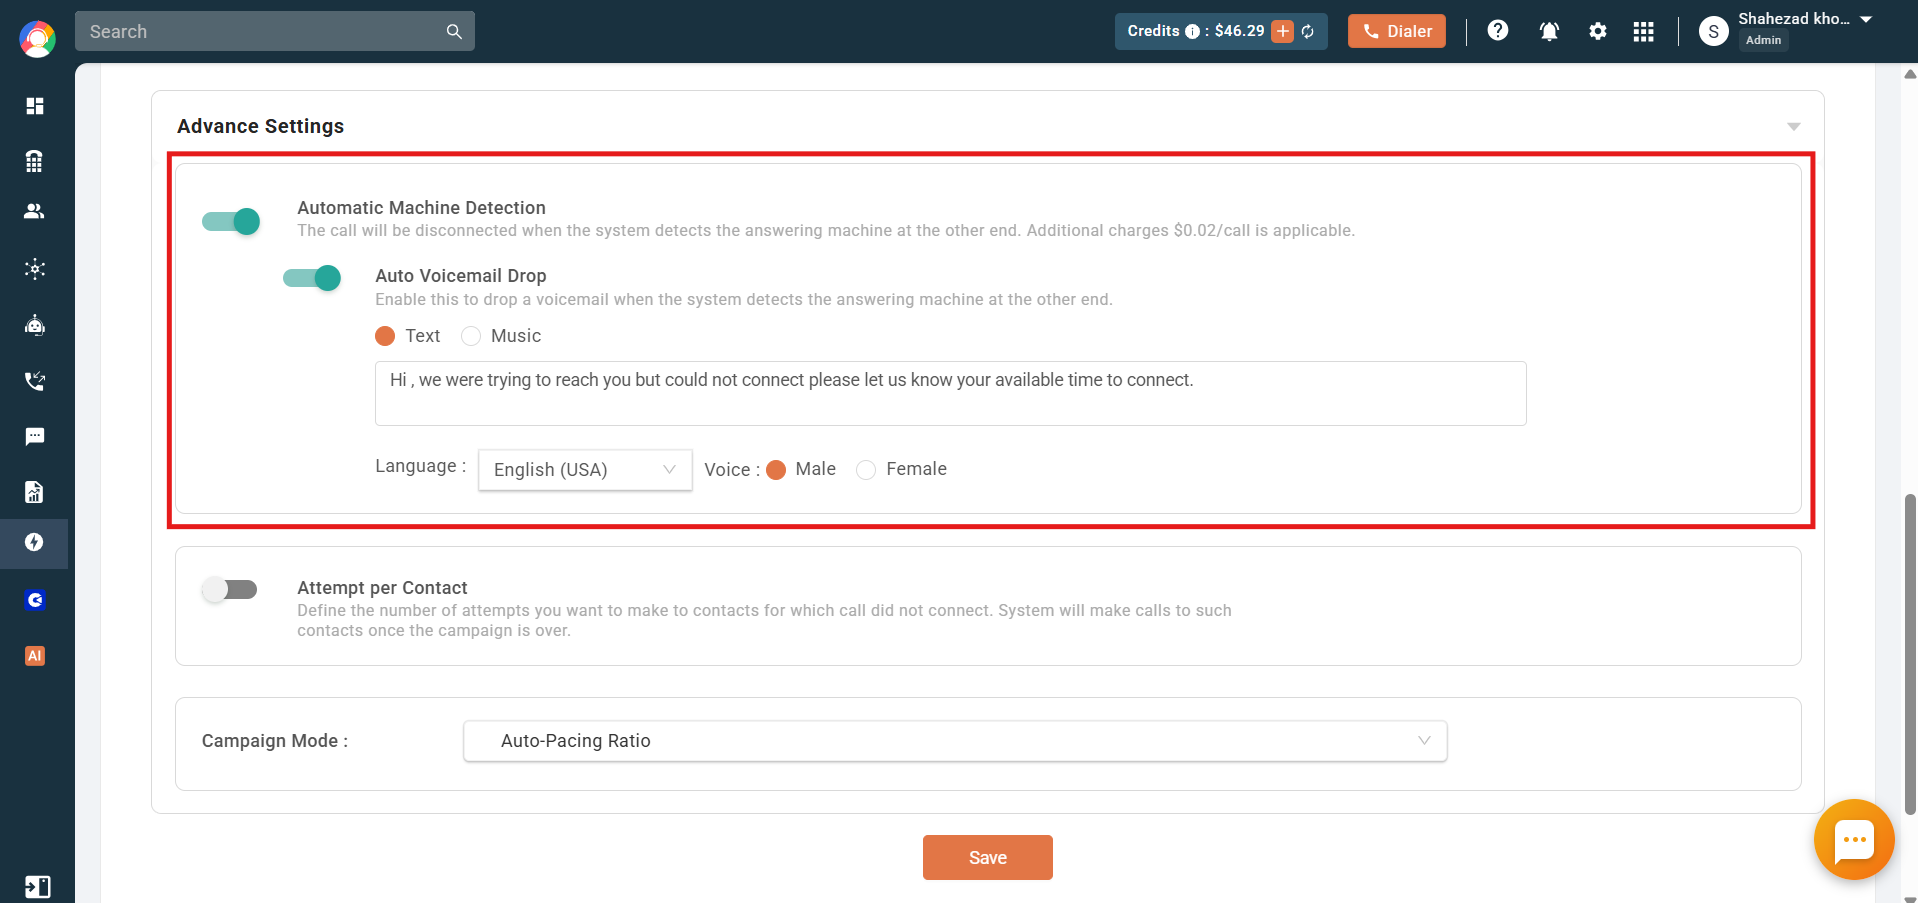
- Automatic Machine Detection – the call is disconnected if an answering machine is detected. Auto Voicemail Drop then delivers a pre-recorded voicemail automatically.
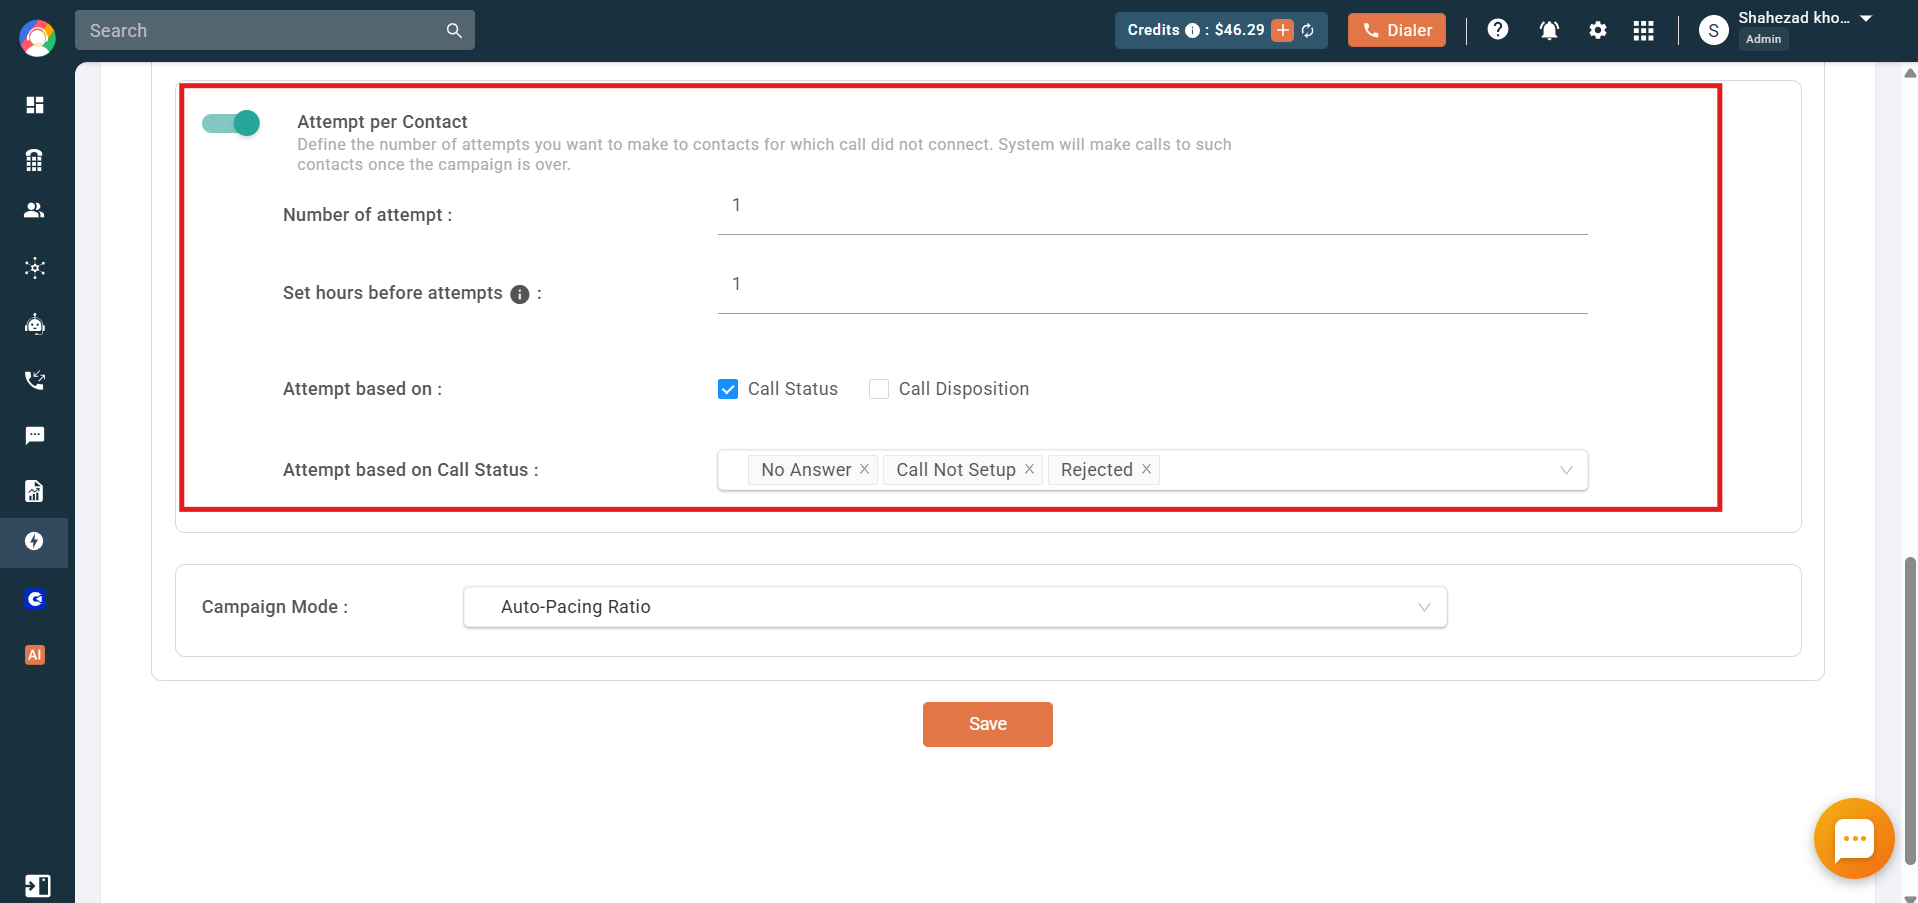
- Attempt per Contact – reattempt unconnected numbers after a set time. Configure the number of attempts, the hours to pause between attempts, and whether attempts are based on Call Status, Call Disposition, or both.
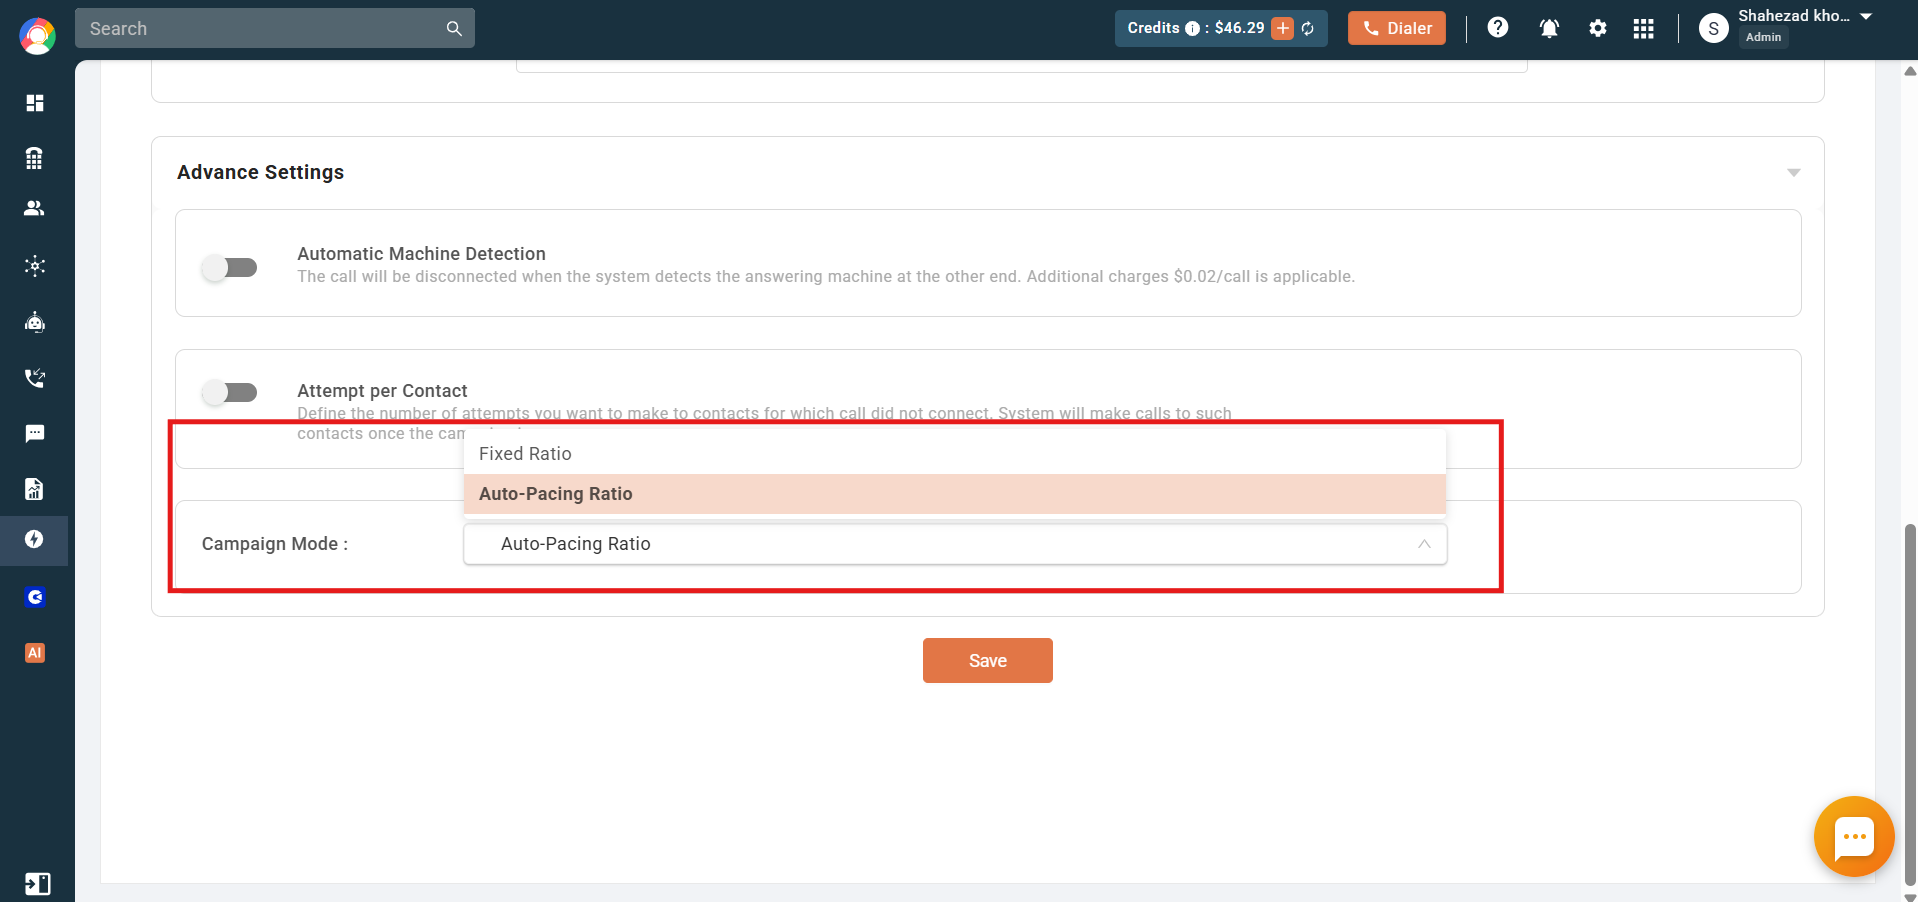
- Campaign Mode – run in Fixed Pacing (a set number of parallel calls) or Auto Pacing (the system decides the optimal number of parallel calls based on available agents).
Click Save to create the campaign.
Campaign List: Start and Manage Campaigns
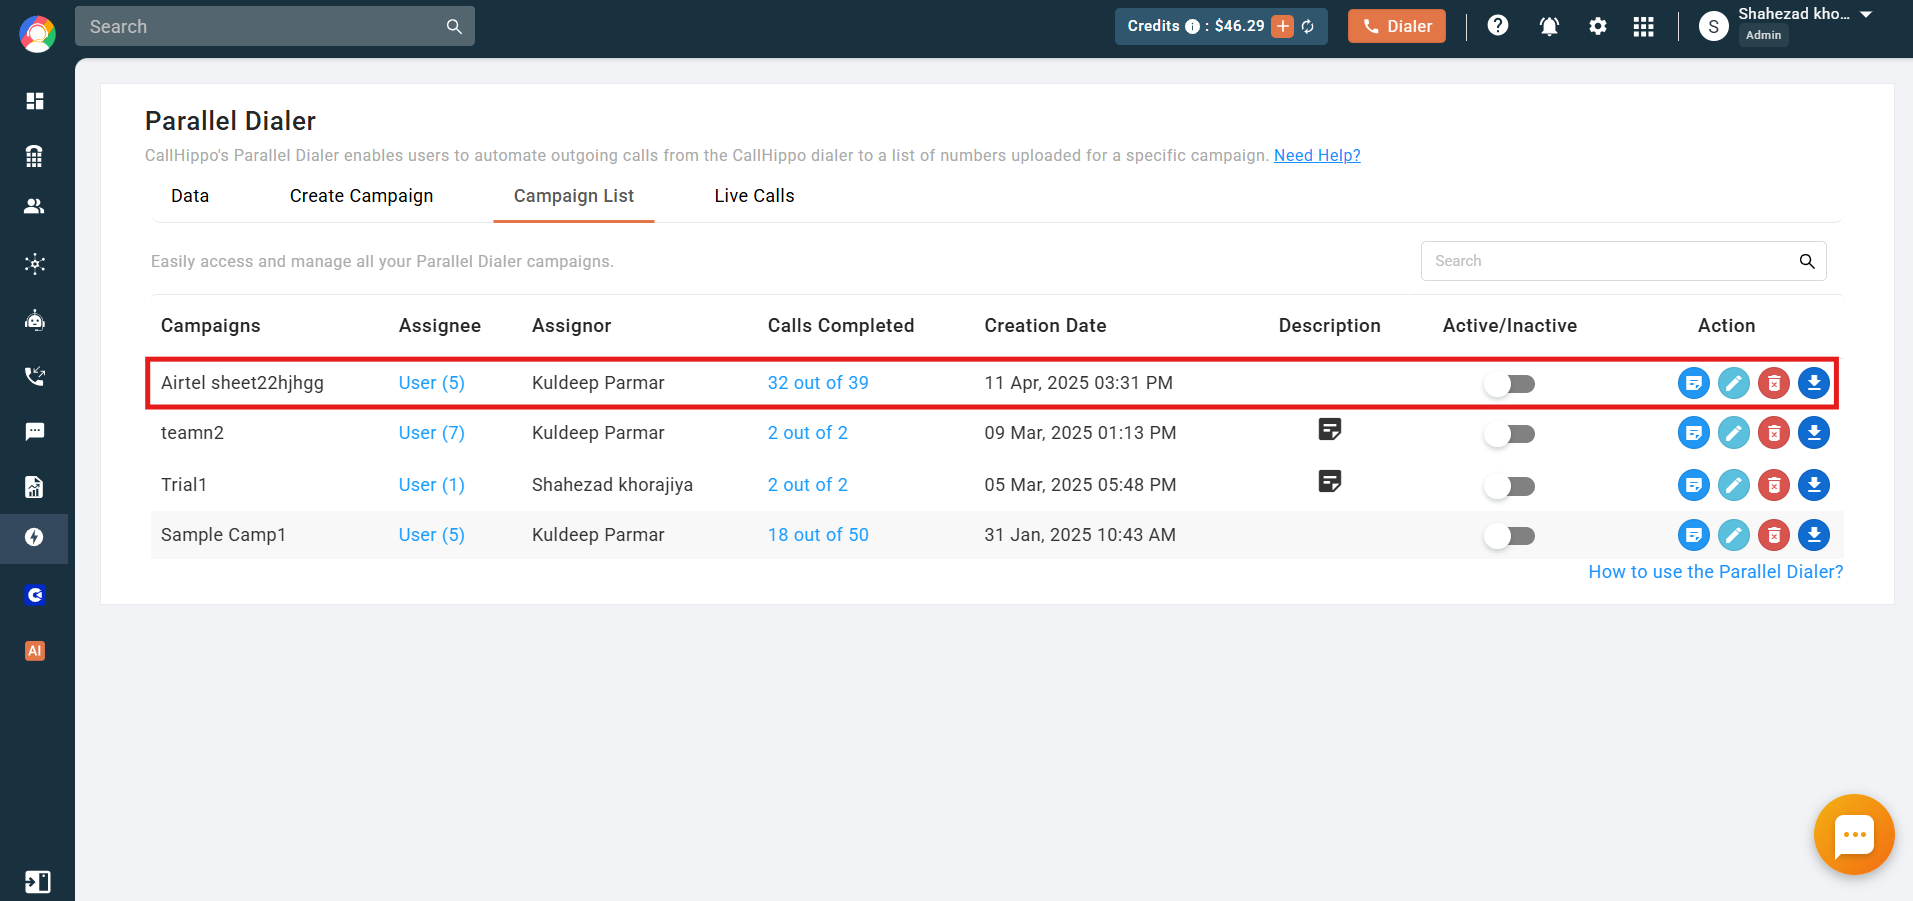
All created campaigns appear under the Campaign List. Make sure every agent has their dialer open, then click the toggle to start the campaign.
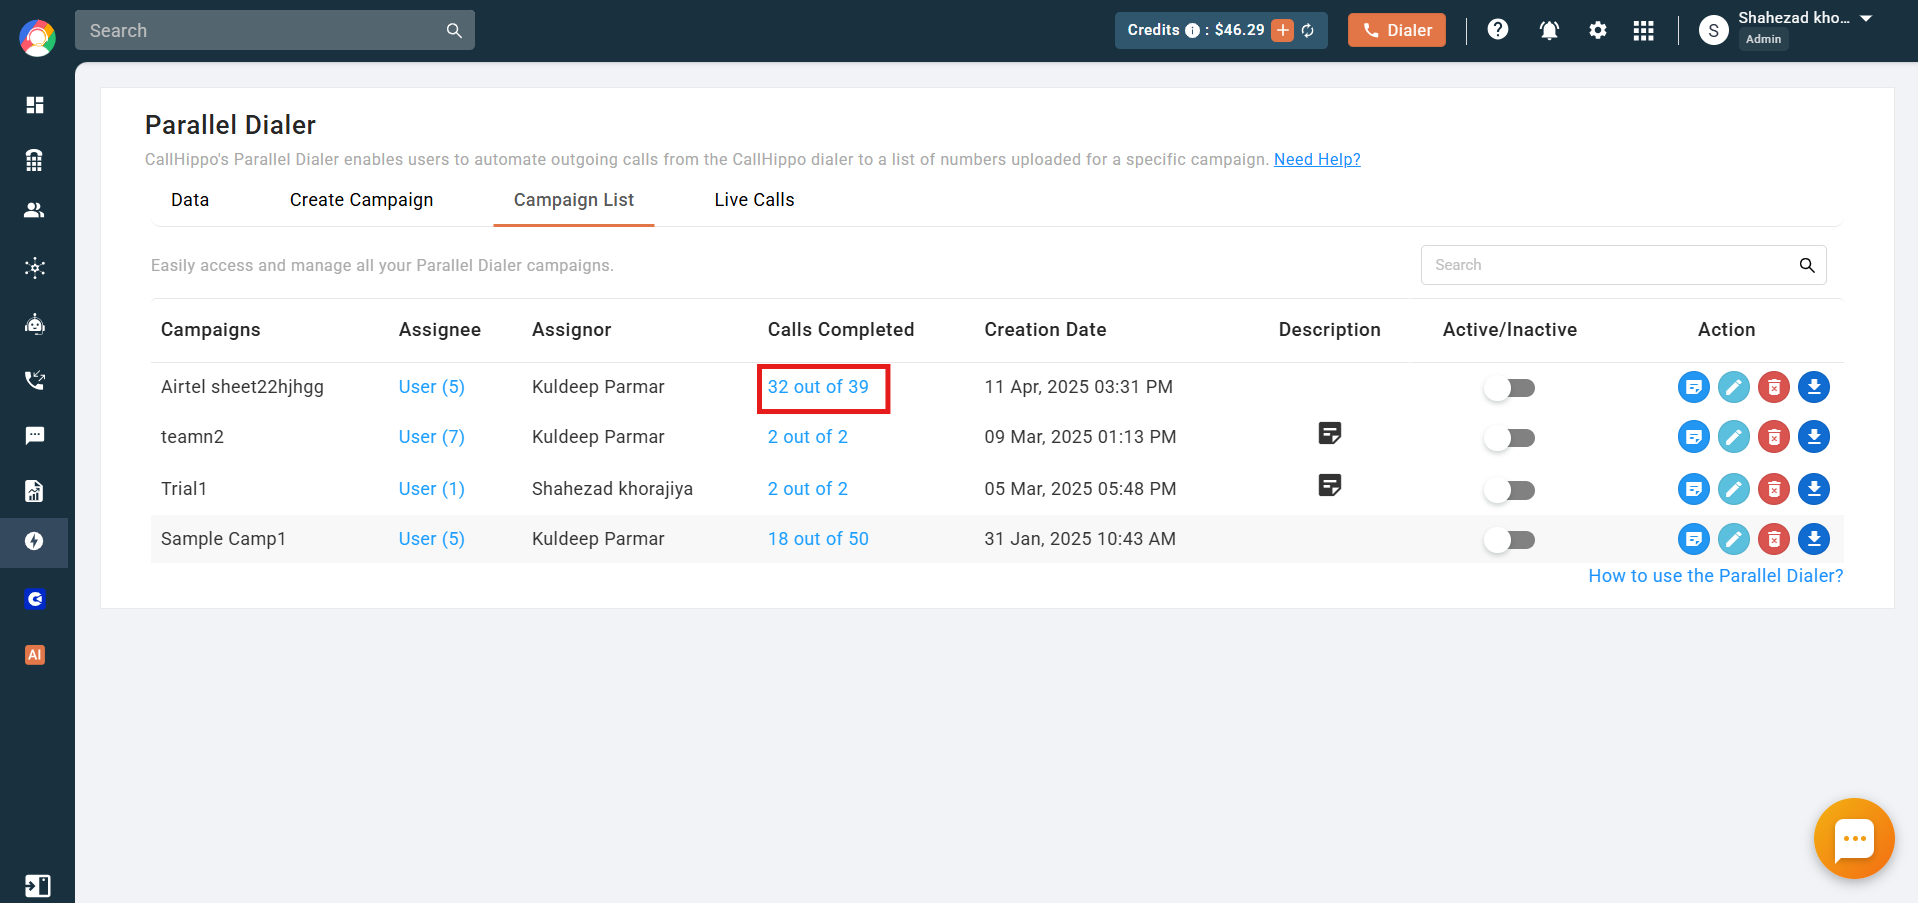
Note: A campaign from HubSpot is created only using Contacts. Data from other HubSpot modules such as Deals is not fetched into the campaign.
When a call connects, the agent sees the contact’s details alongside call controls and any call scripts.
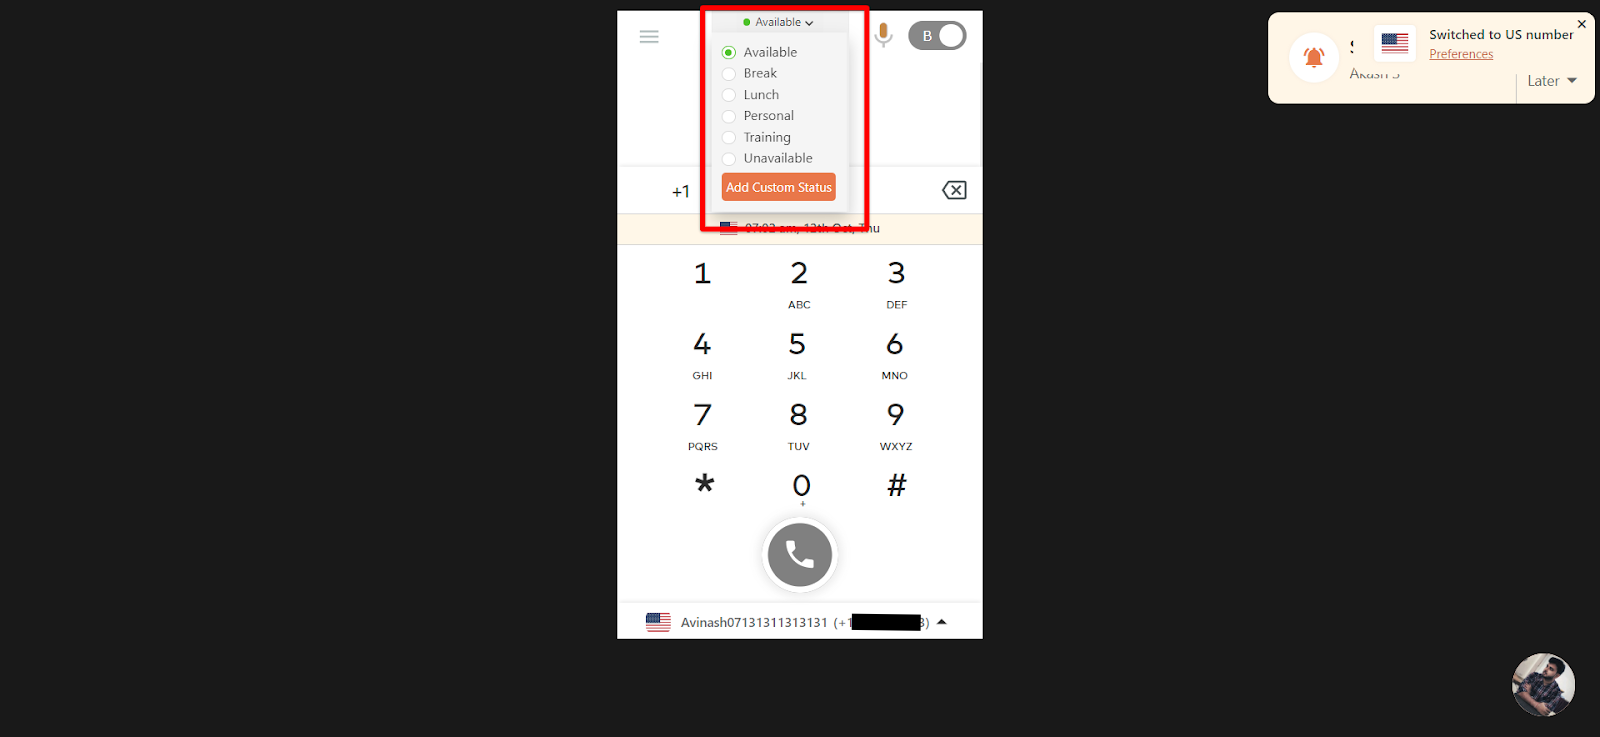
Agents can change their availability status to take a break and switch back when they return.
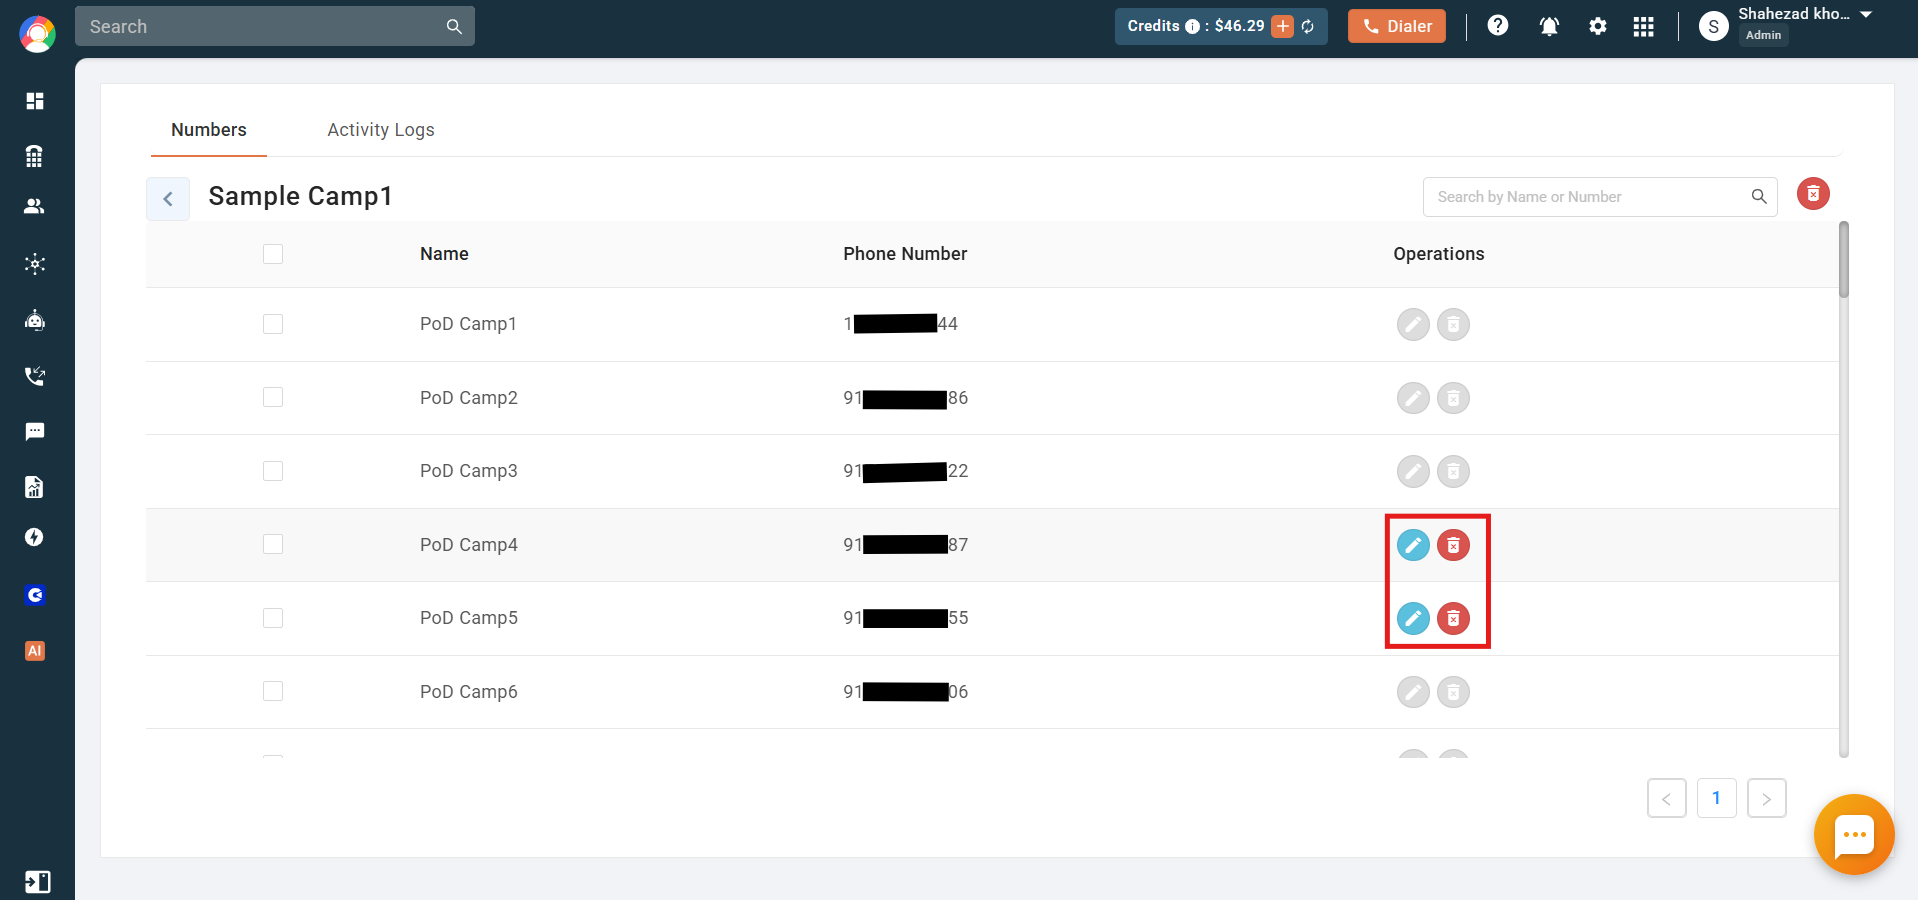
From the action buttons you can edit or delete the campaign, download the report, or view it. In the View section you can access the uploaded contacts and edit or delete any contact not yet called.
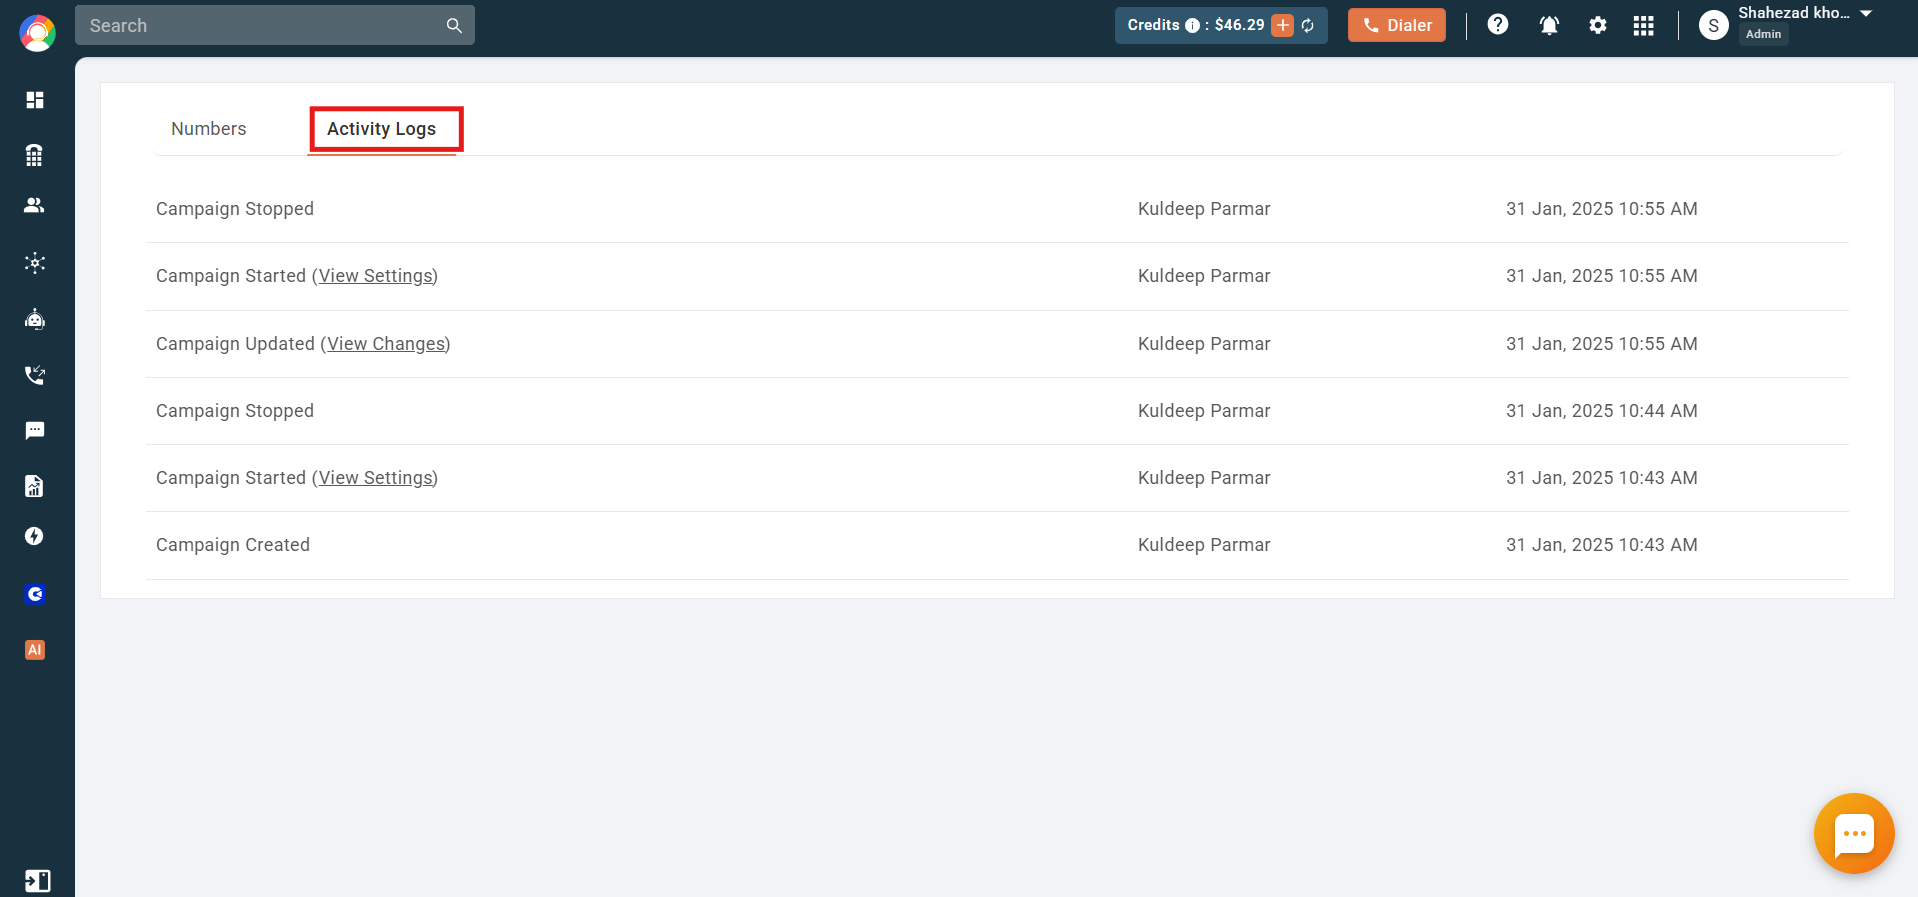
The Activity Logs section lets you audit campaign activity, including the timestamp and the person who performed each action.
Live Calls
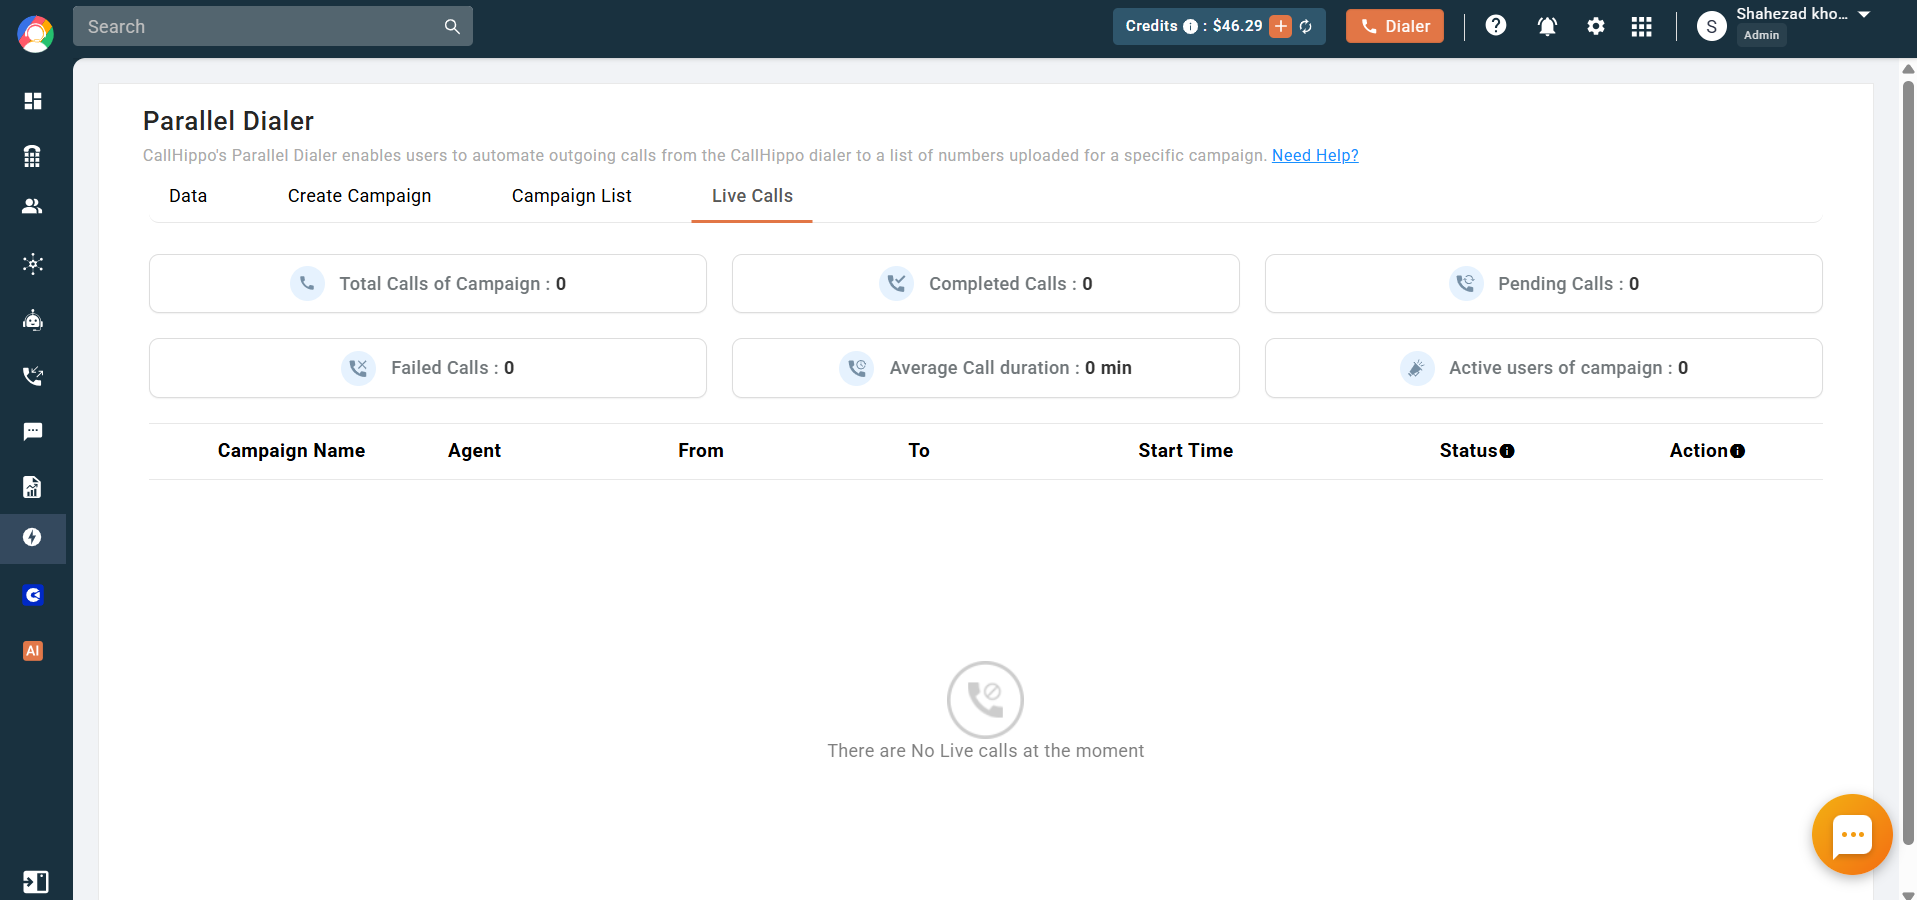
The Live Calls tab shows all ongoing calls in active campaigns, with insights including total calls in the campaign, completed calls, pending calls, failed calls, average call duration, and active users in the campaign.
Frequently Asked Questions
Can multiple campaigns run simultaneously?
Yes. You can create and run multiple campaigns at the same time for efficient call management and better outreach.
What format should the contact list be in?
Upload the list in the specific format provided by the system. Download the template from the Data tab to be sure.
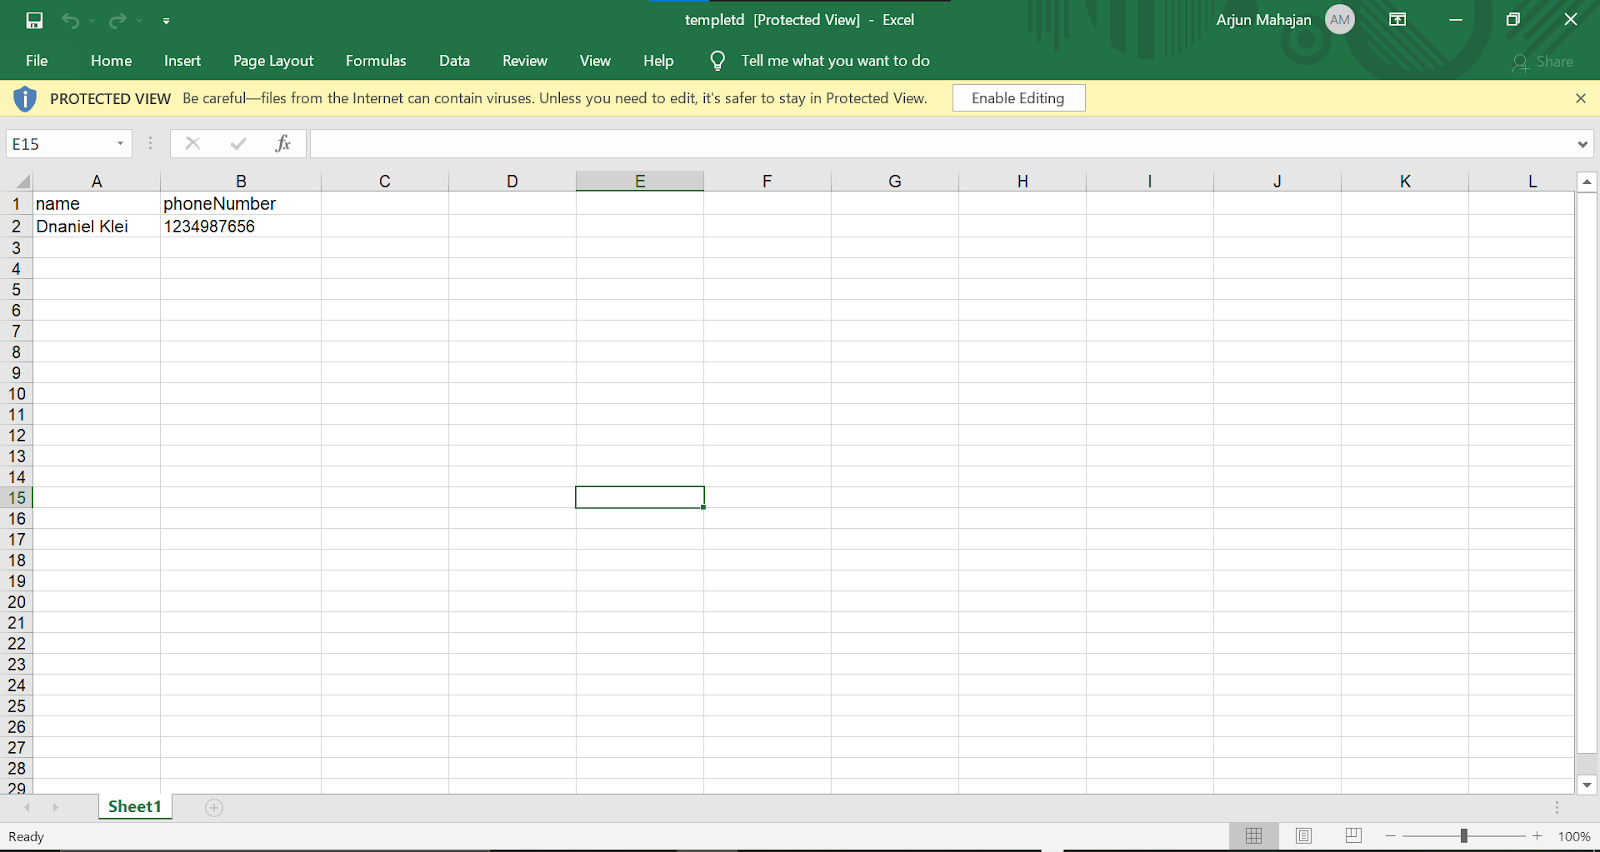
Keep these points in mind: numbers must be complete with the country code and free of special characters; names and numbers must be filled in with no blank rows or columns; and you can add up to 10 columns, which all appear in the dialer during calls.
What are the benefits of Auto Voicemail Drop?
It lets you leave a message even when a call is unanswered. Instead of recording a voicemail each time, the system delivers a pre-set message when a call reaches voicemail. Key advantages:
- Saves time – no need to leave voicemails manually.
- Increases connectivity – your message reaches prospects even if they do not answer.
- Consistency – delivers a uniform message across all unanswered calls.
- Improves productivity – agents focus on live conversations rather than voicemail recordings.