
Connecting CallHippo with GoHighLevel (GHL) lets you place click-to-call calls from your CRM, automatically log calls and SMS as tasks, and run outbound campaigns without leaving GoHighLevel. This guide walks you through connecting your sub-accounts, configuring what syncs, and showing assignee names in your task list.
Connect GoHighLevel in CallHippo
- Log in to your CallHippo account.
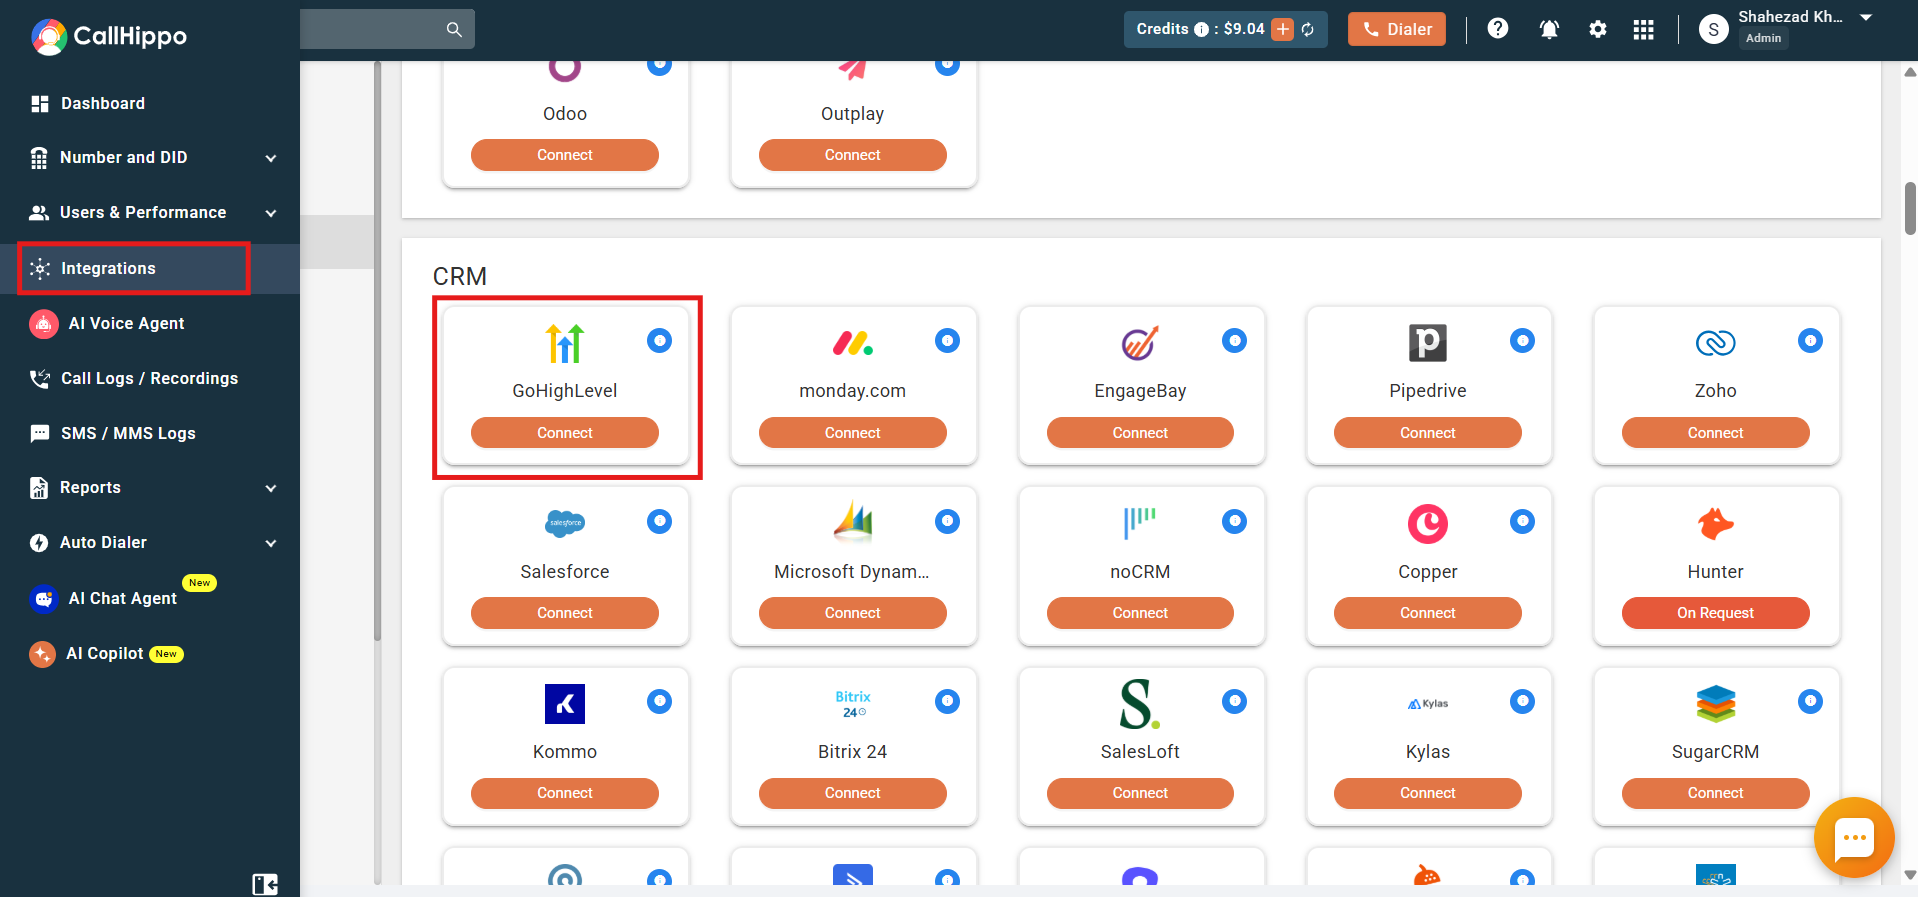
- Open the Integrations tab and, under the CRM section, find GoHighLevel. Click Connect.
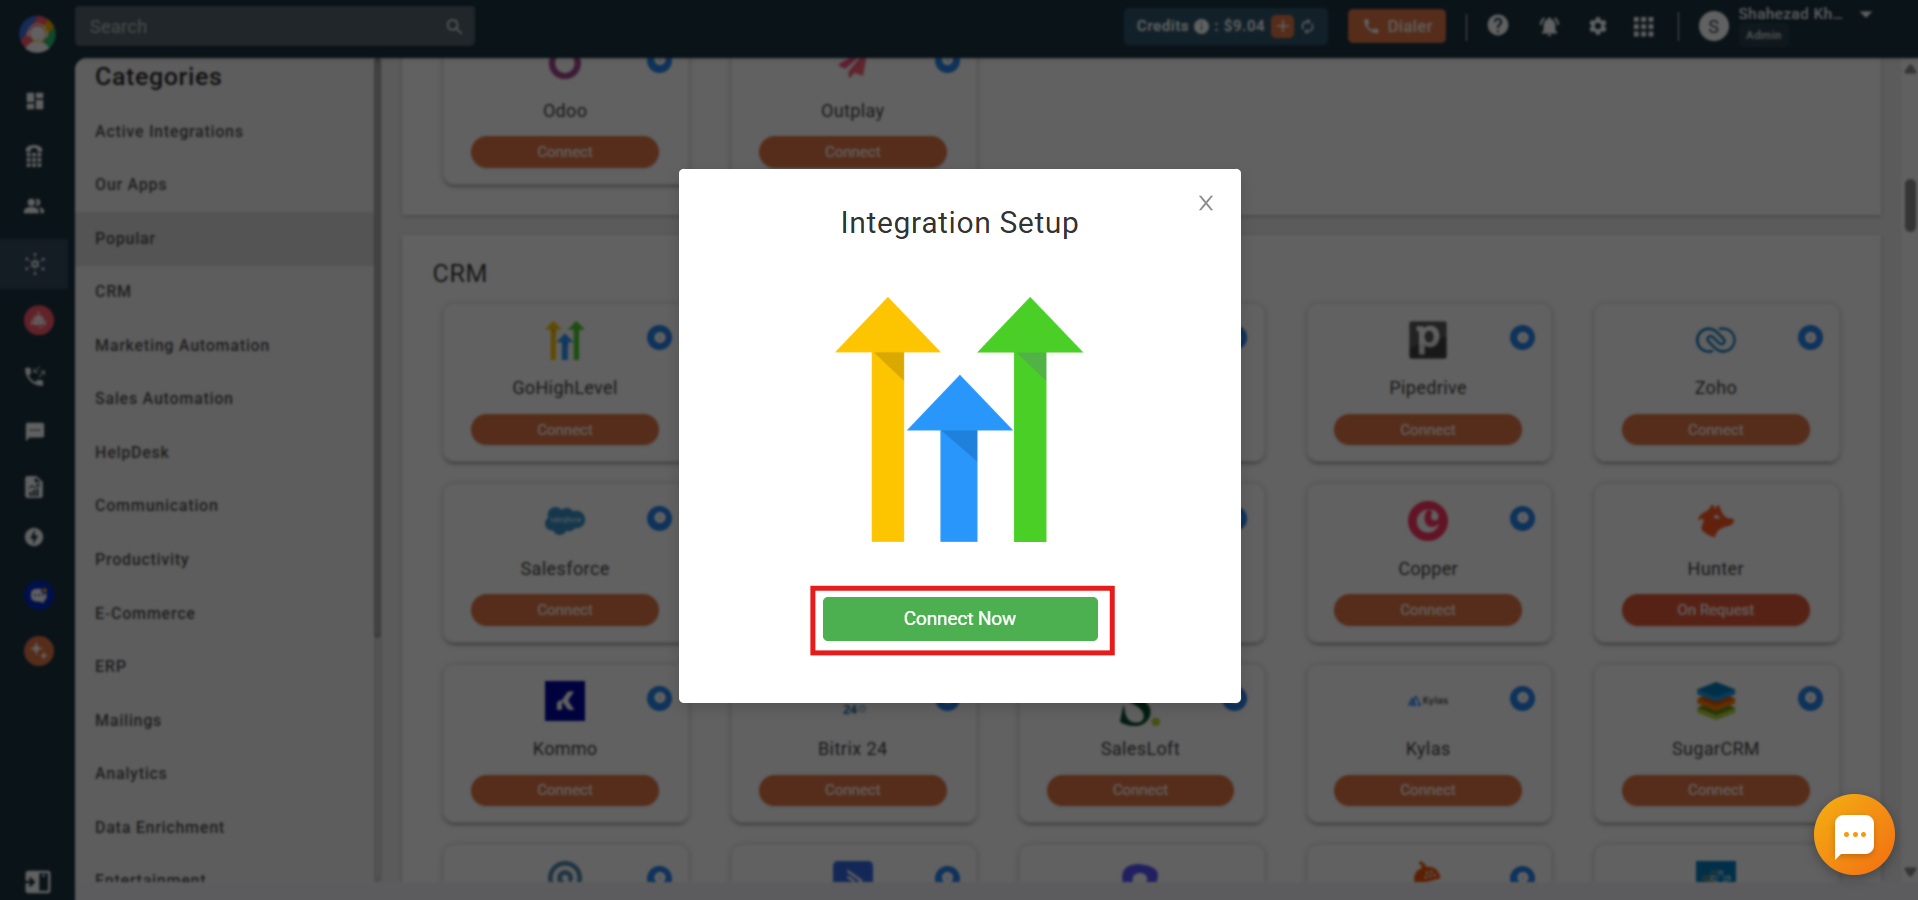
- In the Integration Setup popup, click Connect Now.
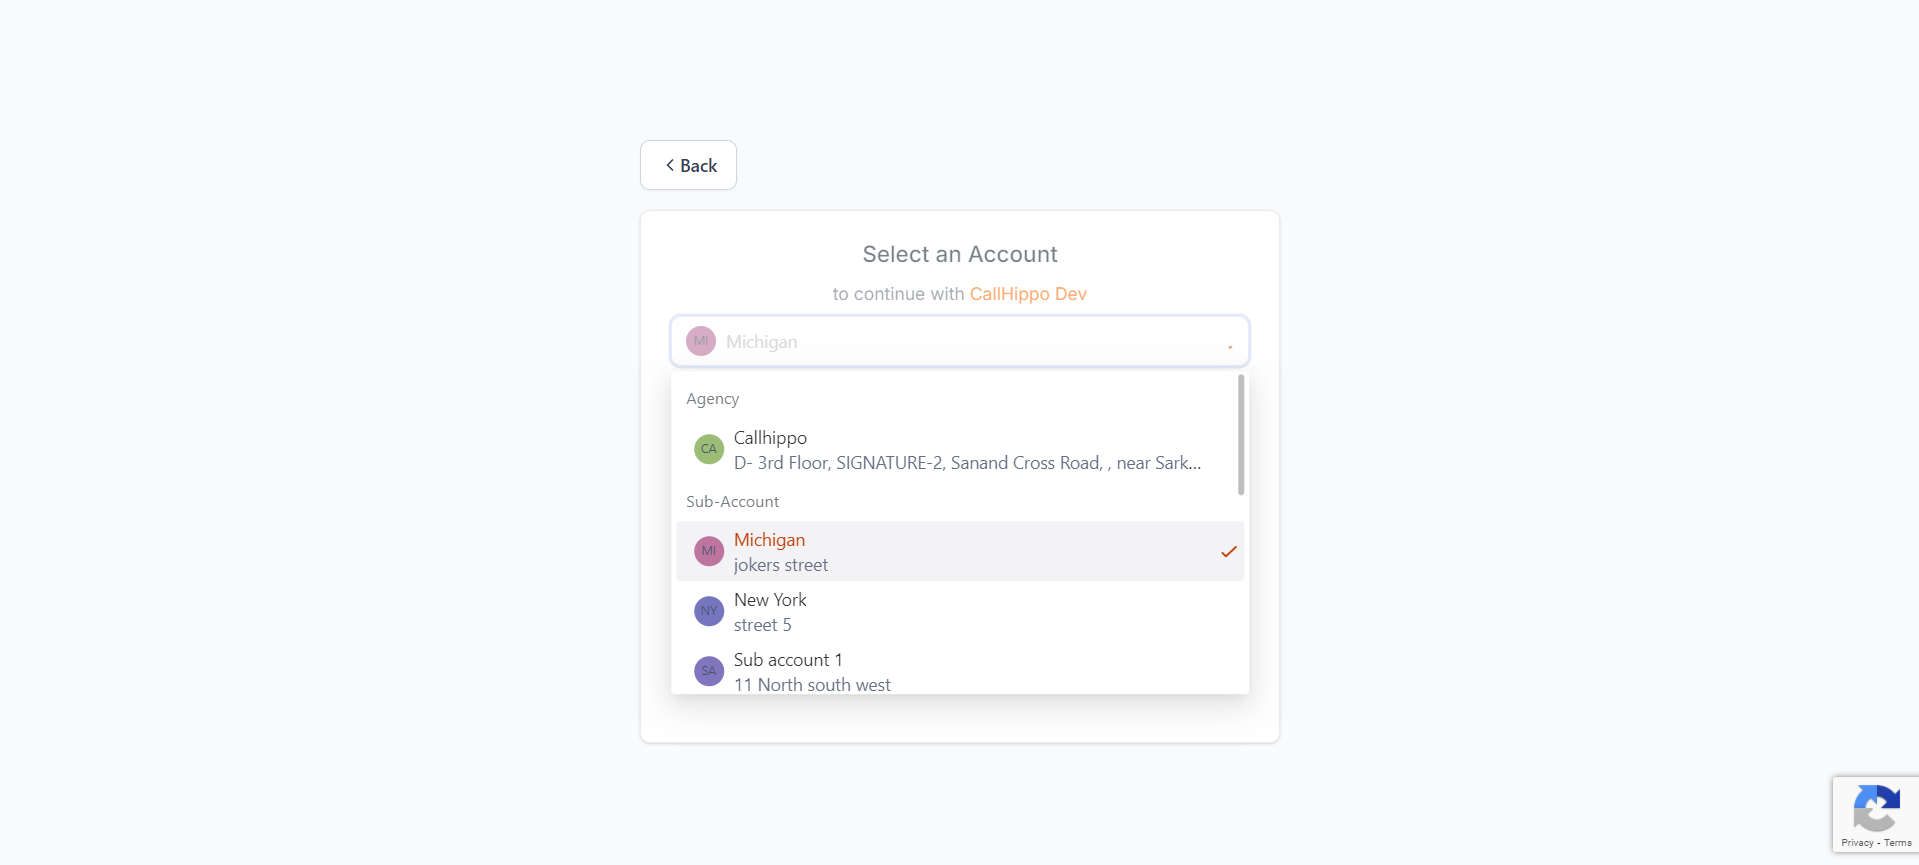
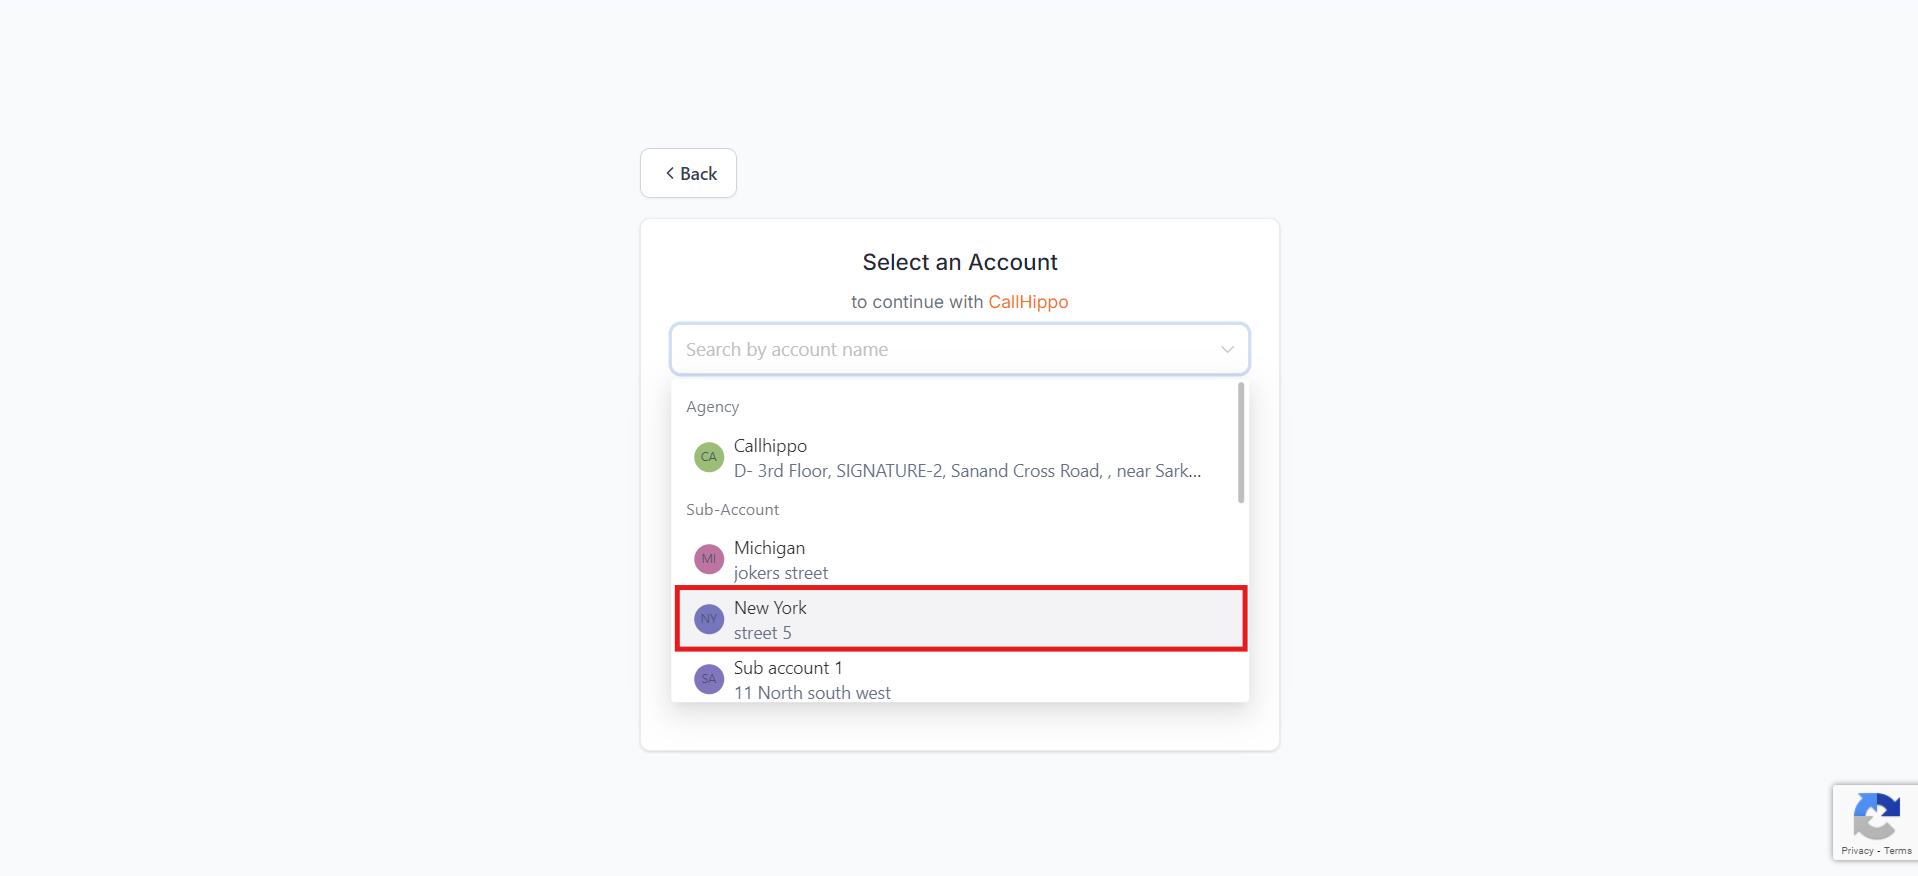
- You are taken to the GoHighLevel Select an Account page, which lists your agency account and its sub-accounts. Integration can only be done for sub-accounts, so choose a sub-account and click it. You are then redirected back to CallHippo with the account integrated.
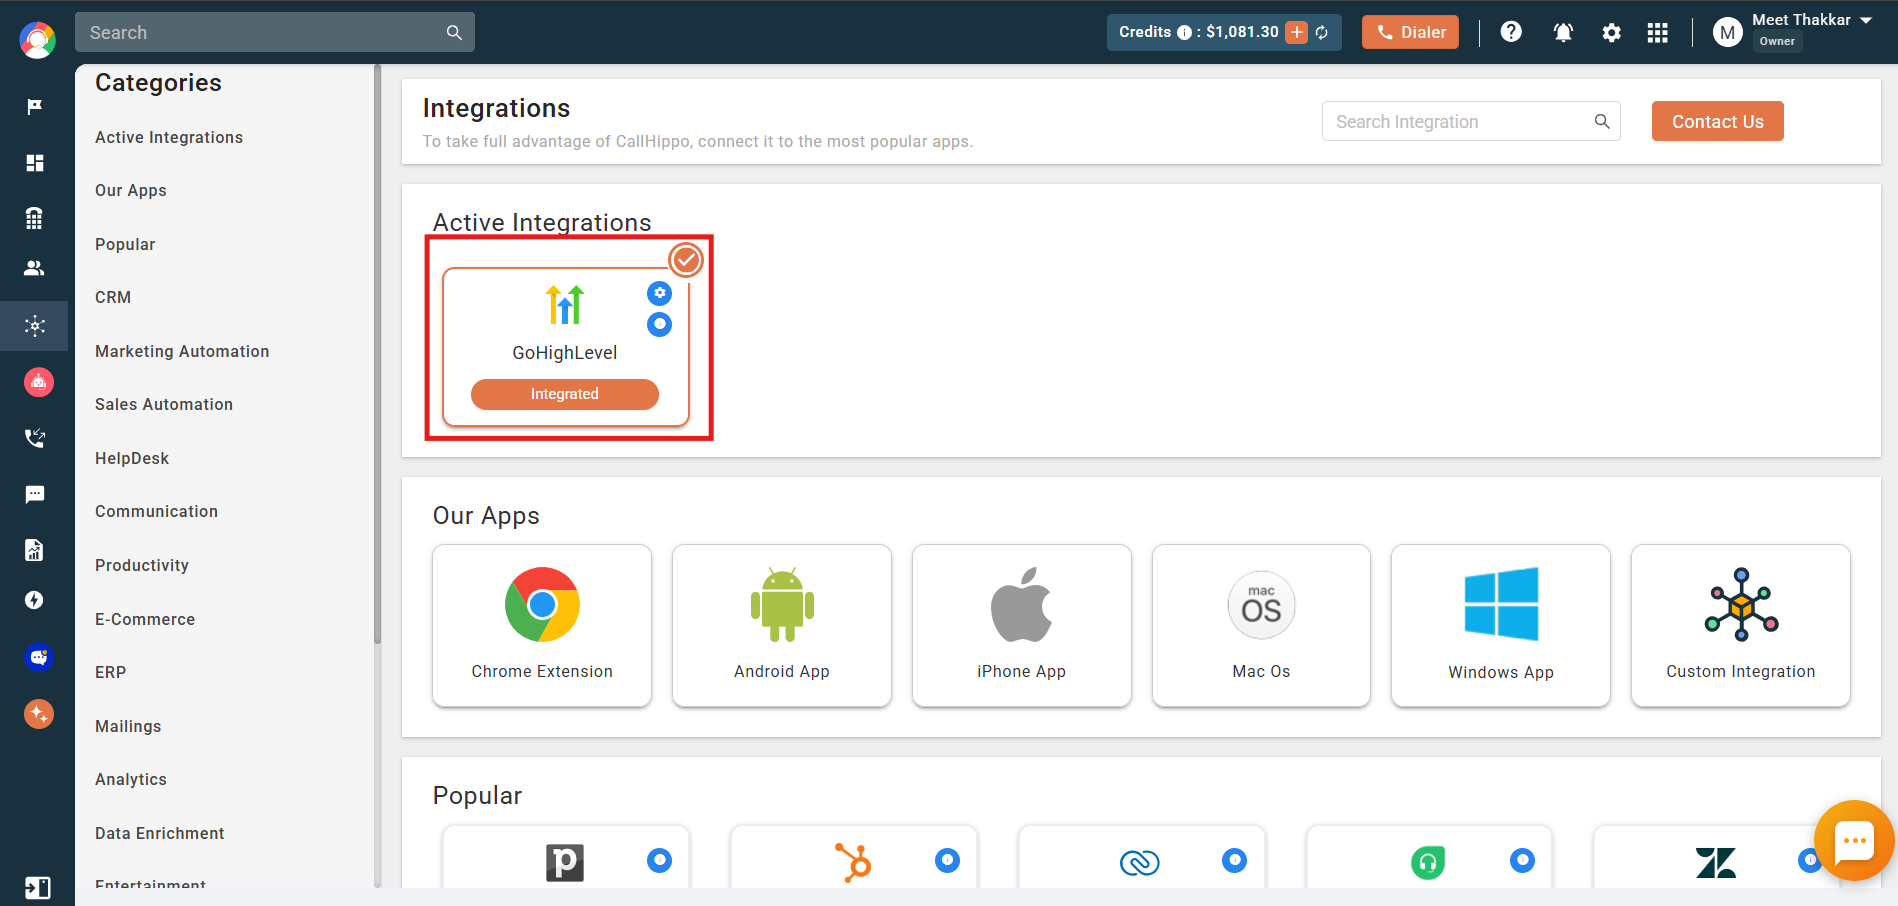
- The integration now appears under Active Integrations in CallHippo, marked as Integrated.
Add multiple sub-accounts
CallHippo lets you integrate more than one GoHighLevel sub-account.
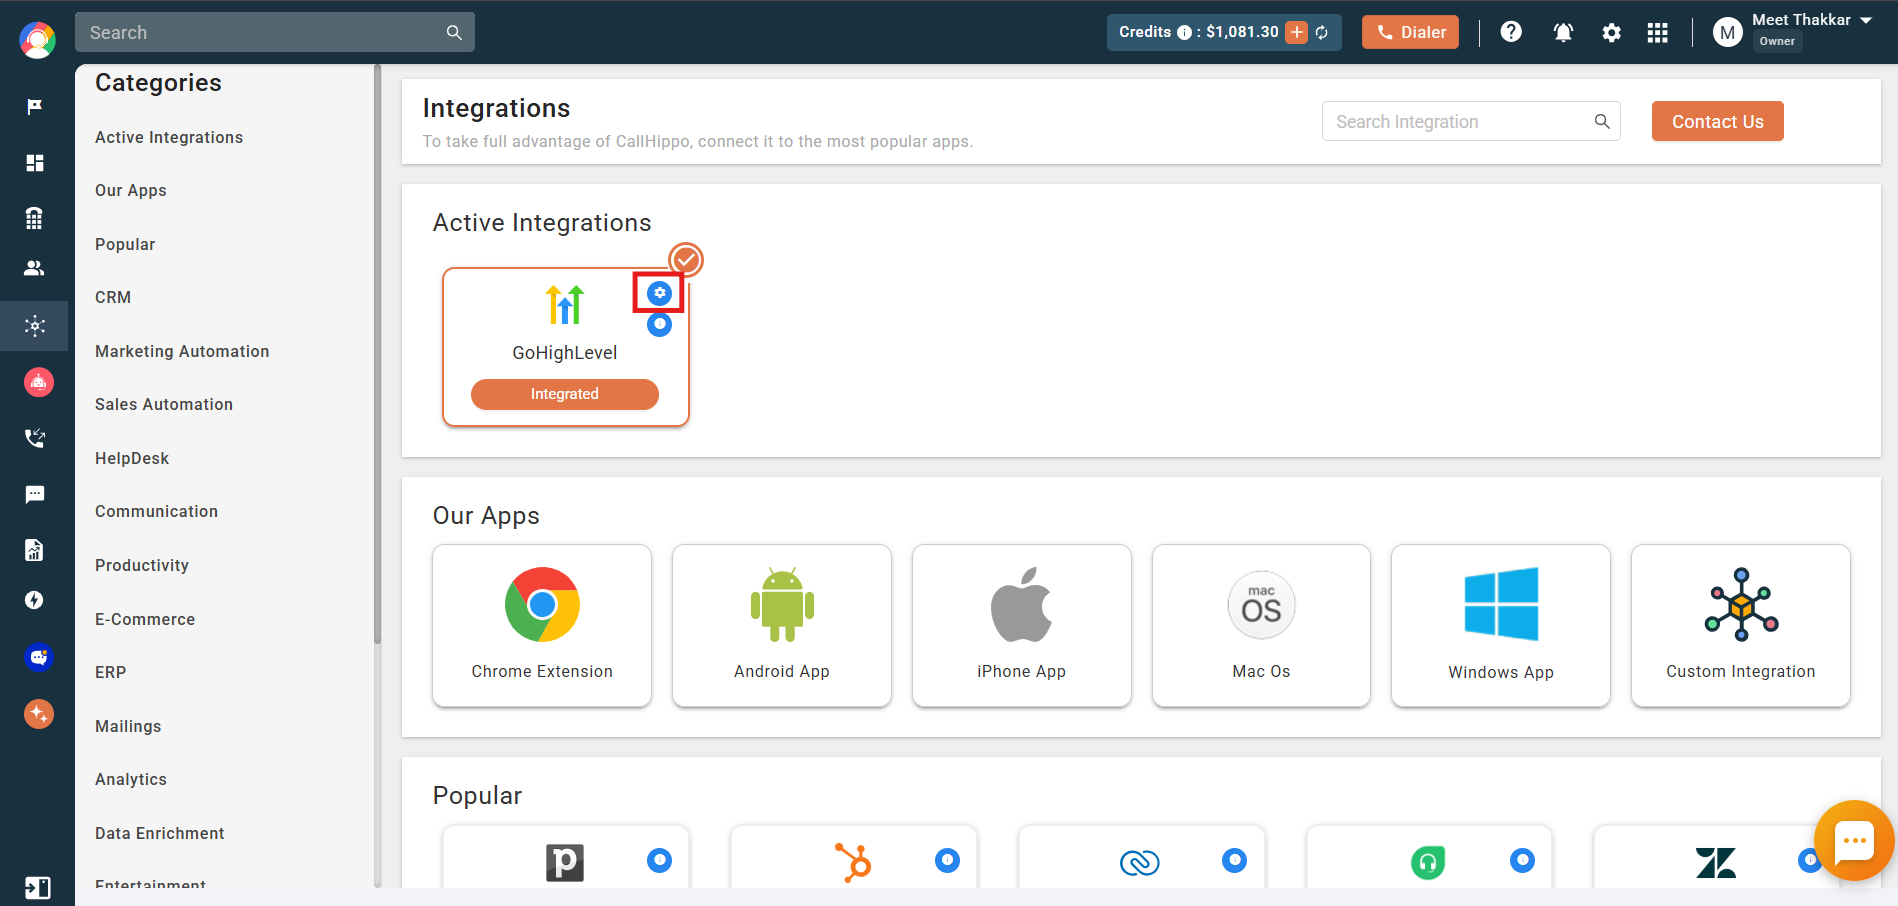
- On the GoHighLevel active integration card, click the settings (gear) icon to open Integration Settings.
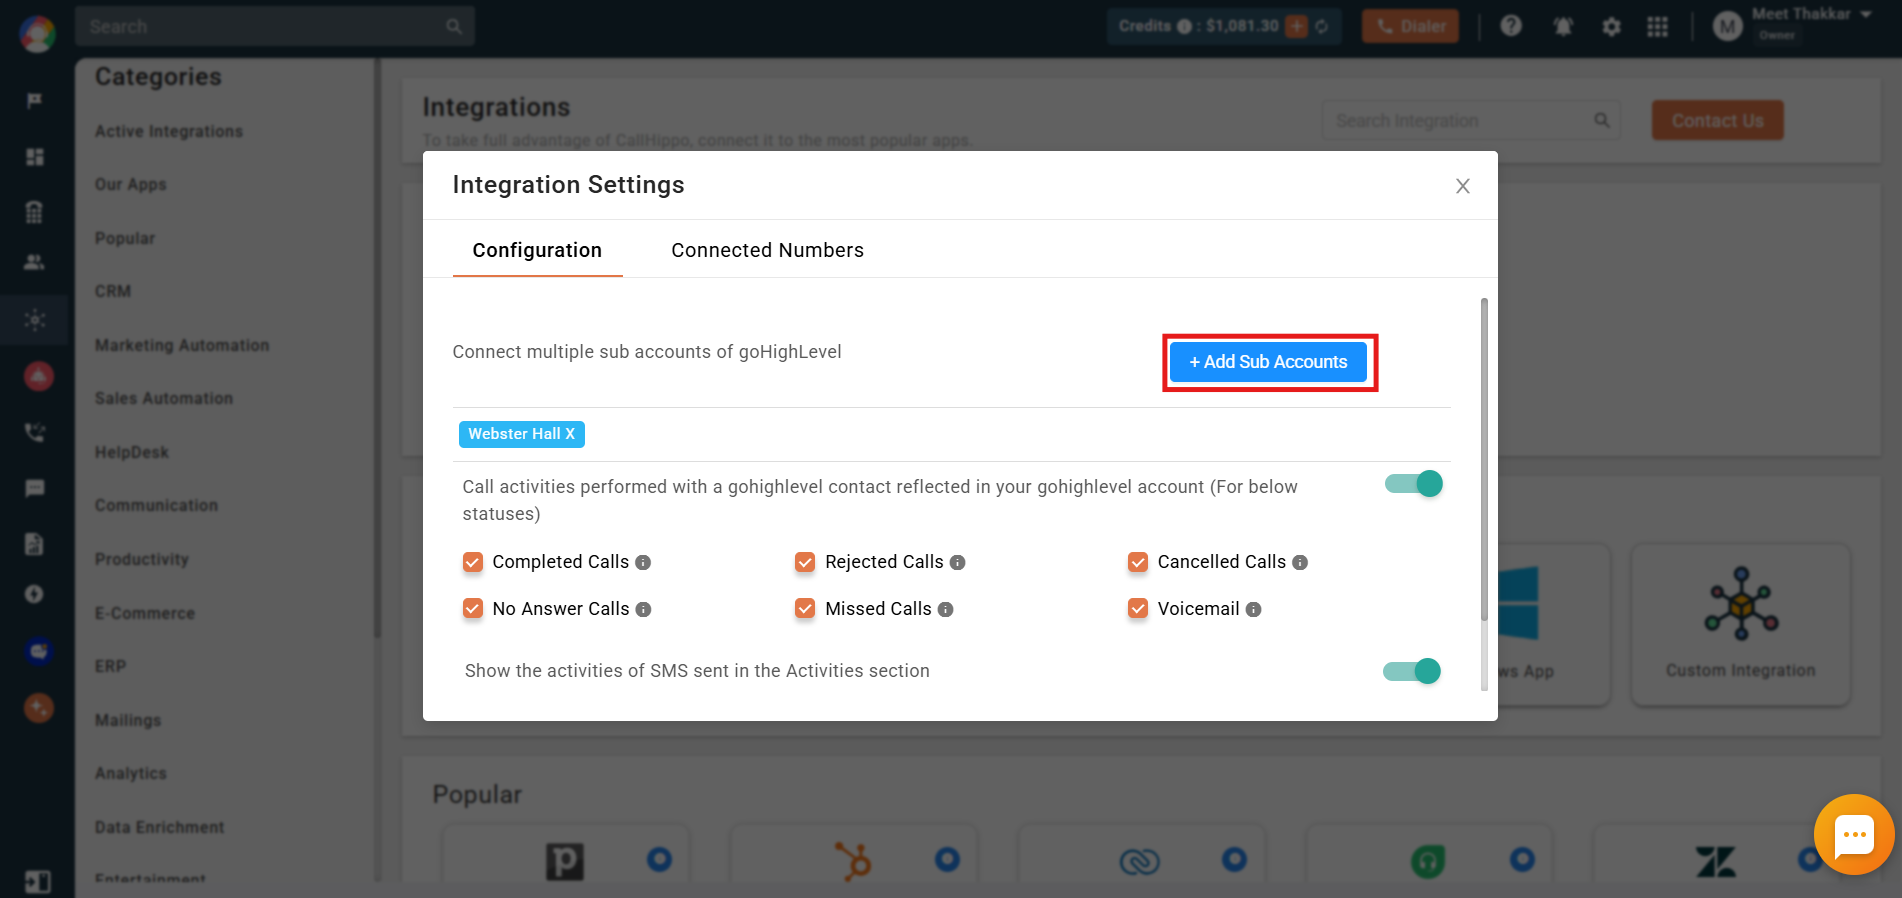
- On the Configuration tab, click + Add Sub Accounts.
- You are taken to the account-selection page again. Pick the sub-account you want to integrate, and repeat for each additional account.
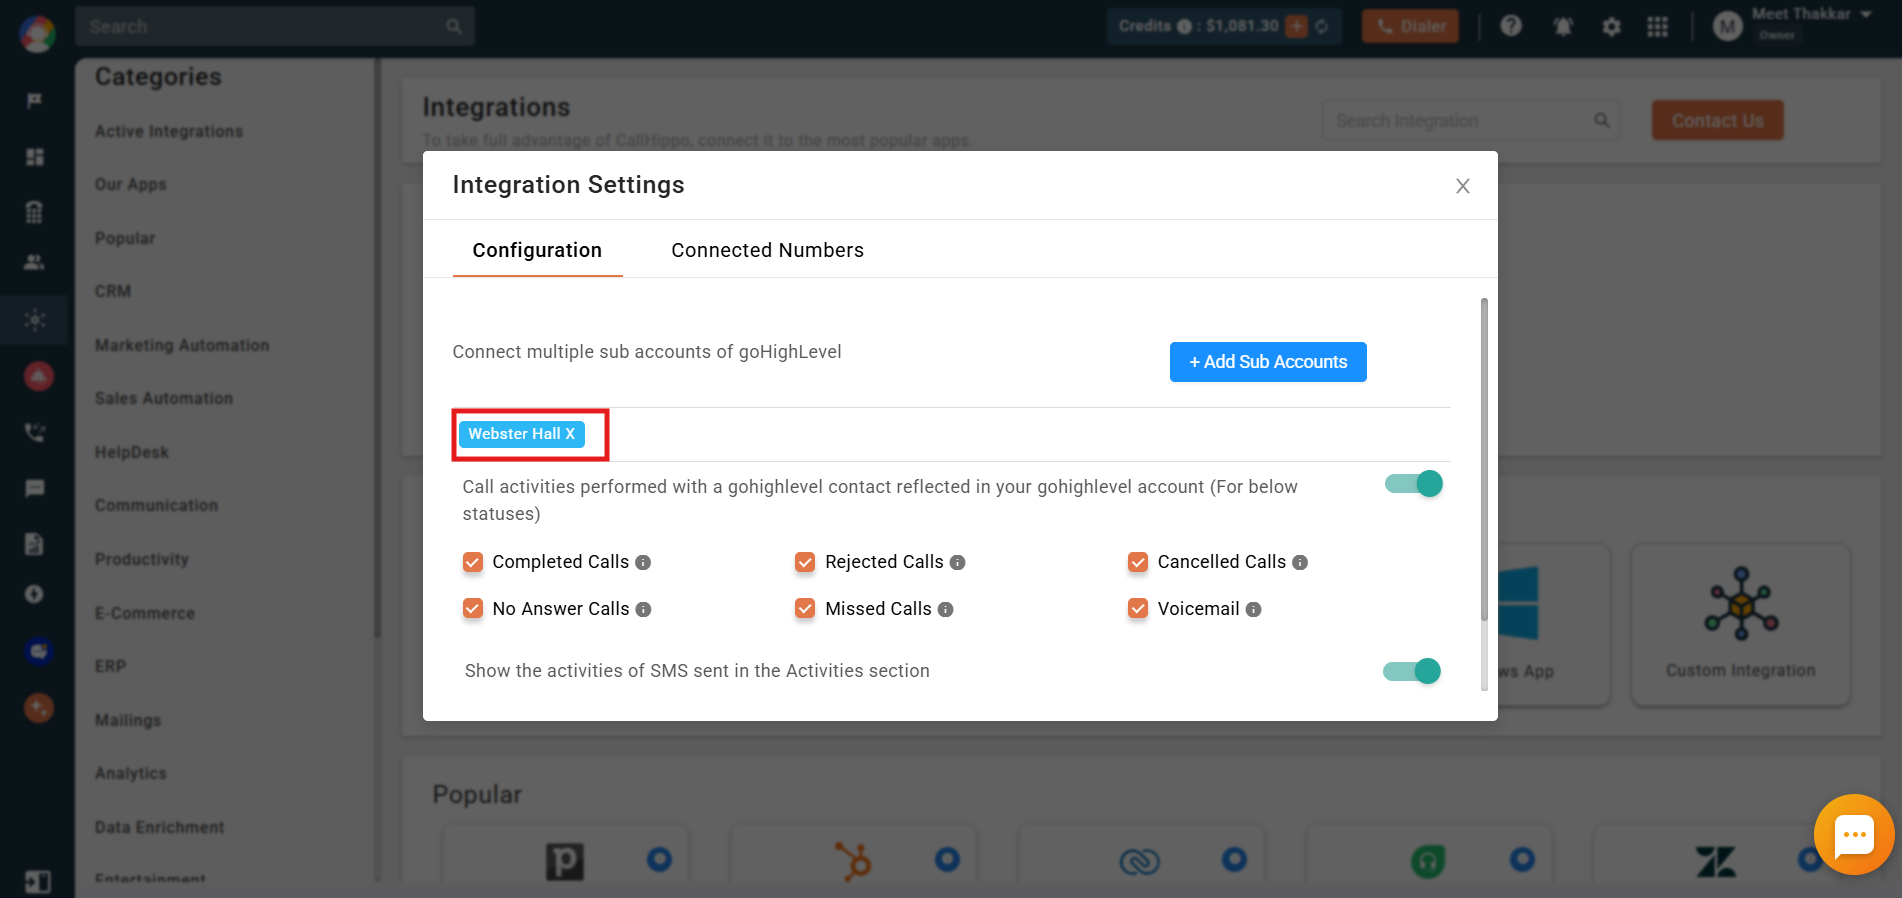
- All integrated sub-accounts are listed under the Integration settings.
Configure call & SMS sync
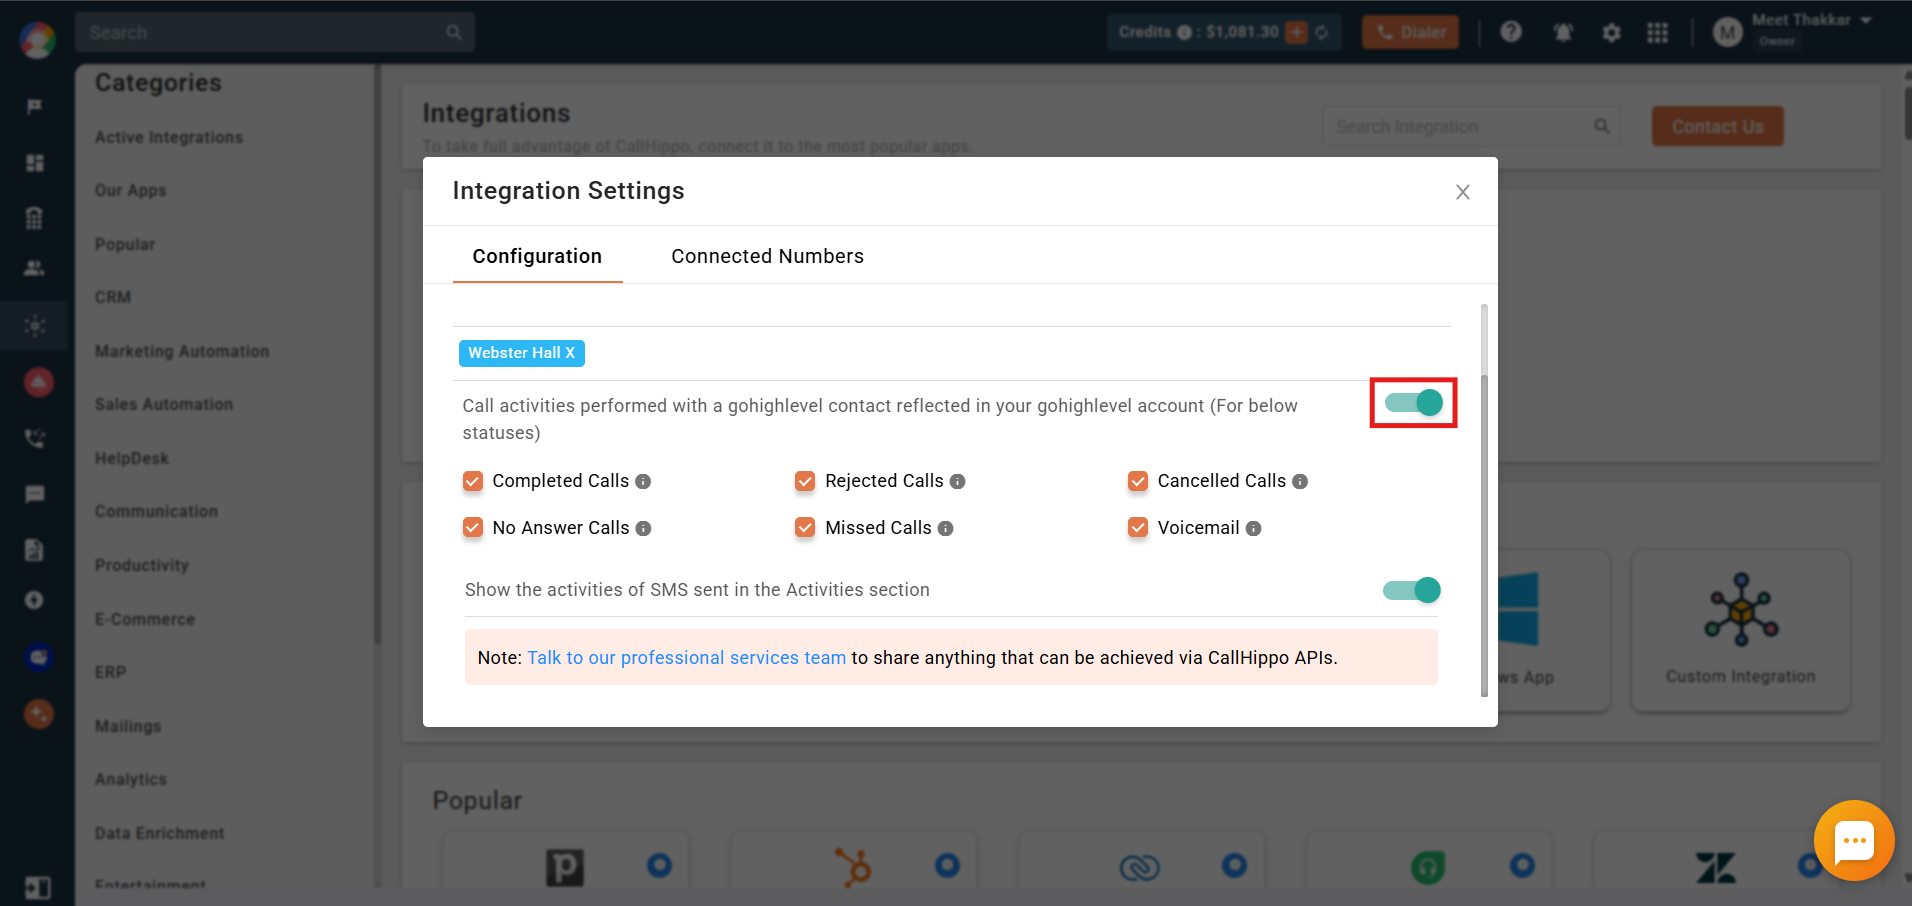
- Enable the call toggle to push call activities into GoHighLevel for the call statuses you select (Completed, Rejected, Cancelled, No Answer, Missed, and Voicemail).
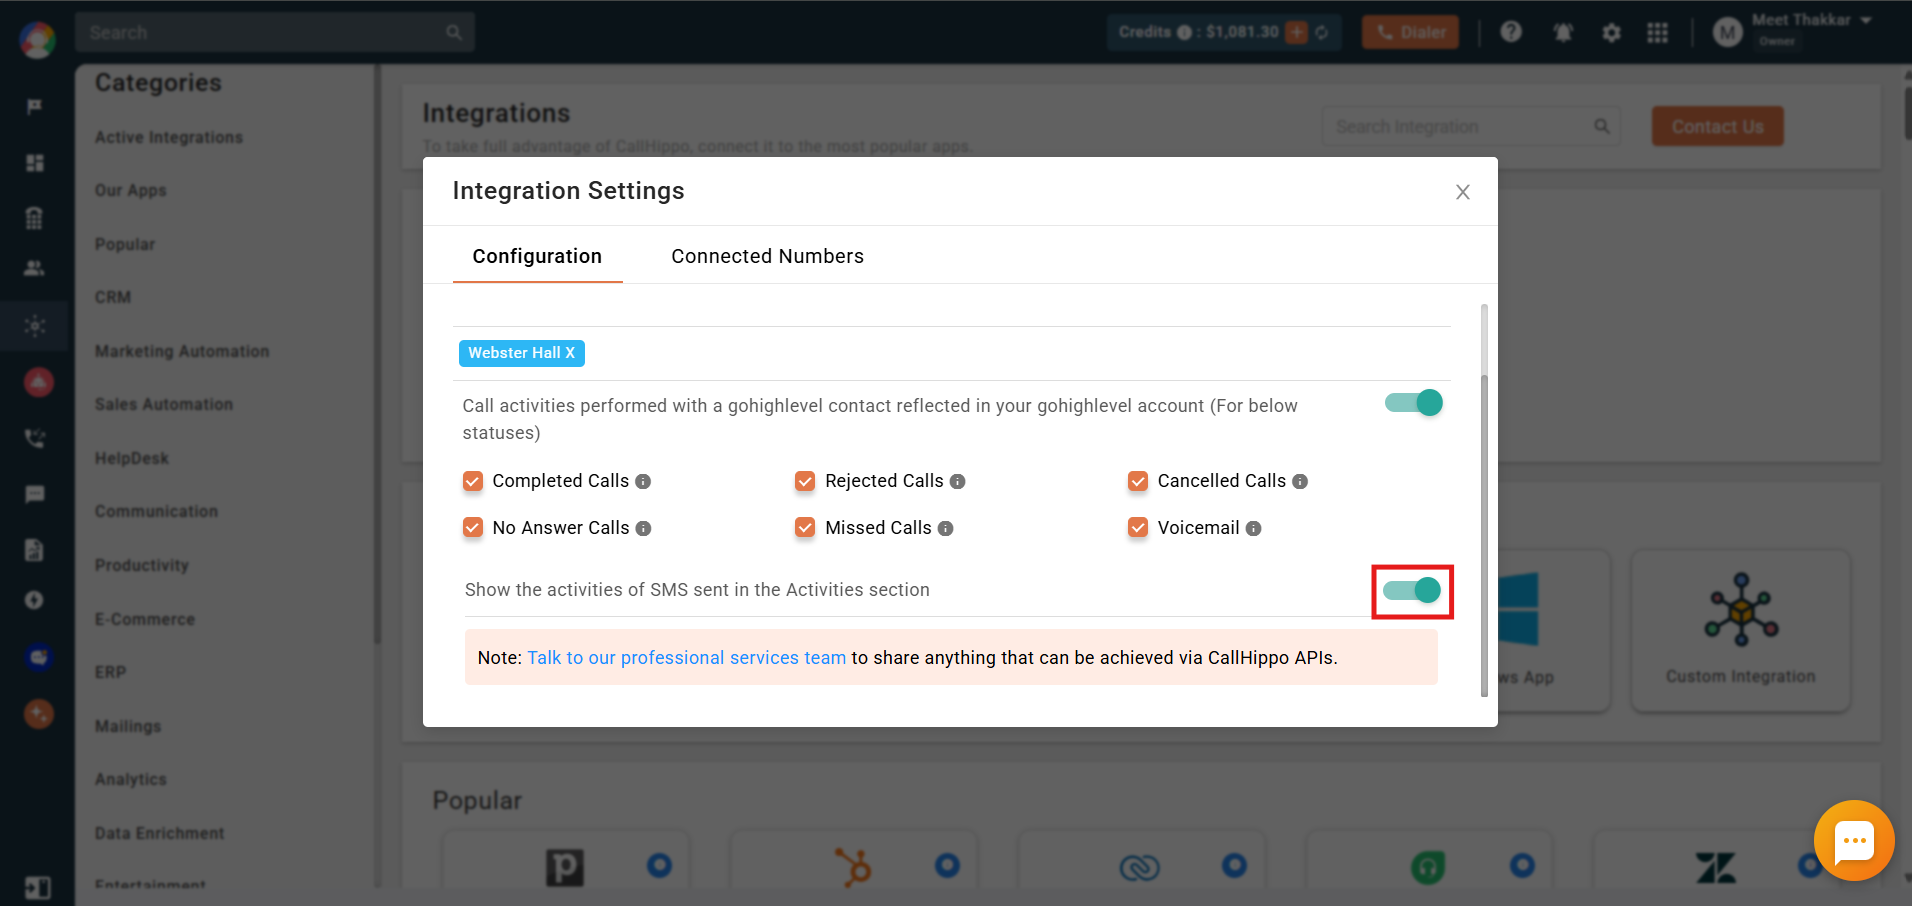
- Enable the SMS toggle to send all SMS activities to GoHighLevel.
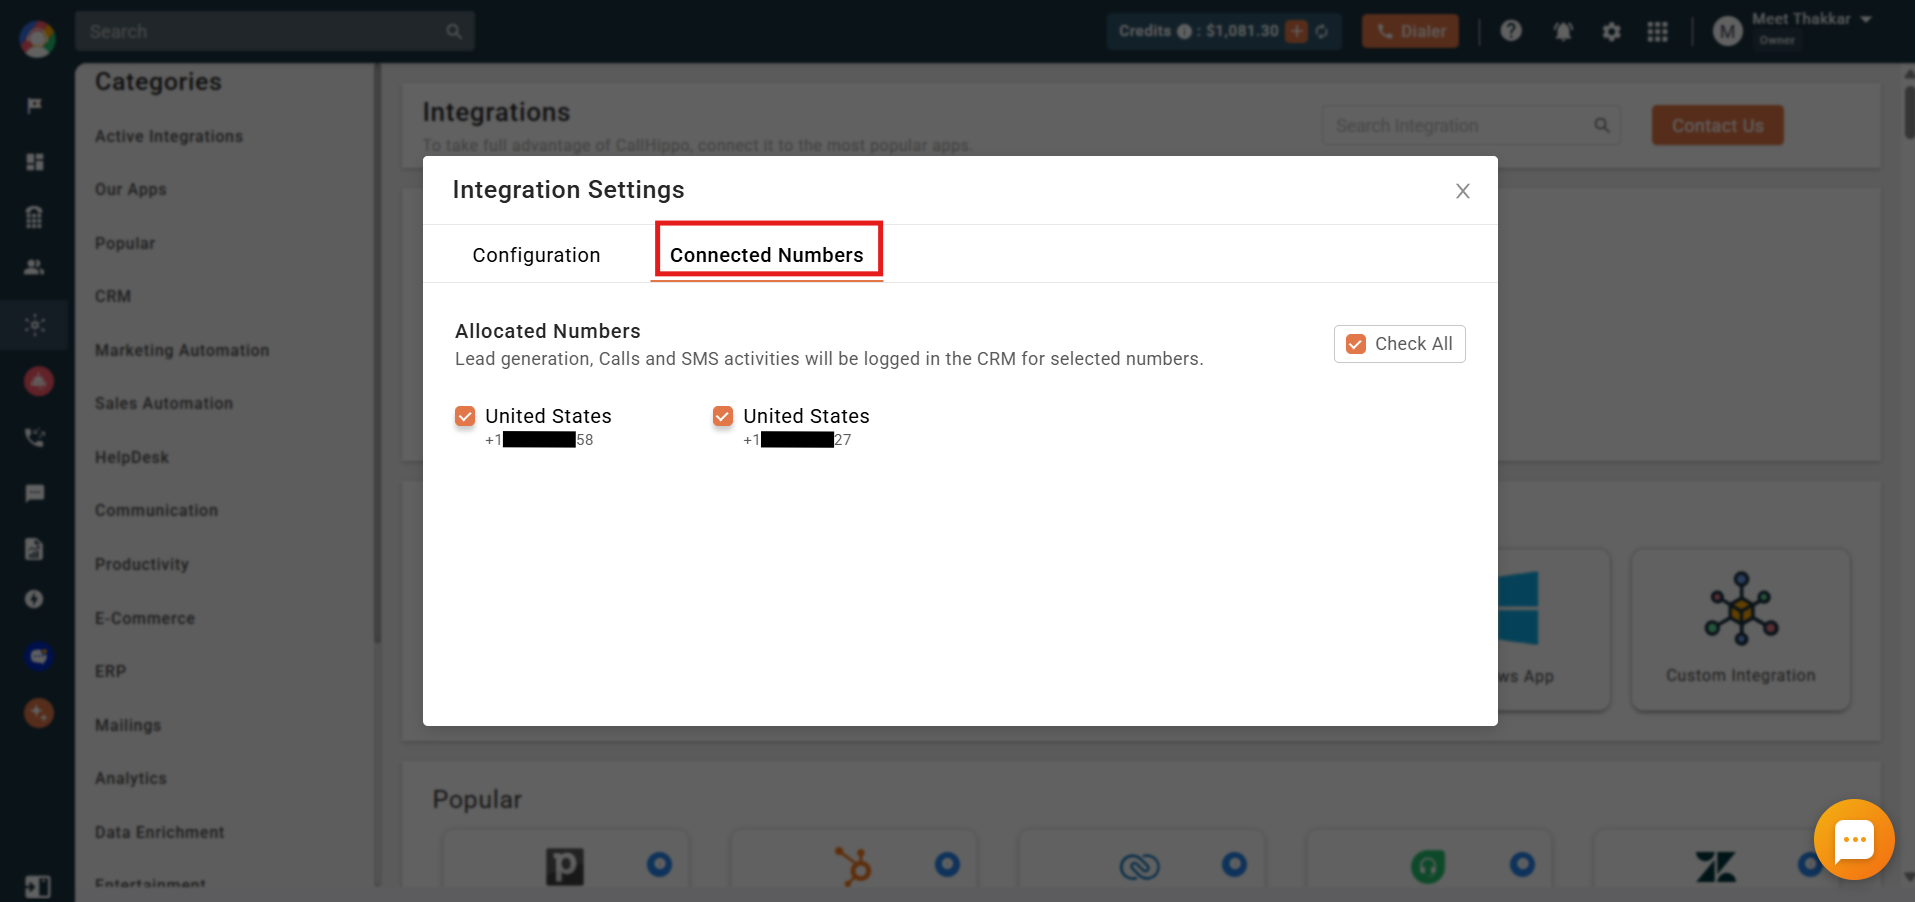
- Open the Connected Numbers tab to choose which phone numbers send activities to the CRM. All numbers are selected by default.
How syncing works
- GoHighLevel does not sync older contacts to CallHippo, or the other way around.
- When a call is made from GoHighLevel using the click-to-call extension, a new contact syncs to CallHippo automatically.
- Once a contact is synced, manually dialed outgoing calls and incoming calls on connected numbers sync back to GoHighLevel.
How calls and tasks are logged
- Connected incoming and outgoing calls are logged as completed tasks.
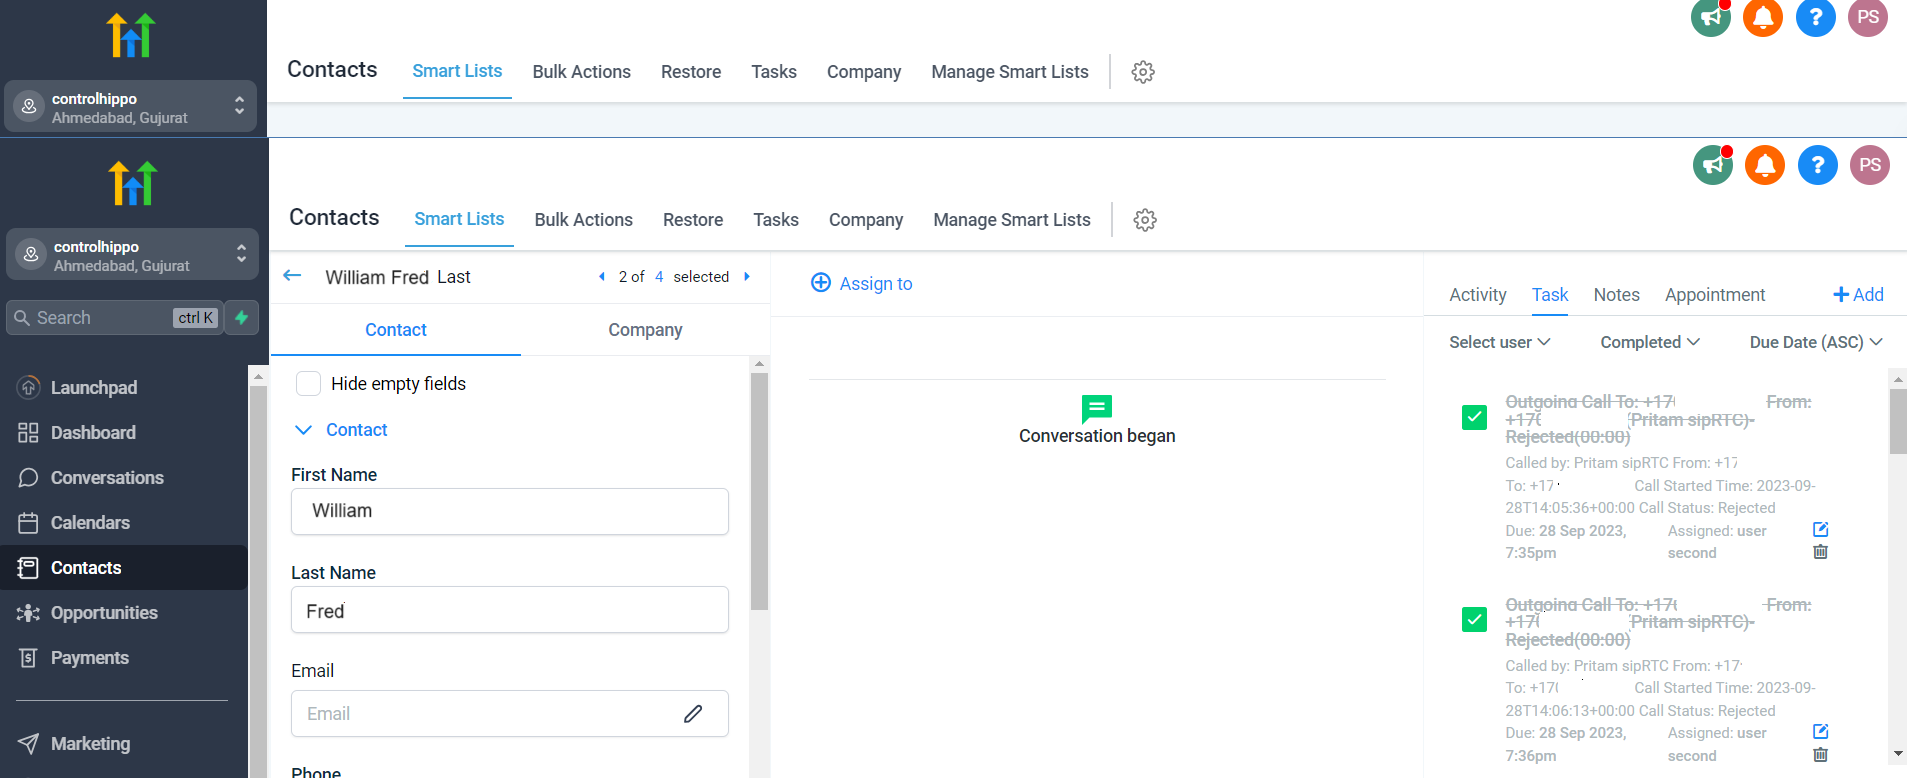
- Missed calls and voicemails are logged as pending tasks, and text messages also appear in the Task section.
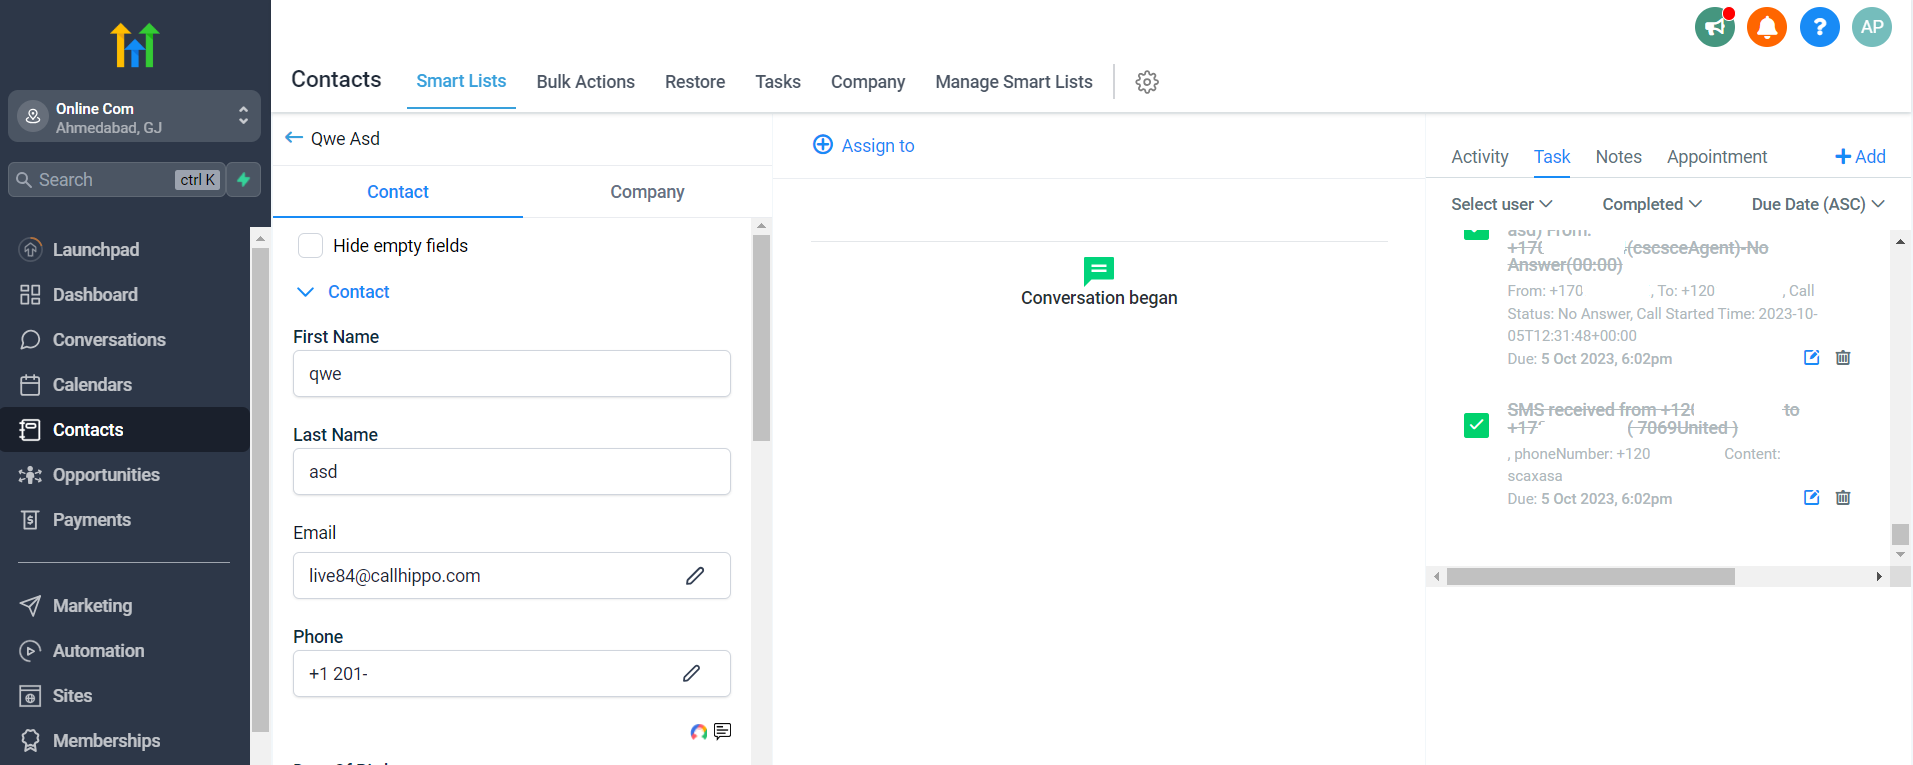
After-Call Work (ACW) activity is reflected in GoHighLevel too. If you have CallHippo’s call tags & disposition service enabled, the pushed activity includes the tags and disposition added on the ACW screen.
Note: This only syncs when tags and disposition are added on the ACW screen. Tags or disposition added later through the call logs will not sync.
Install the Click-to-Call extension
To place calls directly from GoHighLevel, install the CallHippo Click-to-Call Chrome extension first. Once installed, call and SMS icons appear next to a contact’s phone number so you can dial in one click.
- Install the extension from the Chrome Web Store: CallHippo Click-to-Call for Chrome.
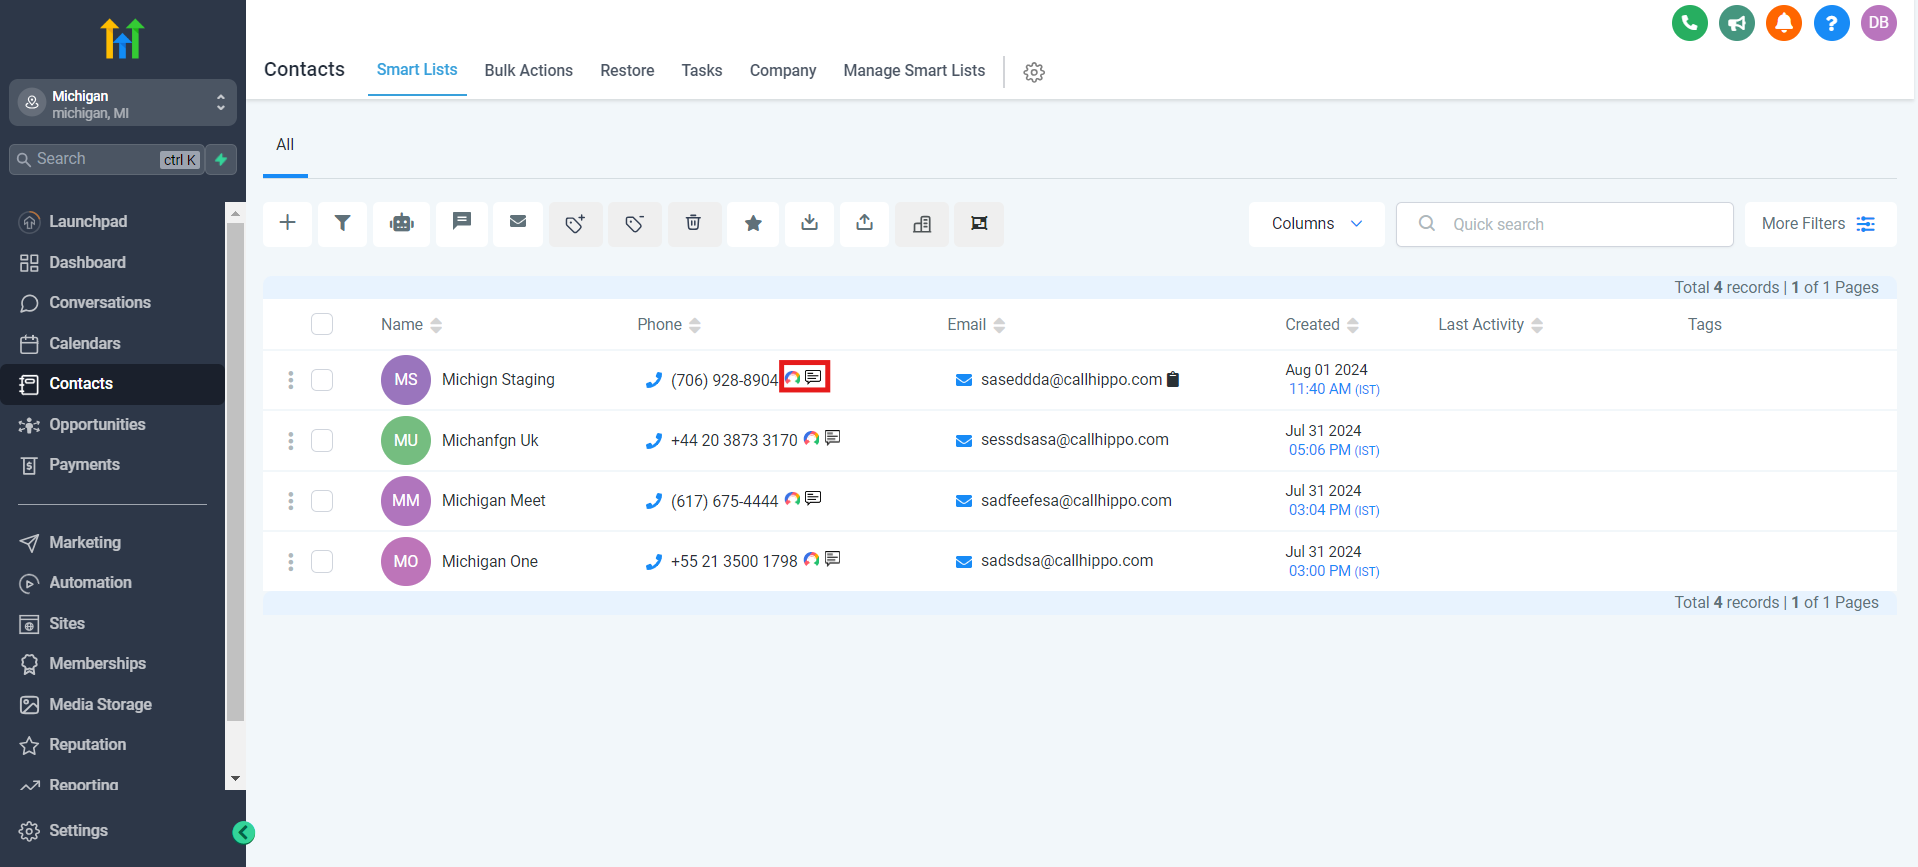
Show the assignee name in the Task list
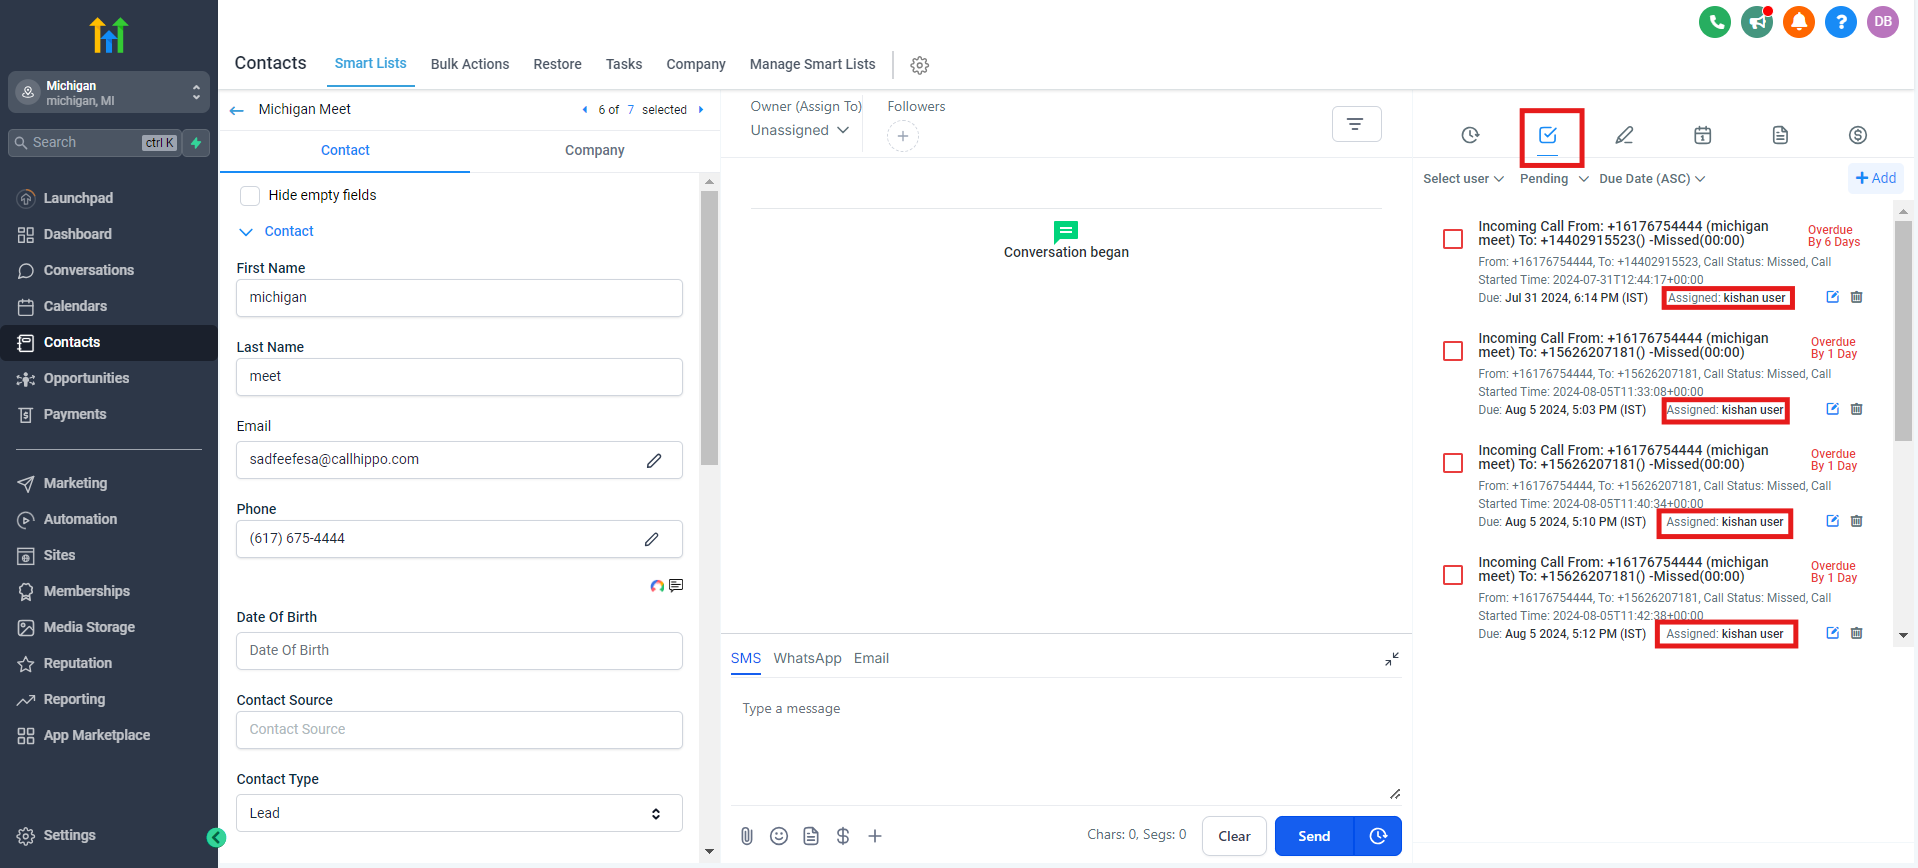
By default, the GoHighLevel Task list shows the assignee for each logged activity when the CallHippo user is also a GoHighLevel team member.
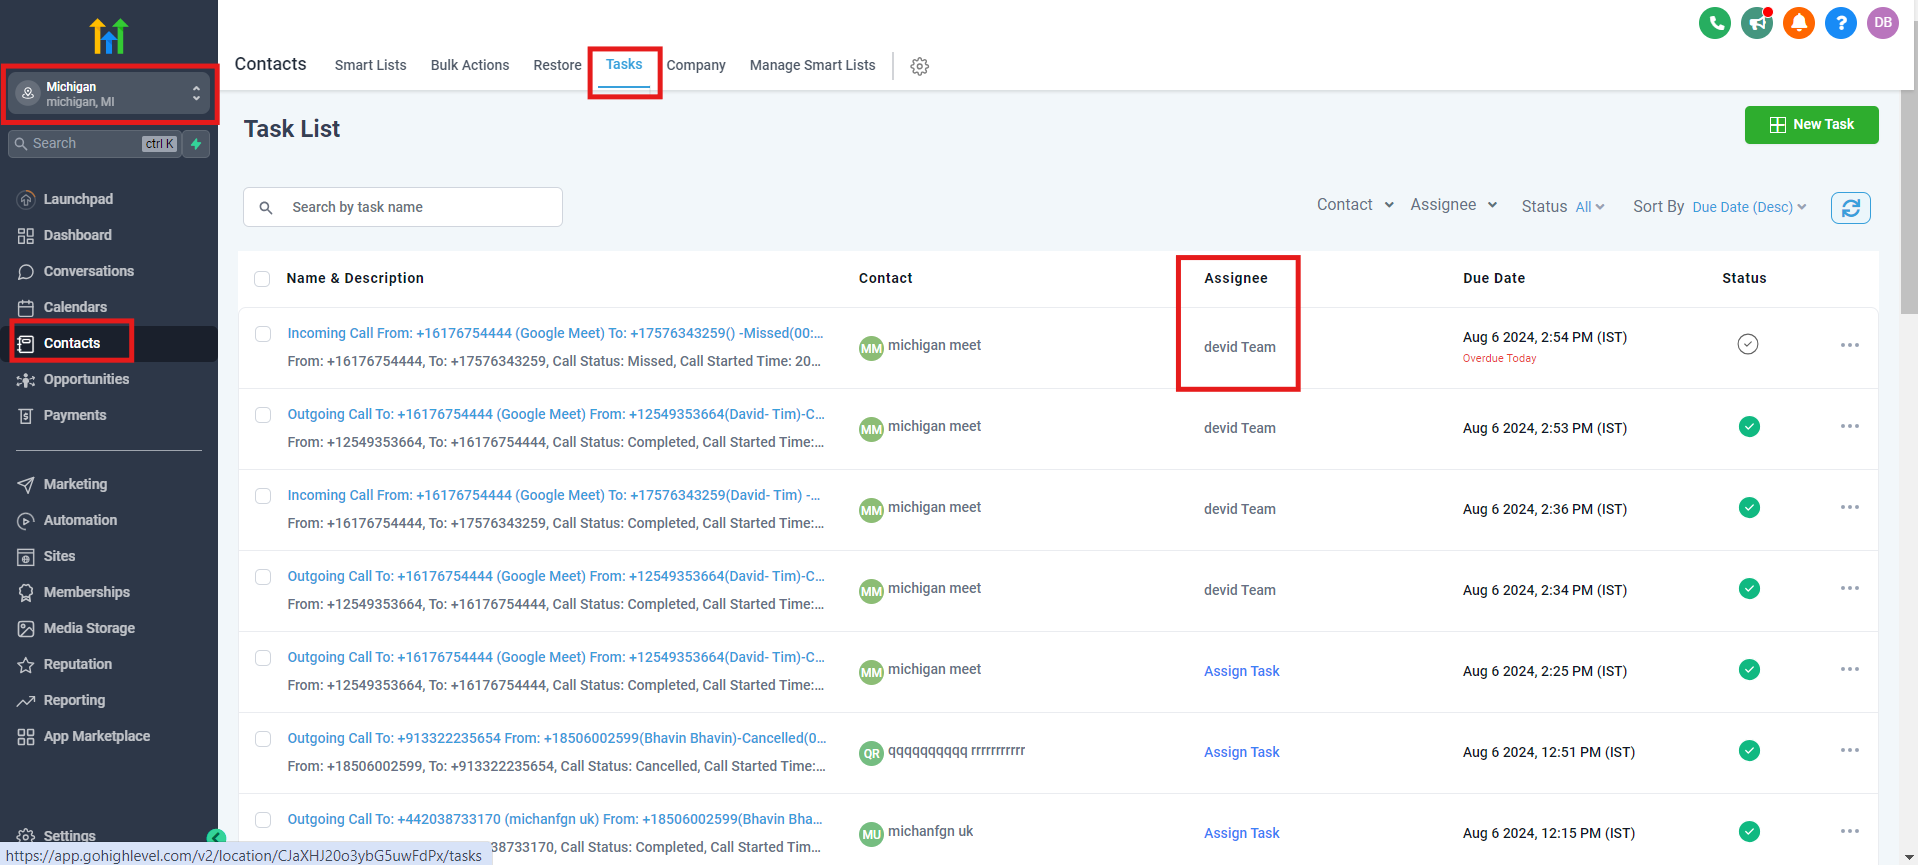
To make sure assignee names appear, add the user as a team member in GoHighLevel:
- From the Agency dashboard view, go to Settings.
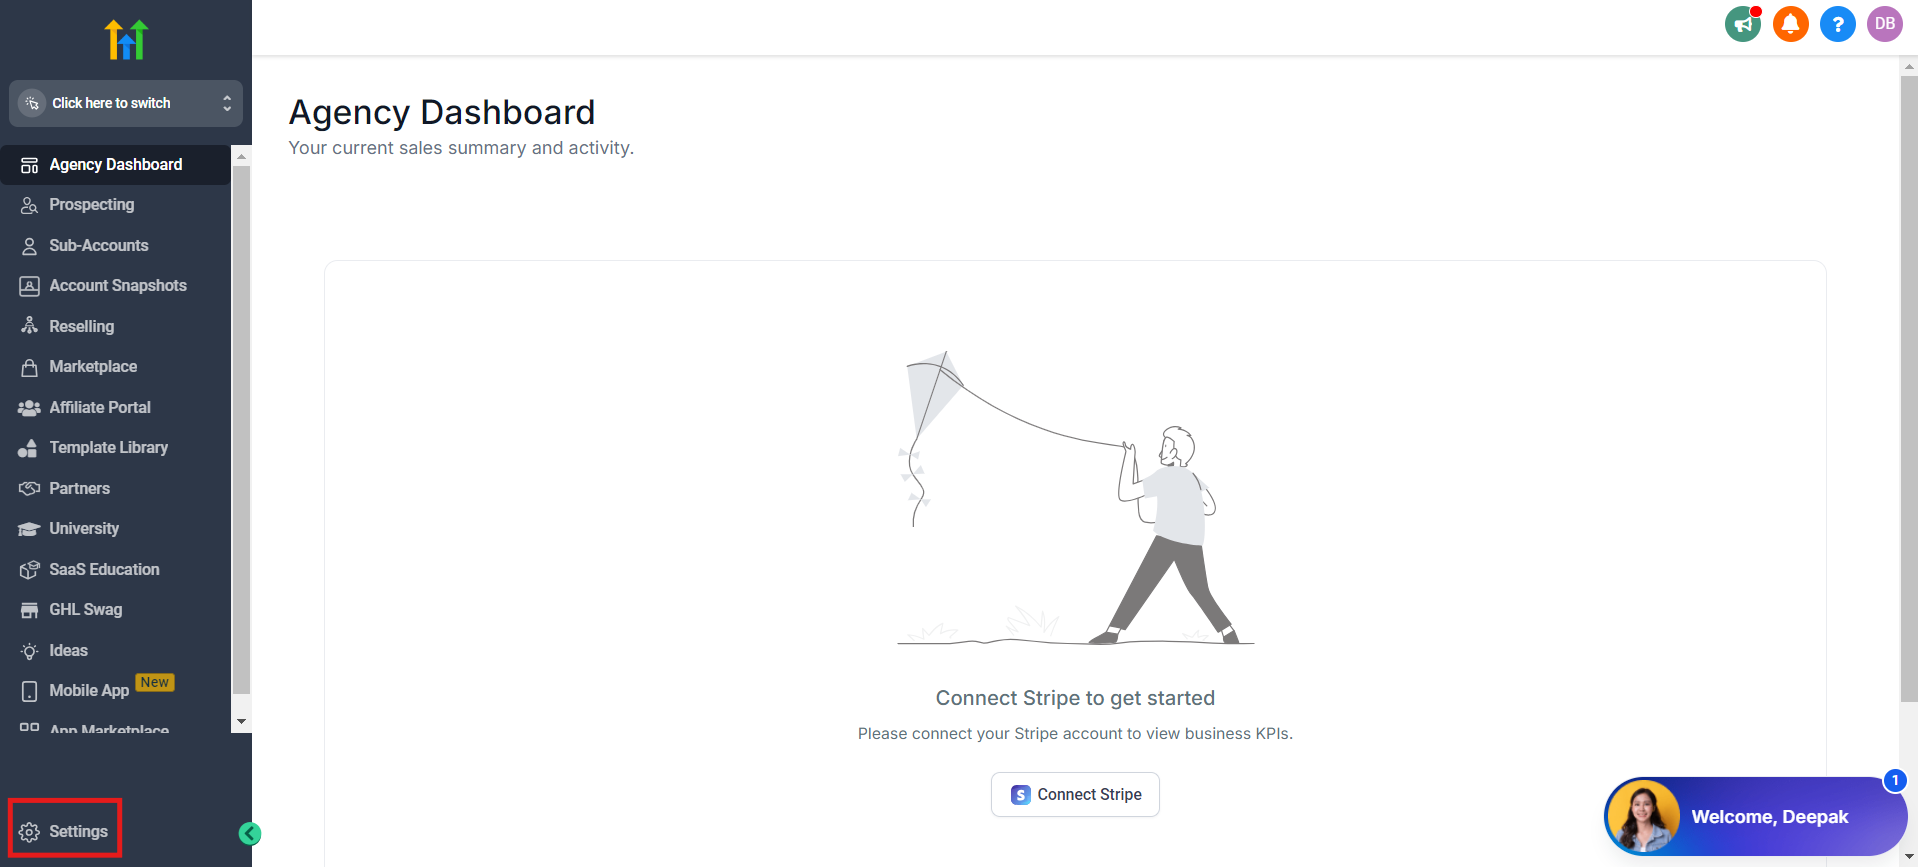
- Open the Team tab and click + Add Employee.
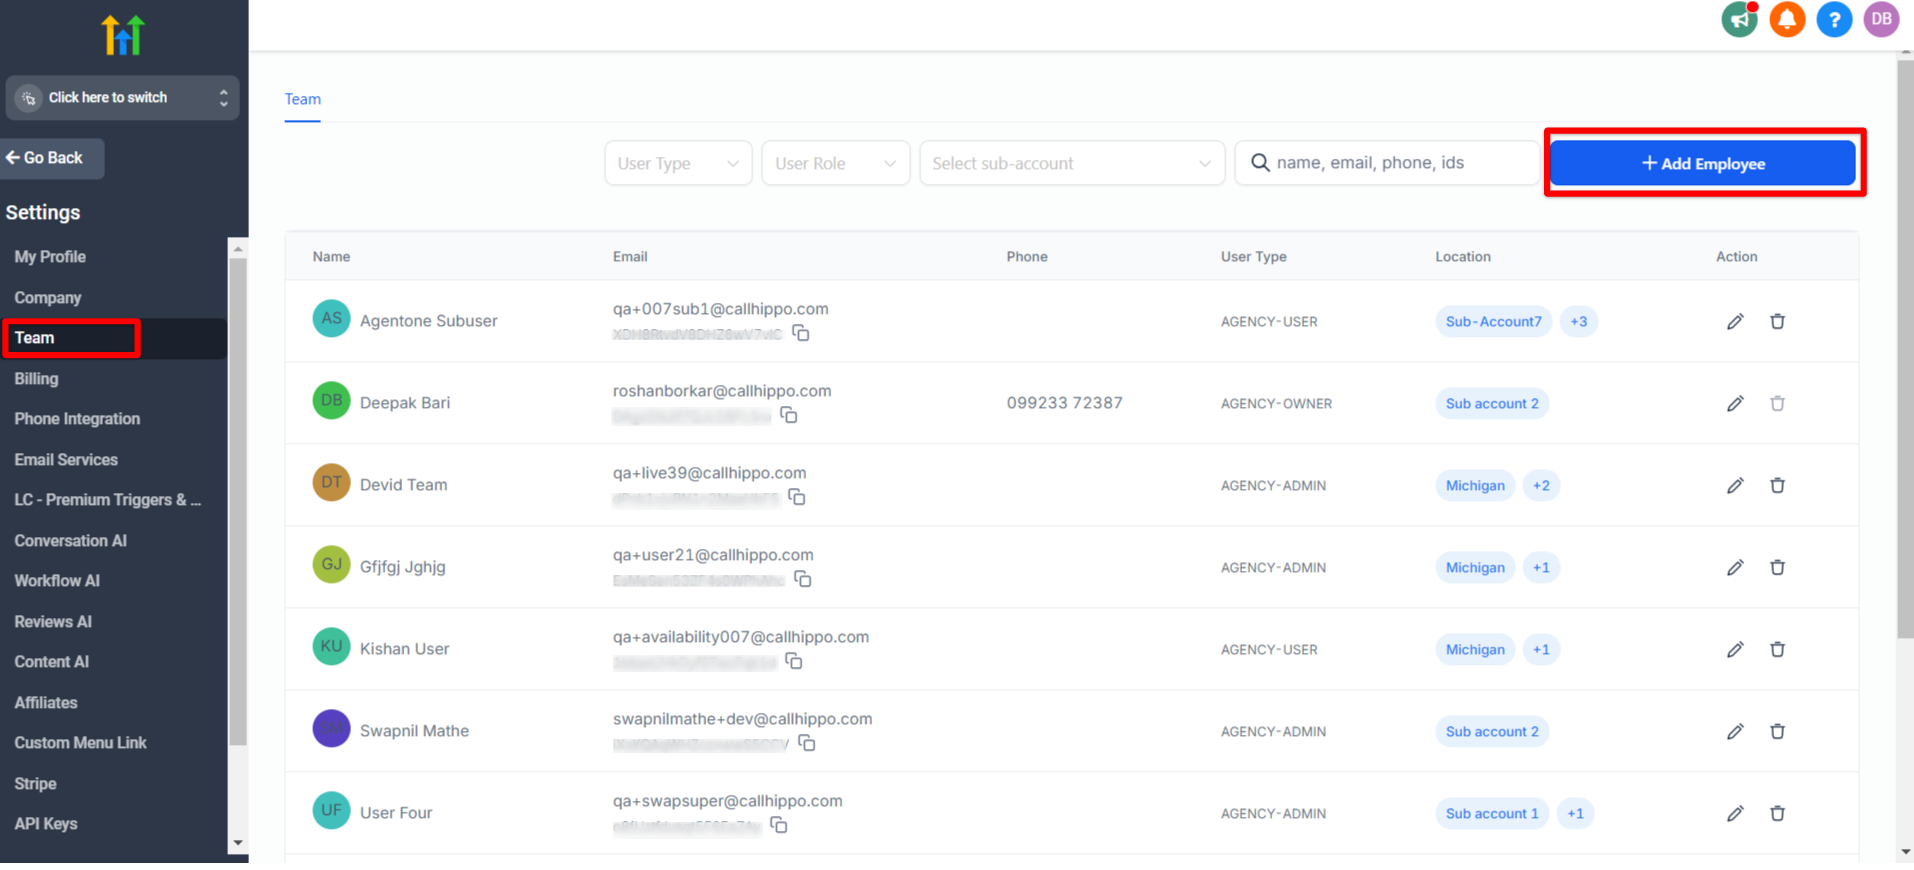
- Provide the required details, give the user a role and role type, and assign the relevant sub-accounts.
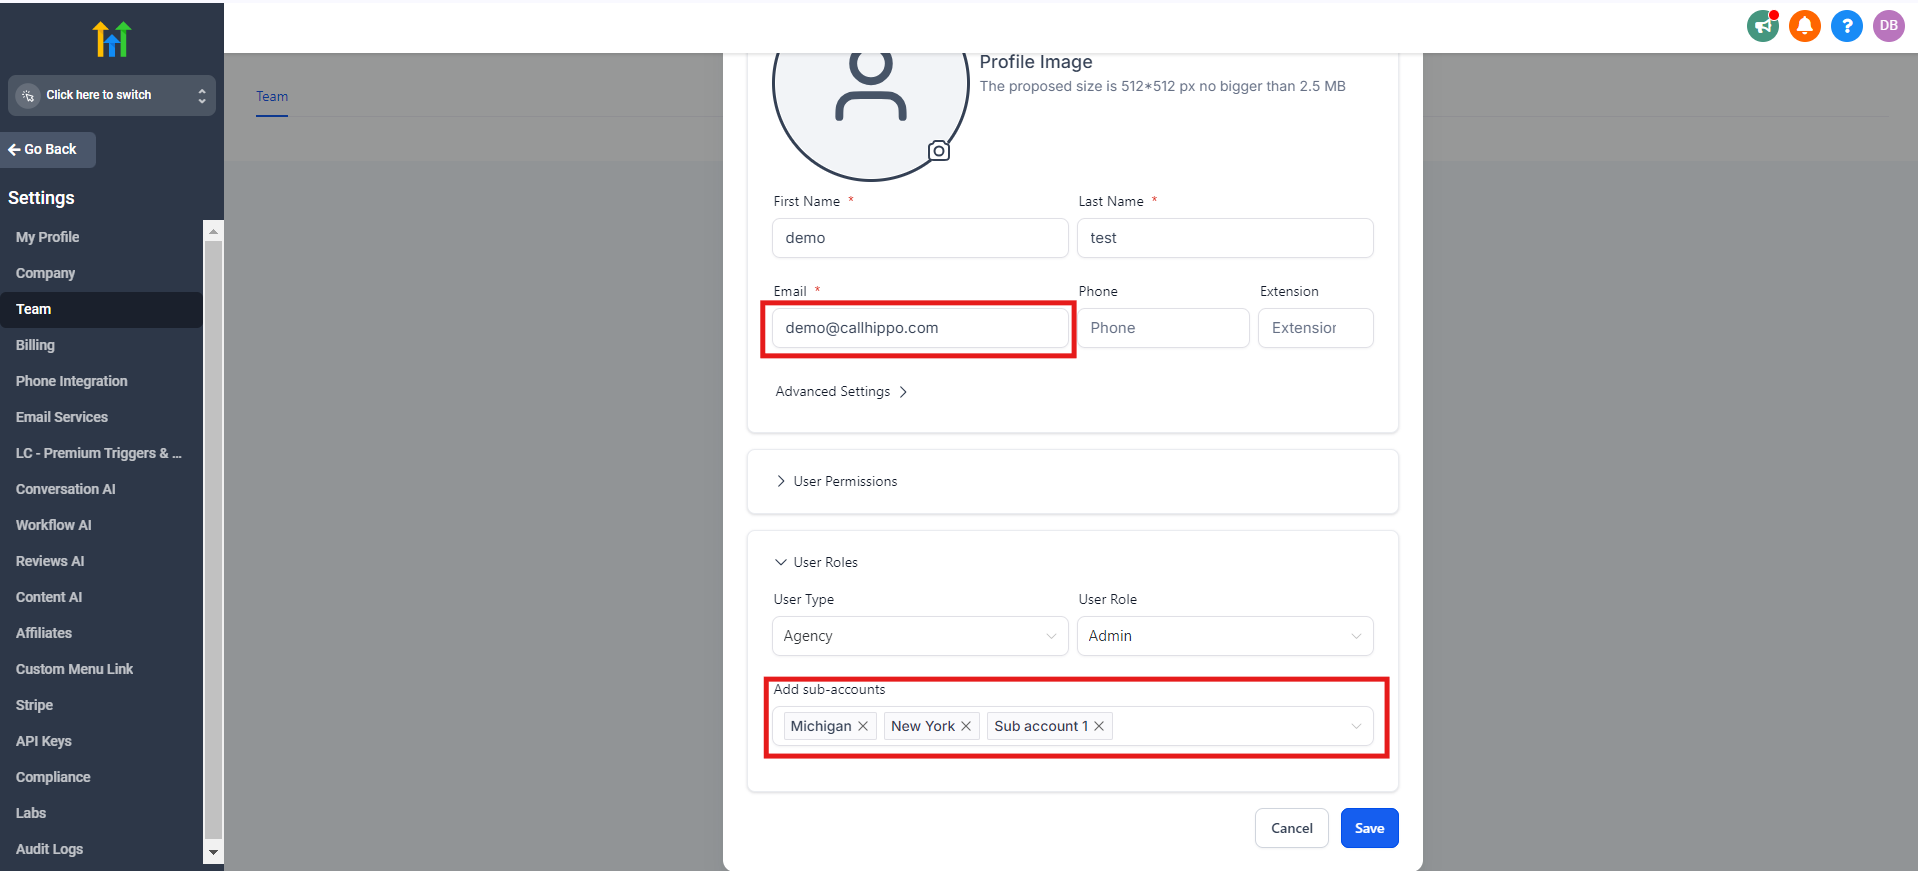
- Click Save. The new employee is added to your team.
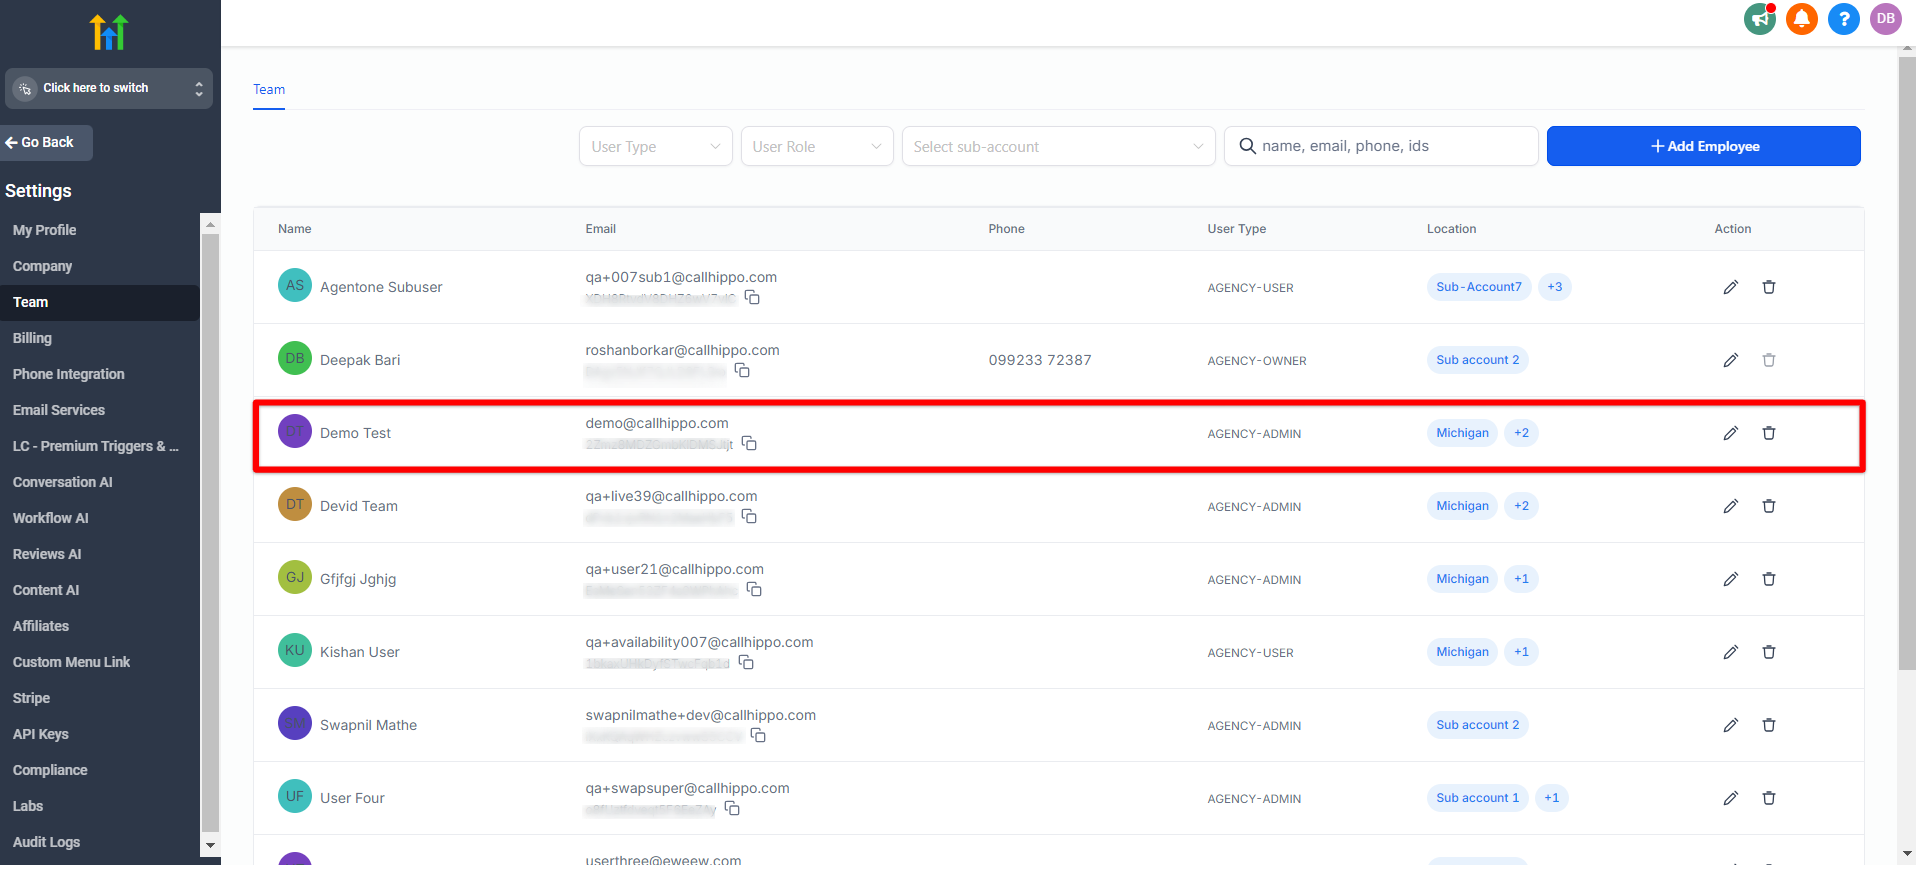
Keep these points in mind:
- In the Email field, use the same email ID assigned to the user in CallHippo.
- For the sub-accounts assigned when adding the team member, incoming call and SMS activity in the Task tab will show the assignee name.
- After adding team members, re-integrate GoHighLevel with CallHippo.
- Any CallHippo user who is not added as a GoHighLevel team member will have no assignee name and will instead show Assign Task.
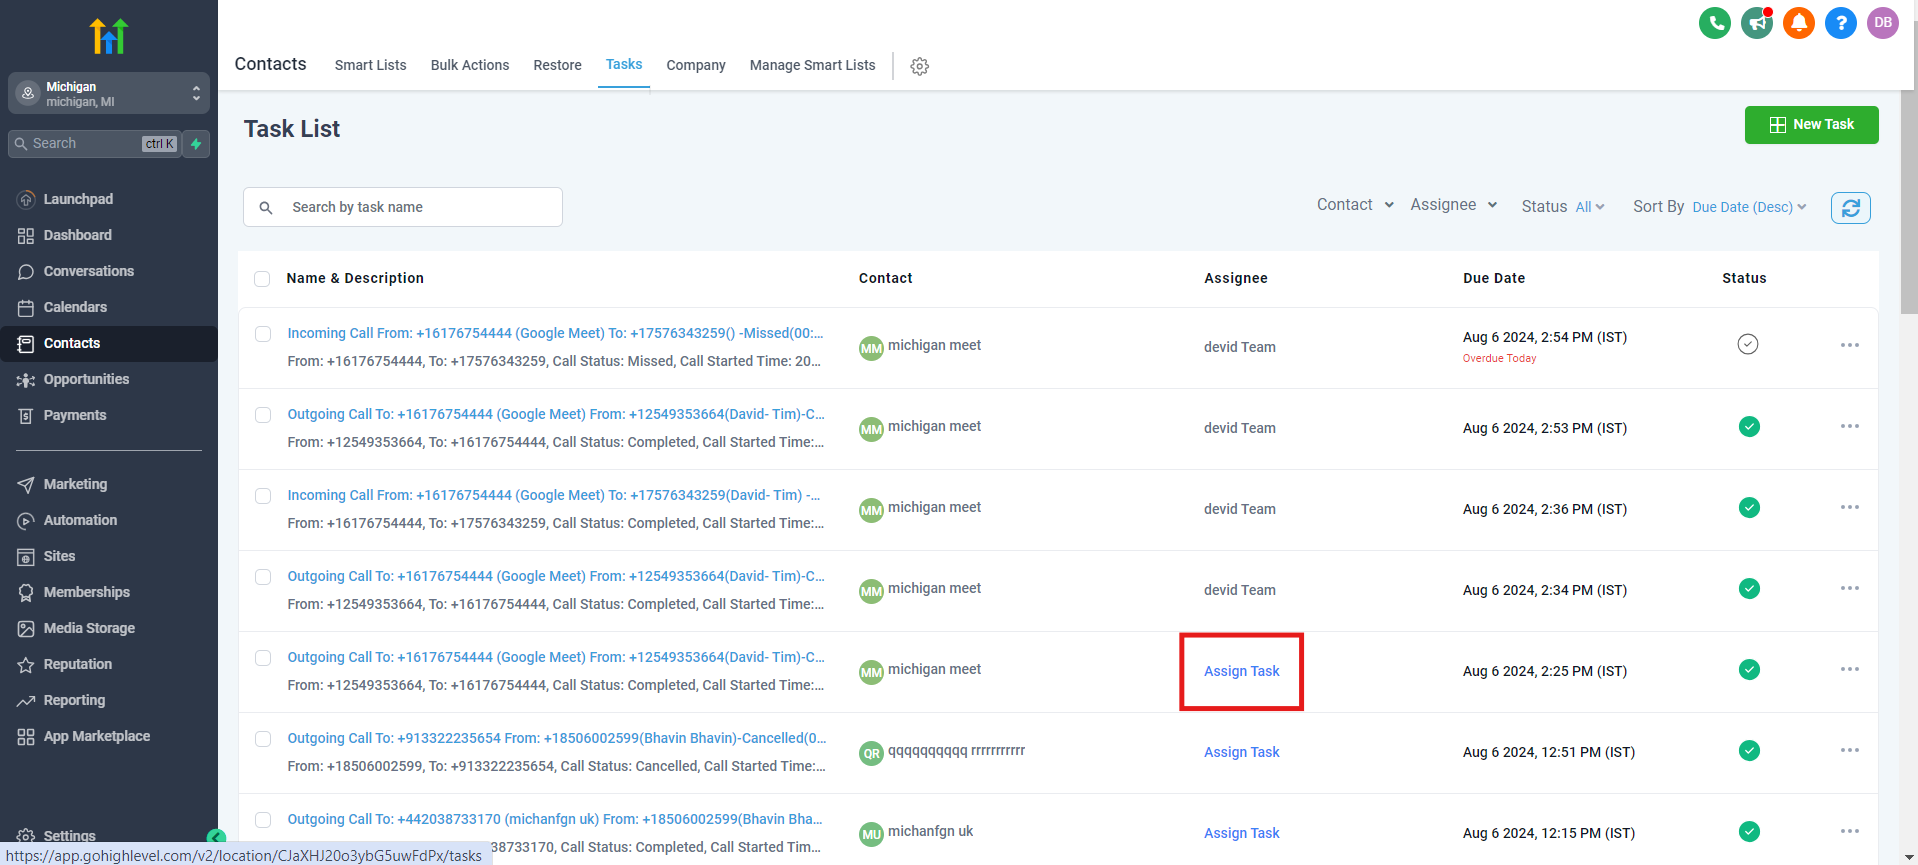
The assignee name also appears under a specific contact, at Contacts > Smart Lists > (a contact) > Tasks.
Still need help? Reach us at [email protected].