
Connecting OneLogin Single Sign-On (SSO) to CallHippo lets your team sign in through one secure identity provider, so you can manage access centrally and keep logins consistent across web, desktop, and mobile. This guide walks you through activating the integration and configuring SSO for both web and Android login.
Activate the OneLogin SSO integration in CallHippo
- Log in to your CallHippo account.
- Open Integrations from the left menu.
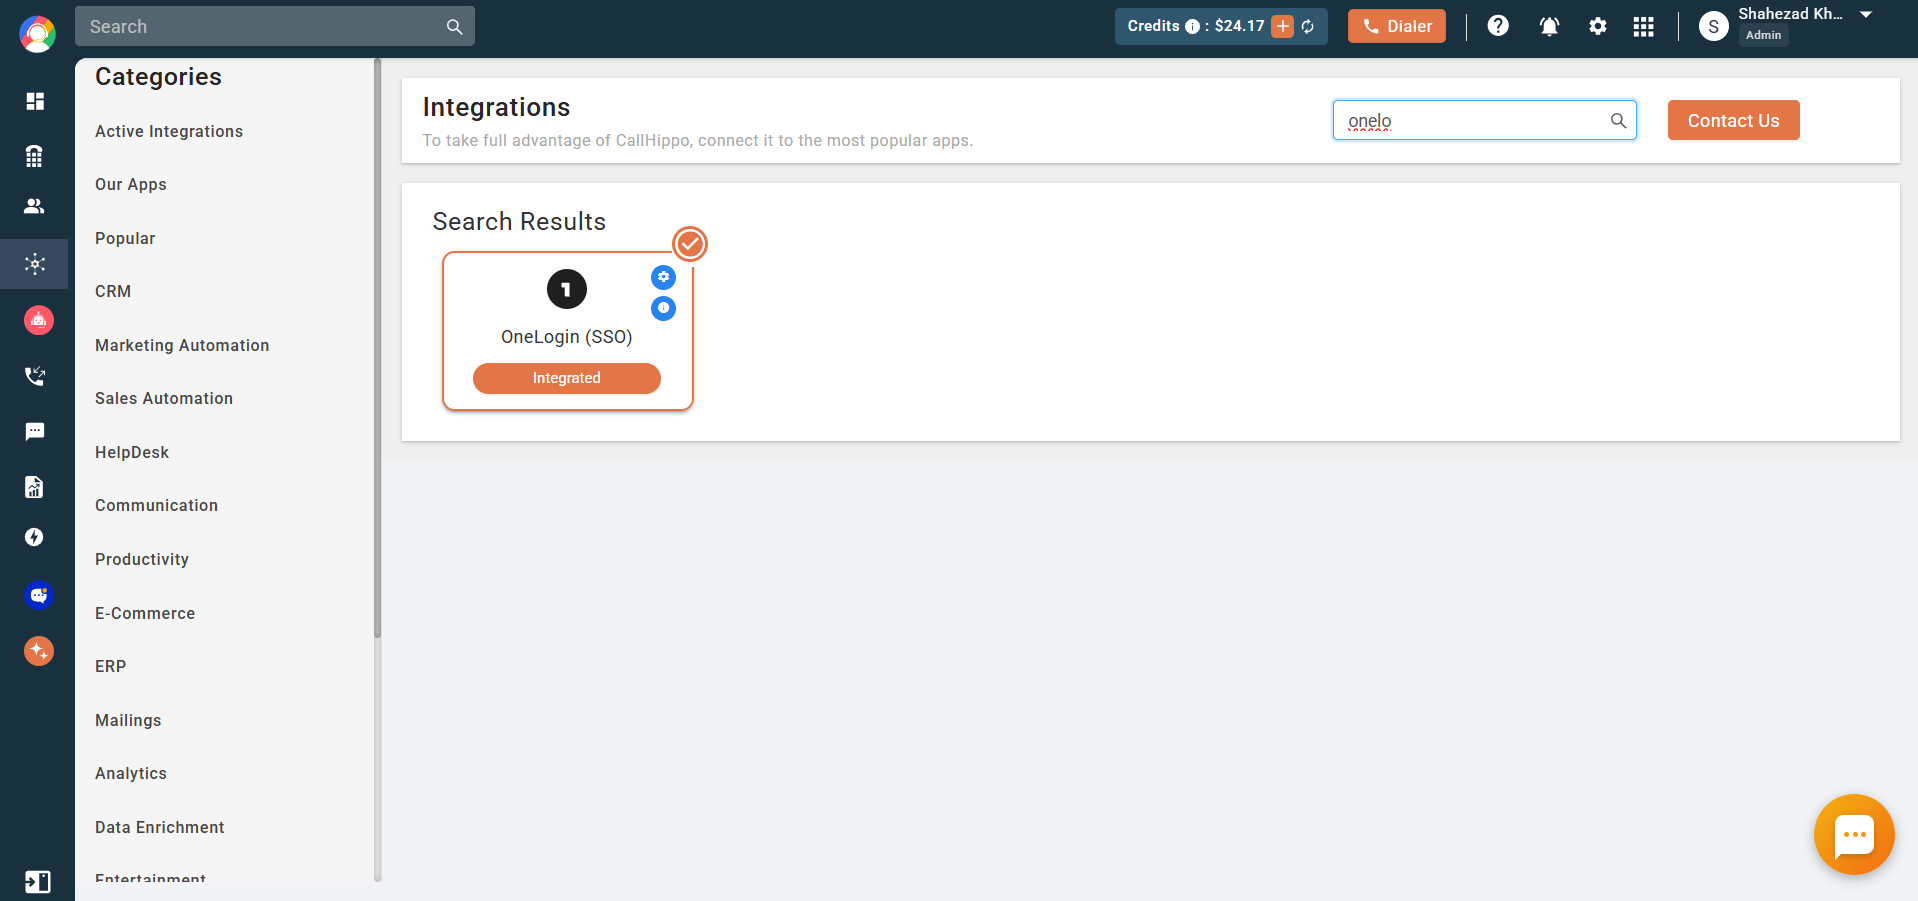
- Search for OneLogin SSO and click Connect.
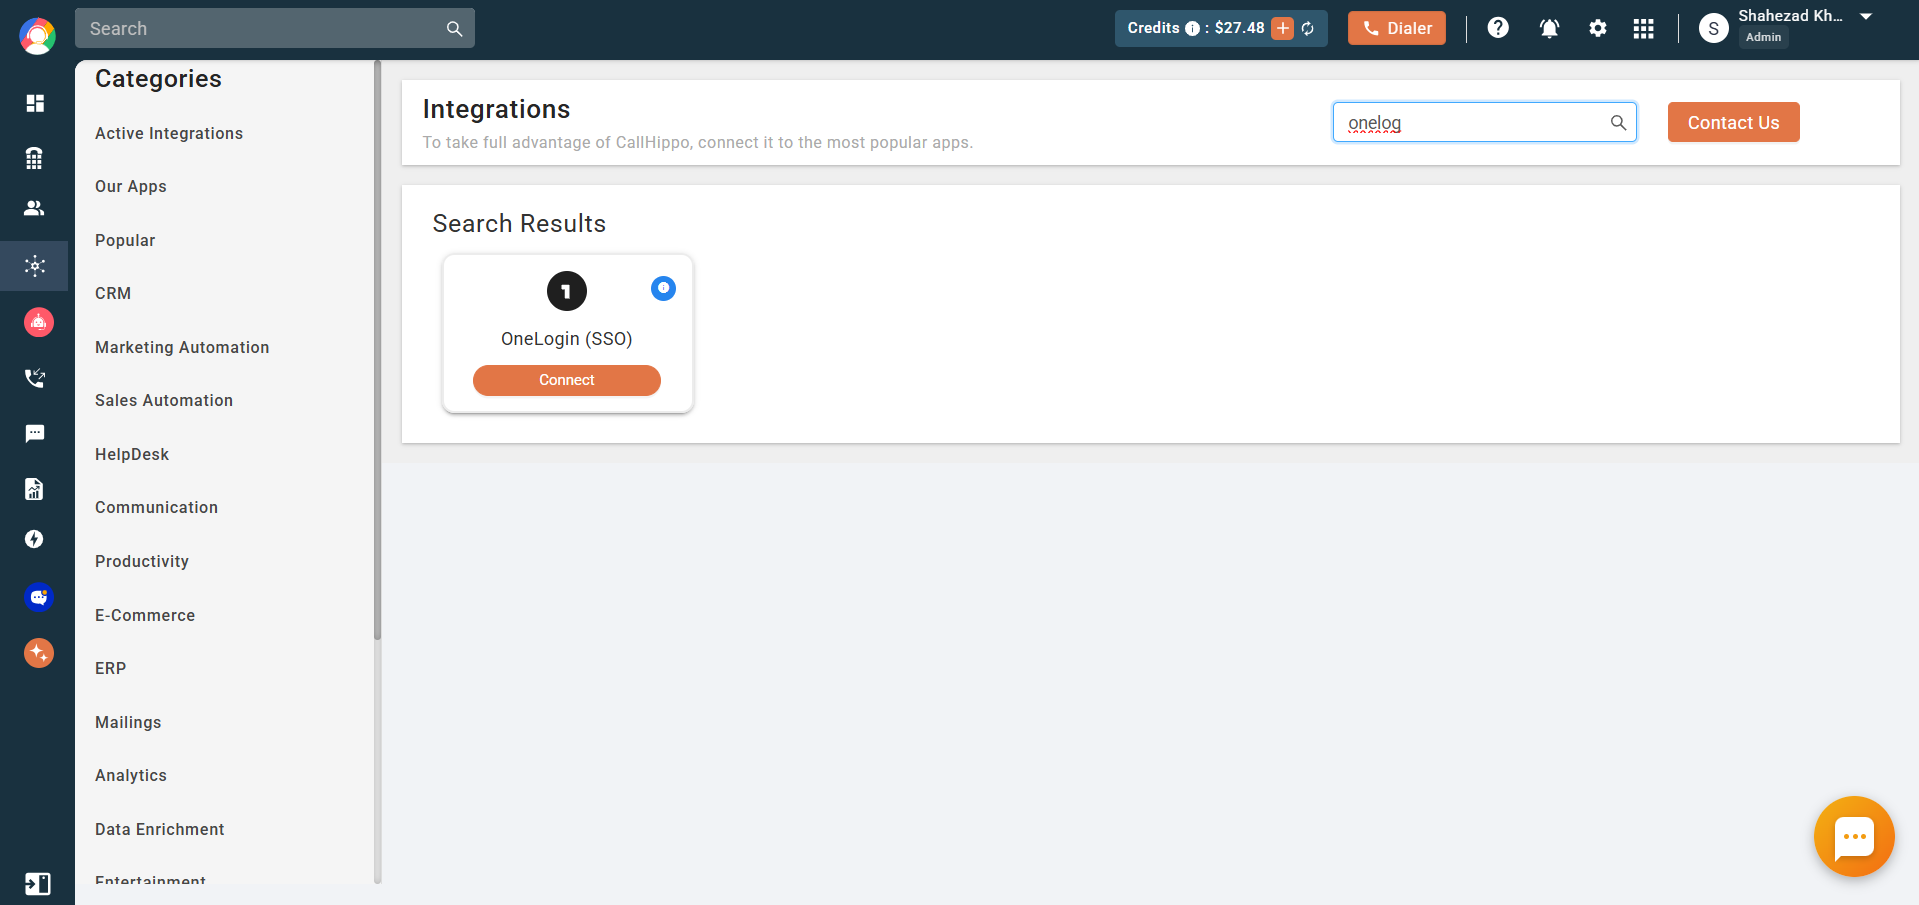
- In the popup that appears, click Connect Now.
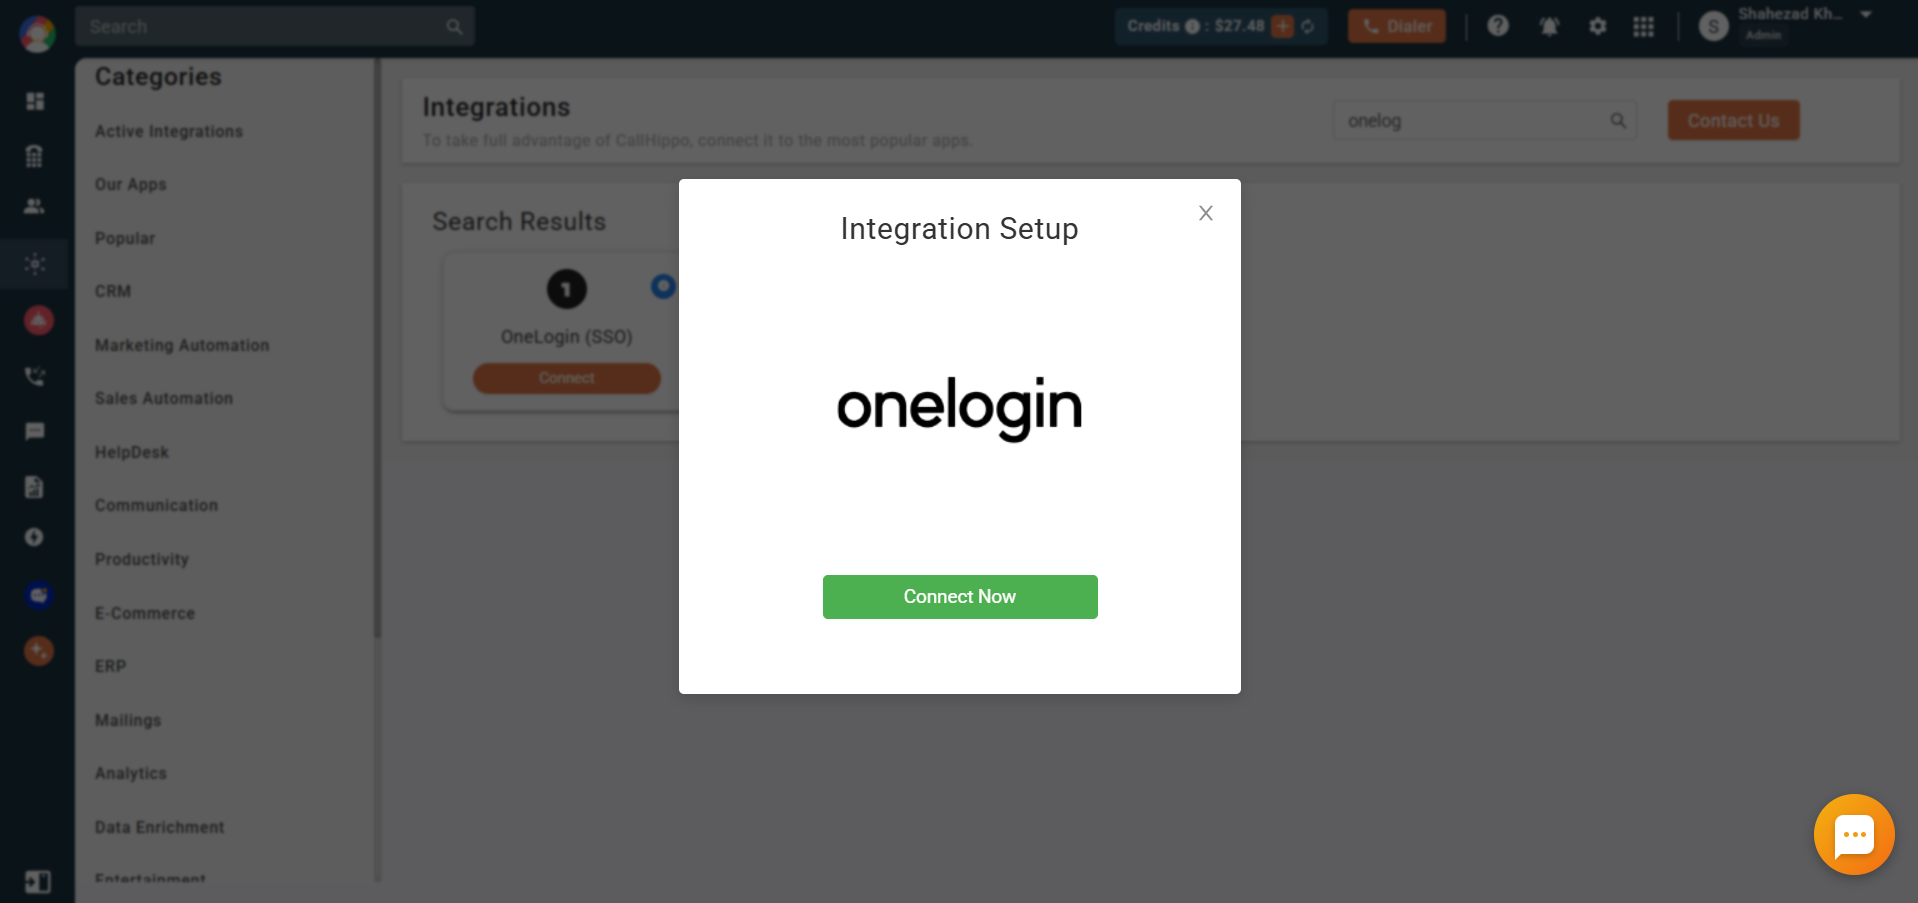
- The integration status now shows In Progress.
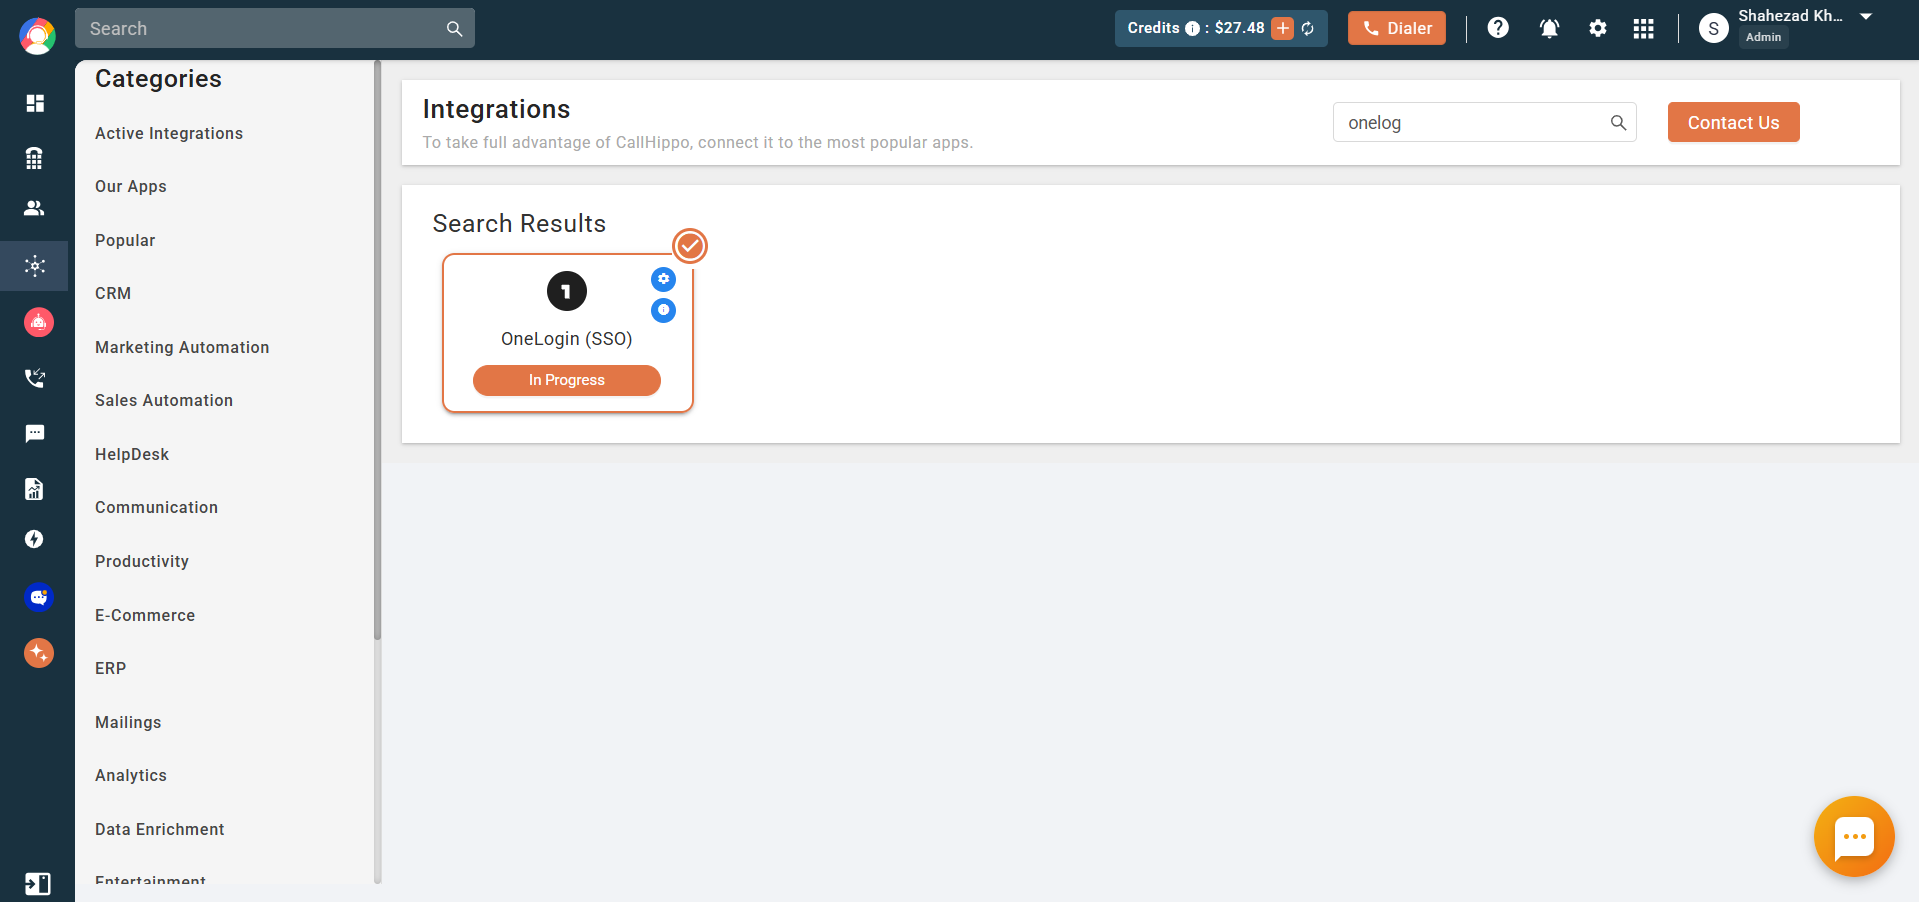
- The Integration Settings popup opens. Fill in the required details on the Configuration tab to finish setup, following the sections below.
Configure SSO for web login
- Sign in to your OneLogin account.
- Go to Security > Certificates and click New.

- Choose the key length, signature, and expiration, then click Save. We recommend a key length of 2048 and a signature of at least SHA-256.
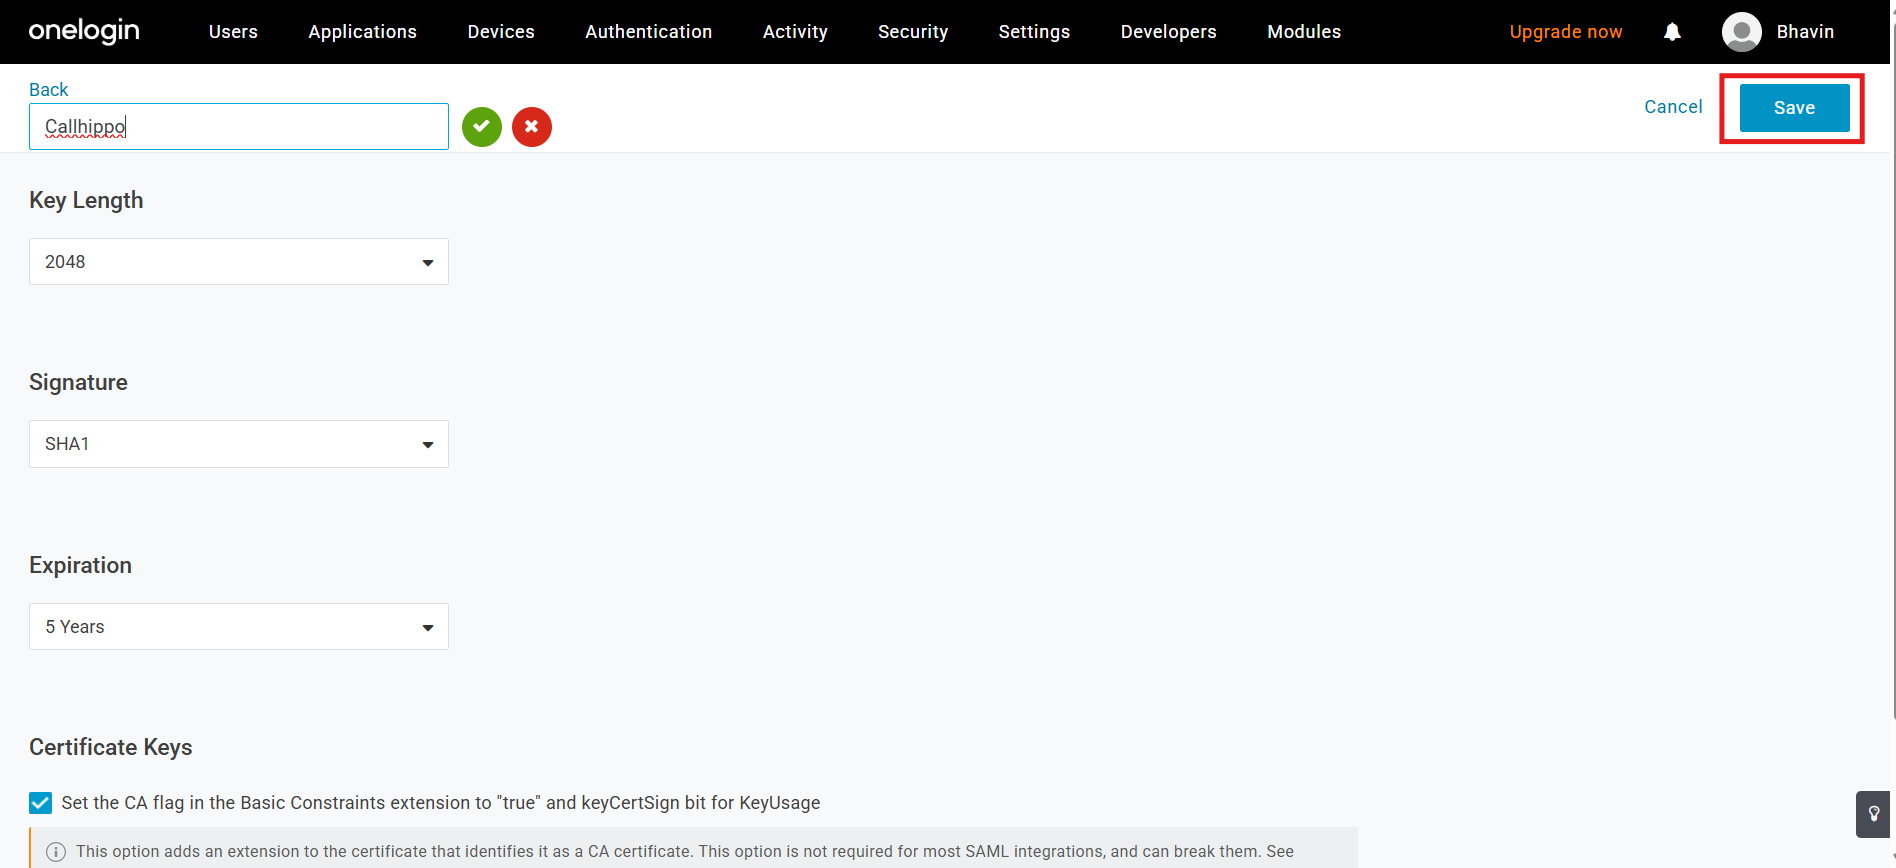
- OneLogin generates a security certificate. Copy the complete X.509 certificate.
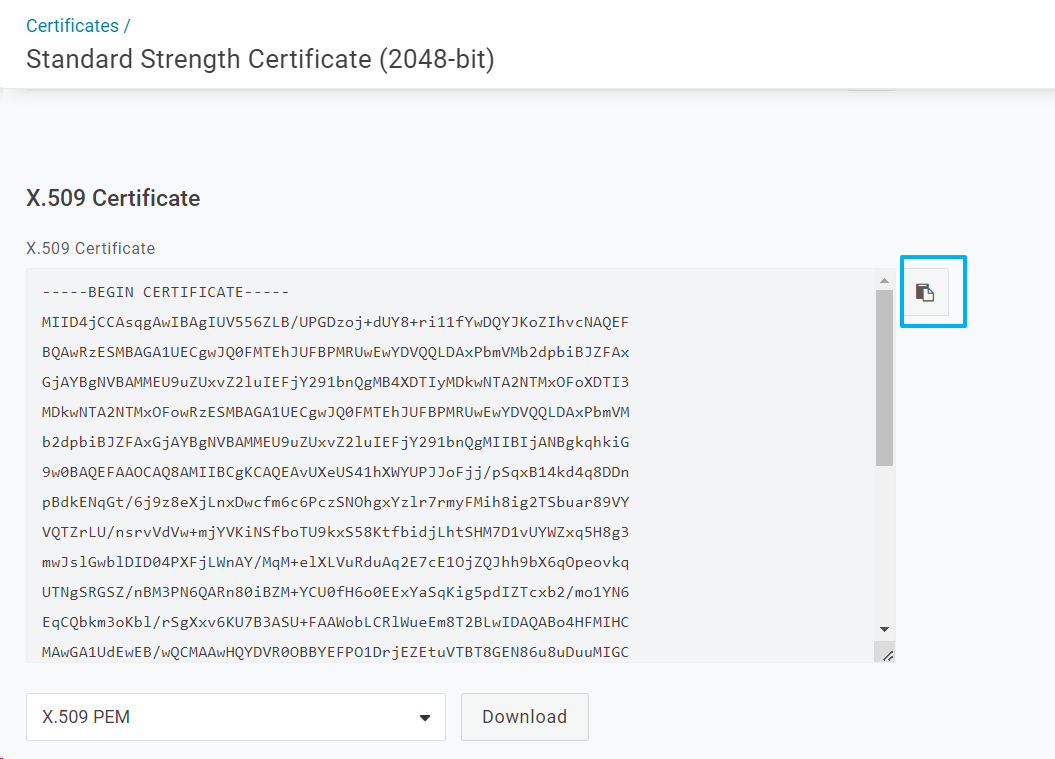
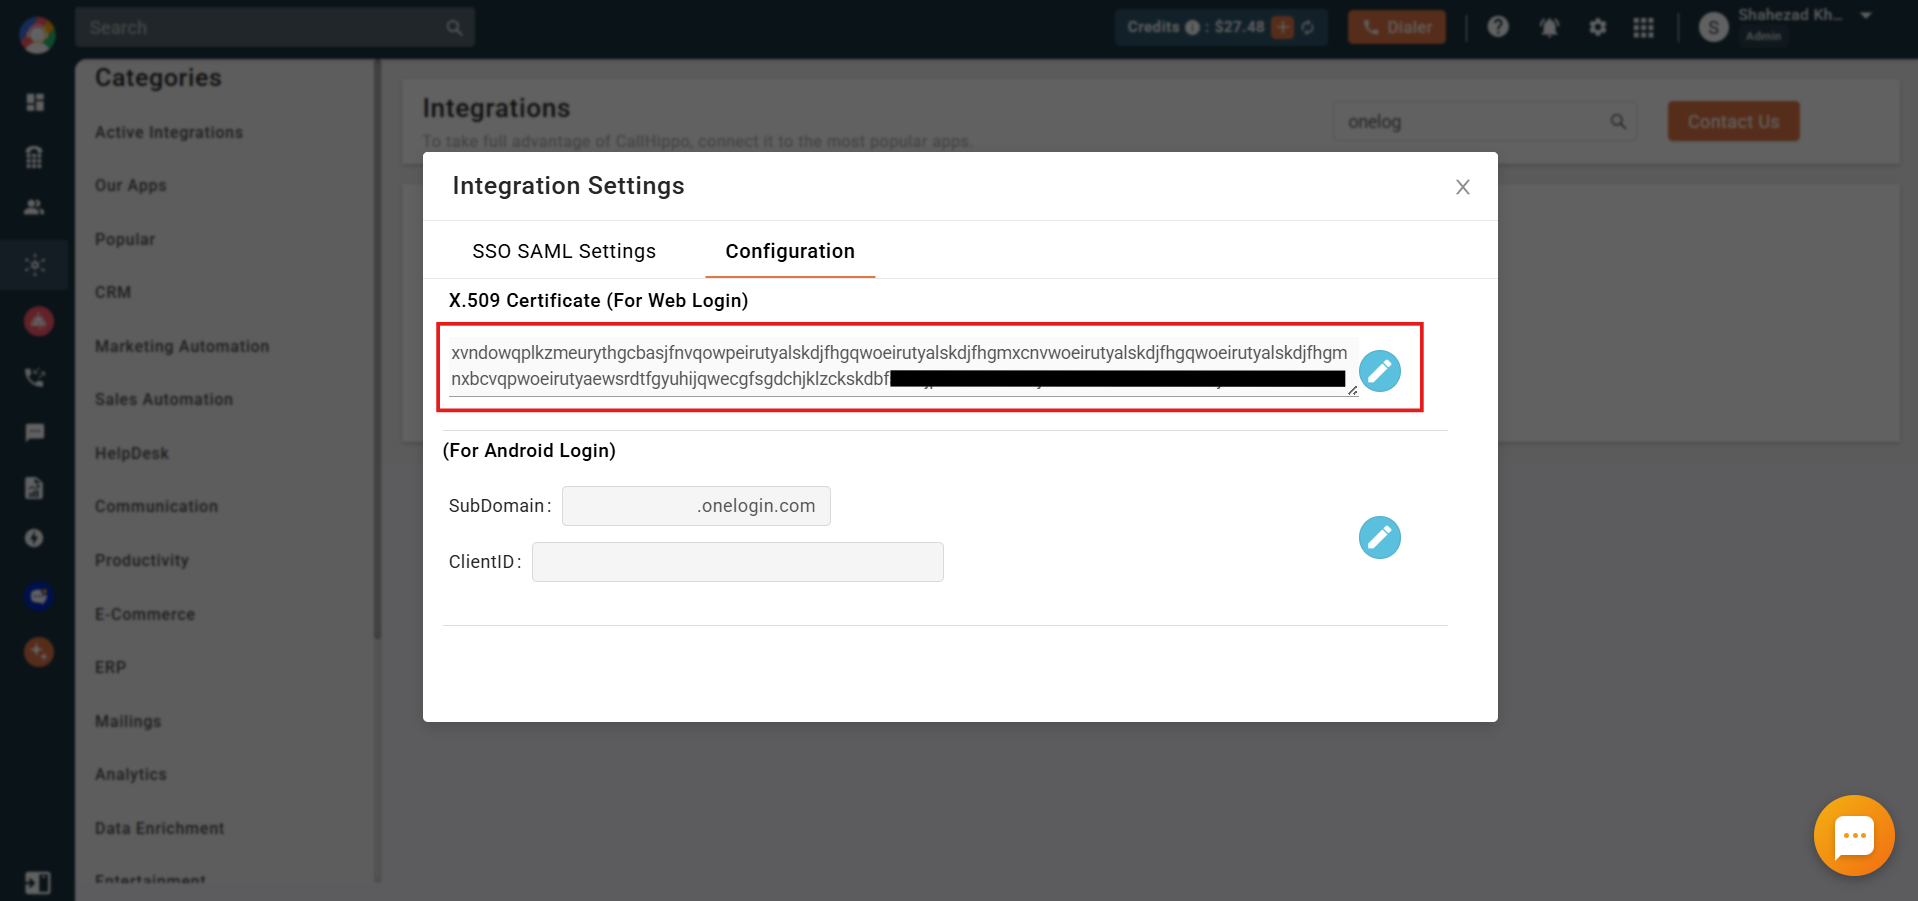
- Back in CallHippo, open the OneLogin SSO Integration Settings > Configuration tab, edit the X.509 Certificate (For Web Login) field, paste the copied certificate, and click Save.
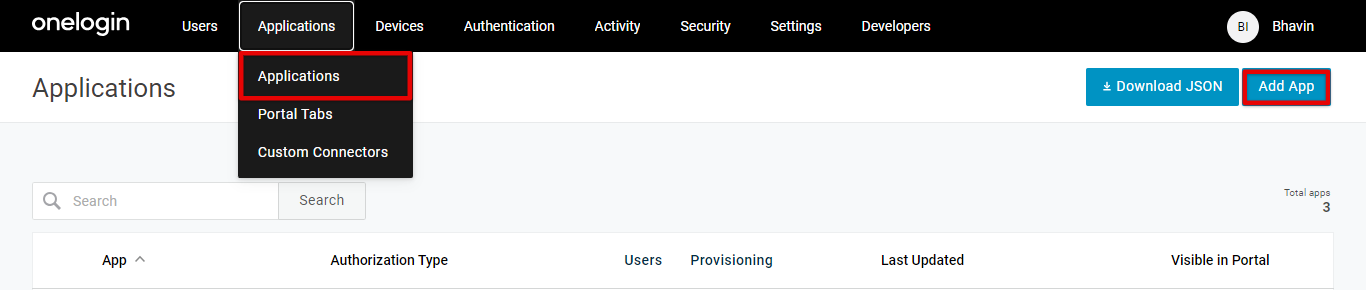
- In OneLogin, go to Applications > Applications and click Add App.
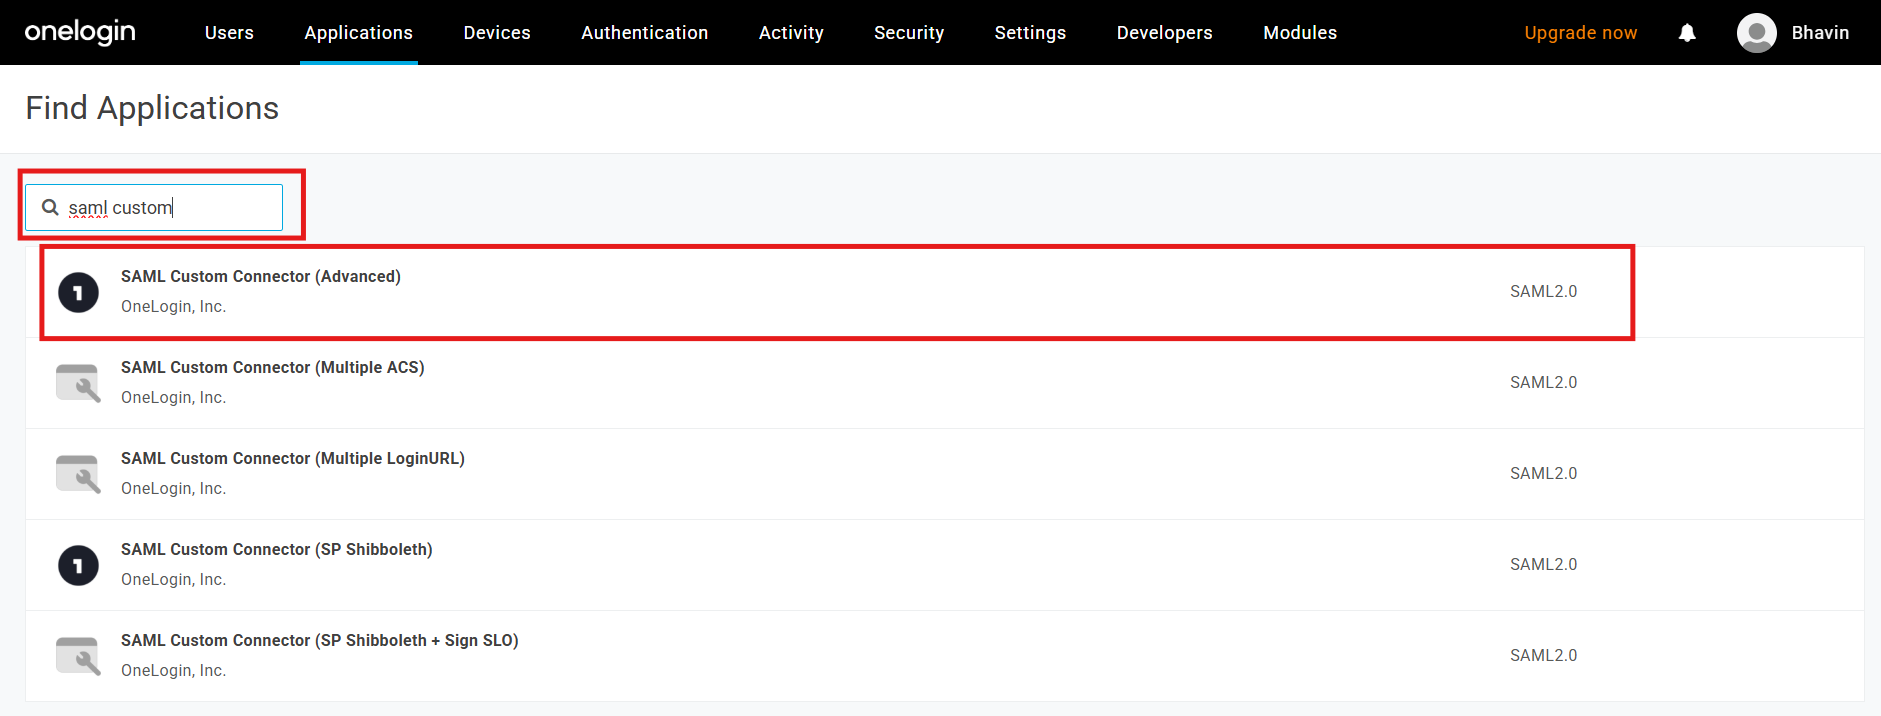
- Search for SAML custom and select SAML Custom Connector (Advanced).
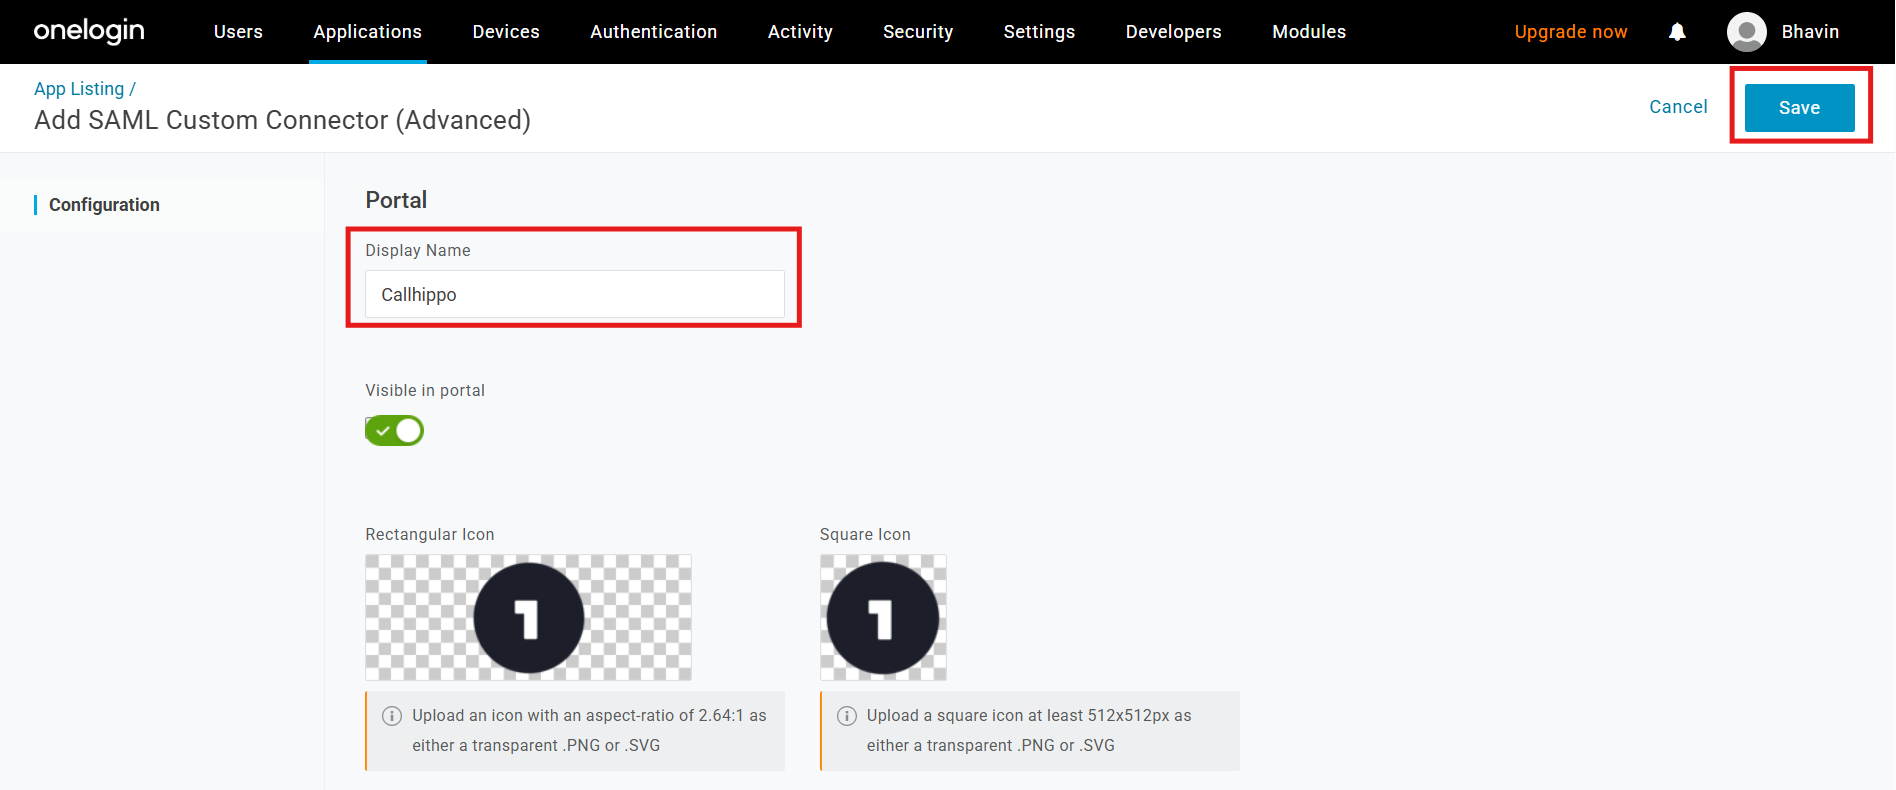
- Enter a portal Display Name and click Save.
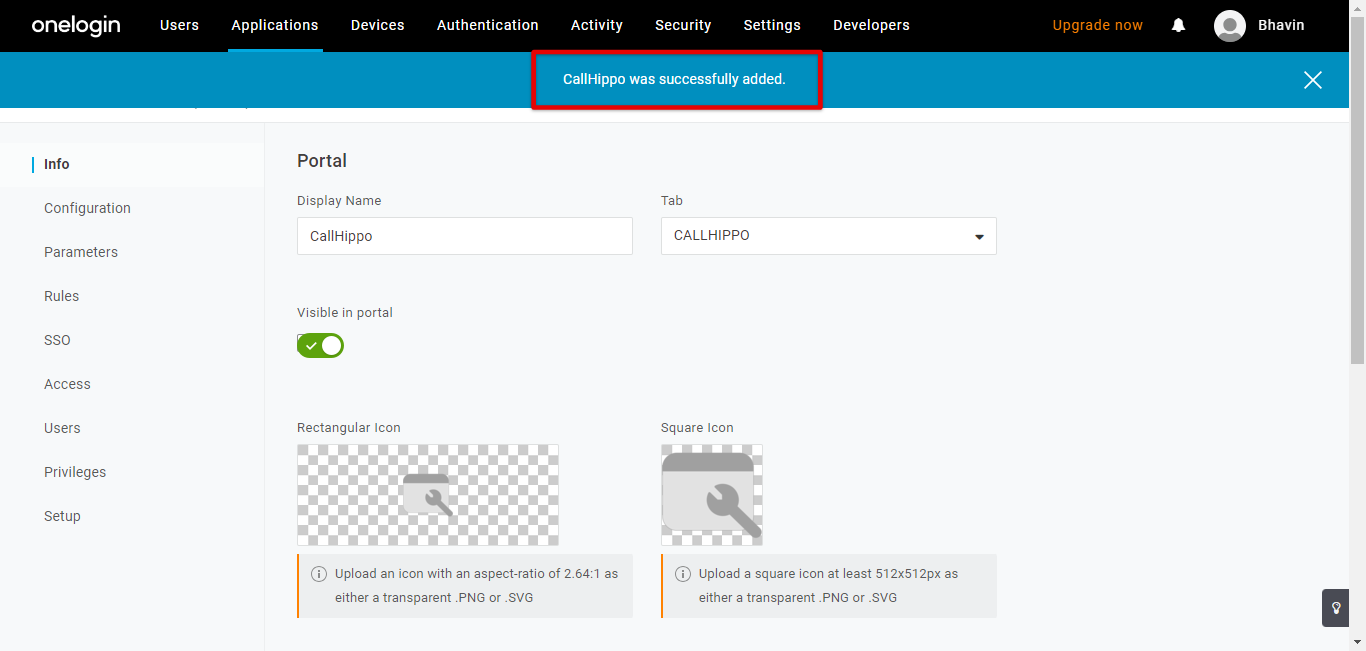
- You will see a confirmation that the app was added successfully.
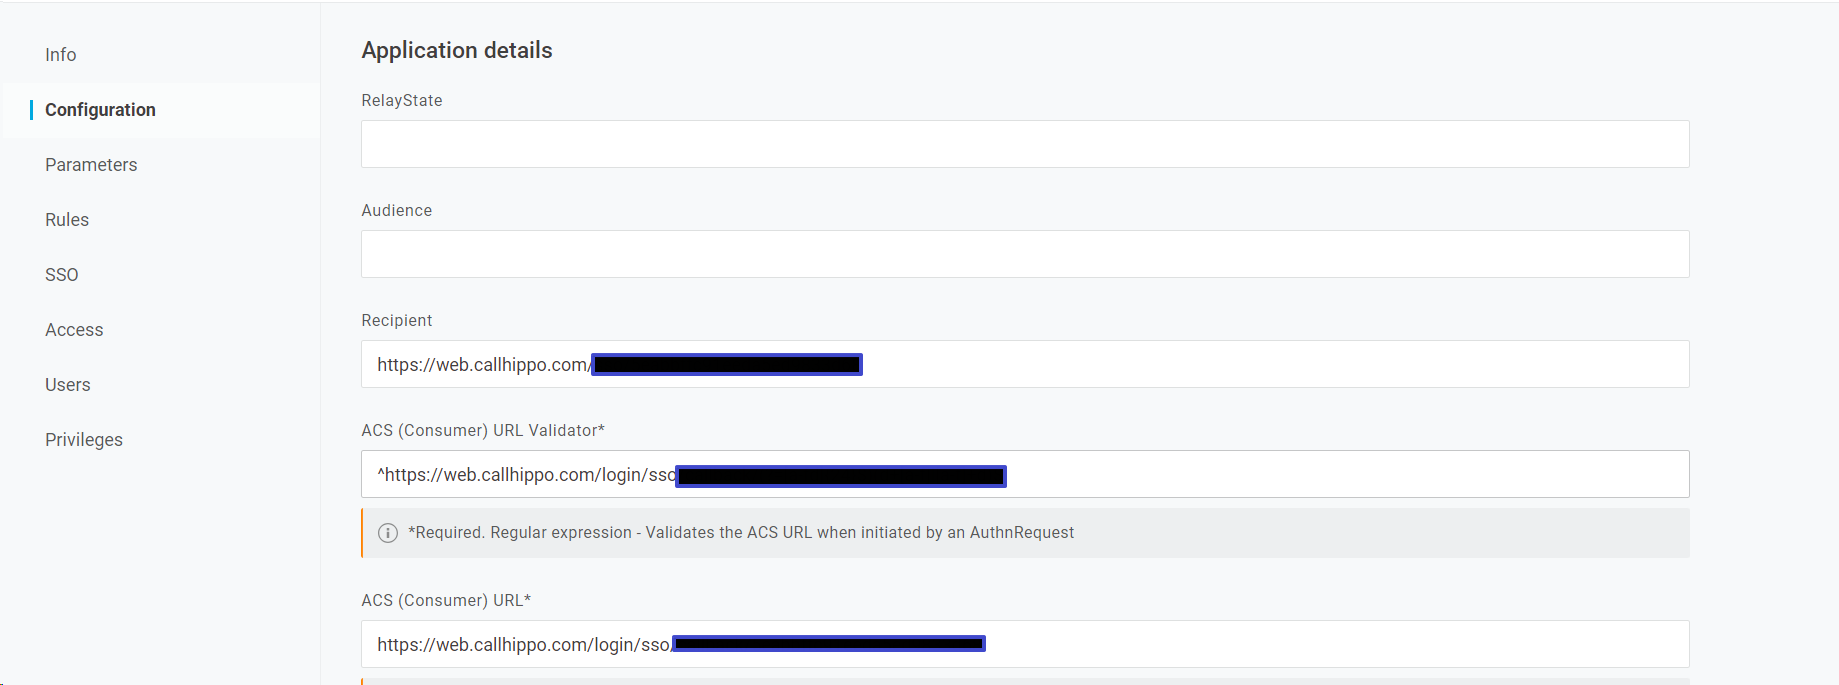
- In CallHippo, open the OneLogin SSO Integration Settings and copy the three values shown on the SSO SAML Settings tab: Recipient, ACS (Consumer) URL Validator, and ACS (Consumer) URL.
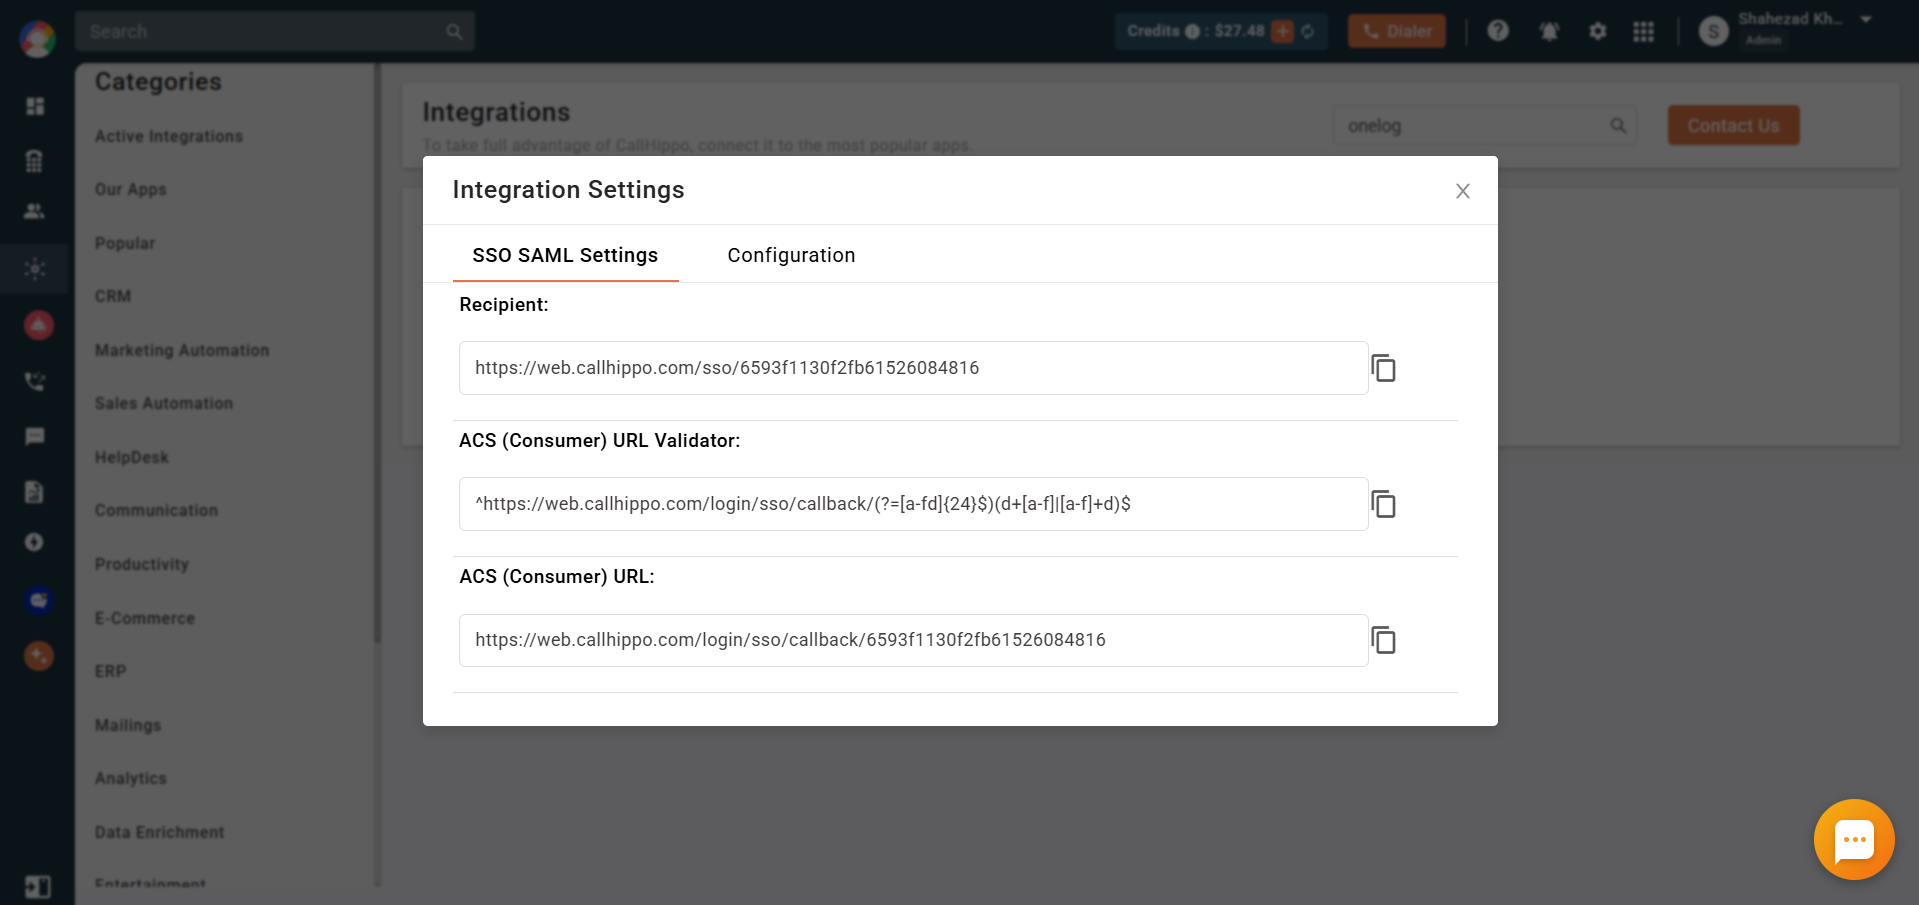
- In the OneLogin app’s Configuration tab, paste those values into the matching Recipient, ACS (Consumer) URL Validator, and ACS (Consumer) URL fields.
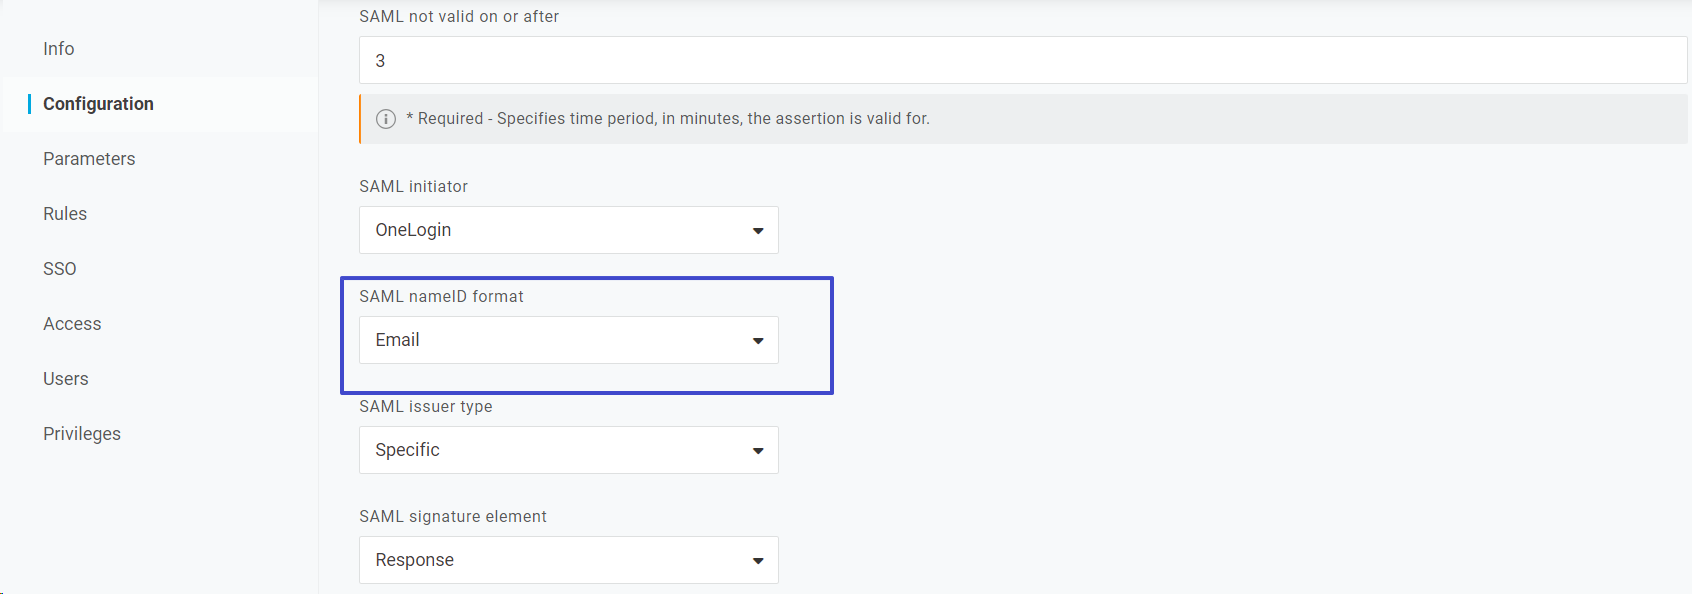
- Make sure the SAML nameID format is set to Email.
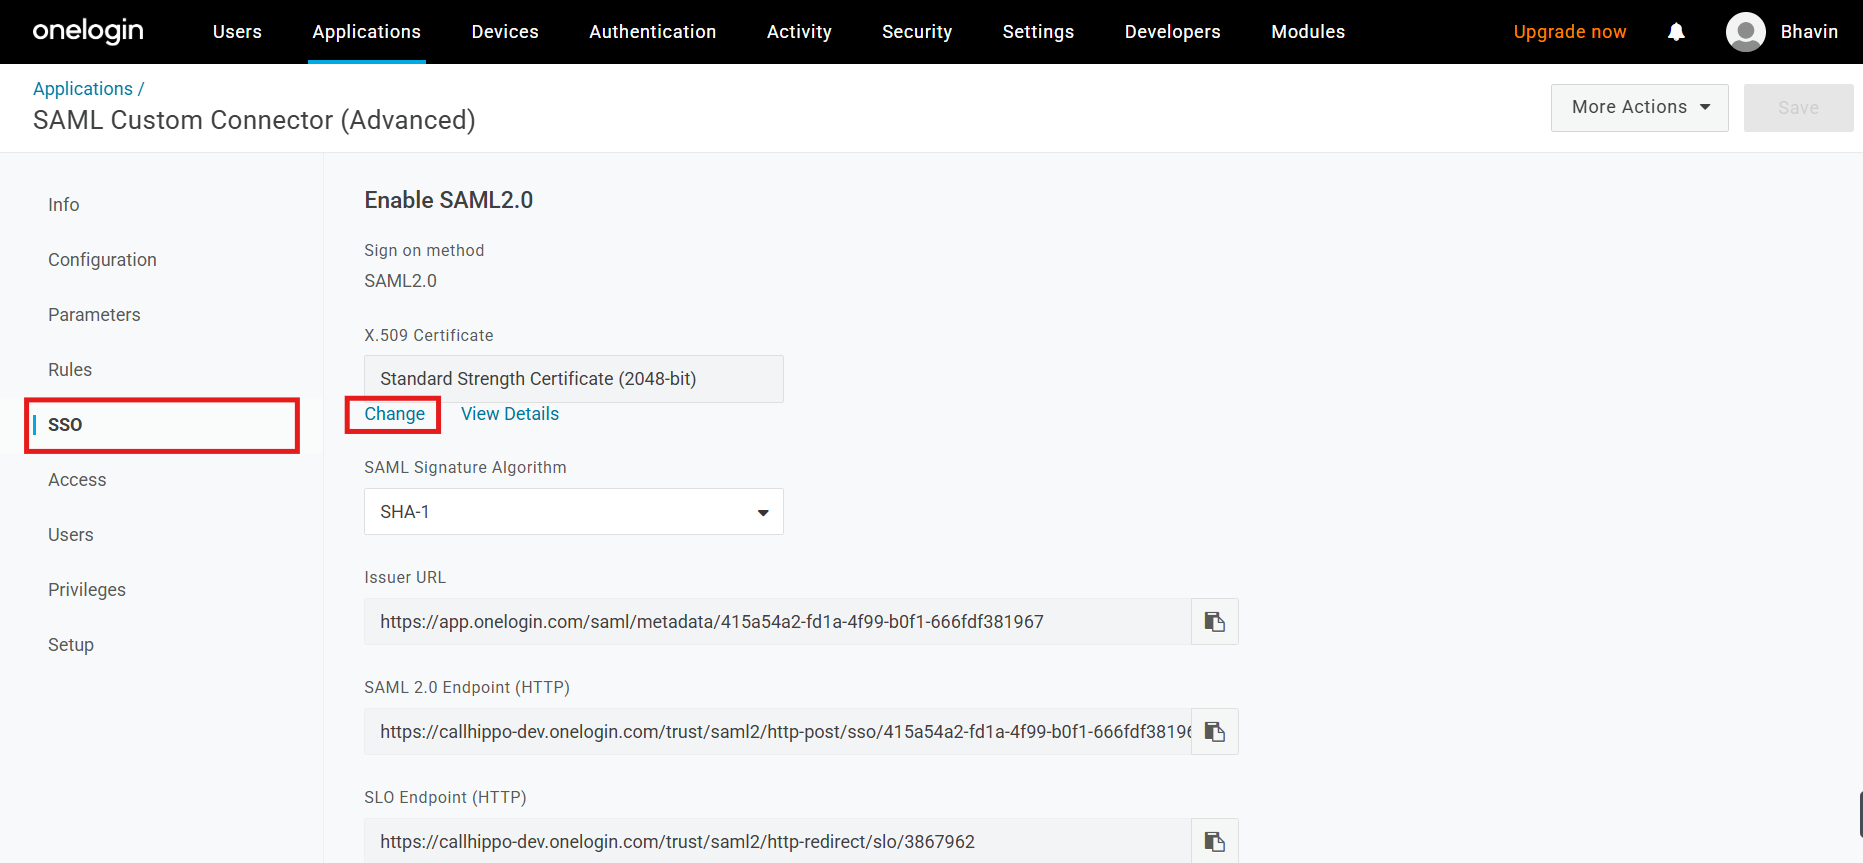
- Go to the SSO tab and click Change next to the X.509 Certificate.
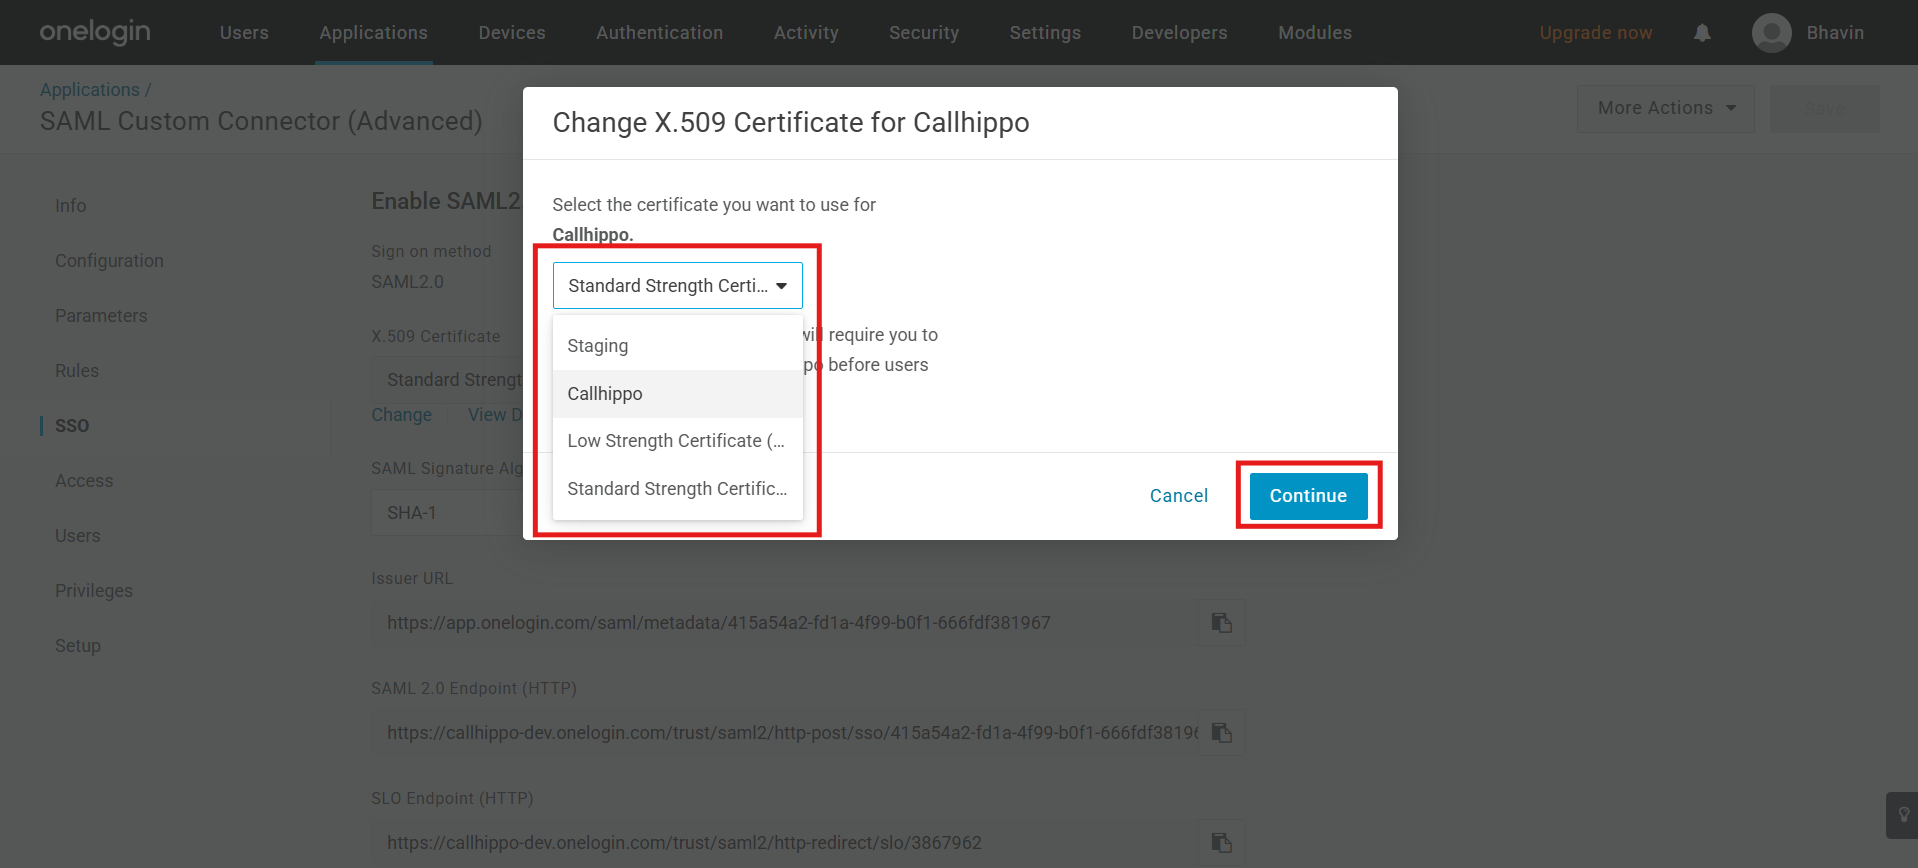
- Select the certificate you created earlier and click Continue.
- Click Save to apply the configuration.
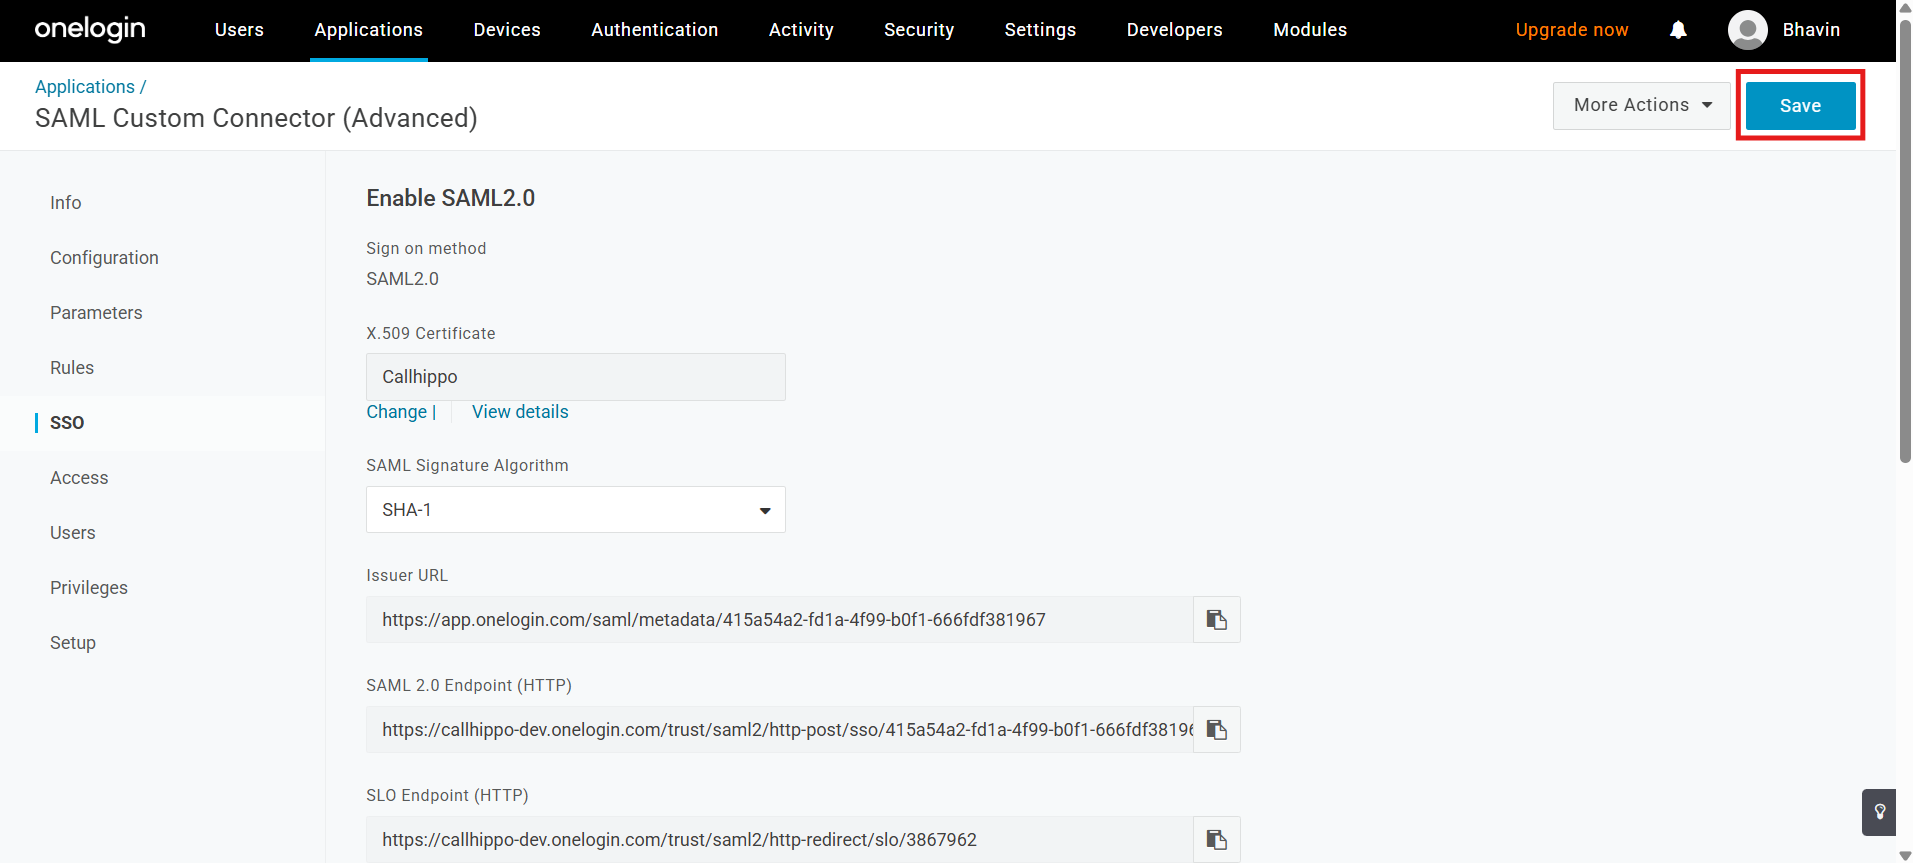
- Open the app from your OneLogin portal. It redirects to CallHippo and logs you in automatically. Once all configurations are complete and the required details are filled in, the integration status shows Integrated.
Configure SSO for Android login
Configure web login first, then complete the steps below to enable SSO for the Android app.
- Sign in to your OneLogin account.
- Go to Applications > Applications and click Add App.
- Search for OIDC and select OpenID Connect (OIDC).
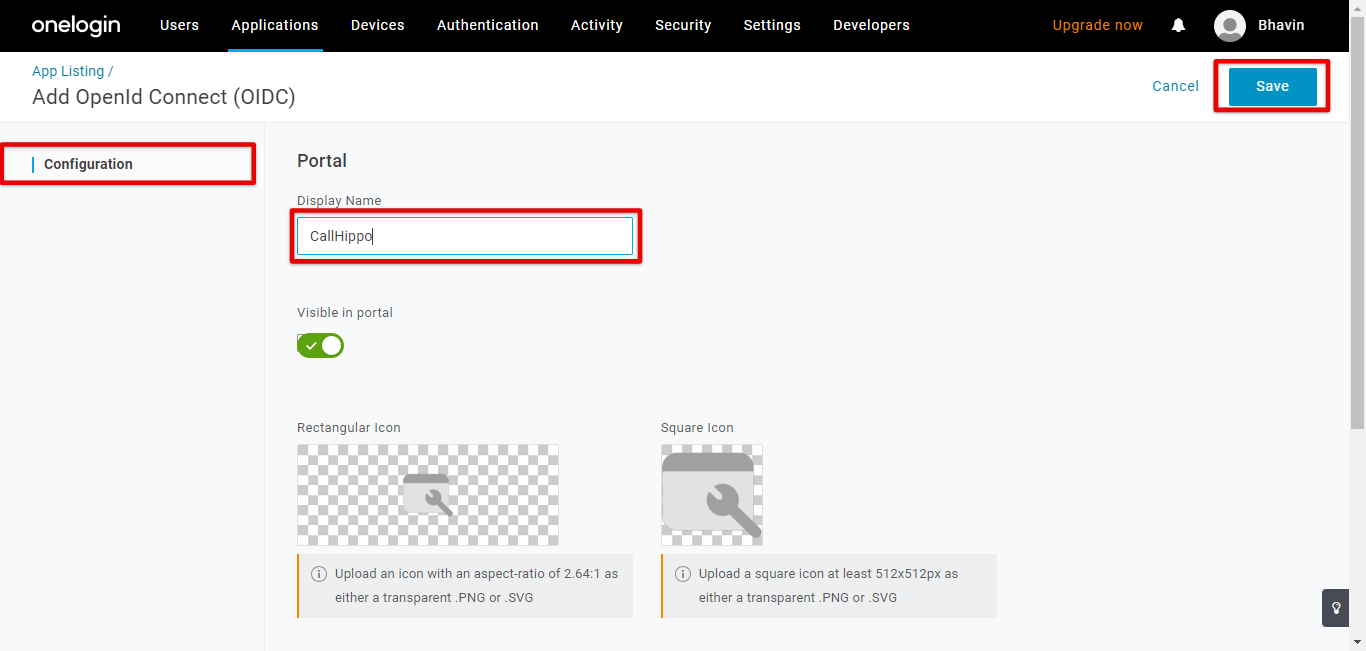
- Enter a portal Display Name and click Save. You will see a confirmation that the app was added.
- Go to the SSO tab, set Application Type to Native and Authentication Method to None (PKCE), then click Save.
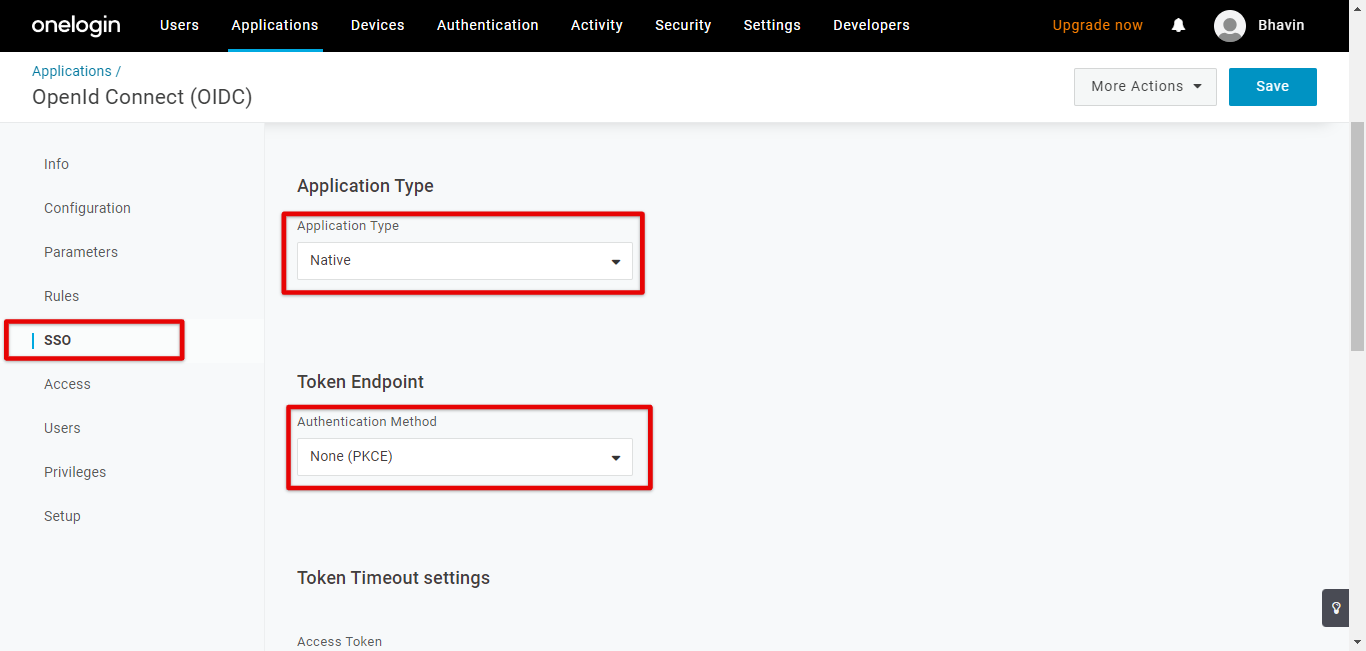
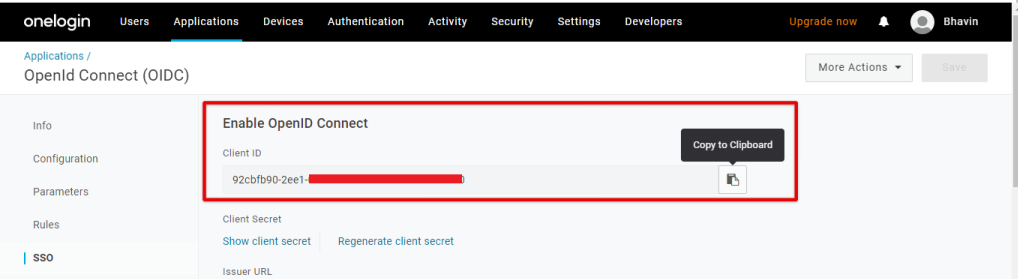
- Copy the Client ID from the SSO section.
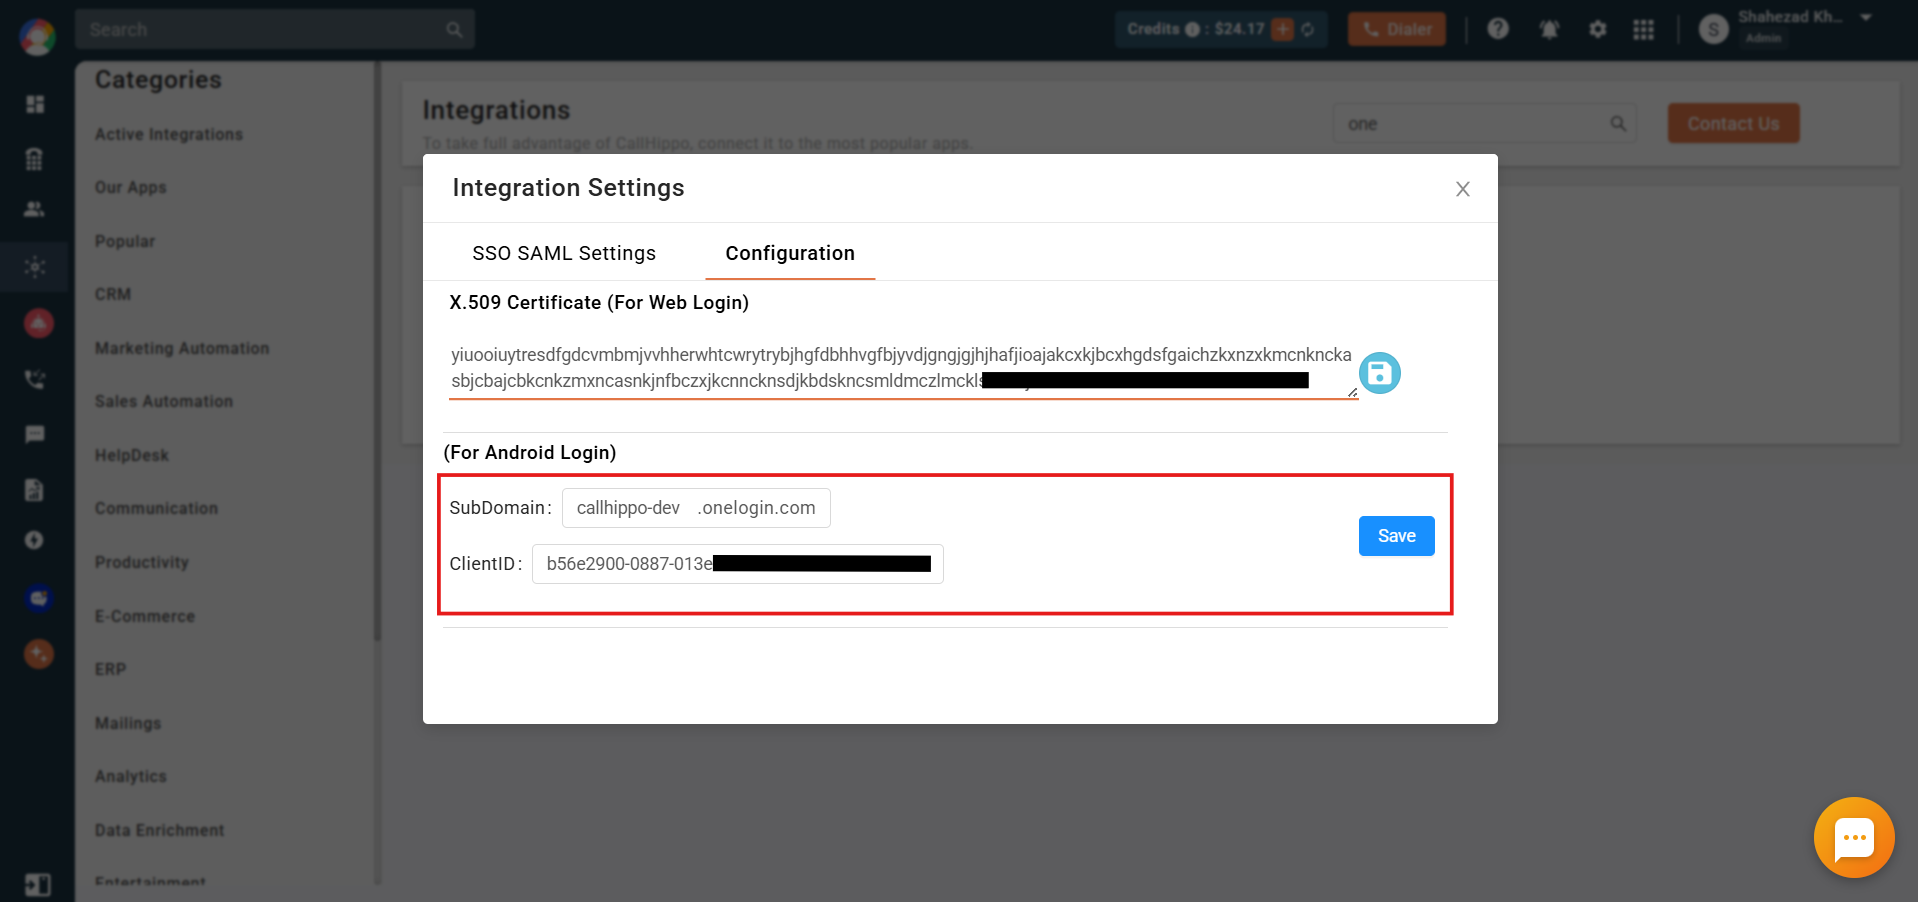
- In the CallHippo Integration Settings > Configuration tab, paste the Client ID, enter your OneLogin SubDomain, and click Save. CallHippo returns a redirect domain, copy the complete domain.
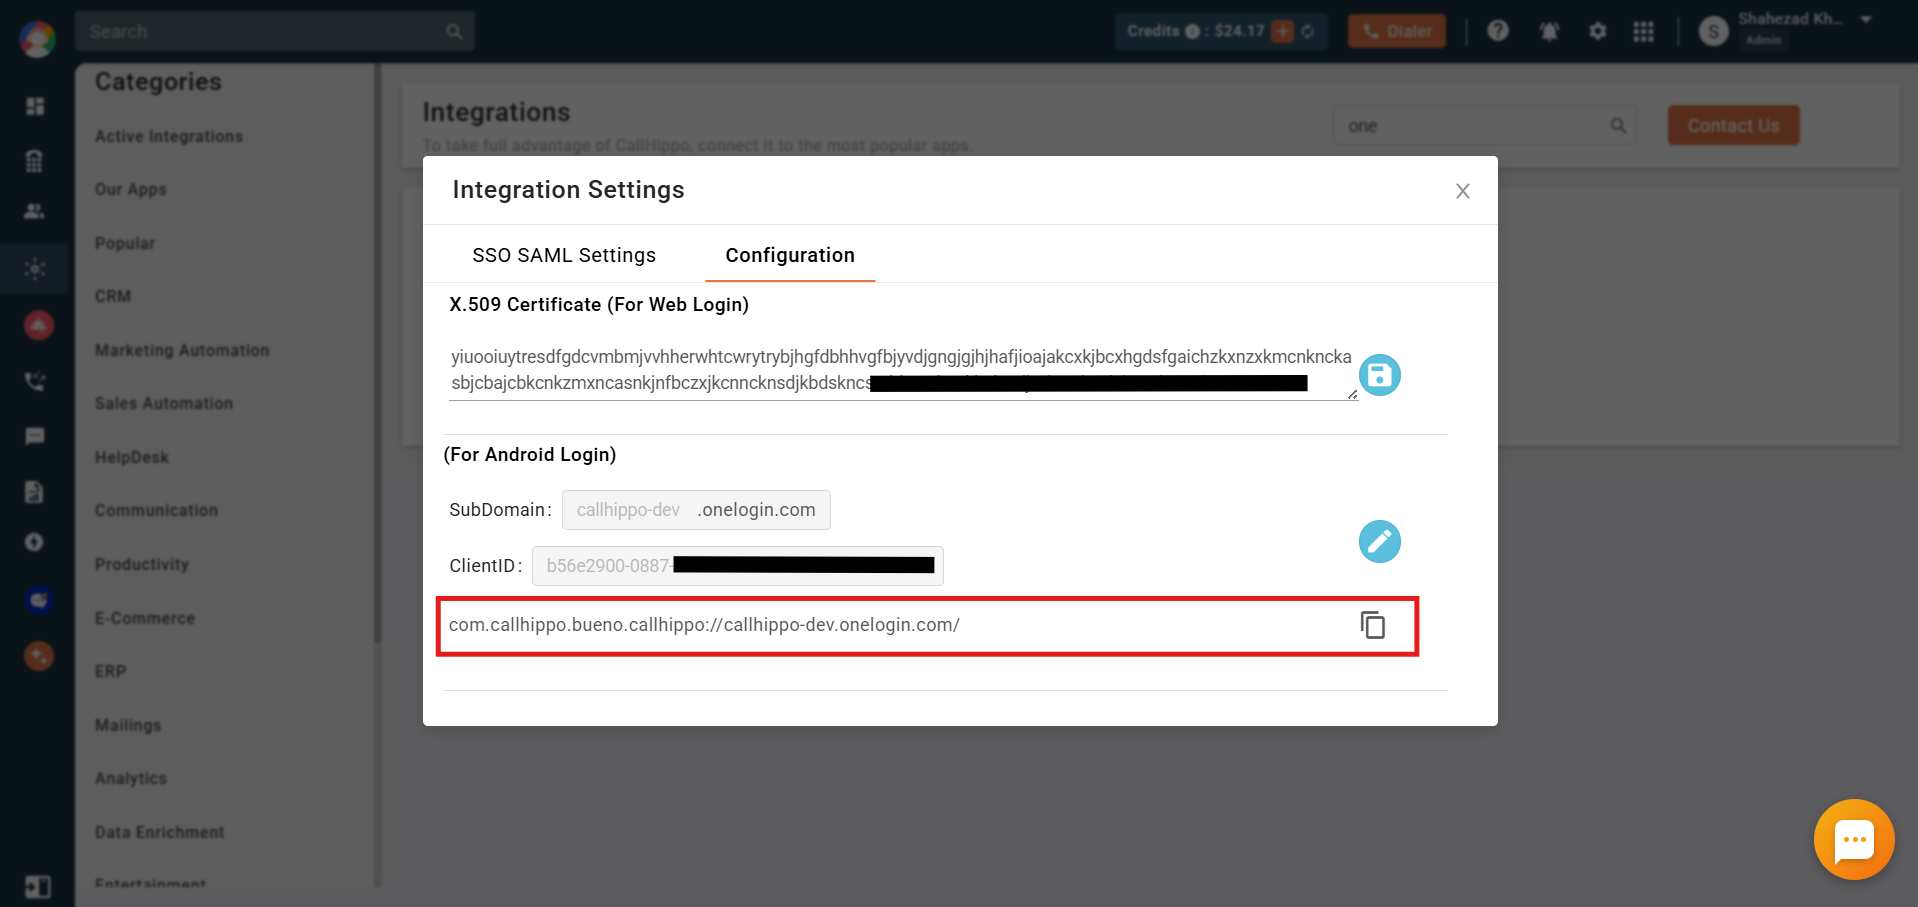
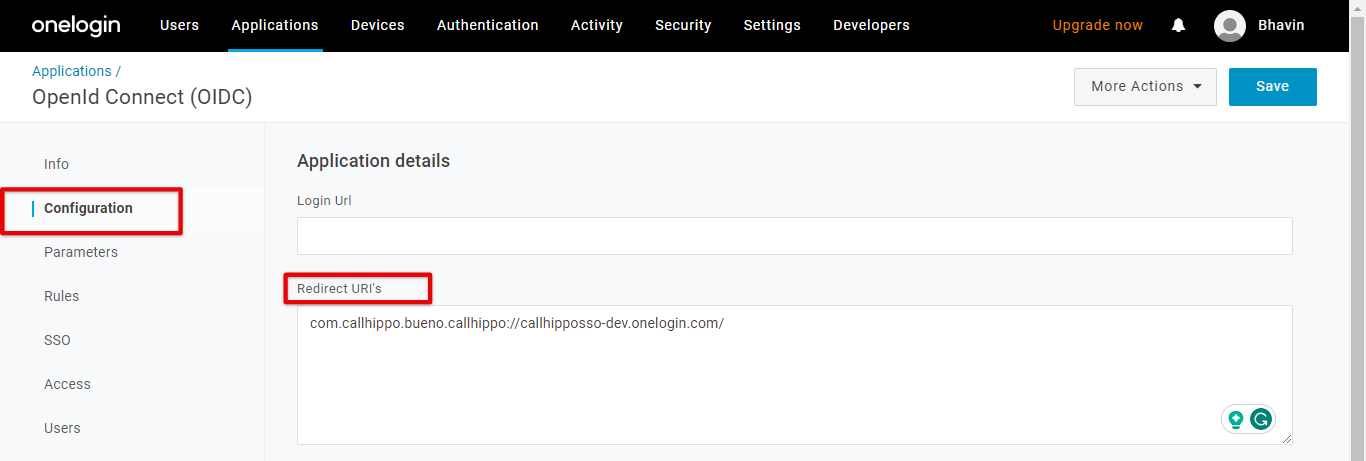
- Open the OIDC app’s Configuration in OneLogin, paste the copied domain into the Redirect URI’s field, and click Save.
Notes
- Once the CallHippo <> OneLogin integration is set up, sub-users can no longer log in manually, they must sign in through SSO. This applies to the web, desktop, and mobile apps.
- Only the Owner and Admins can use both manual login and SSO login.
Still need help? Reach us at [email protected].