
A CallHippo AI Voice Agent handles calls automatically, answering questions and routing callers using content you train it on. This guide walks you through creating one from your dashboard, whether you want a simple knowledge-based agent or a full conversational flow.
Before you begin
Make sure you have the following ready so setup goes smoothly:
- Admin access to your CallHippo account.
- The training material for your agent — a website URL, or a CSV or PDF file (up to 20 MB).
- A clear idea of the agent type you need: a Simple Agent for question-and-answer support, or a Conversational Flow Agent for guided, multi-step call handling.
Open the AI Voice Agent section
- Log in to your CallHippo dashboard.
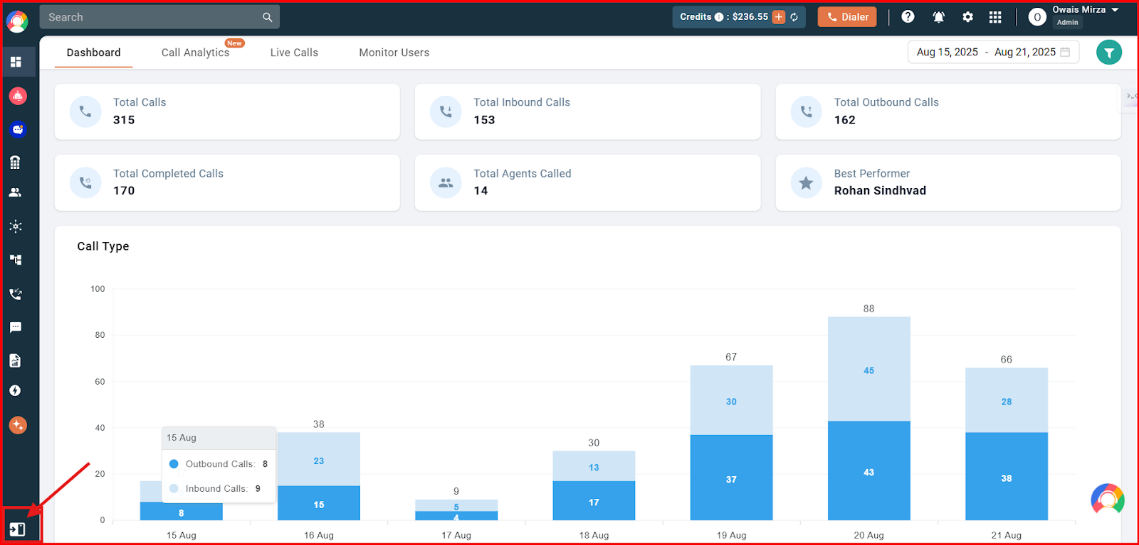
- Click the expand icon in the bottom-left corner to open the full side menu.
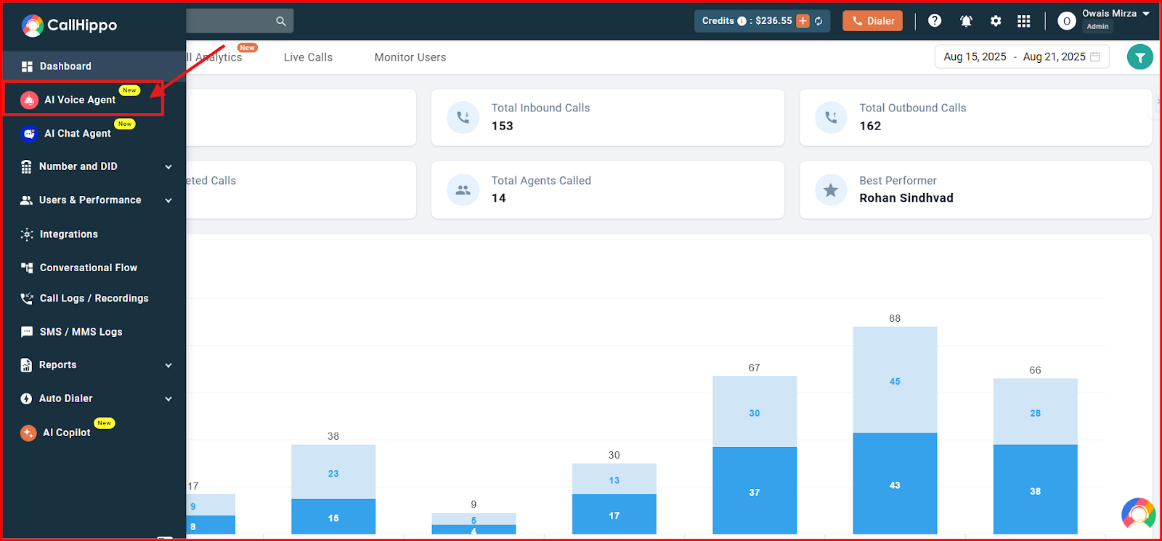
- From the side menu, select AI Voice Agent.
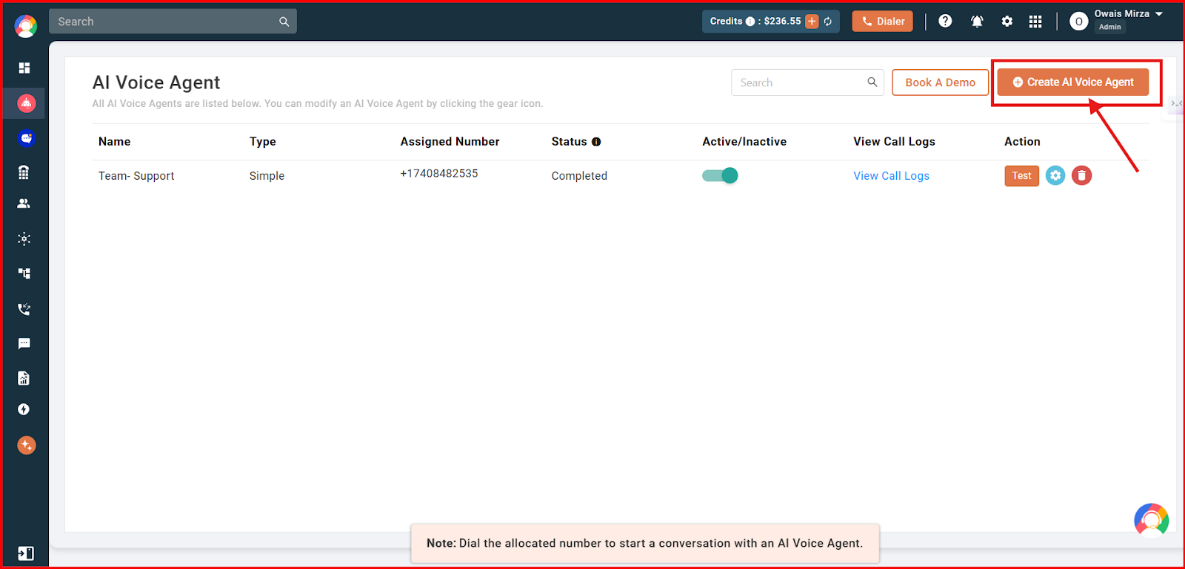
- In the top-right corner, click Create AI Voice Agent.
Configure your AI Voice Agent
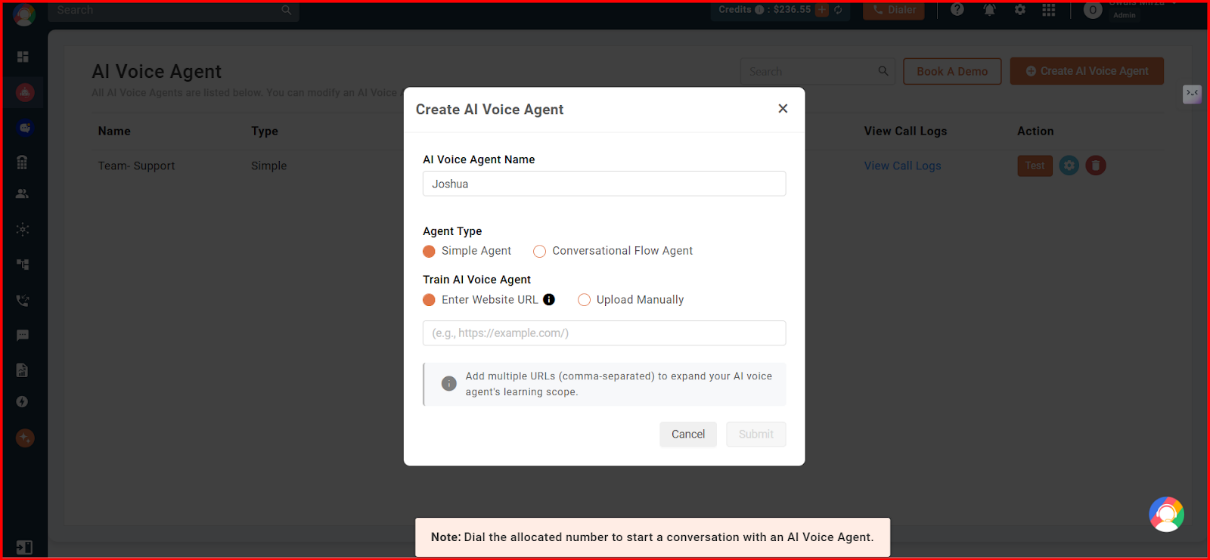
A pop-up window opens. Start by naming your agent and choosing its type:
- Enter a name for your AI Voice Agent.
- Choose the Agent Type: Simple Agent or Conversational Flow Agent.
Option 1: Set up a Simple Agent
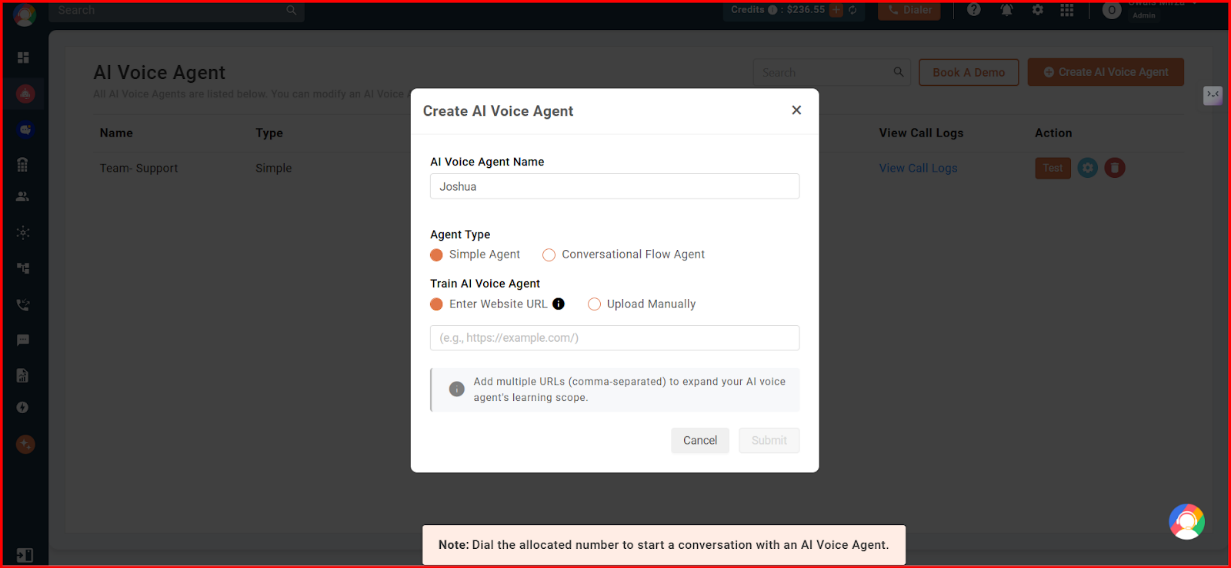
A Simple Agent answers callers based on the knowledge you give it. Select Simple Agent as the Agent Type, then train it using one of the two methods below.
Method A: Train with a website URL
- Select Enter Website URL.
- Paste the website URL (for example, https://example.com/). You can add multiple comma-separated URLs, up to 300 in total.
- Click Submit.
Method B: Upload files manually
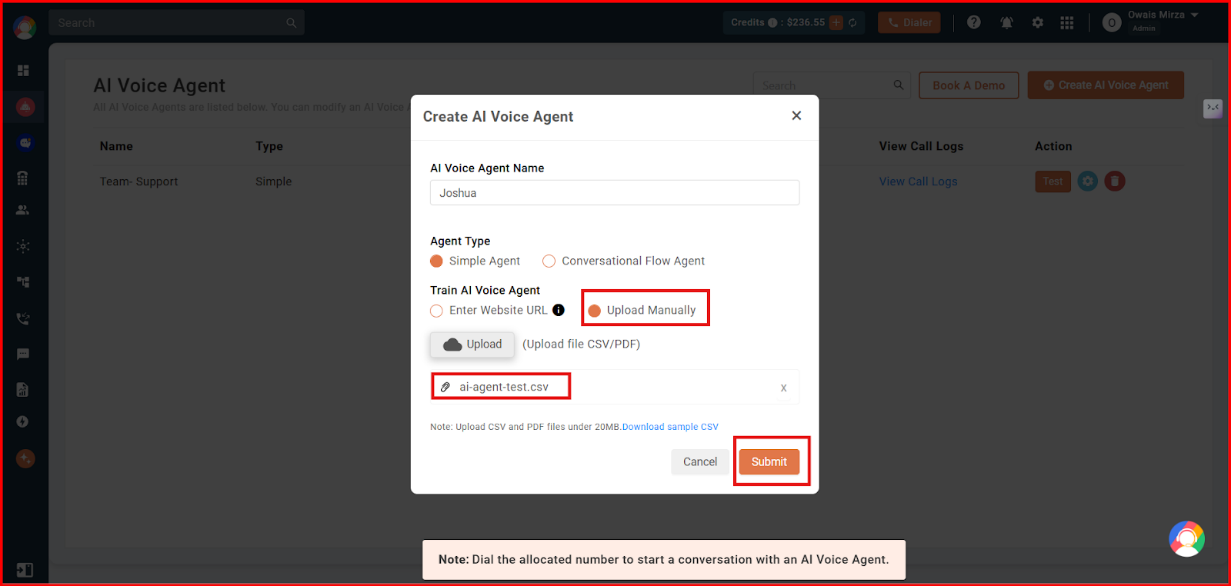
- Select Upload Manually.
- Upload a CSV or PDF file (maximum size 20 MB). You can download the sample CSV for reference.
- Click Submit.
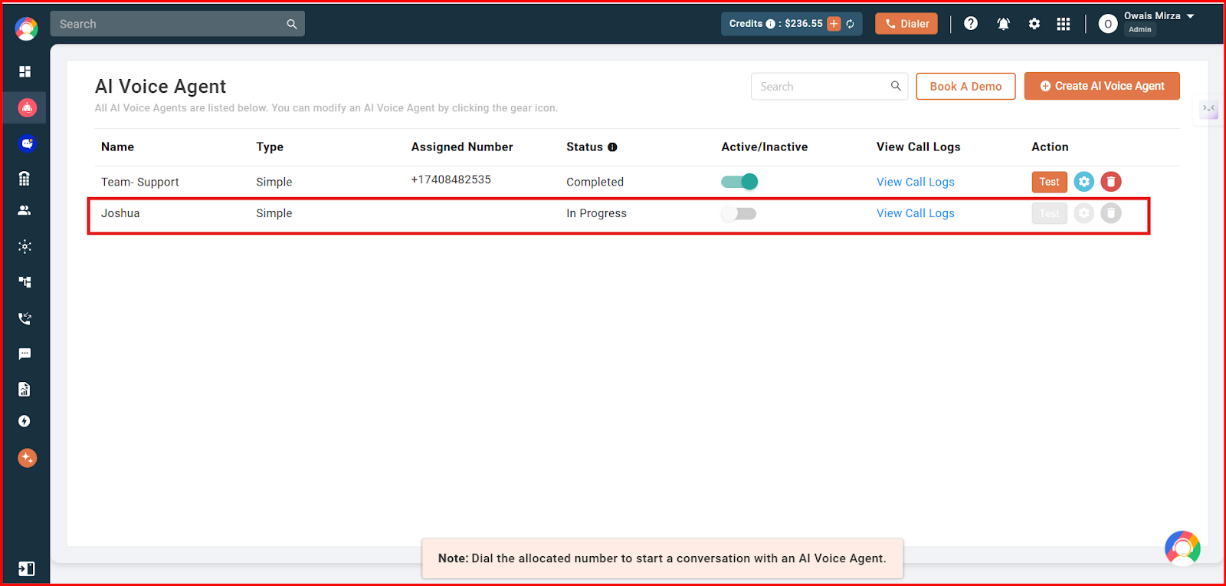
Once submitted, your Simple Agent is created and begins training. It appears in your list with an In Progress status until training completes.
Option 2: Set up a Conversational Flow Agent
A Conversational Flow Agent follows a structured, step-by-step call flow that you design.
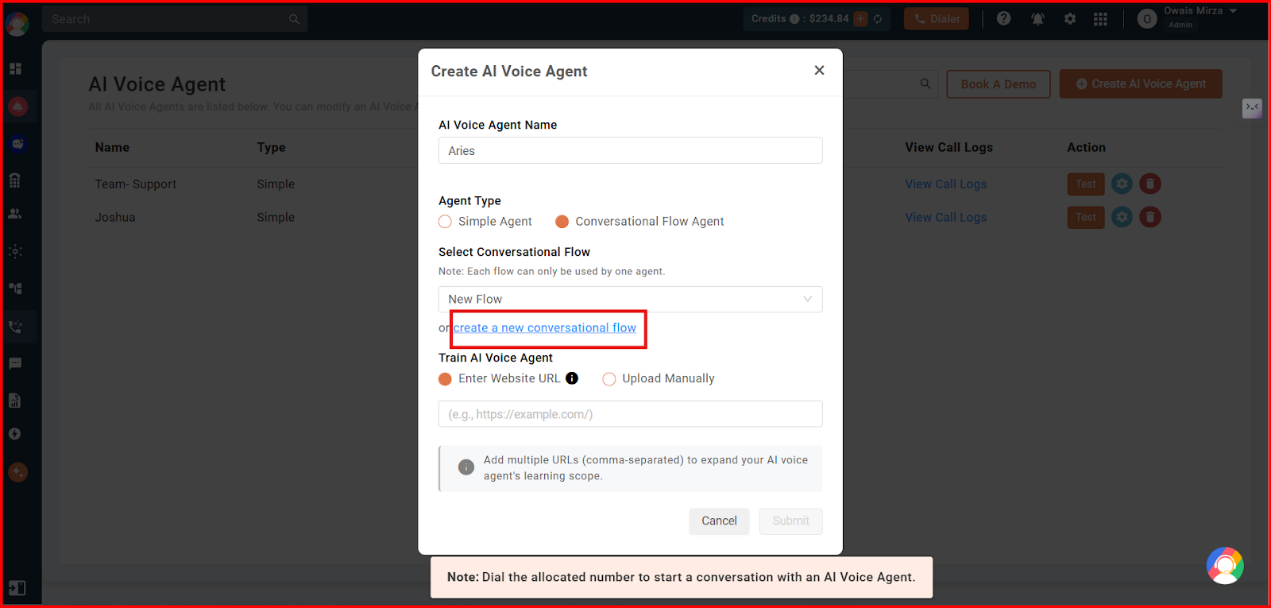
- After entering the agent’s name, select Conversational Flow Agent as the Agent Type.
- Choose an existing flow, enter the required details, and click Submit. Note that each flow can be used by only one agent.
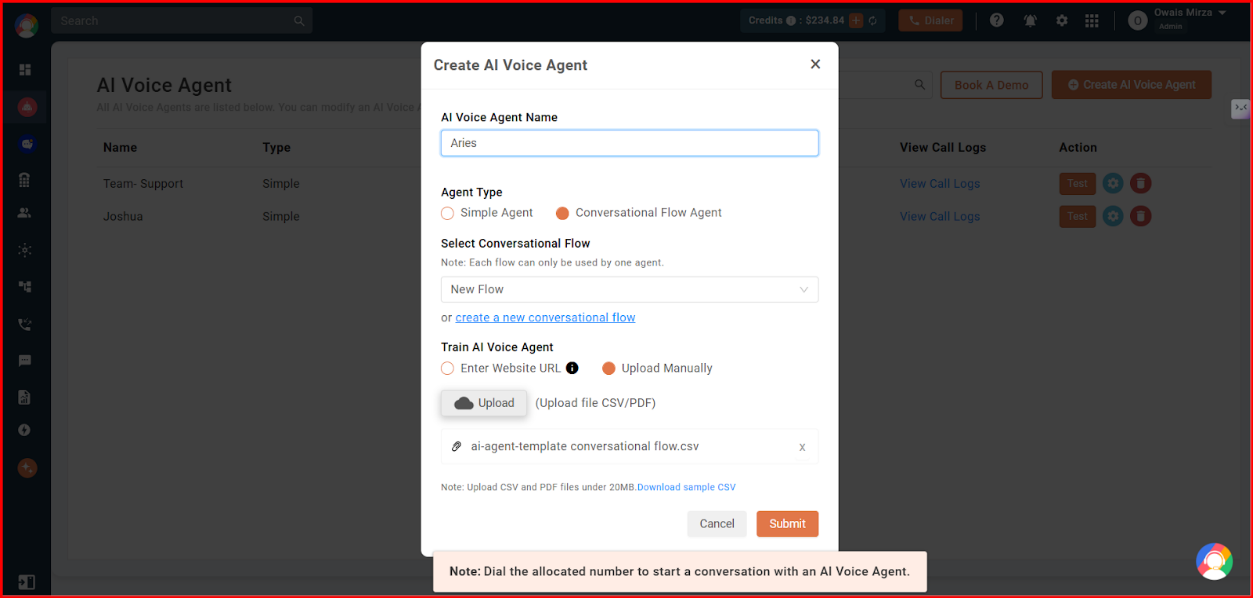
- To build a flow from scratch, click create a new conversational flow.
Build your flow using the drag-and-drop interface. You can combine several node types:
- Question Node — ask callers questions.
- Press Digit Node — let callers select numeric options.
- Call Transfer Node — redirect calls to a live agent.
- Logic Split Node — branch the conversation based on conditions.
- End Call Node — close the call.
Activate and test your agent
After your agent finishes training, assign it to a number and use the Active/Inactive toggle in the agent list to turn it on. Use the Test button, or simply dial the allocated number, to start a conversation with your AI Voice Agent and confirm it responds as expected.
Still need help? Reach us at [email protected].