
CNAM (Caller ID Name) lets your business name appear on your customer’s phone when you call them from your CallHippo number. This guide explains what CNAM is, which countries are supported, and the step-by-step process to register and update it.
What is CNAM?
Caller ID Name (CNAM) is a service used in telephone networks to provide the name of the calling party. The name can be a business or a person, represented as a string of text no longer than 15 characters.
CNAM cannot start with a number — it should begin with a letter and can only contain letters, numbers, periods, commas and spaces.
Telephone carriers are responsible for populating one of several authoritative databases with subscriber data, known as CNAM repositories and collectively referred to as the Line Information Database (LIDB).
Supported countries
CNAM change requests are currently supported for the following countries:
- United States
- Puerto Rico
- Canada
Important notes
- While every effort is made to update and correct a number’s CNAM value, not all carriers subscribe to the multiple CNAM databases available.
- The set CNAM value is confirmed and verified, then passed to the terminating carrier. However, correct display of CNAM cannot be guaranteed for Canada or Puerto Rico numbers at this time.
- Mobile users, depending on the subscriber’s carrier, will most likely need to enable, subscribe to, or pay an up-charge so that CNAM is displayed on their handsets.
How to set up CNAM
To display CNAM on your Caller ID, you first create a business (Customer) profile in Twilio, then register your CallHippo number for CNAM. Log in to Twilio and follow the steps below.
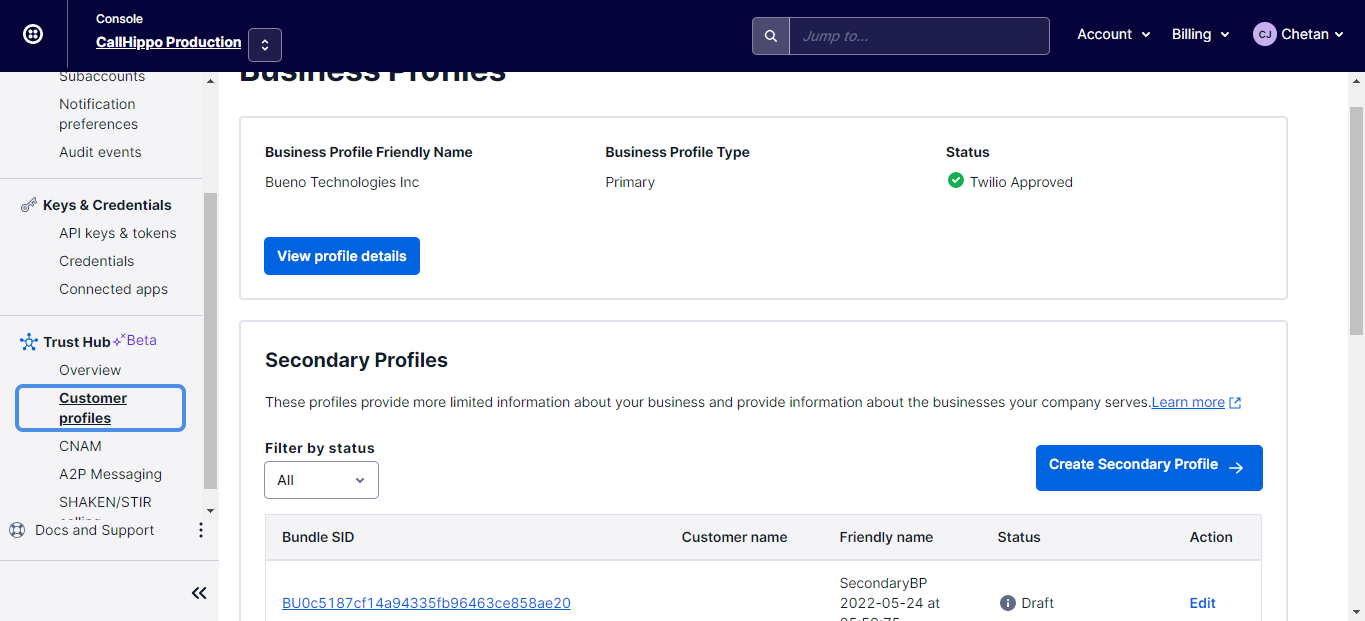
Step 1: Create a Secondary Customer profile
Go to Account → Customer profile and open the Customer Profiles page. Click Create Secondary Profile.
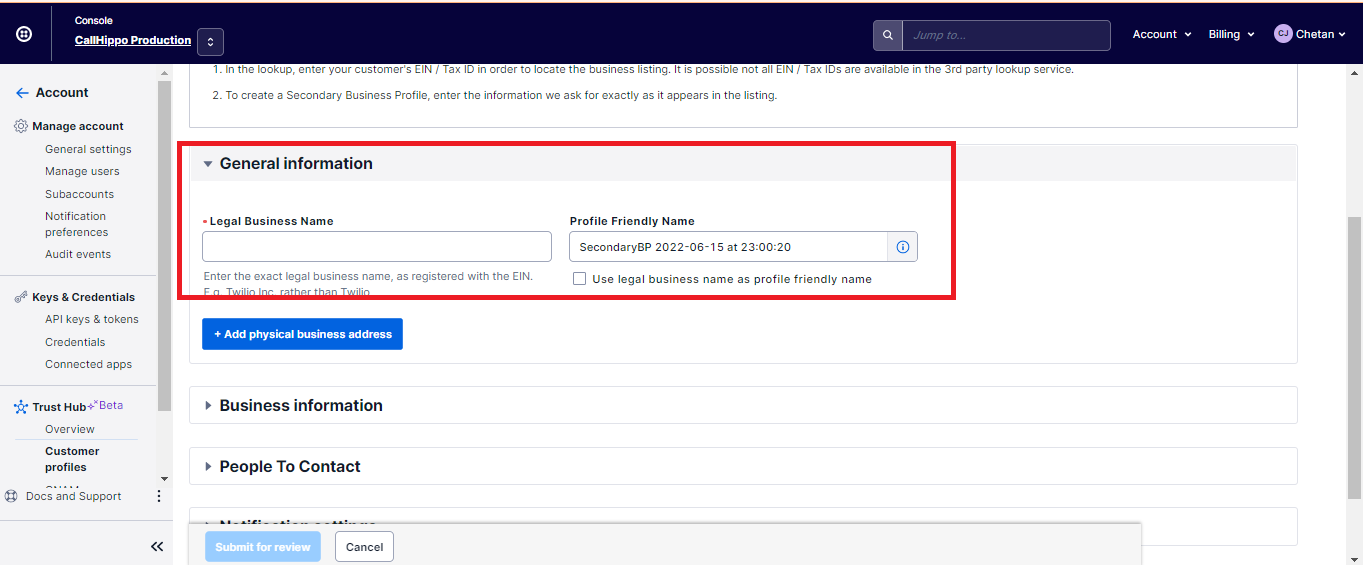
Step 2: Fill in the General Information
Enter the Legal Business Name (exactly as registered with the EIN) and a Profile Friendly Name.
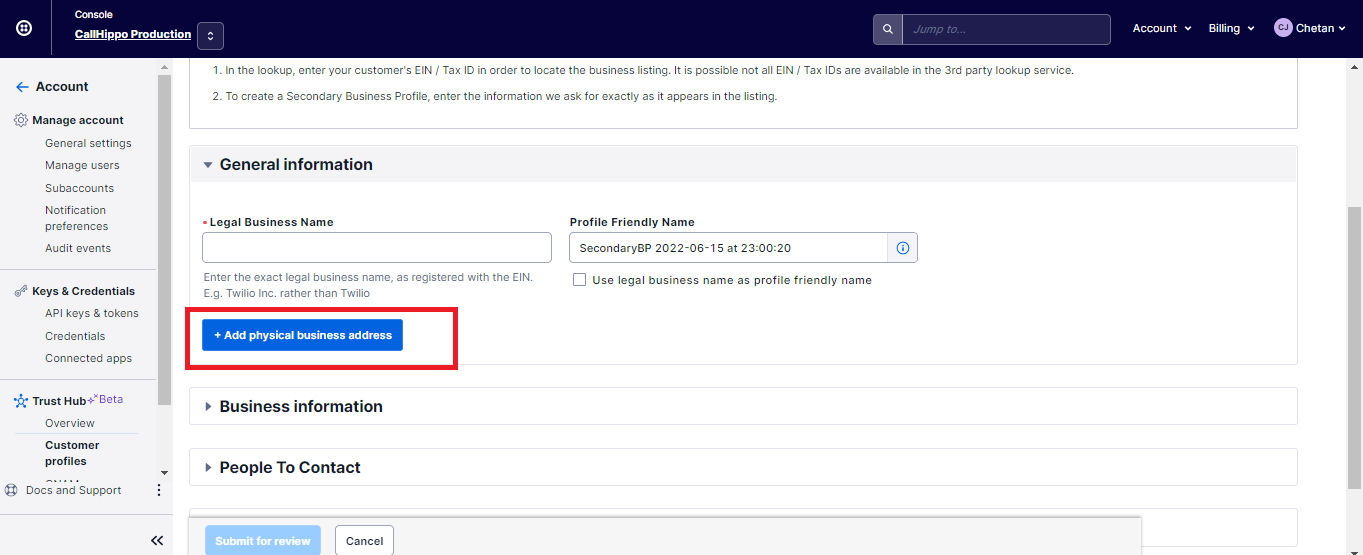
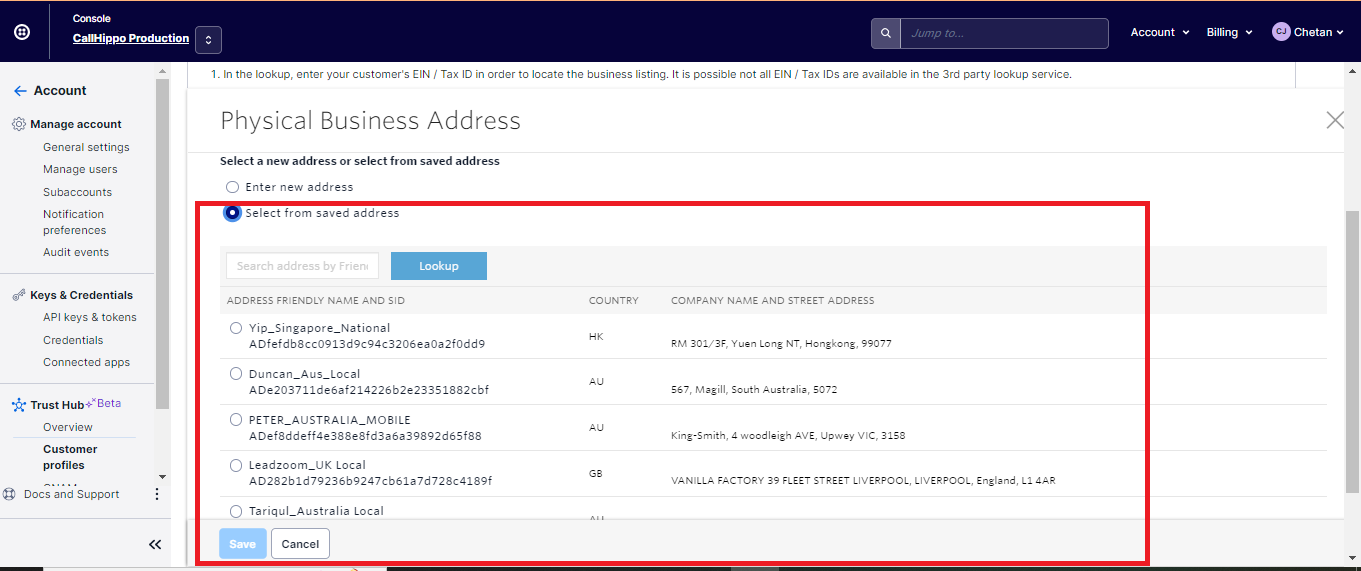
Step 3: Add a physical business address
Click Add physical business address.
To enter a new address, select Enter new address and fill in the address details.
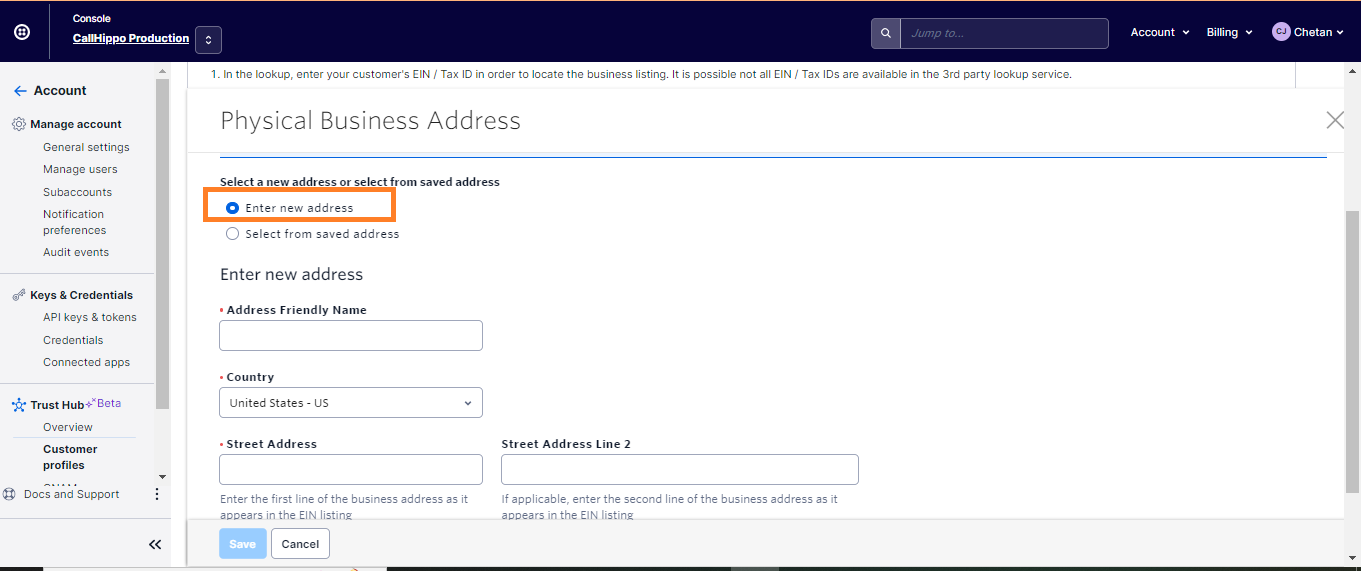
If the address is already saved, choose Select from saved address and pick it from the list.
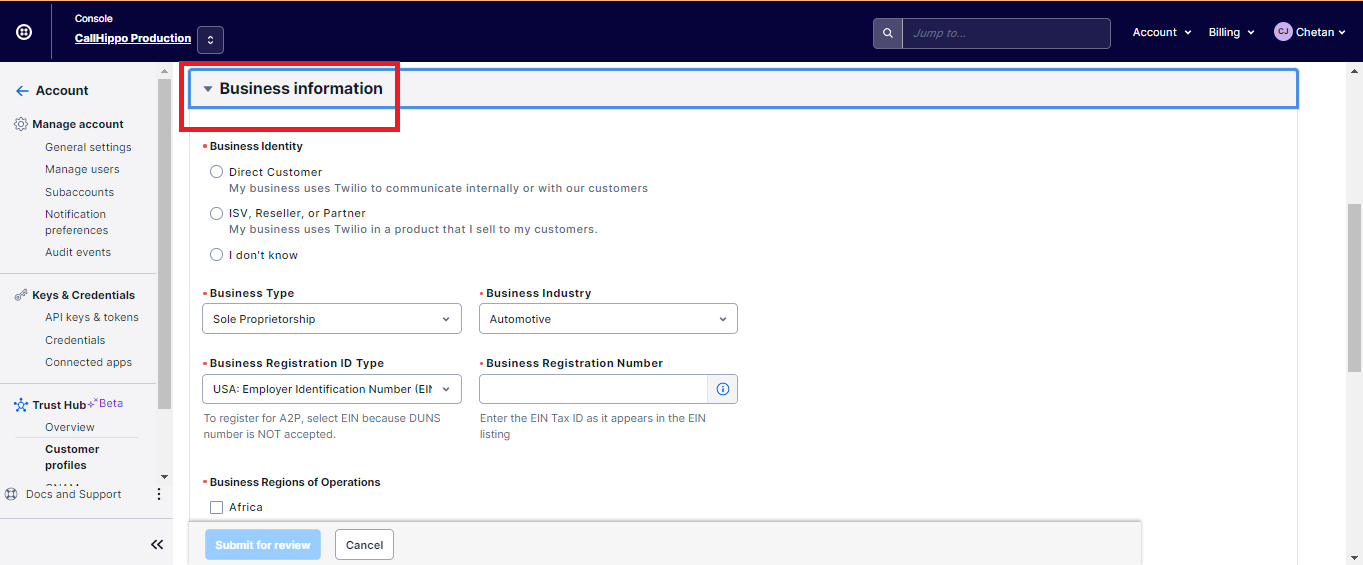
Step 4: Fill in the Business Information
Complete the Business Information section, including business identity, business type, industry and the business registration ID.
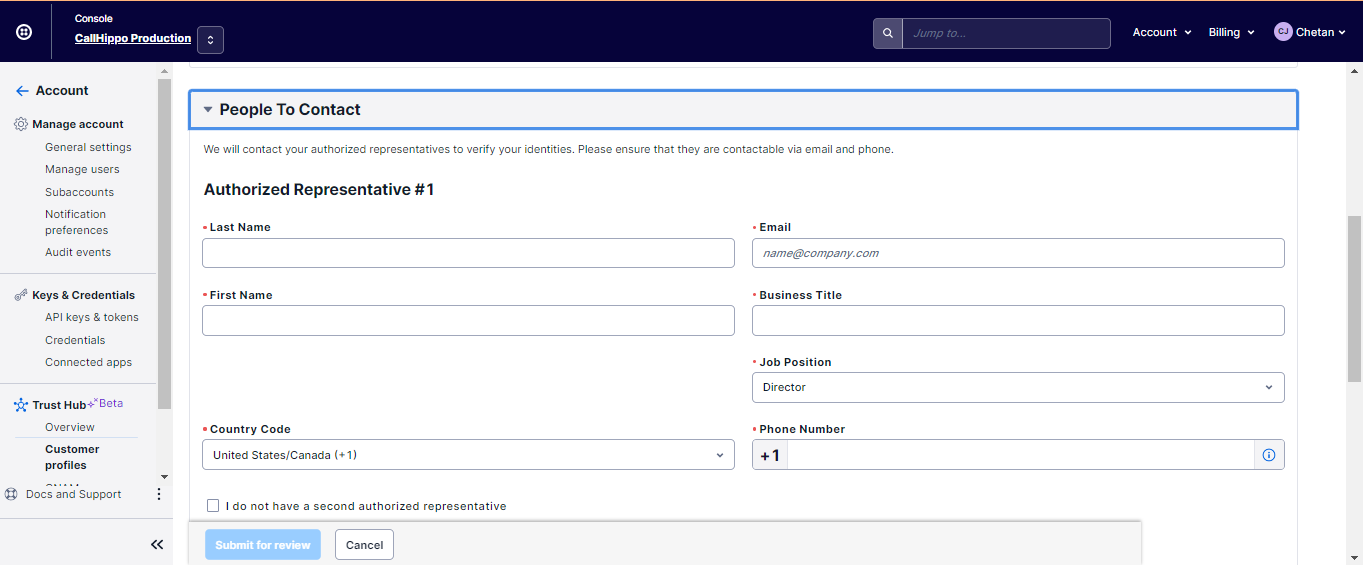
Step 5: Add the People To Contact
Fill in the People To Contact section. You need to provide the details of two authorized representatives.
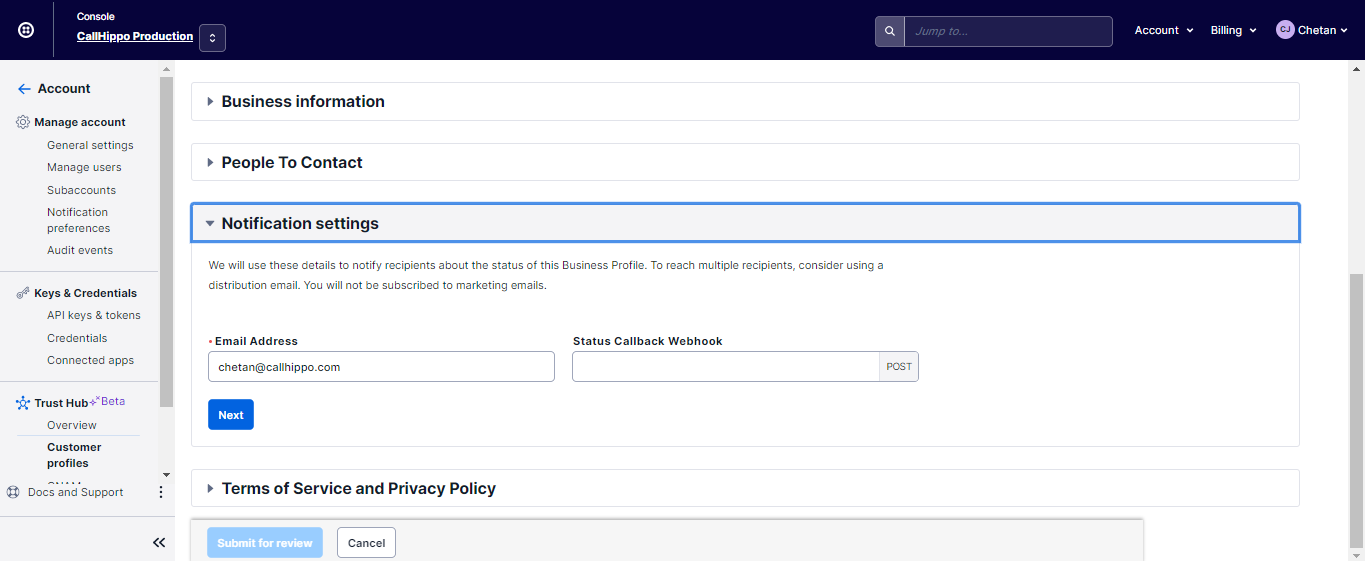
Step 6: Notification Settings
There is no need to change the Notification Settings — you can leave this section as it is.
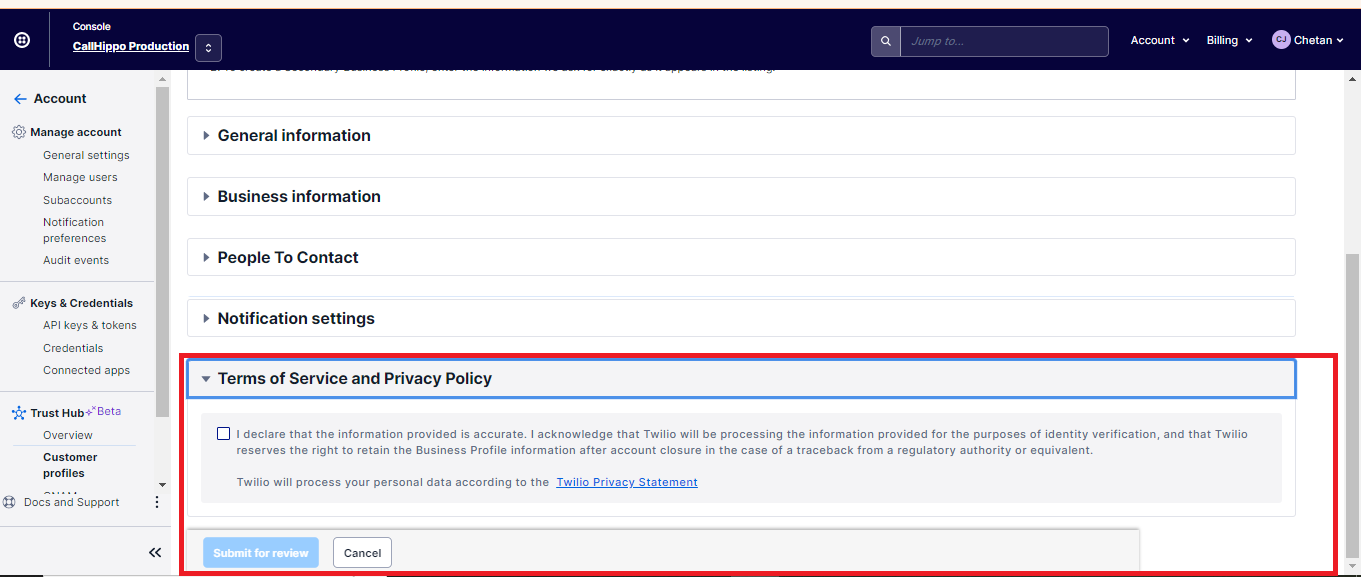
Step 7: Accept the terms and submit for review
Accept the Terms of Service and Privacy Policy, then click Submit for review.
How to register your number for CNAM
Once the profile is created, open the CNAM section. Click the plus (+) icon and fill in the details:
- Enter the Display name.
- Select a Business Profile.
- Register phone numbers for CNAM — provide the CallHippo phone number you want to register.
- Give the Trust Product a friendly name.
- Click Submit for review.
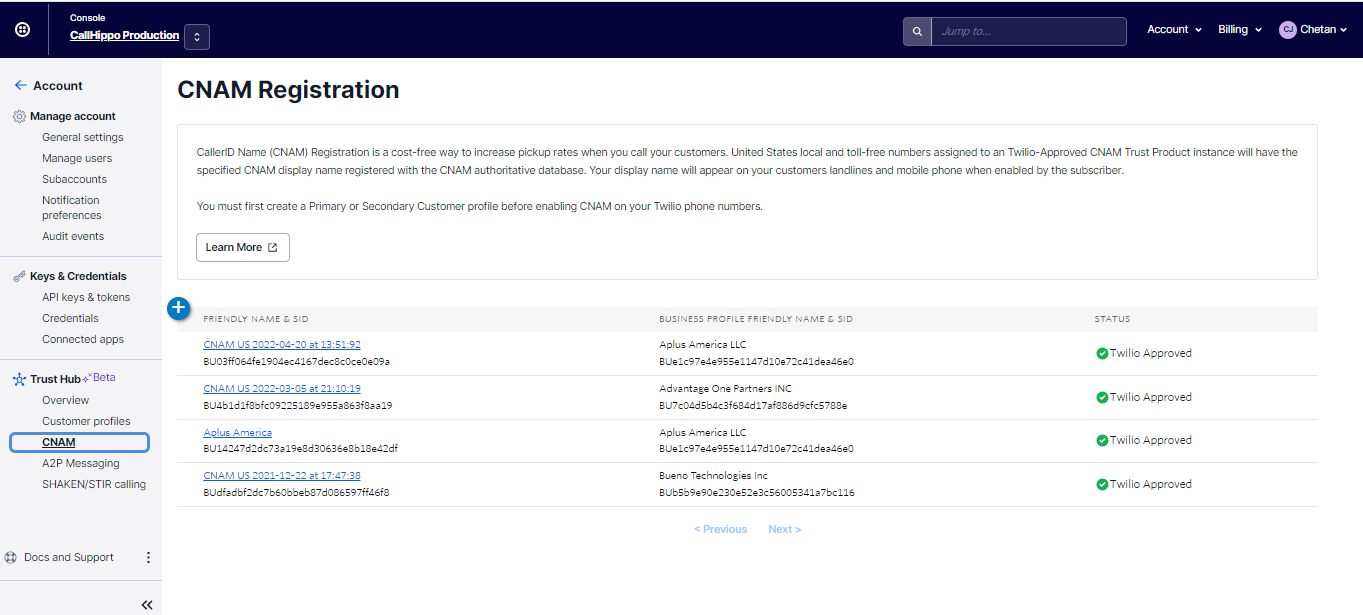
After submission, document verification takes 24–48 hours. Once approved, your CNAM display name will appear when you call customers from the registered number.
We hope this helps. If you still have questions, feel free to reach out at [email protected].