Connecting CallHippo with Freshdesk lets you turn every call into a support ticket automatically, place calls straight from your Freshdesk contacts, and keep your call and SMS activity synced with your helpdesk records.
The setup has three parts: grab your Freshdesk credentials, connect the two accounts in CallHippo, and create a set of webhooks in Freshdesk so ticket events stay in sync. Follow the steps below in order.
Get your Freshdesk API key and domain
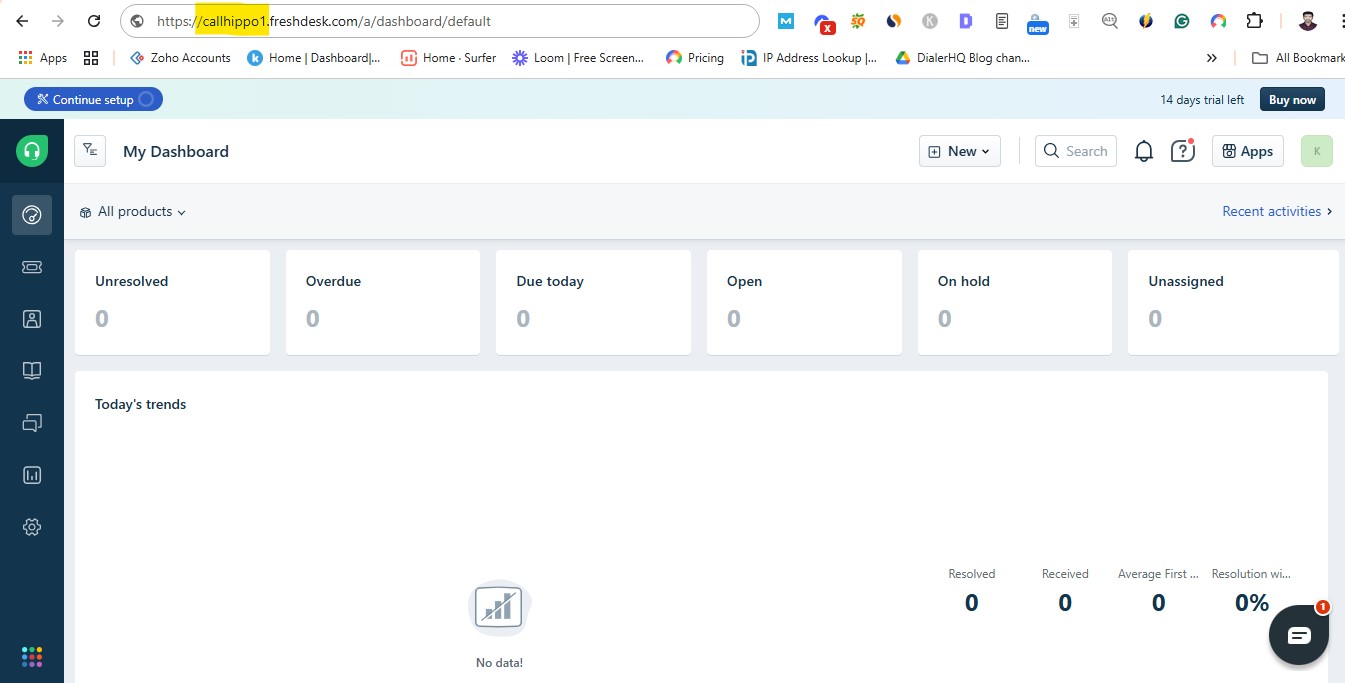
- Log in to Freshdesk. Sign in to your Freshdesk account and note your domain name from the URL. For example, in https://callhippo1.freshdesk.com, the domain name is callhippo1.
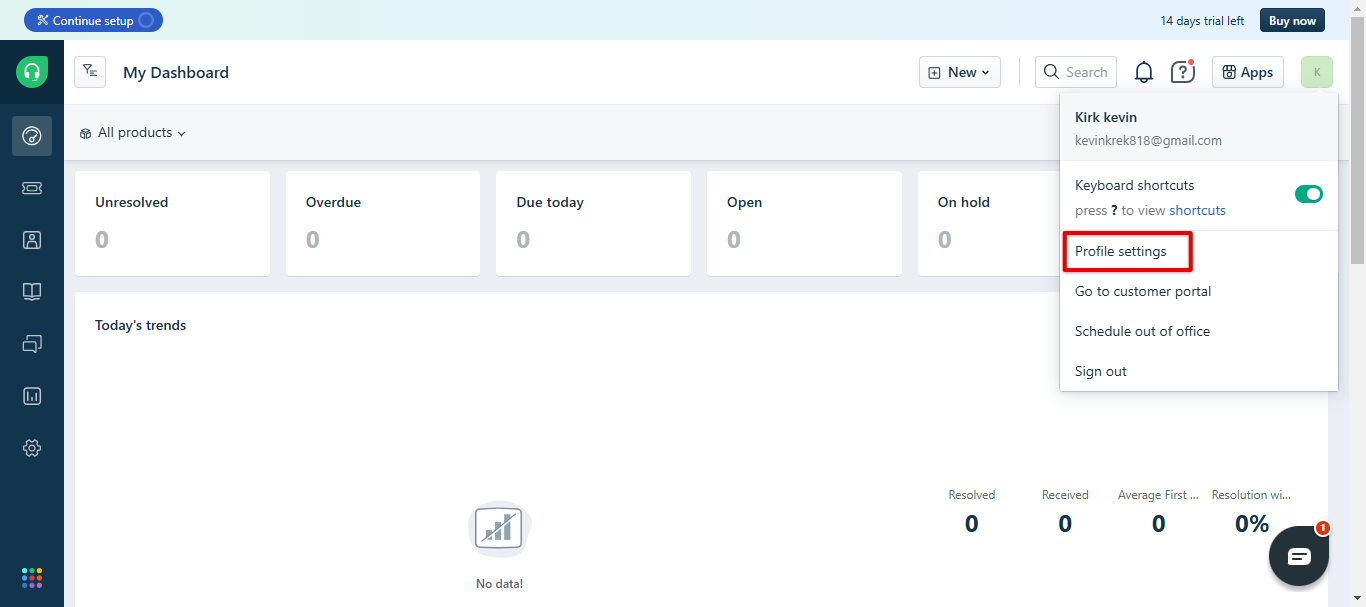
- Open Profile settings. Click your profile icon in the top-right corner and choose Profile Settings from the dropdown.
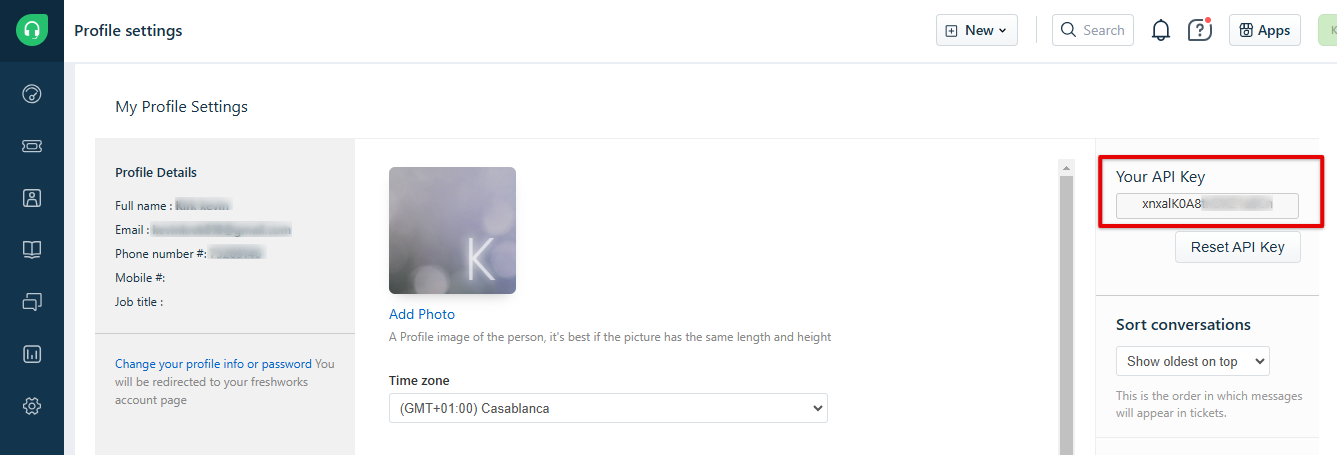
- Copy your API key. On the profile settings page, find and copy Your API Key — you’ll paste it into CallHippo in the next section.
Connect Freshdesk in CallHippo
- Open Integrations. Log in to your CallHippo account, then click Integrations in the sidebar.
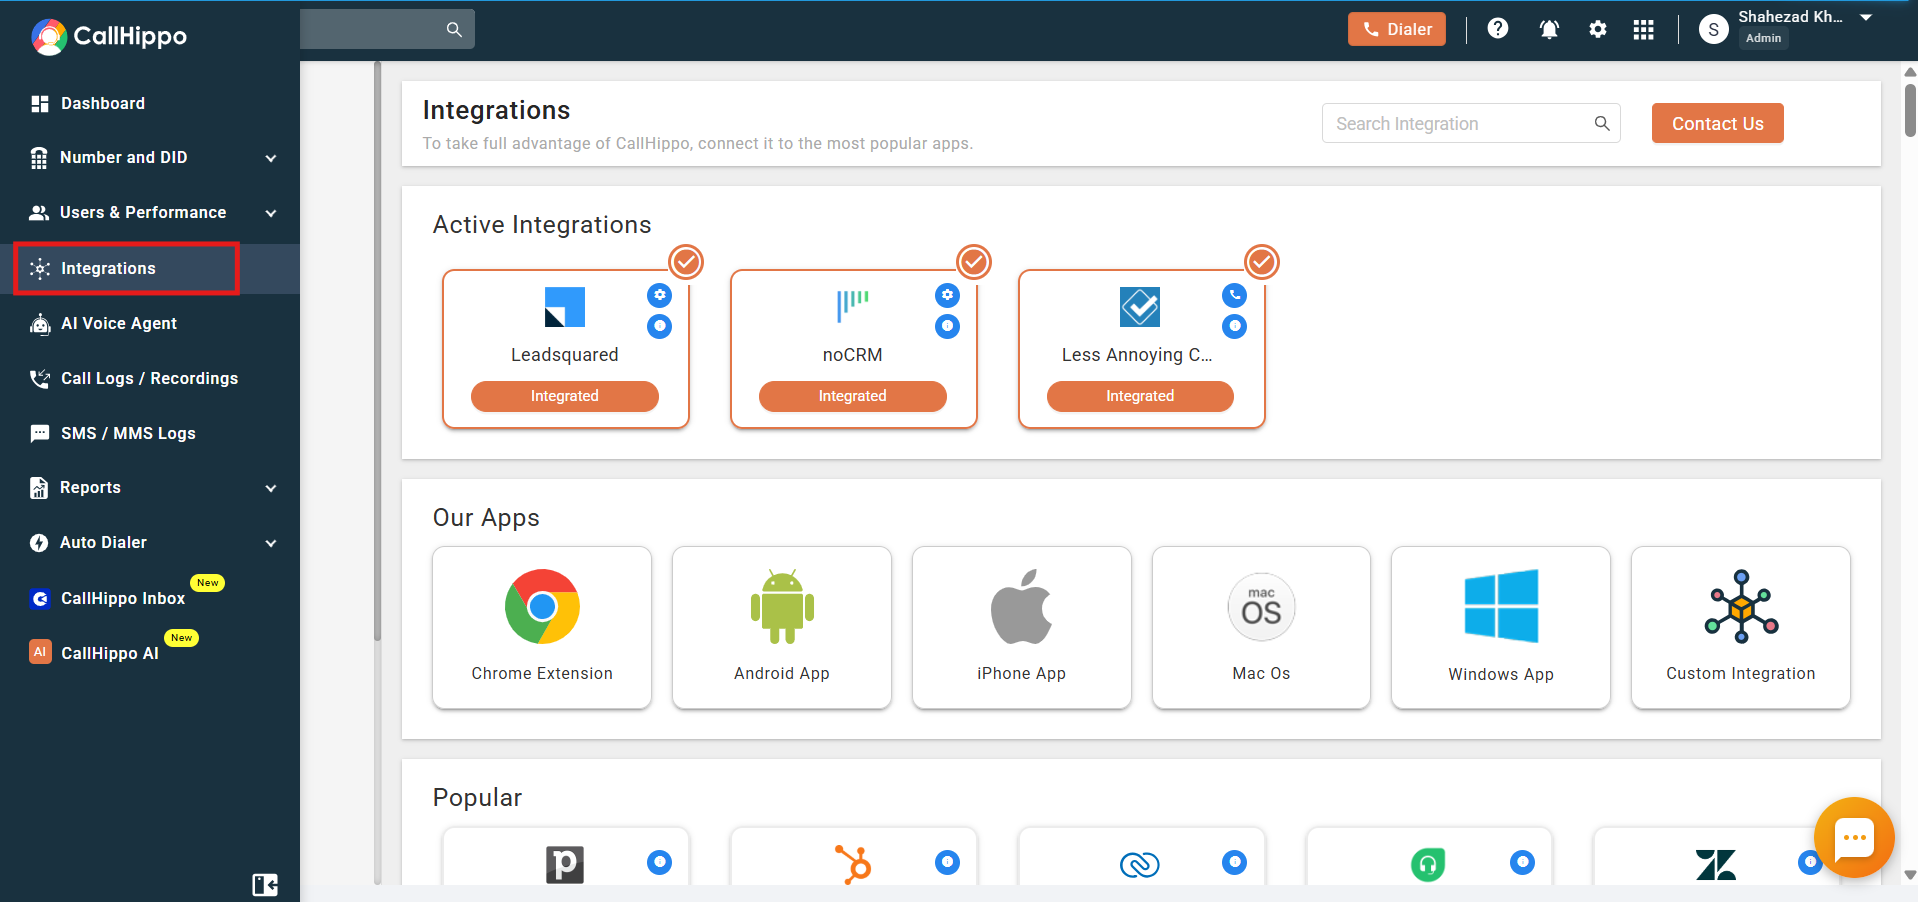
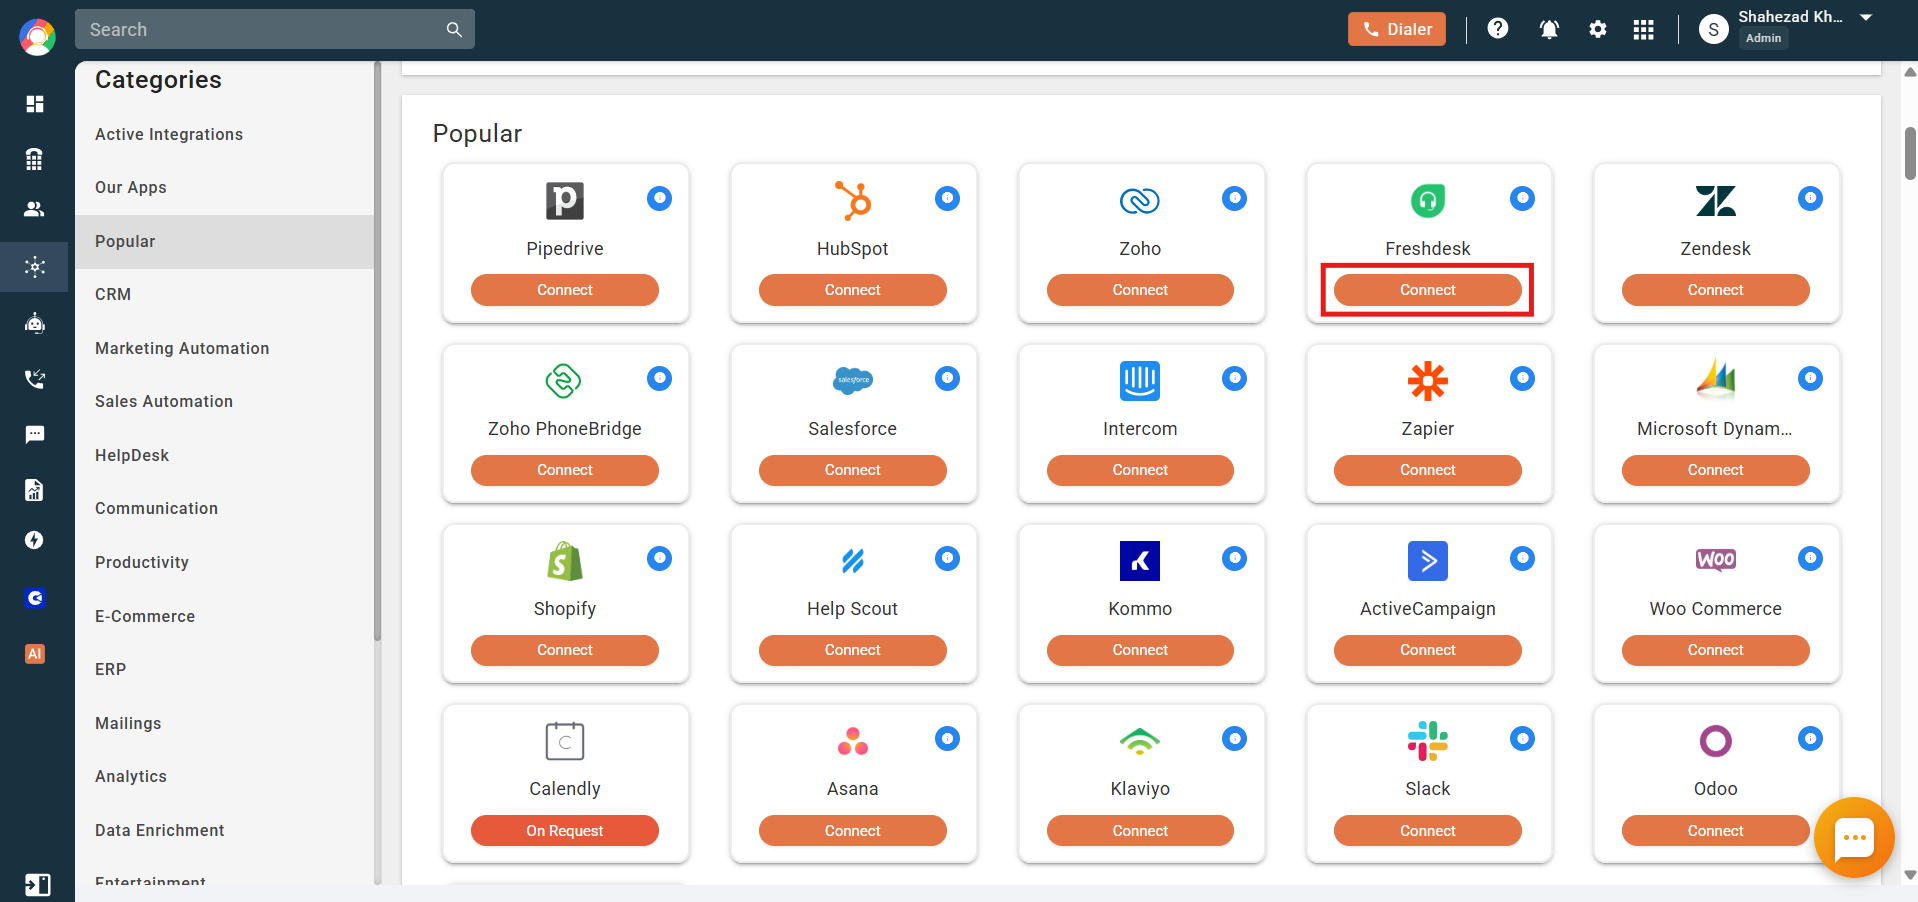
- Connect Freshdesk. Under the Popular category, click the Connect button on the Freshdesk card.
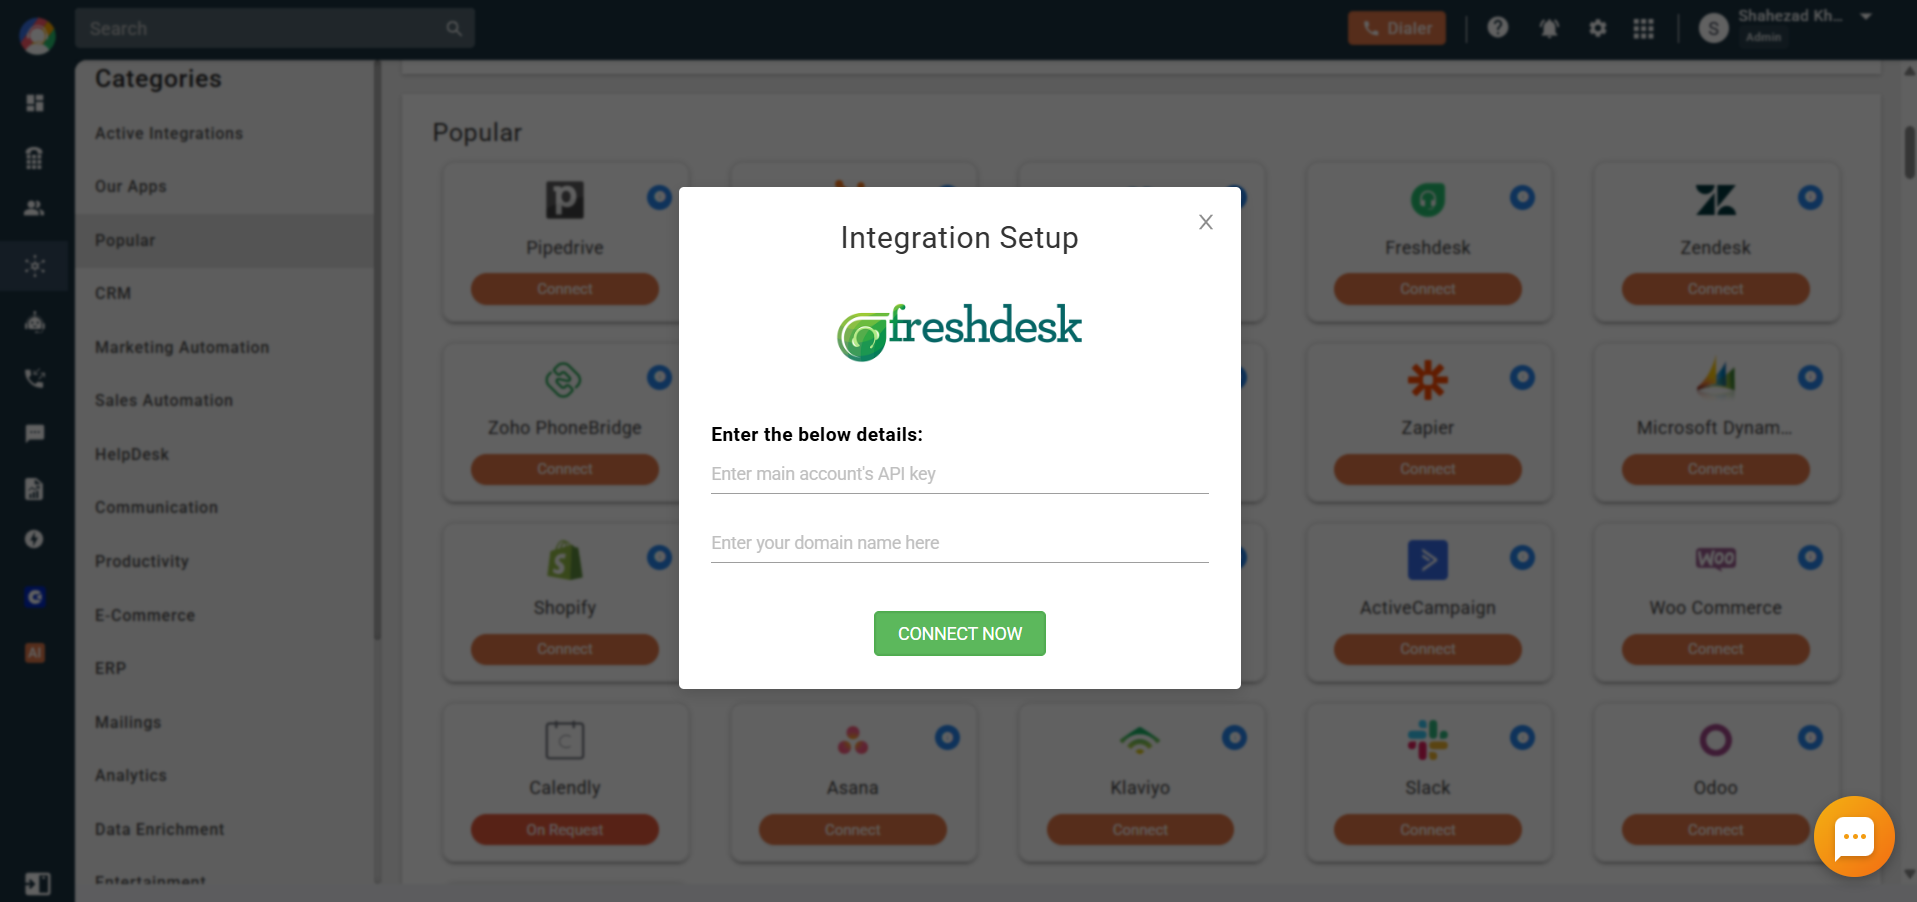
- Enter your details. In the Integration Setup popup, paste your Freshdesk API key and domain name, then click Connect Now.
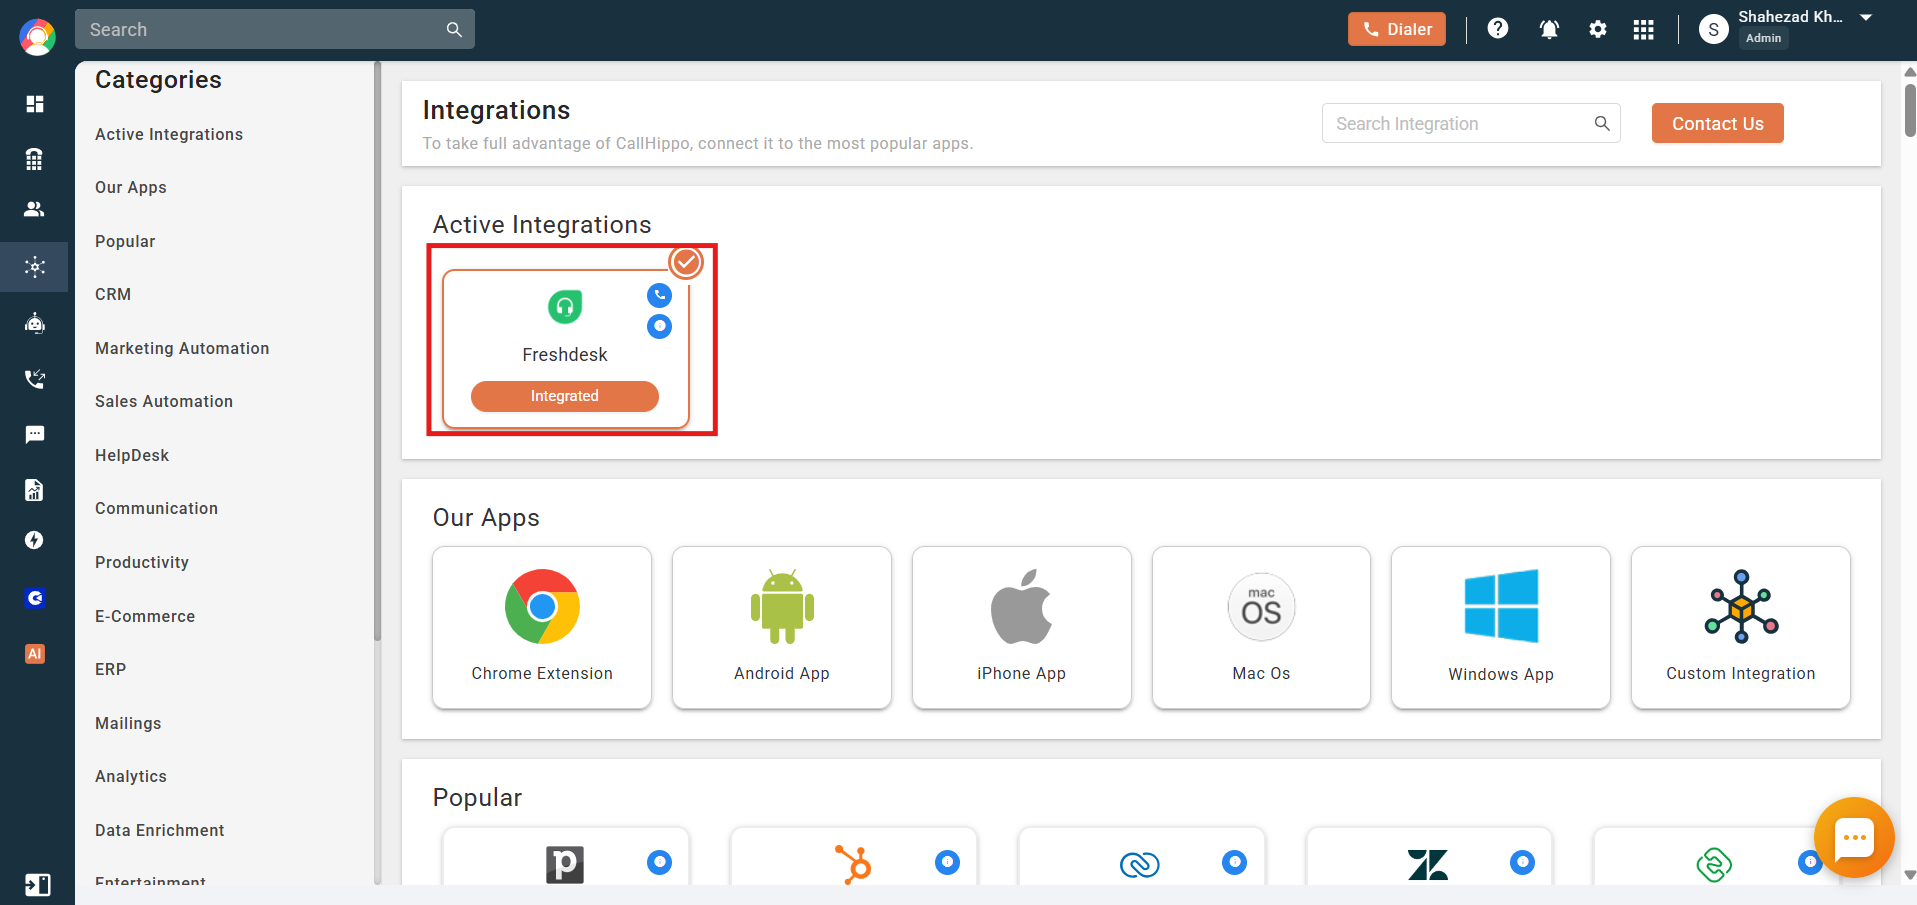
- Wait for confirmation. You’ll see a message that your Freshdesk account will be integrated soon, and the status will read “in progress”. You’ll also get an email once it completes. When the process finishes, the status changes to Integrated.
Find your CallHippo user ID
Before creating the webhooks, copy your CallHippo user ID — you’ll need it in every webhook URL.
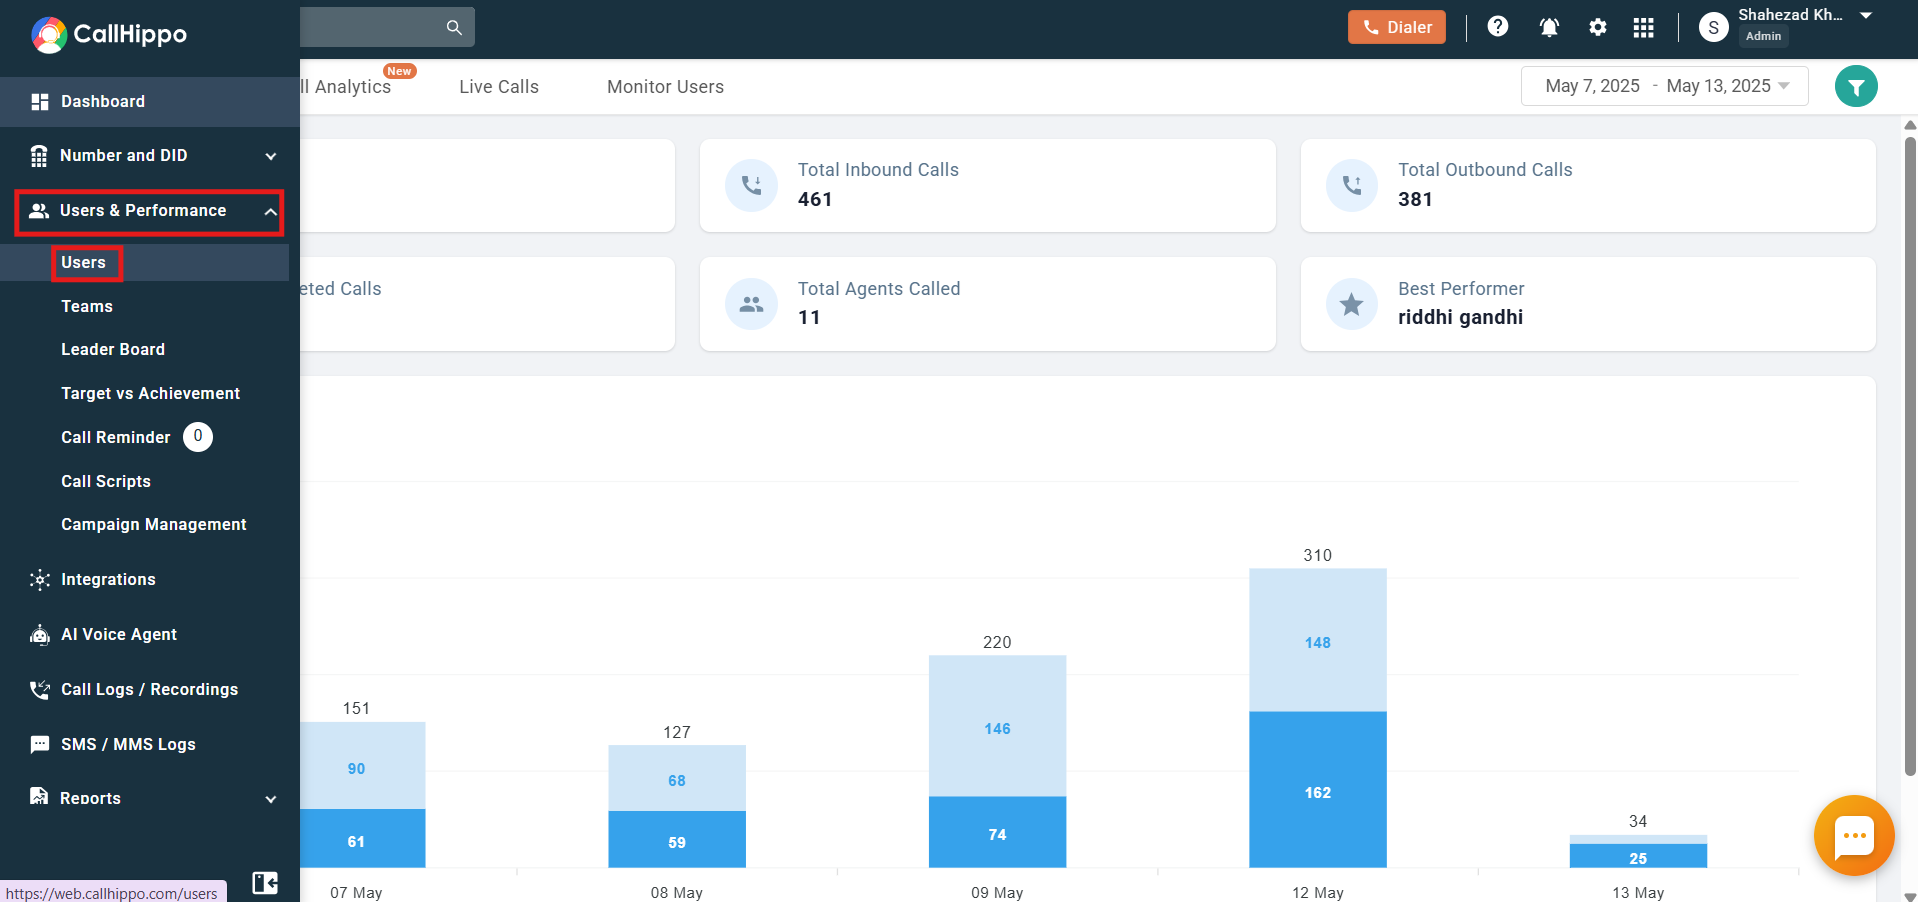
- Go to Users & Performance > Users.
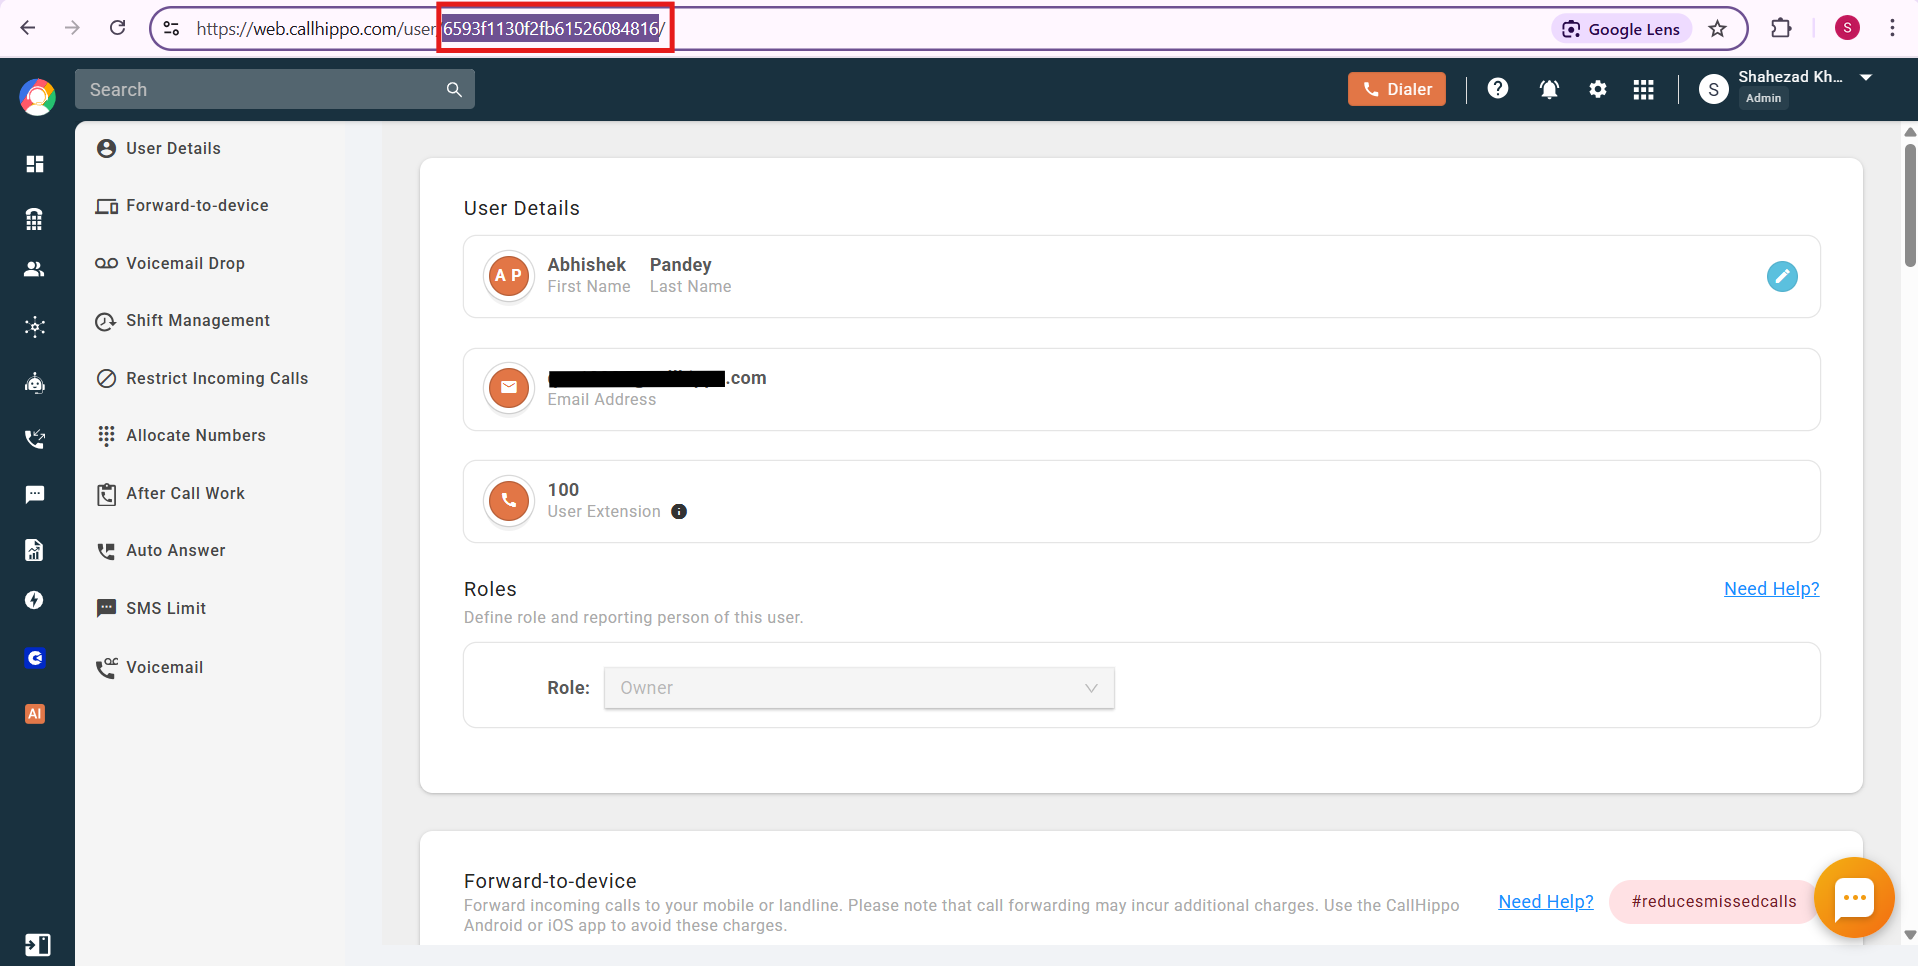
- Open the user settings for the Owner and copy the highlighted ID from the browser URL. Note it down for the next steps.
Create the Freshdesk webhooks
You’ll create four webhooks in Freshdesk so that ticket events stay in sync with CallHippo: Add New Ticket, Close Ticket, Open Ticket, and Delete Ticket. In each webhook URL, replace 59a122da8fe5d239bfc0288a with your own CallHippo user ID from the previous step.
1. Create the “Add New Ticket” webhook
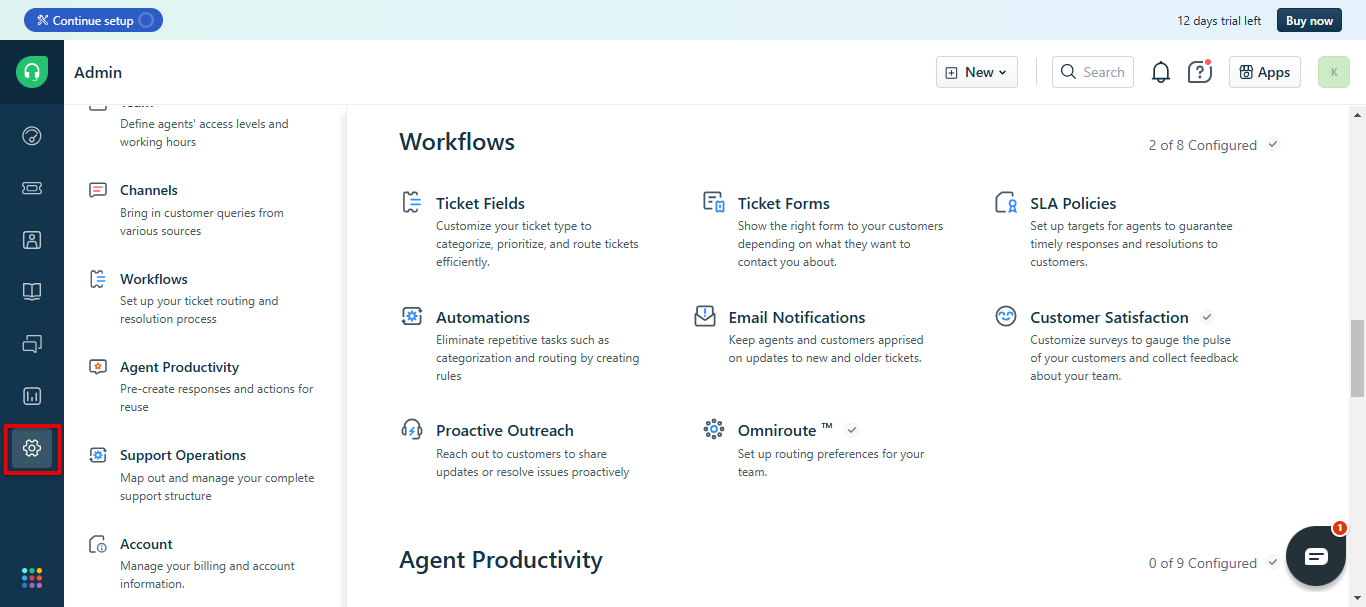
- In your Freshdesk dashboard, click the Admin tab.
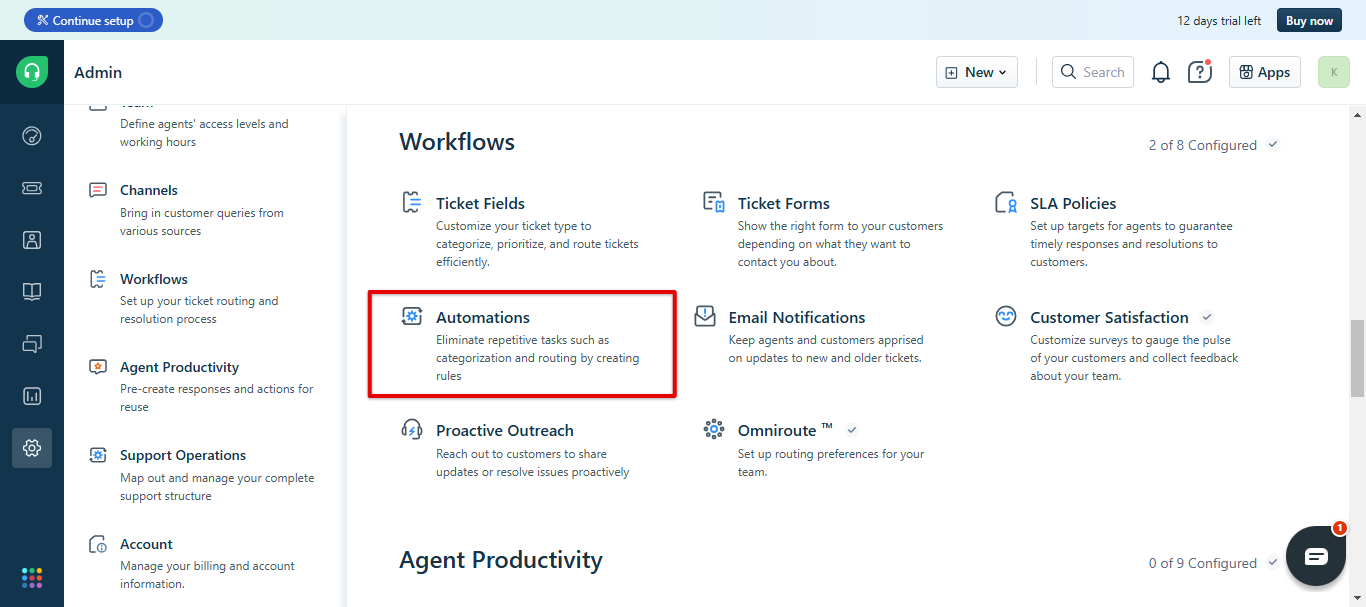
- Under the Workflows section, click the Automations icon.
- Open the Ticket Creation tab and click New rule.
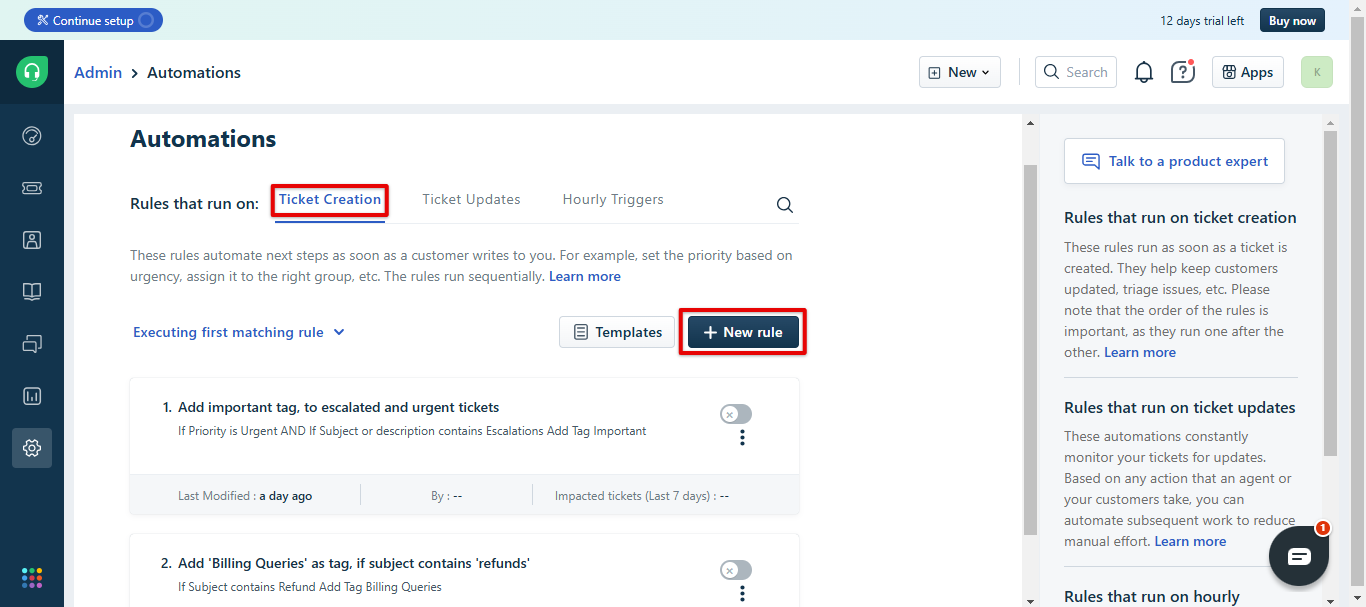
- Enter these details:
- Rule Name: Add New Ticket
- Description: Called when a new ticket with Open status is created
- Select the Match ANY of the below radio button.
- Under Conditions, set Status → Is → Open.
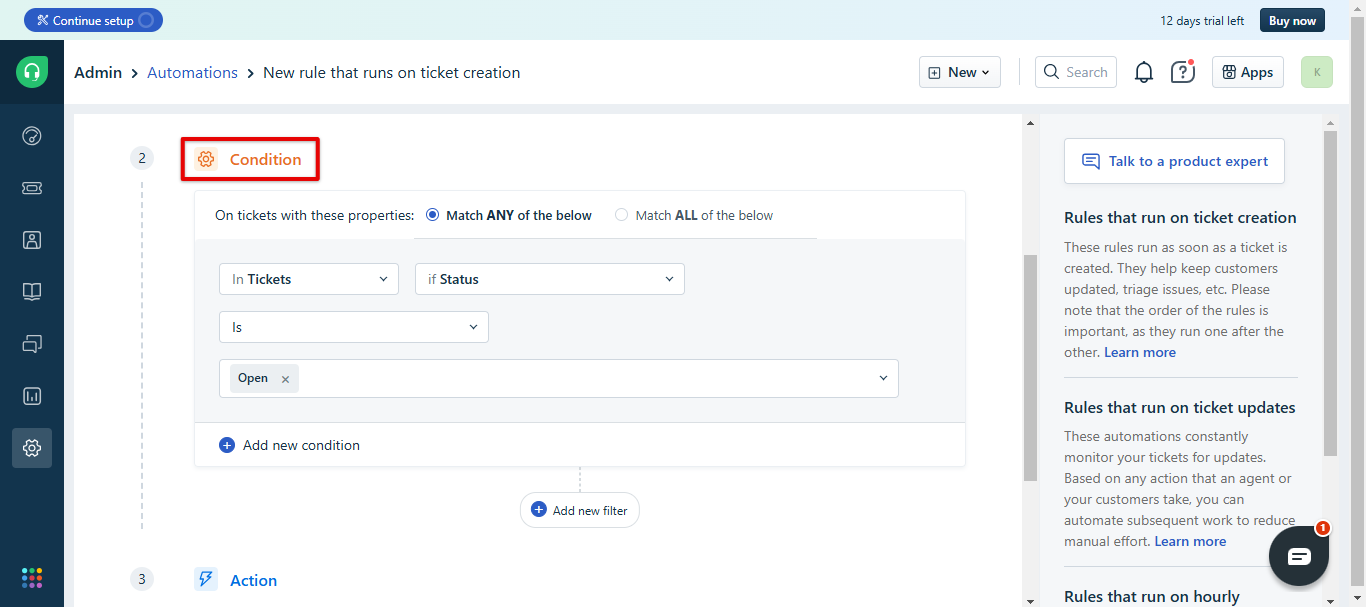
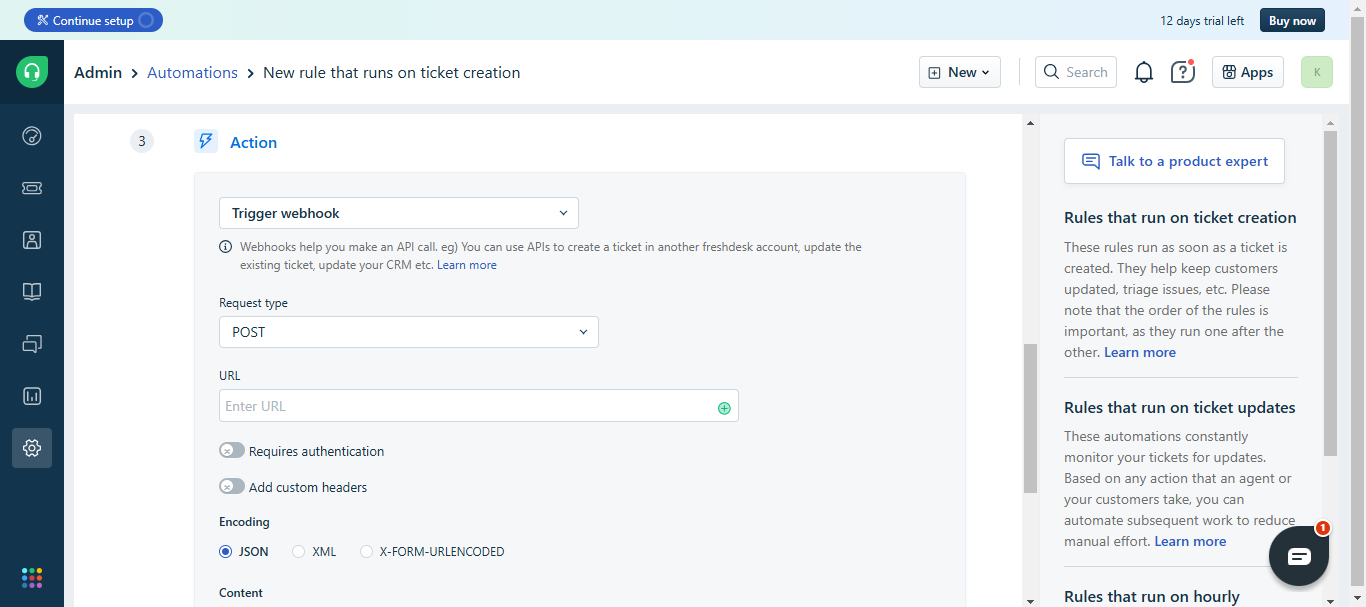
- Under the Actions segment, configure:
- Select Action: Trigger Webhook
- Request Type: POST
- Callback URL:
https://activity.callhippo.com/integration/users/59a122da8fe5d239bfc0288a/freshdesk/webhook/addticket - Encoding: JSON
- Content: Simple
- Select the checkbox against Ticket ID {{ticket.id}}.
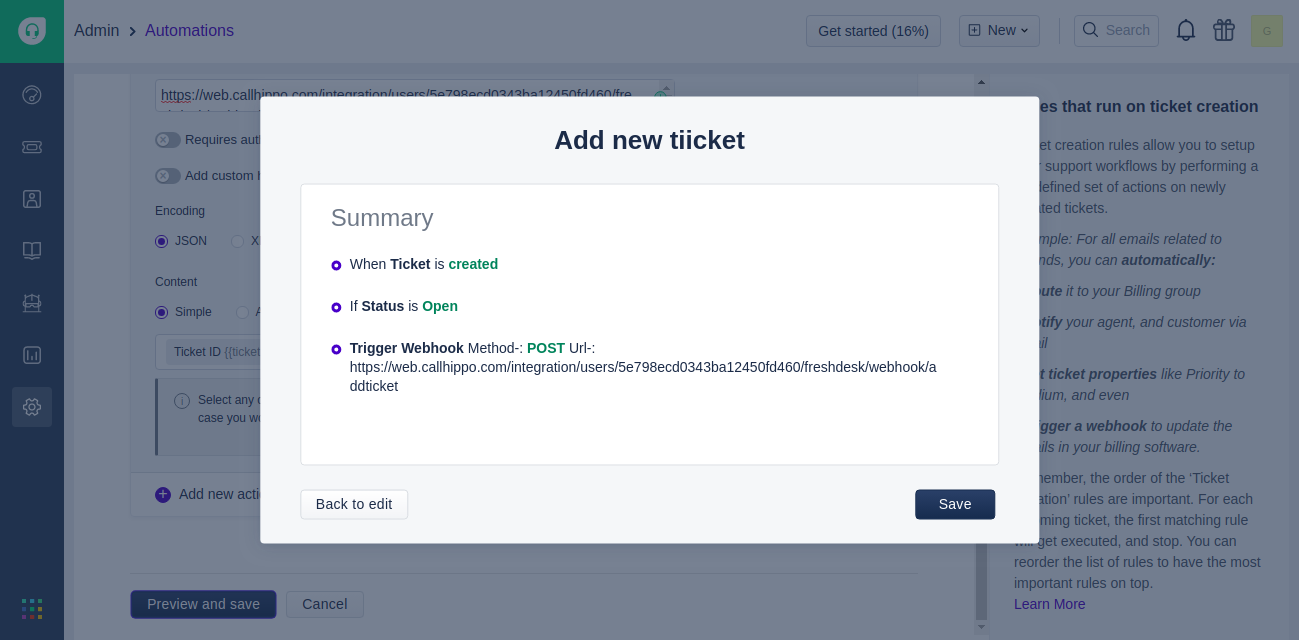
- Click Save. Review the rule summary and save.
2. Create the “Close Ticket” webhook
- Go to Admin > Workflows > Automations, open the Ticket Updates tab, and click New rule.
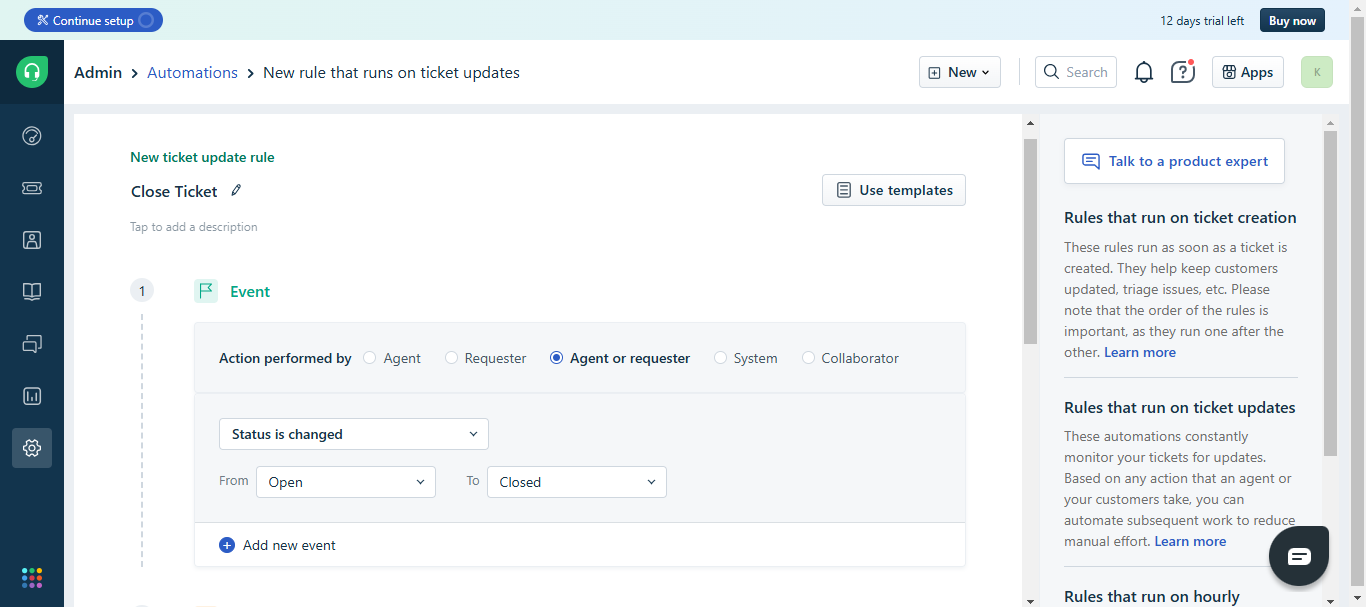
- Set the Rule Name to Close Ticket, choose Agent or Requester under “Action performed by”, then set the event to Status is changed from Open to Closed.
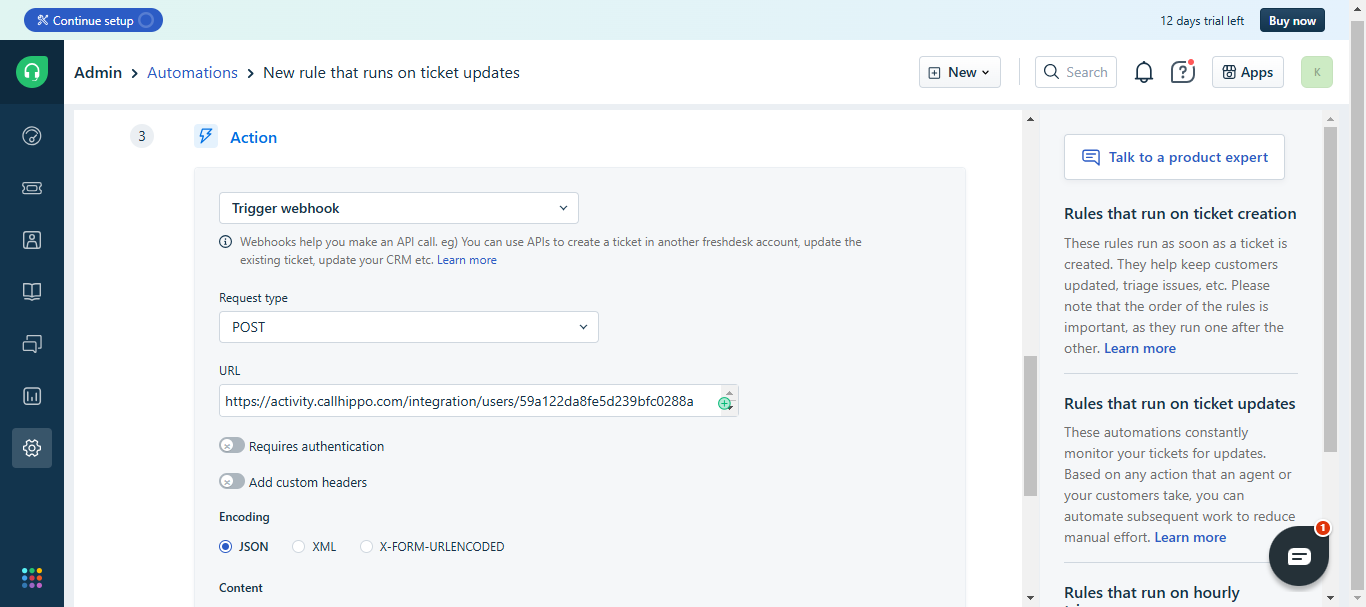
- Under Actions, set Trigger Webhook, POST, JSON encoding, Simple content, select Ticket ID {{ticket.id}}, and use this callback URL:
https://activity.callhippo.com/integration/users/59a122da8fe5d239bfc0288a/freshdesk/webhook/removeticket
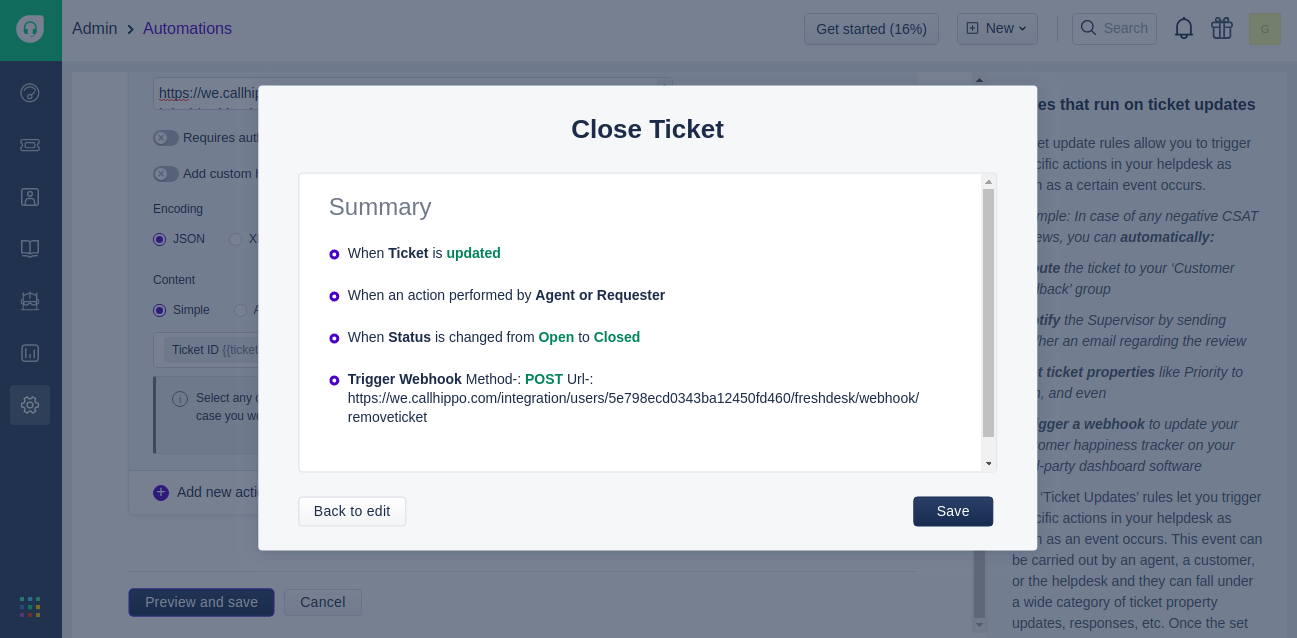
- Click Save and review the summary.
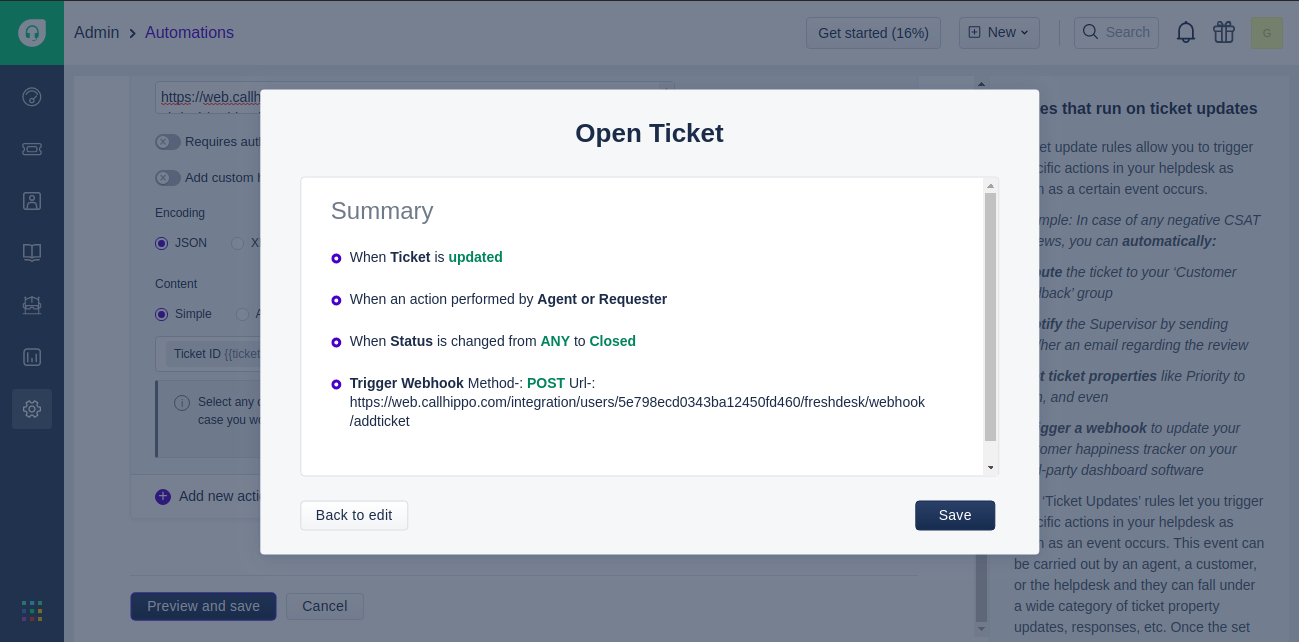
3. Create the “Open Ticket” webhook
- Go to Admin > Workflows > Automations, open the Ticket Updates tab, and click New rule.
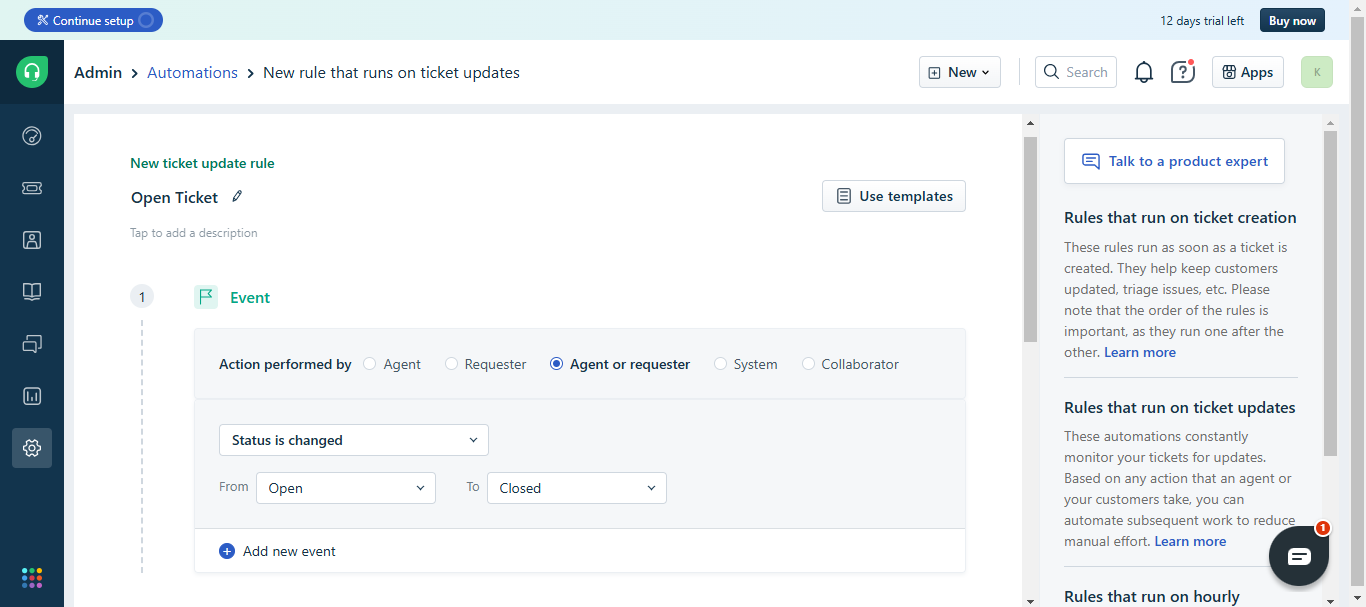
- Set the Rule Name to Open Ticket, choose Agent or Requester, then set the event to Status is changed from Any Status to Closed.
- Under Actions, set Trigger Webhook, POST, JSON encoding, Simple content, select Ticket ID {{ticket.id}}, and use this callback URL:
https://activity.callhippo.com/integration/users/59a122da8fe5d239bfc0288a/freshdesk/webhook/addticket - Click Preview and Save and review the summary.
4. Create the “Delete Ticket” webhook
- Go to Admin > Workflows > Automations, open the Ticket Updates tab, and click New rule.
- Set the Rule Name to Delete Ticket, choose Agent or Requester, then set the event to Ticket is → Deleted.
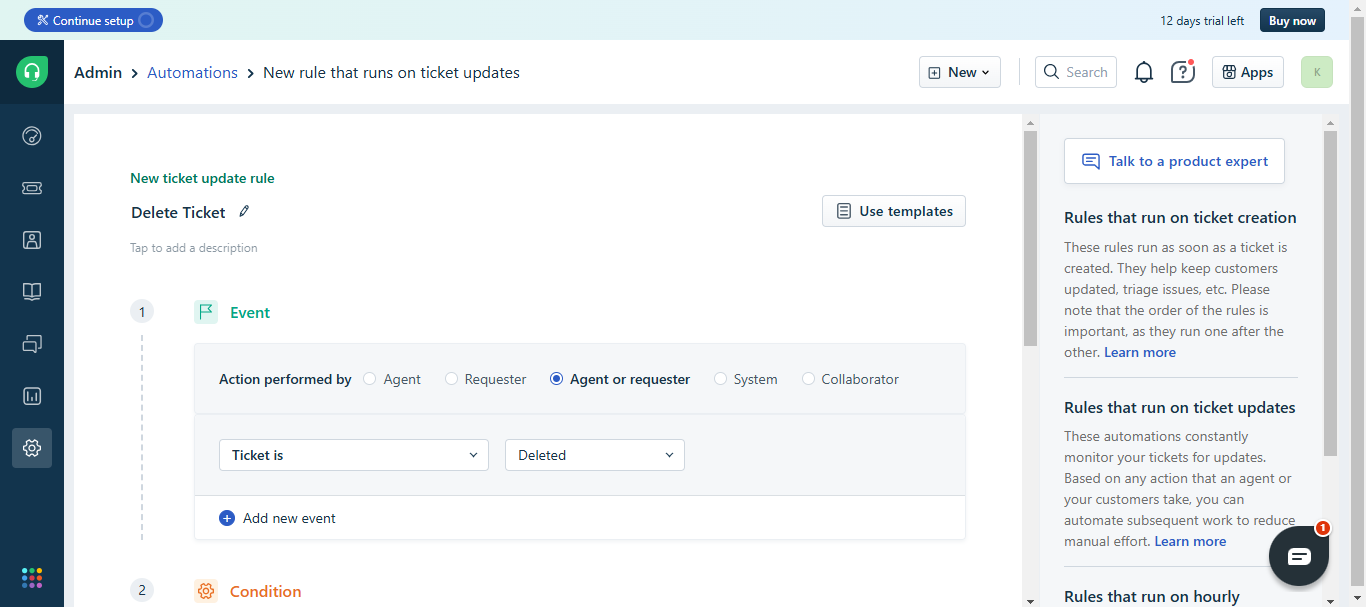
- Under Actions, set Trigger Webhook, POST, JSON encoding, Simple content, select Ticket ID {{ticket.id}}, and use this callback URL:
https://activity.callhippo.com/integration/users/59a122da8fe5d239bfc0288a/freshdesk/webhook/removeticket - Click Preview and Save.
That’s it — Freshdesk is now fully integrated with CallHippo.
What you get after integrating
- Contact sync on click-to-call: Freshdesk contacts sync to CallHippo when a Click-to-Call action is performed on them.
- Enable Click-to-Call: Install the CallHippo Click-to-Call Chrome extension from the Chrome Web Store. Once installed, a call icon appears next to every phone number — click it to place the call.
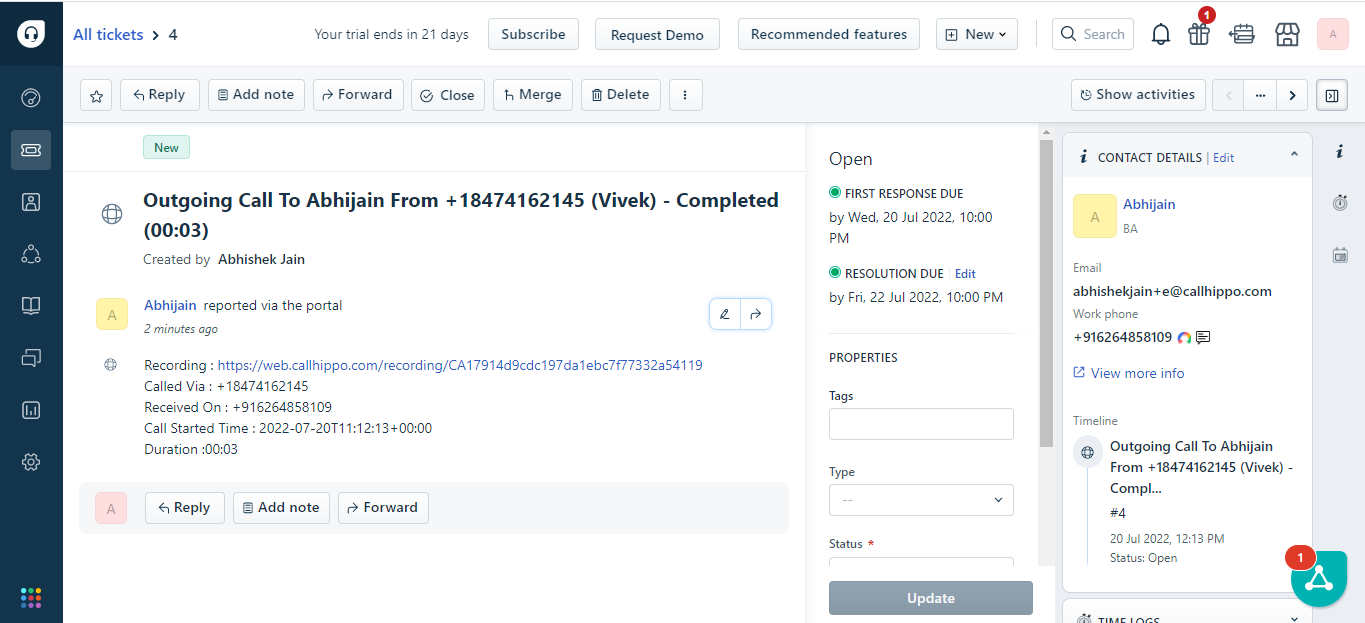
- Call activity on tickets: Any incoming or outgoing call to a synced Freshdesk contact shows up as a call activity ticket.
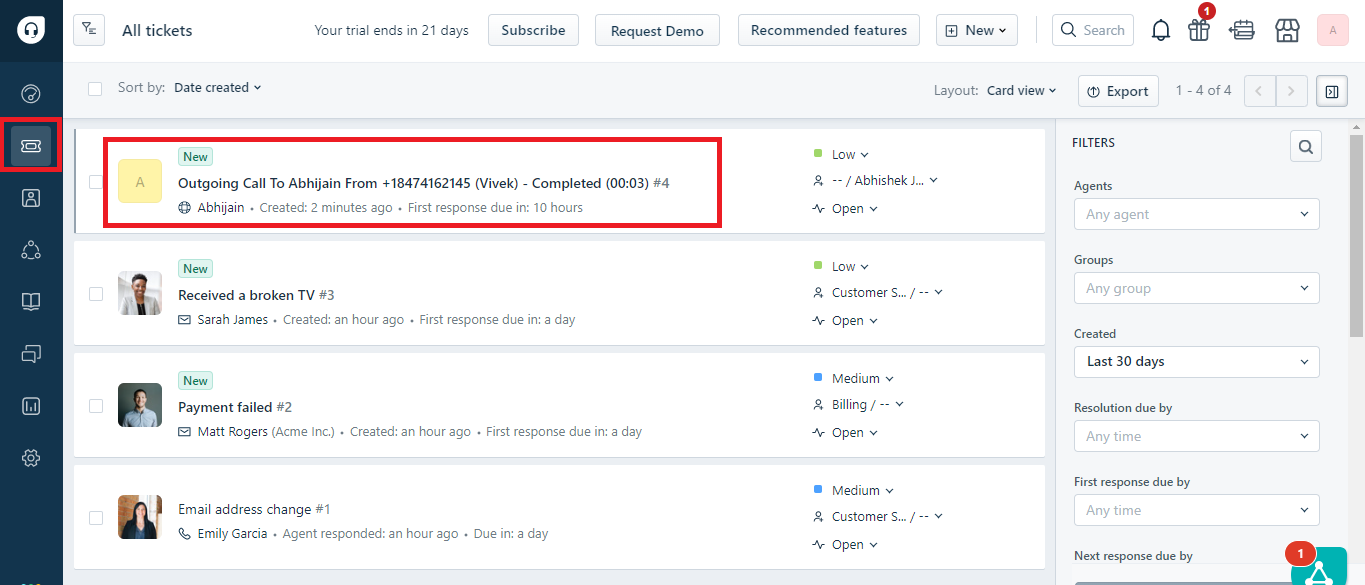
Open the ticket to see the full call details, including the recording, duration, and contact information.
- SMS activity on tickets: SMS sent or received on synced Freshdesk contacts also appears as an activity on the ticket.