
Connecting CallHippo with Intercom lets your support team log every call and SMS against the right contact, place outbound calls straight from Intercom, and keep customer records in sync automatically.
Before you begin, keep these points in mind:
- Owner access: Use an account with owner access on both CallHippo and Intercom to set up the integration.
- Permissions: OAuth and webhook permissions must be enabled in Intercom, with full access to settings.
- Sync timing: Data syncs almost instantly, though the first sync of existing contacts can take a few minutes.
The integration works across the Leads and Contact modules in Intercom.
Set up the app in Intercom
You first create an app in Intercom’s Developer Hub and collect the credentials CallHippo needs.
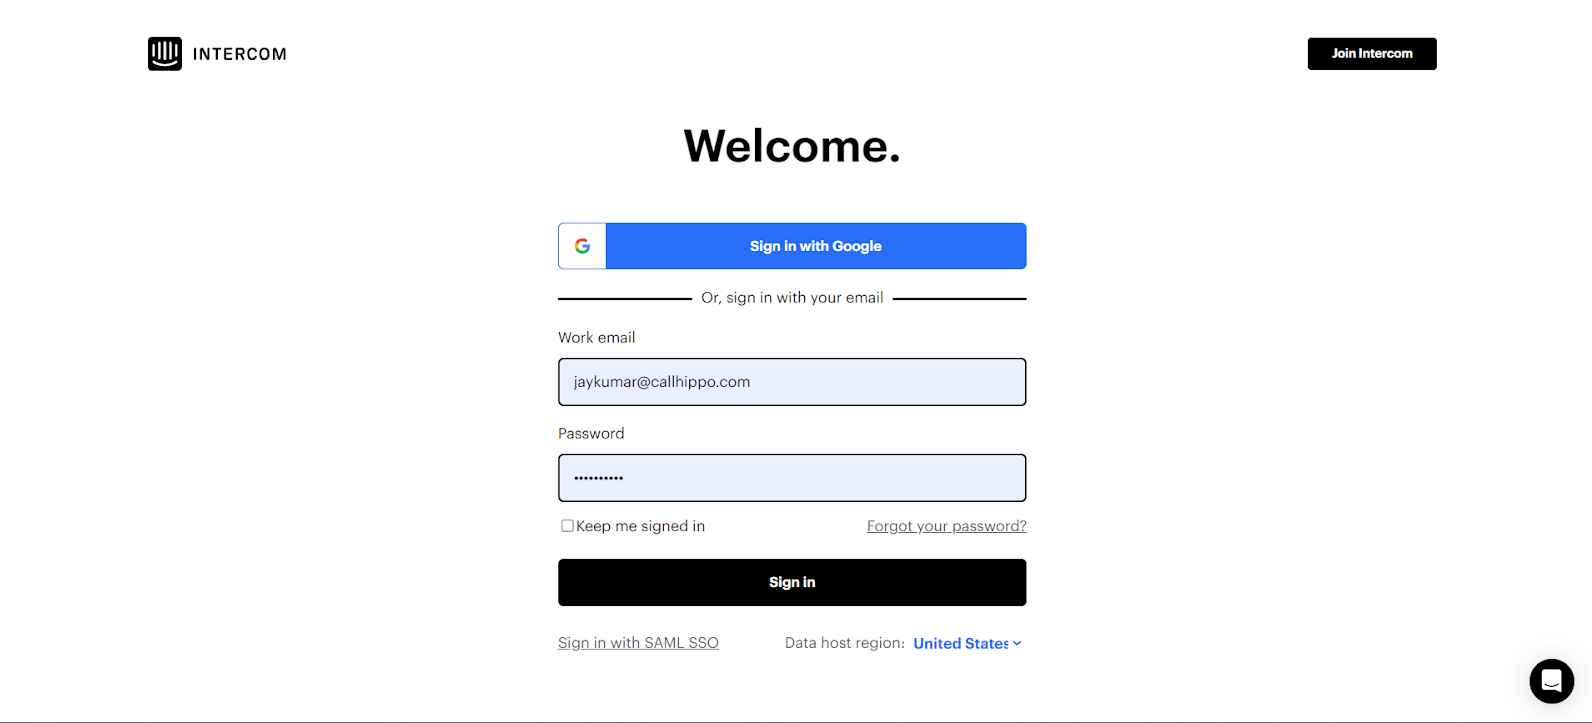
- Log in to Intercom using the account you want to integrate with CallHippo (an owner account is preferable).
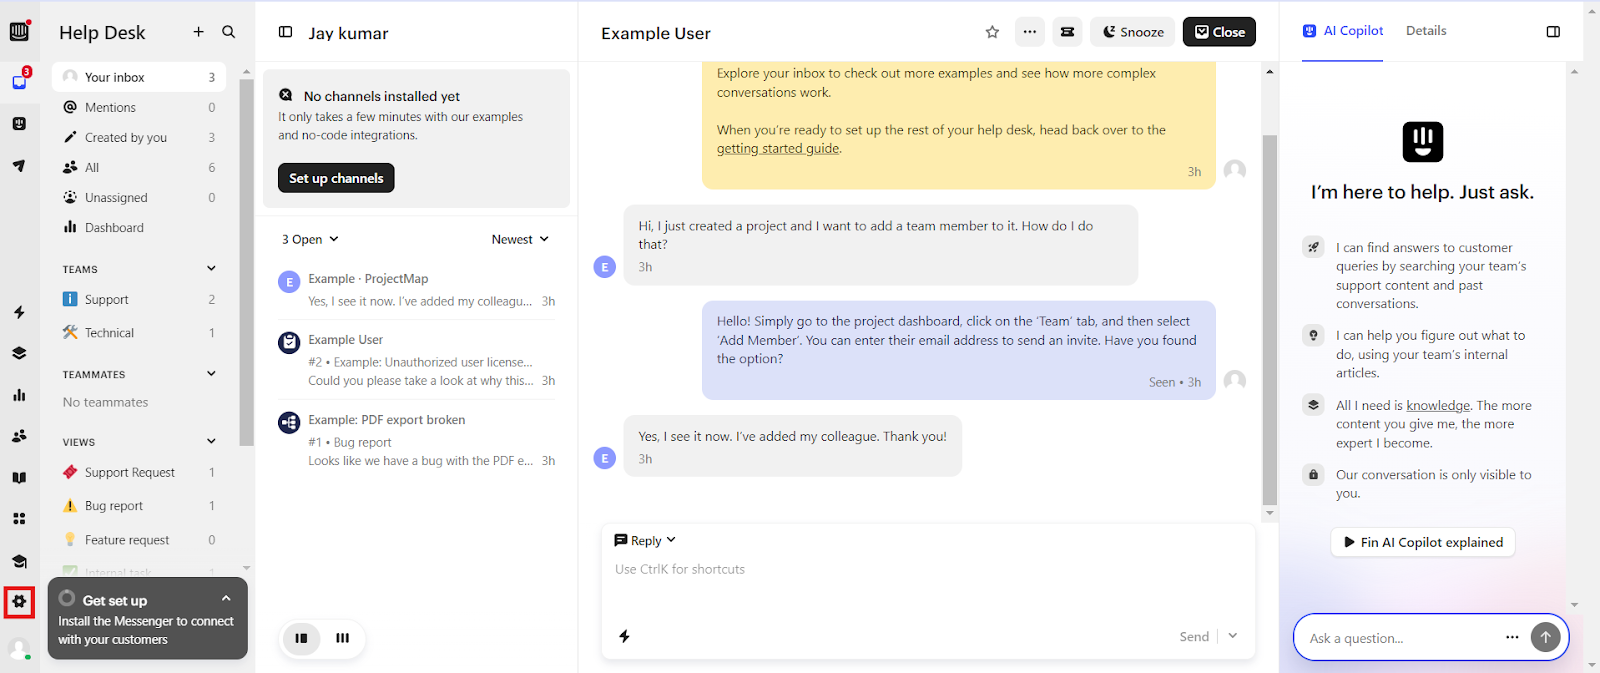
- Open Settings. Click the Settings gear icon in the bottom-left corner.
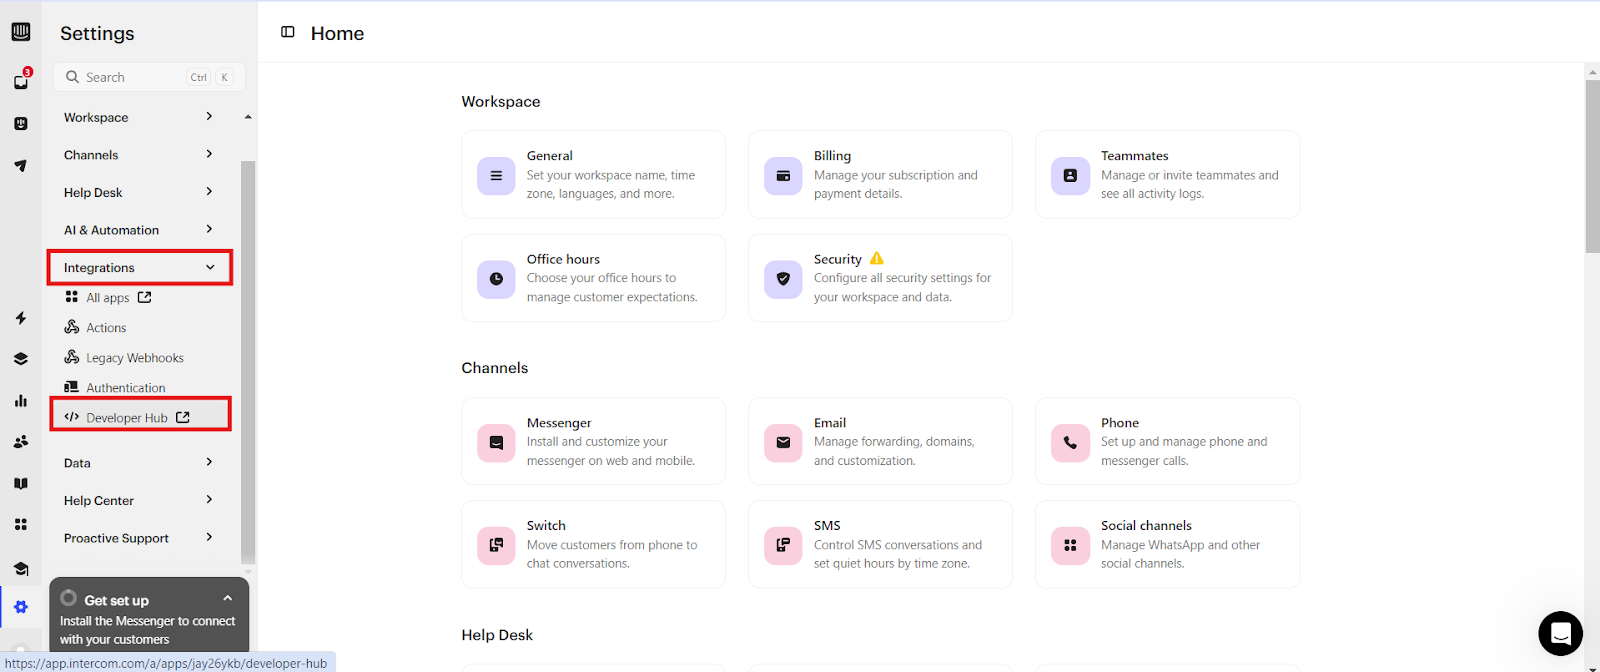
- Go to the Developer Hub. Click Integrations, then Developer Hub.
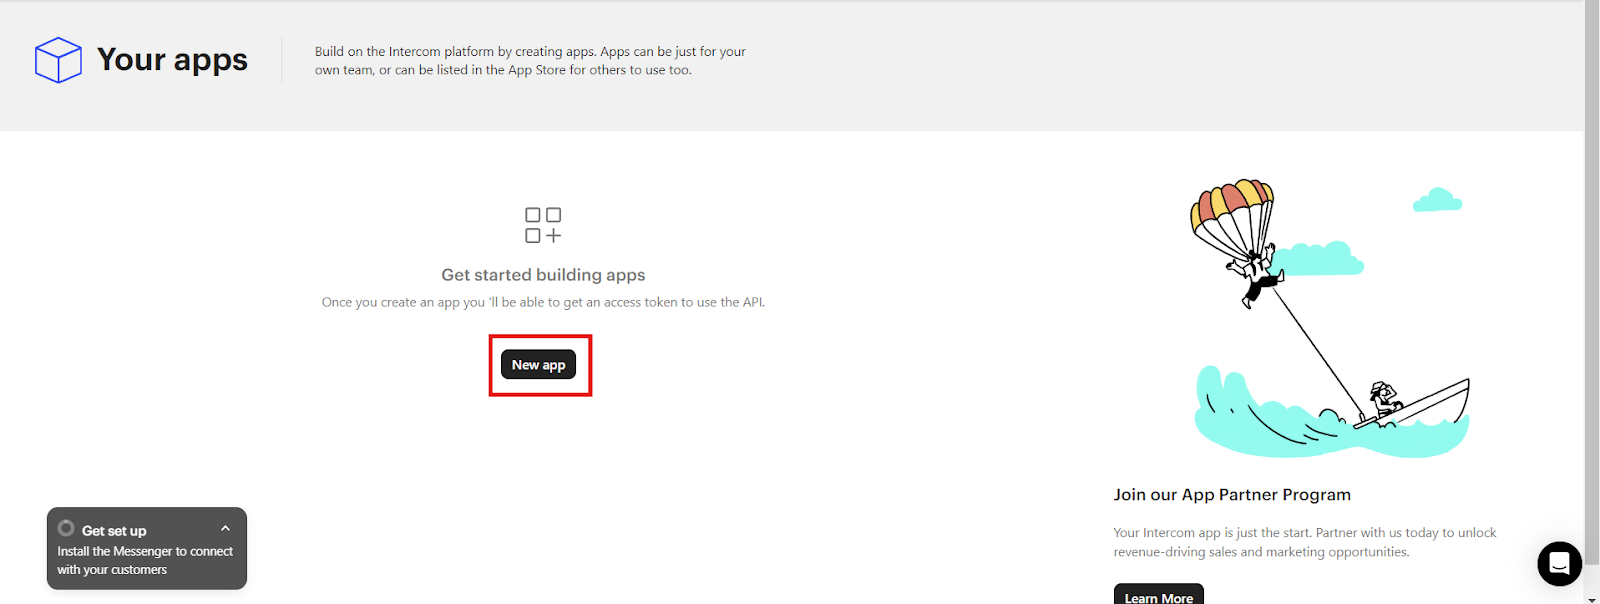
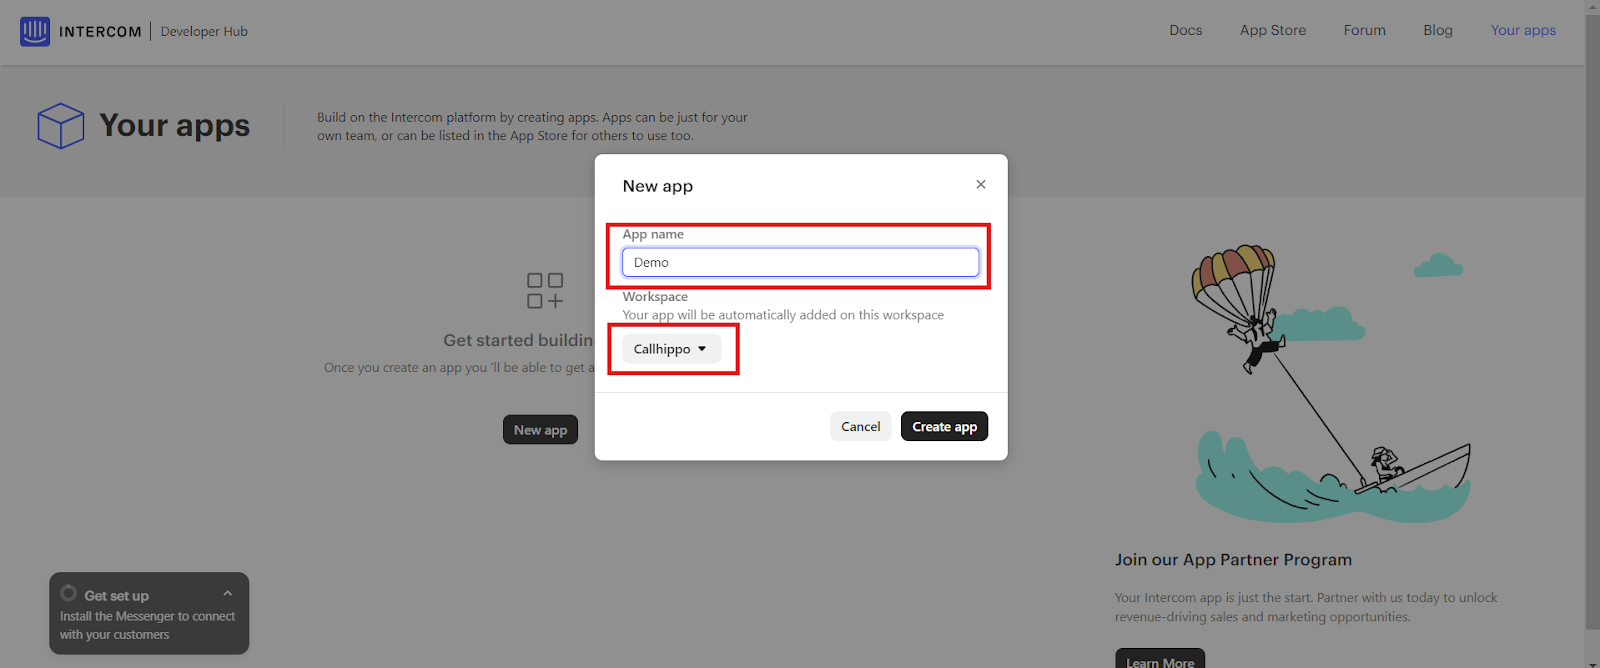
- Create a new app. Click the New app button, set a name, select the desired workspace, and click Create app.
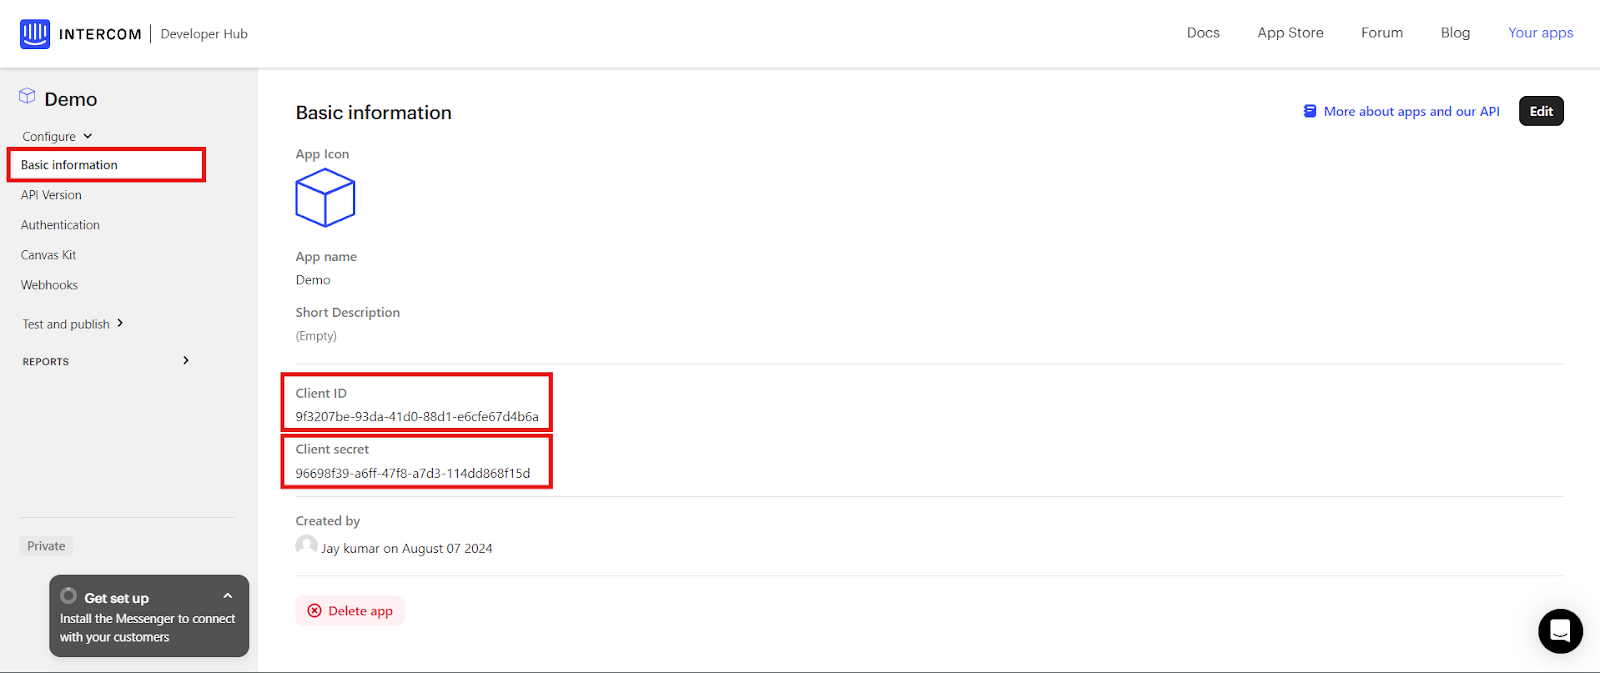
- Note the Client ID and Client Secret. In the Basic information tab, copy down the Client ID and Client secret.
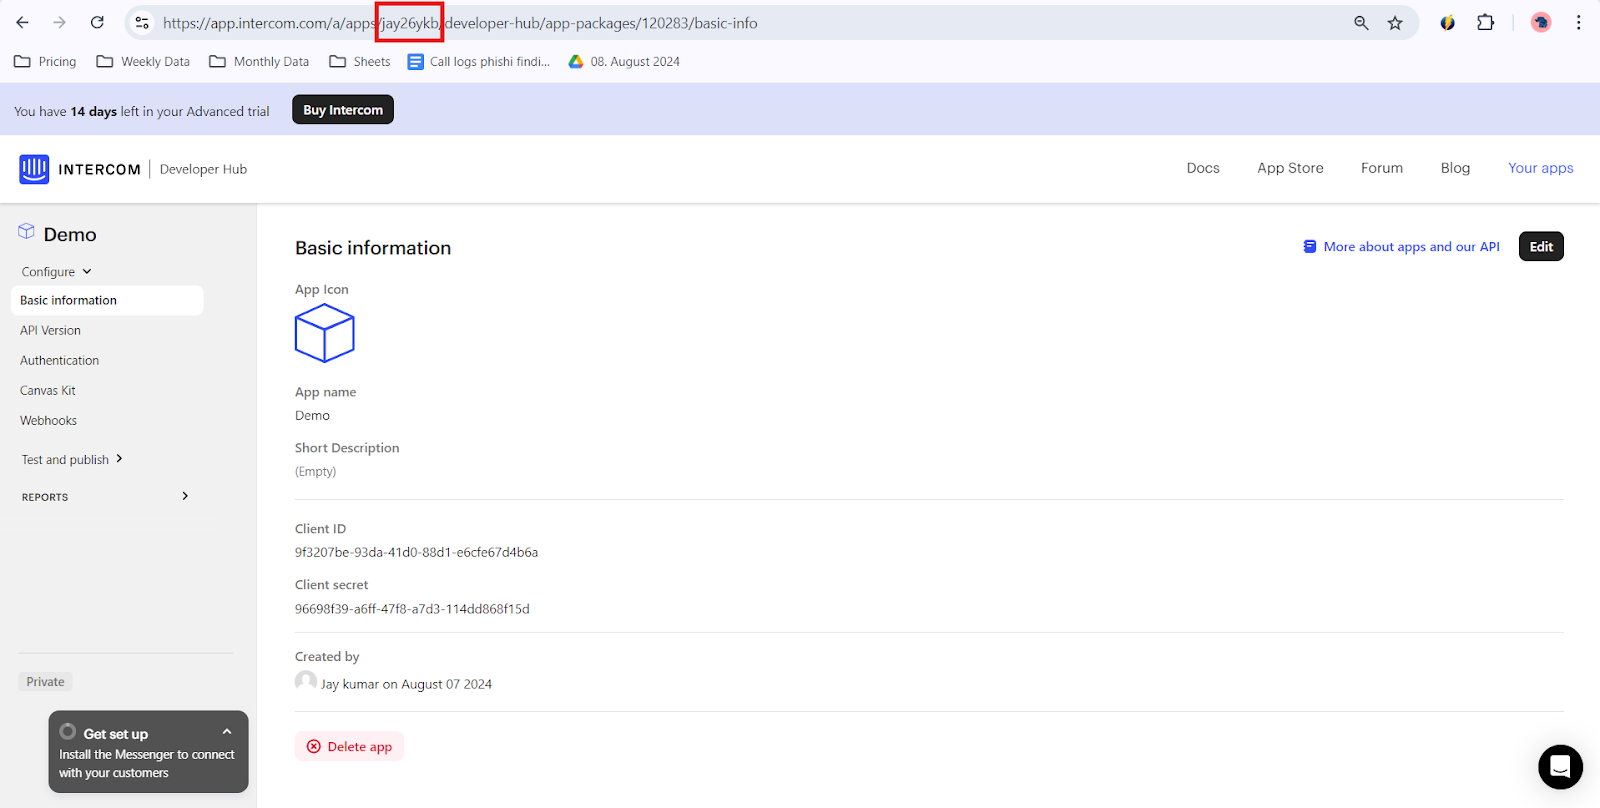
- Note the App ID. Copy the highlighted portion of the Intercom URL — this is the App ID you will need in CallHippo.
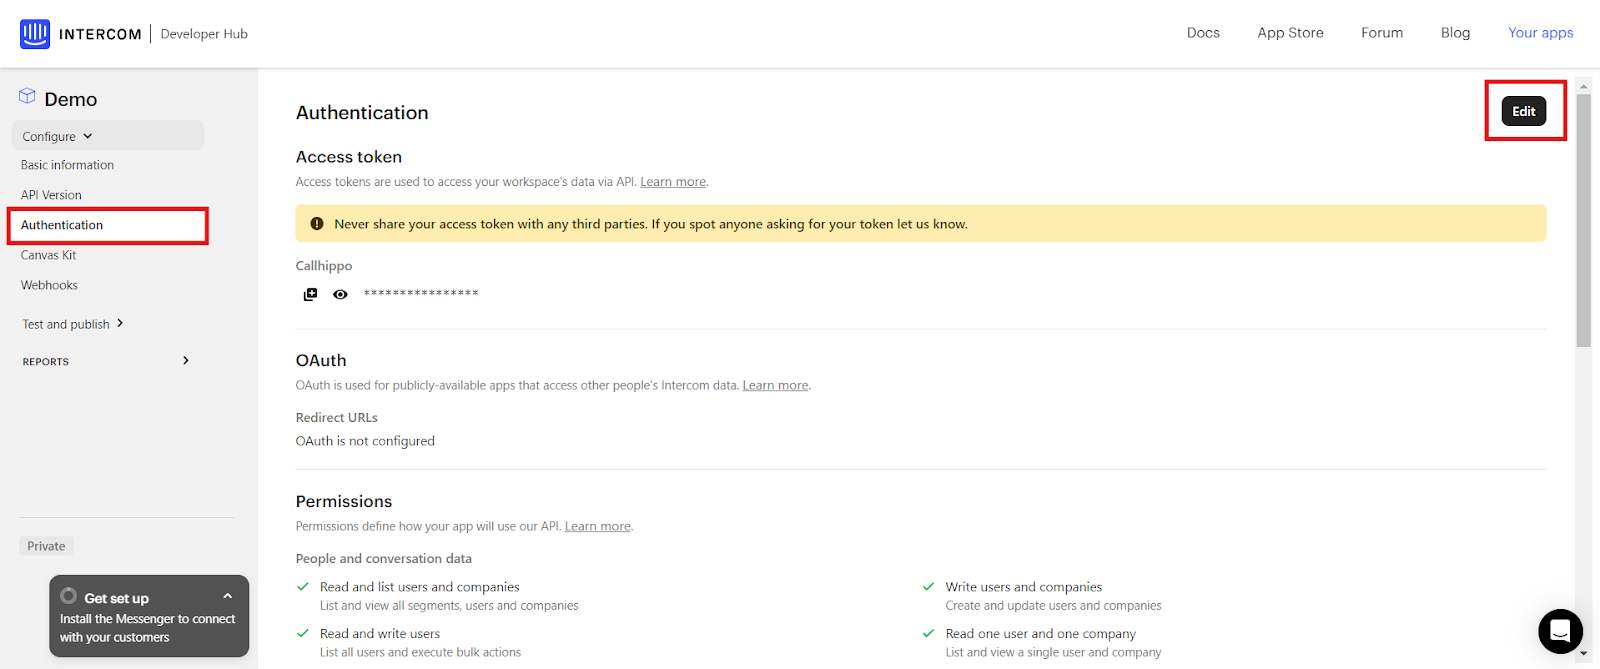
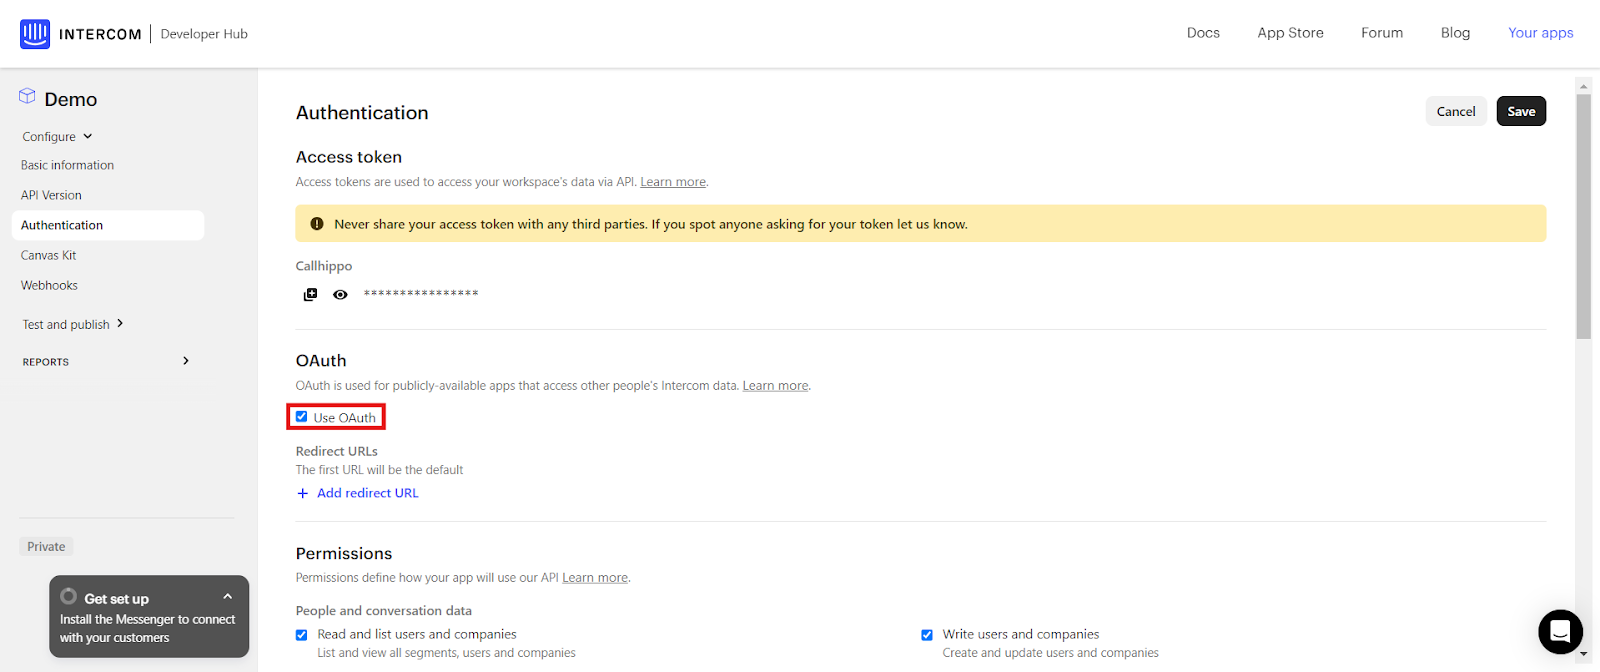
- Enable OAuth. Open the Authentication menu, click Edit, and select the Use OAuth checkbox.
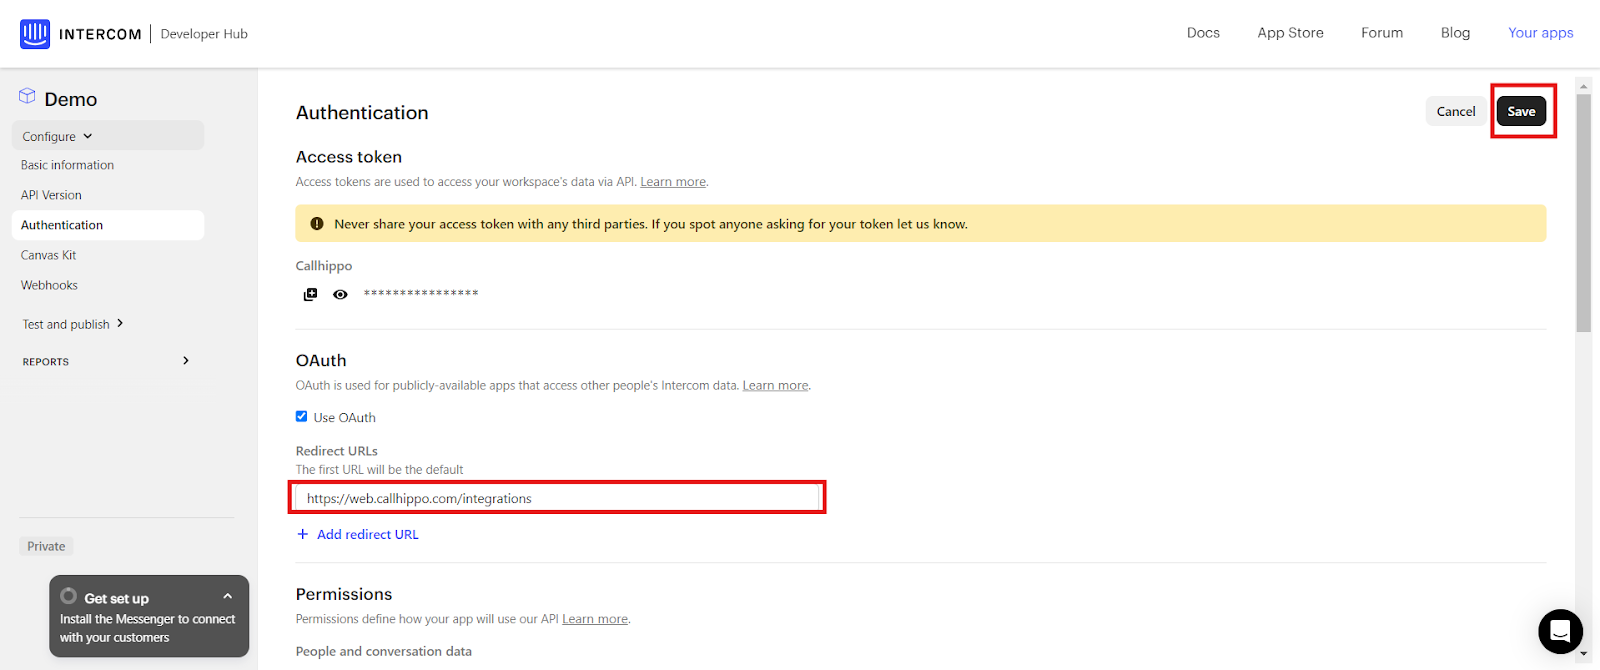
- Add the Redirect URL. Enter https://web.callhippo.com/integrations as the redirect URL and save your changes.
Connect the integration in CallHippo
With the Client ID, Client Secret, and App ID from Intercom in hand, complete the connection inside CallHippo.
- Open Integrations. Go to the Integrations page in CallHippo and find Intercom.
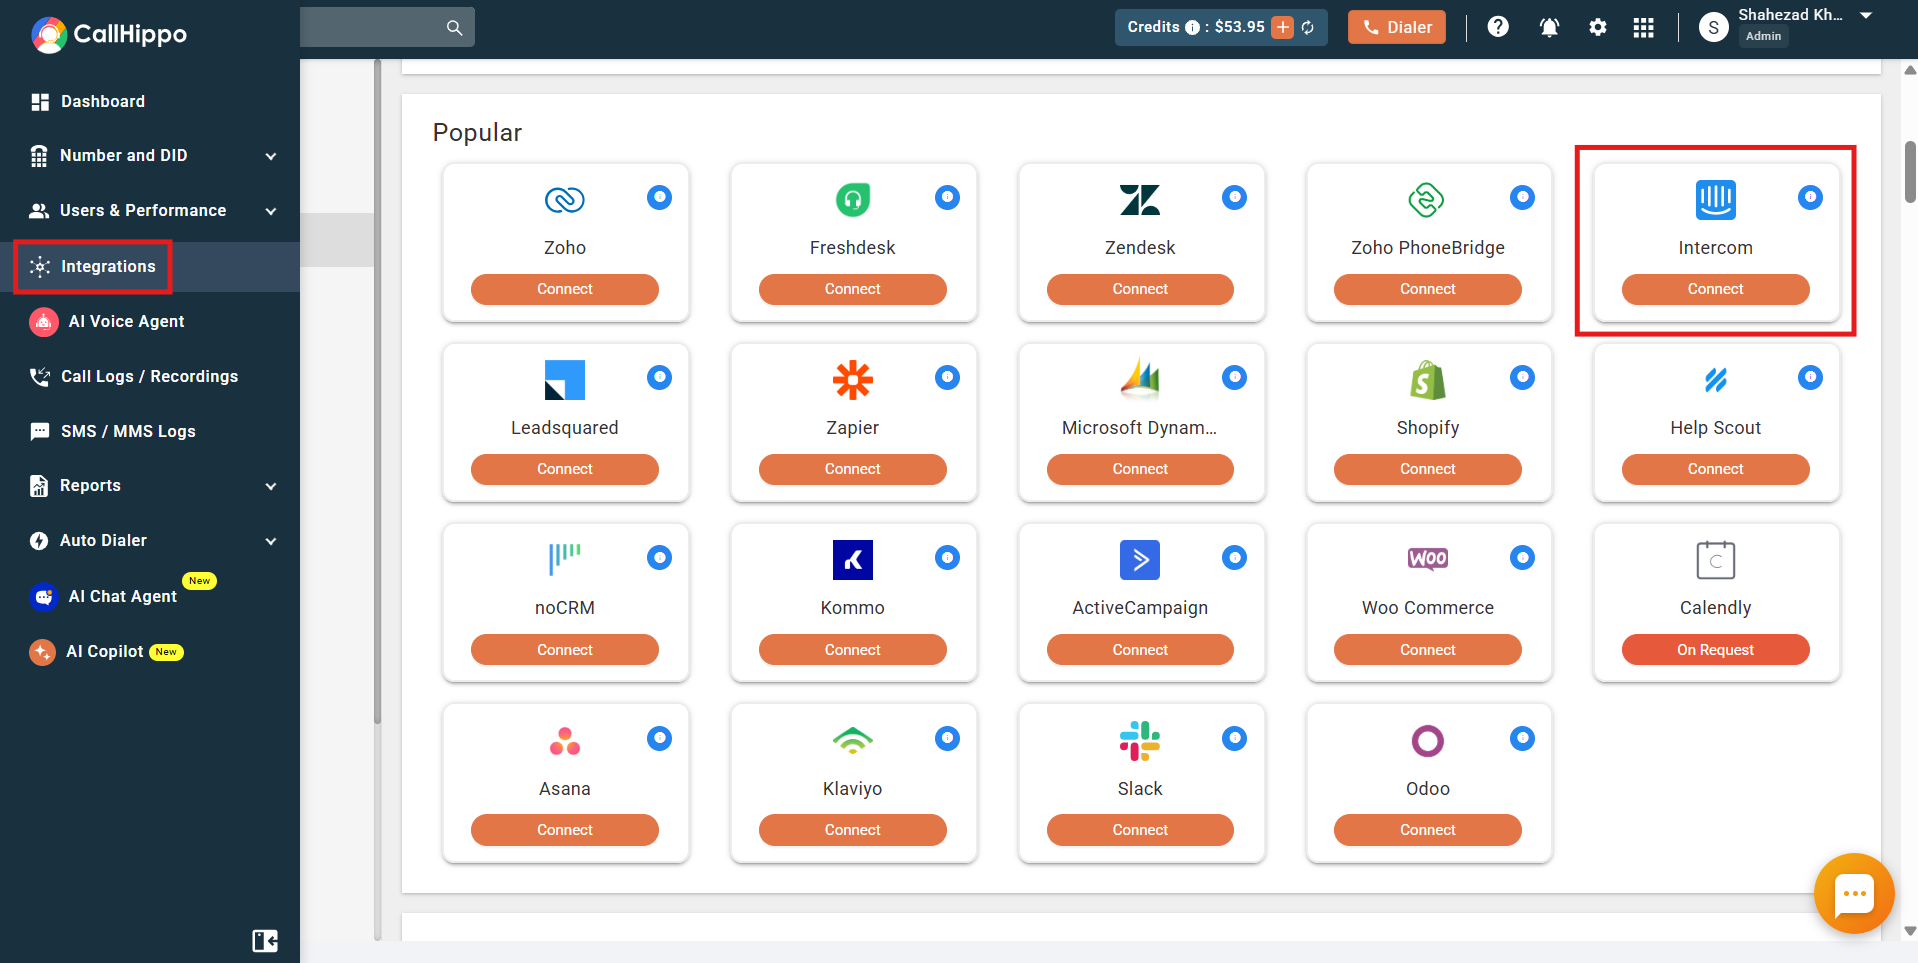
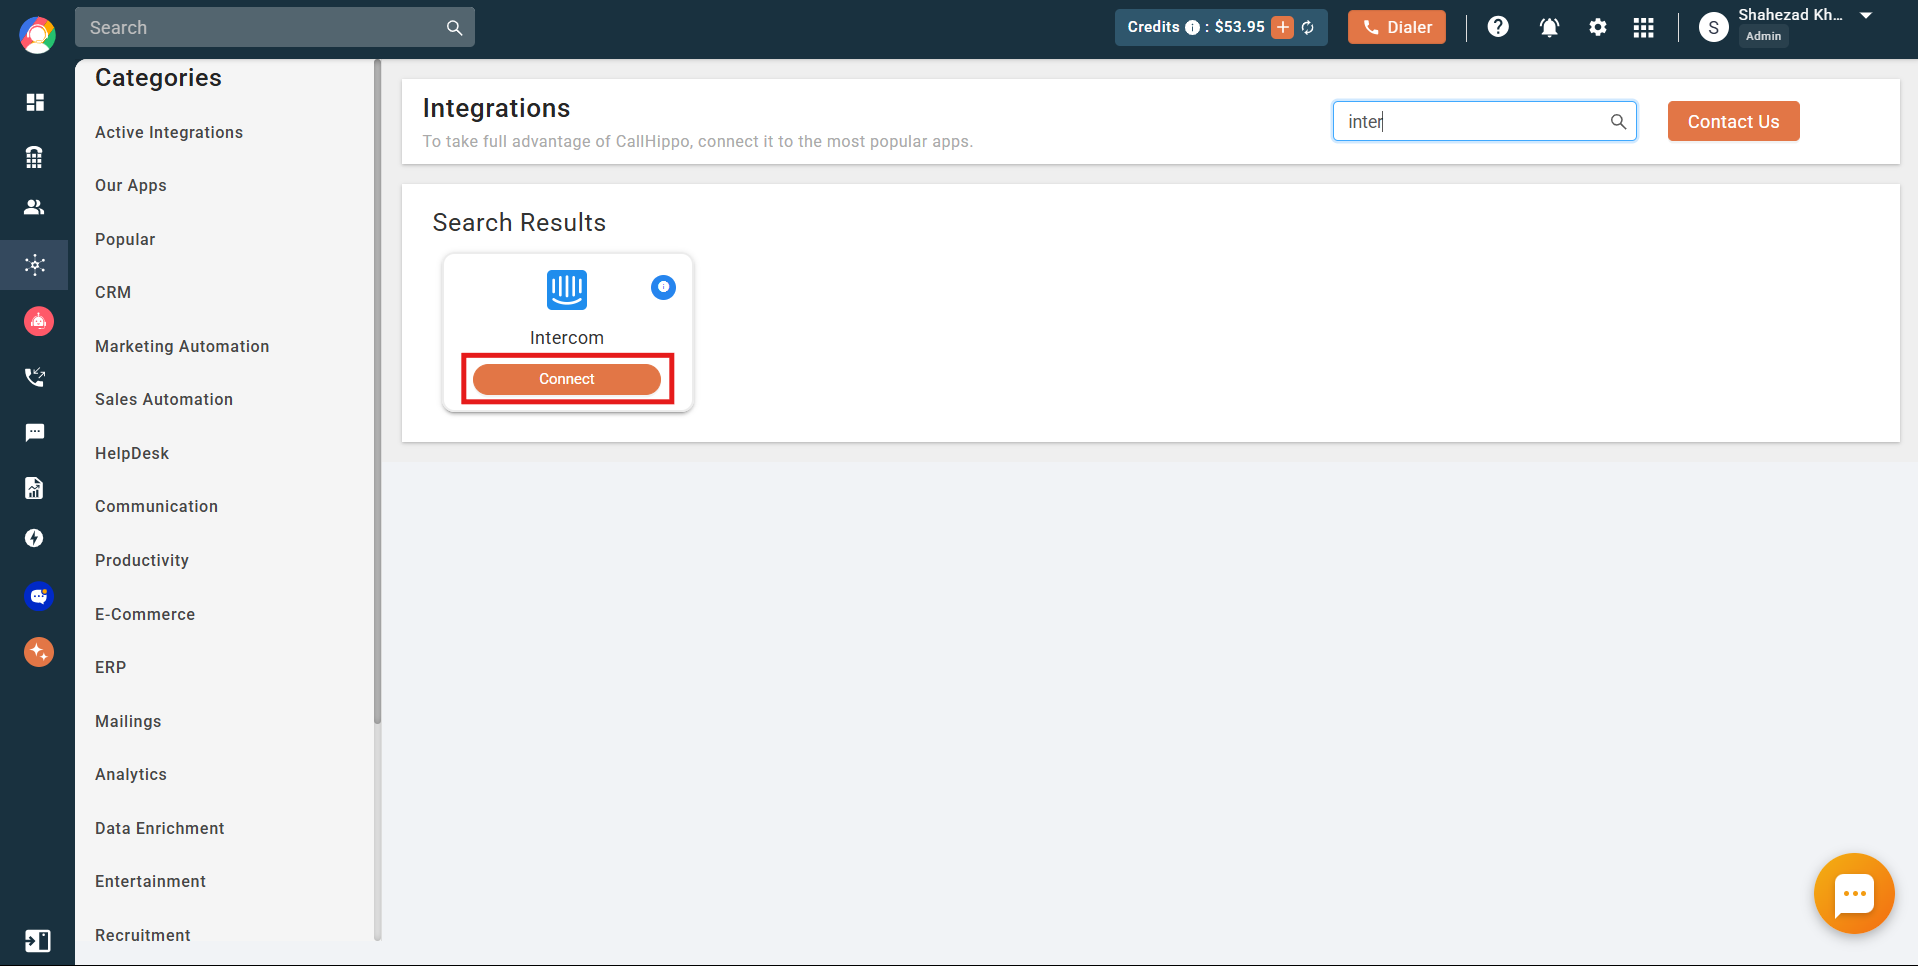
- Click Connect on the Intercom tile.
- Enter your credentials. Paste the Client ID, Client Secret, and App ID copied from Intercom, then click Connect Now.
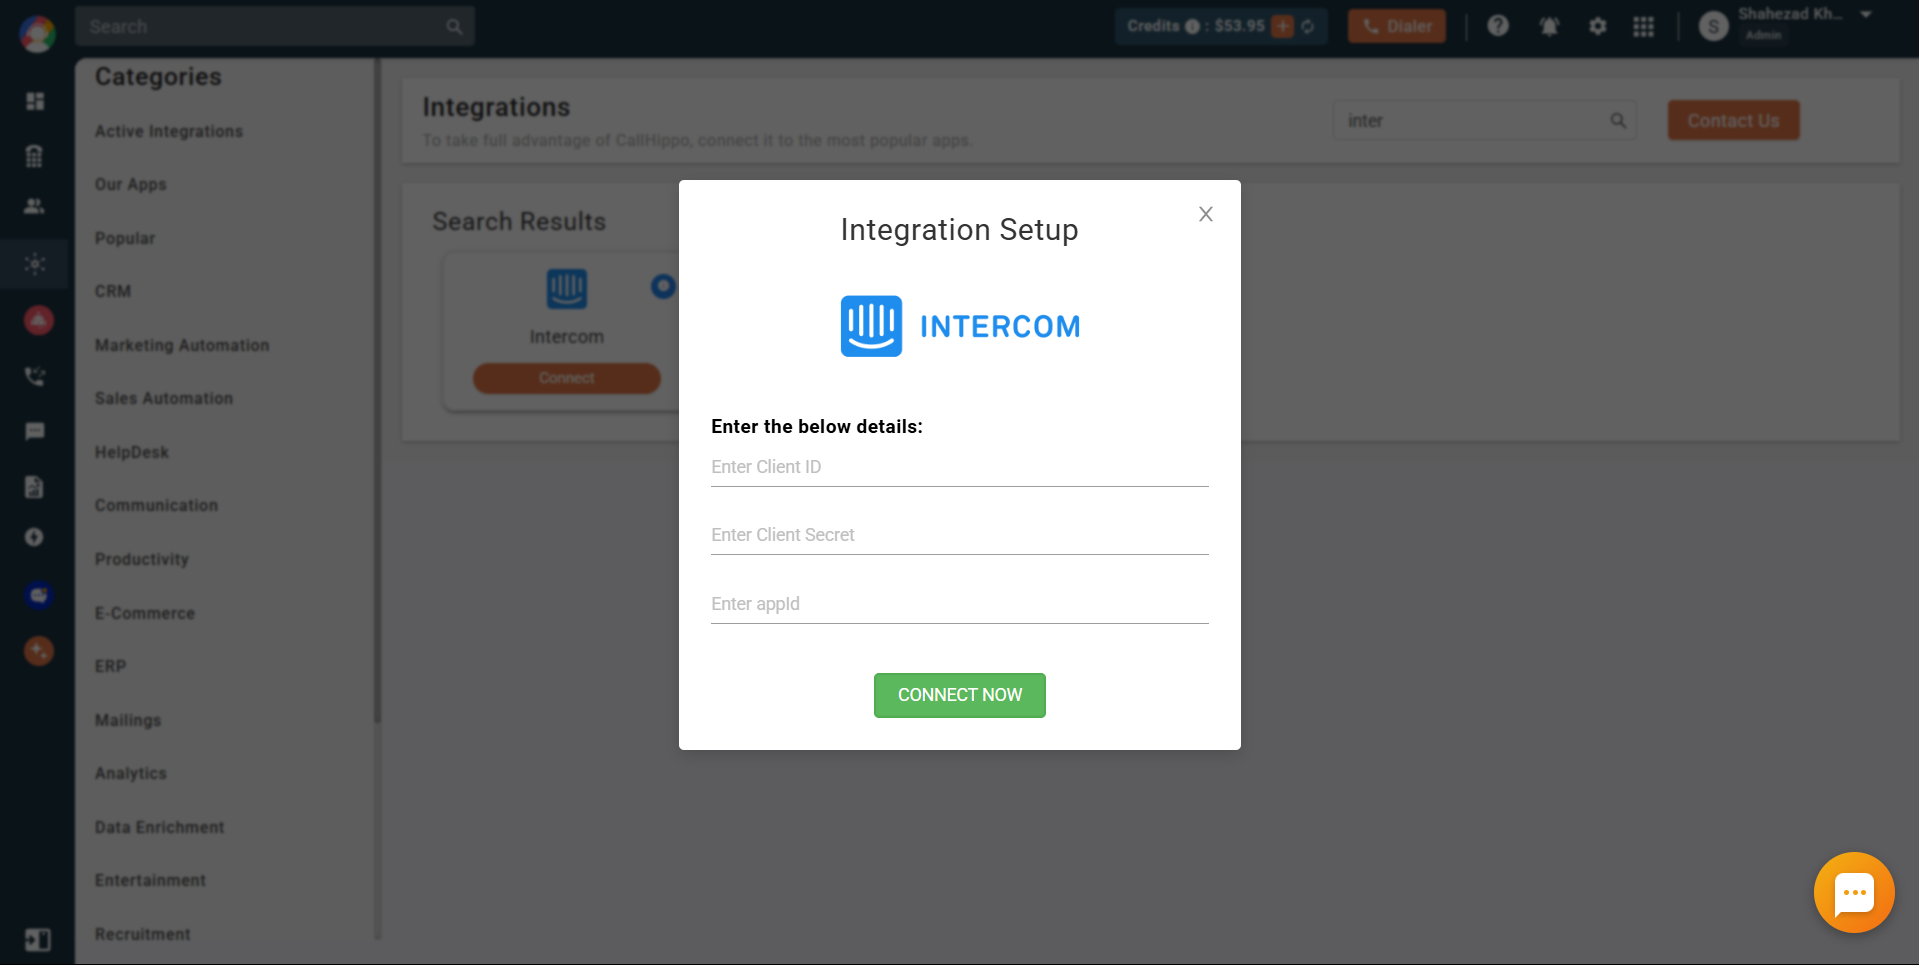
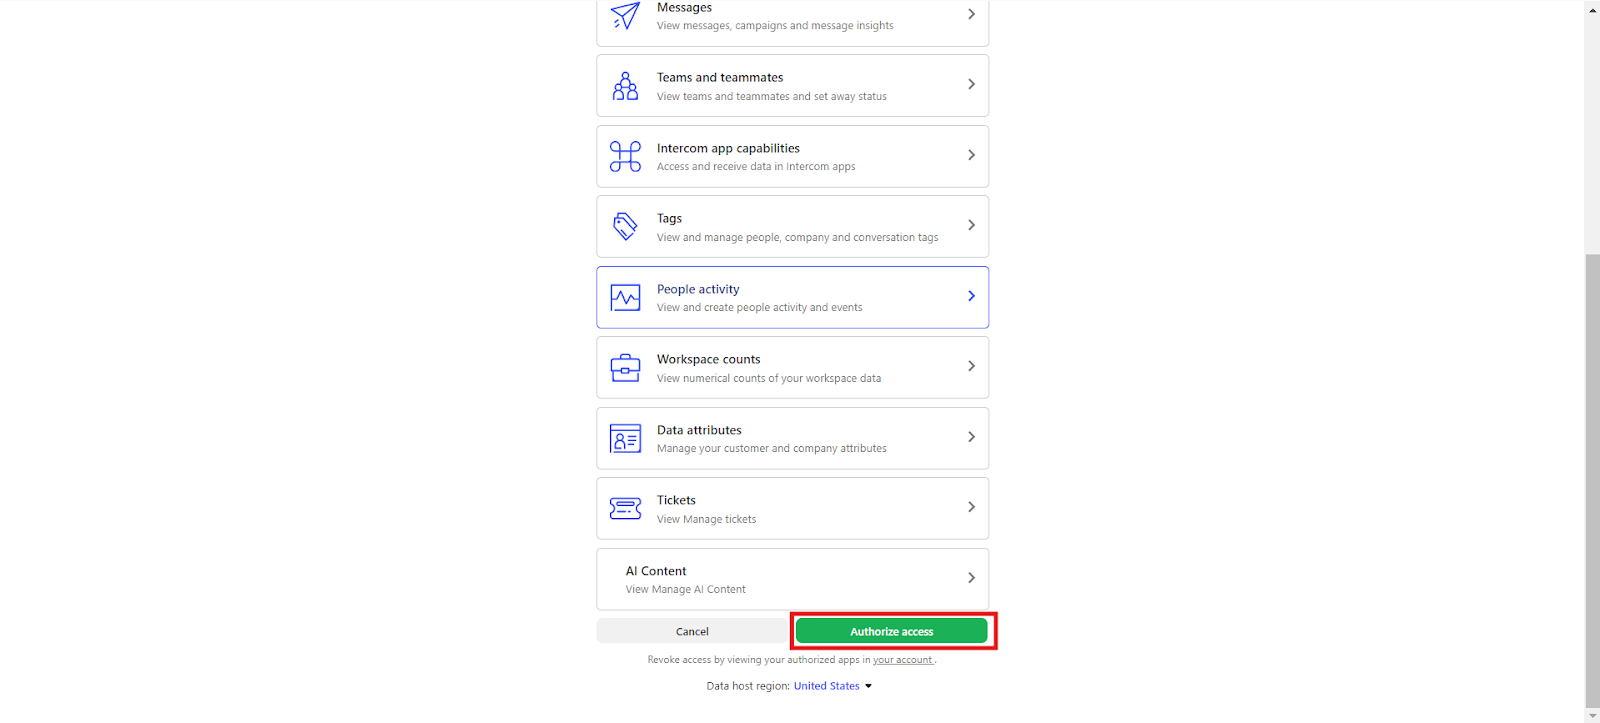
- Authorize access. You will be redirected to Intercom to grant access. Click Authorize access.
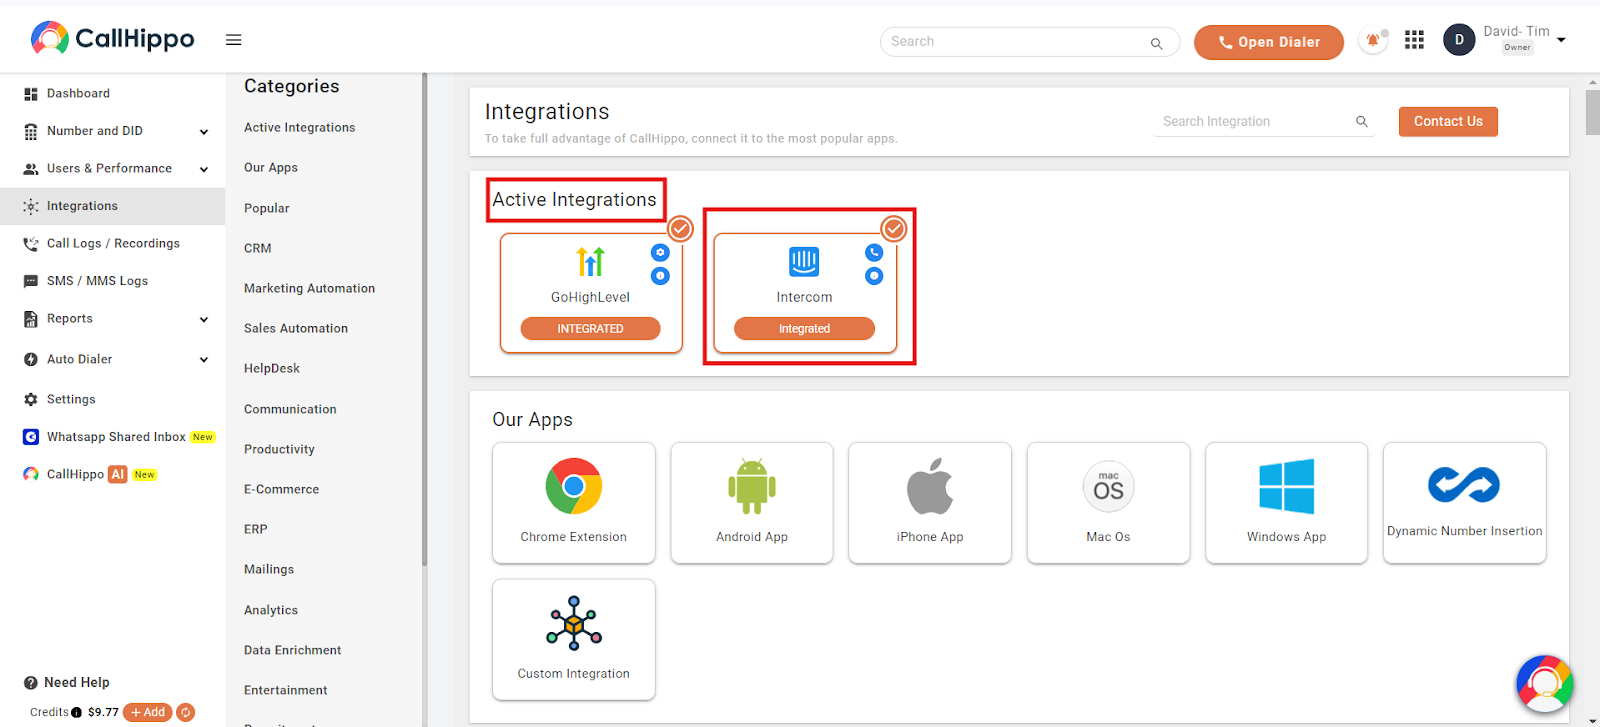
Once authorized, you are redirected back to CallHippo and the status shows as Integrated. Your CallHippo account is now connected to Intercom.
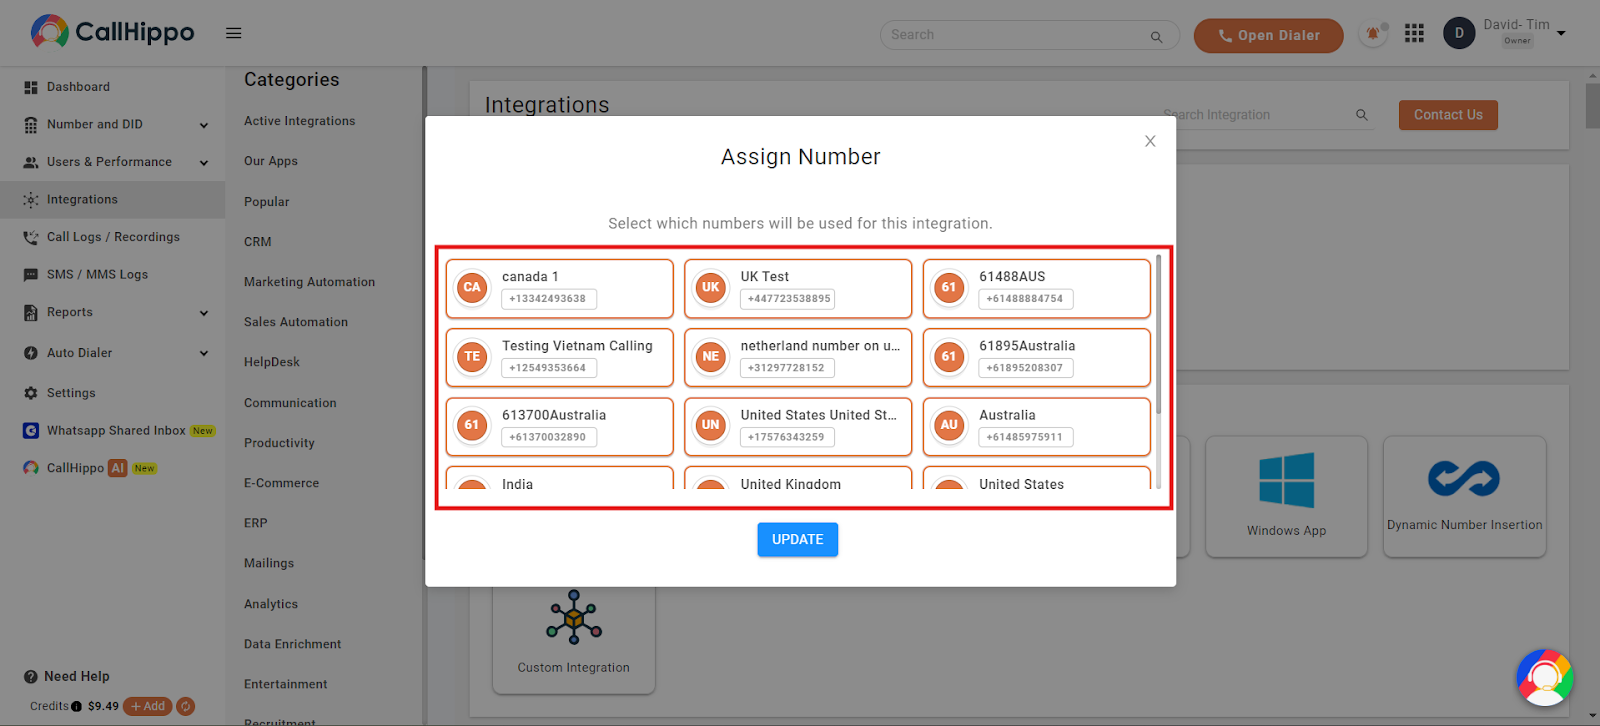
Click the call icon on the integration to assign the numbers whose activity you want pushed into Intercom.
Set up the Intercom webhook
To sync new contacts, configure a webhook in Intercom so events flow back to CallHippo.
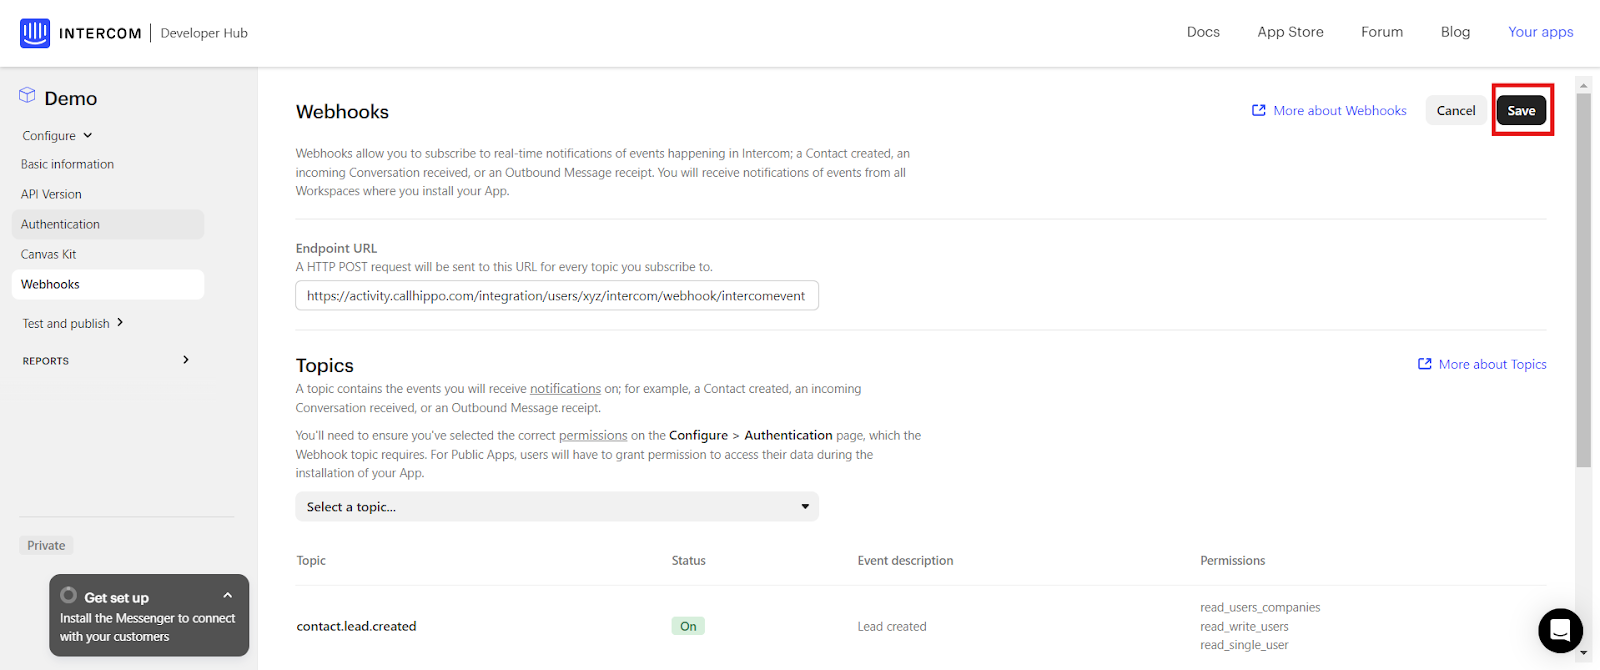
- Open the Webhooks tab in your Intercom app.
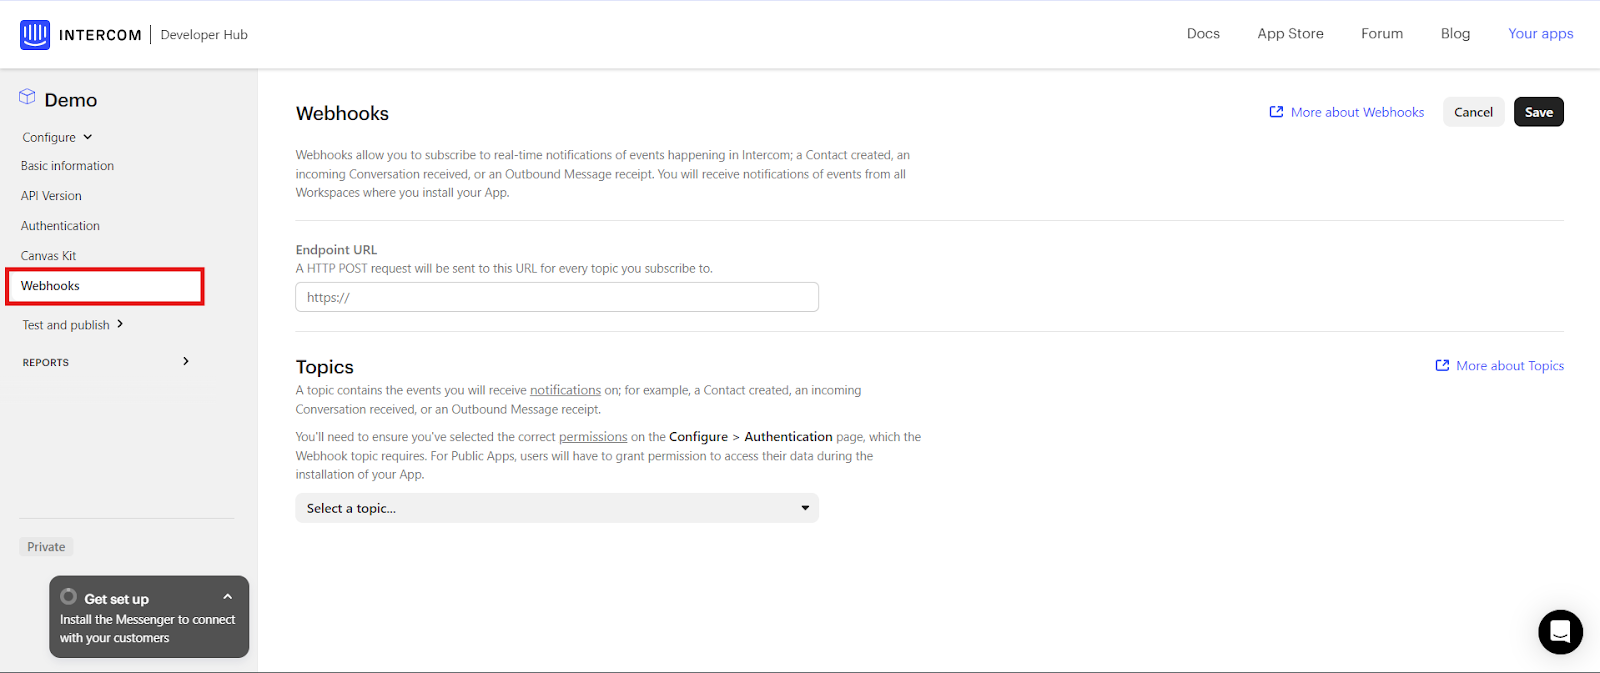
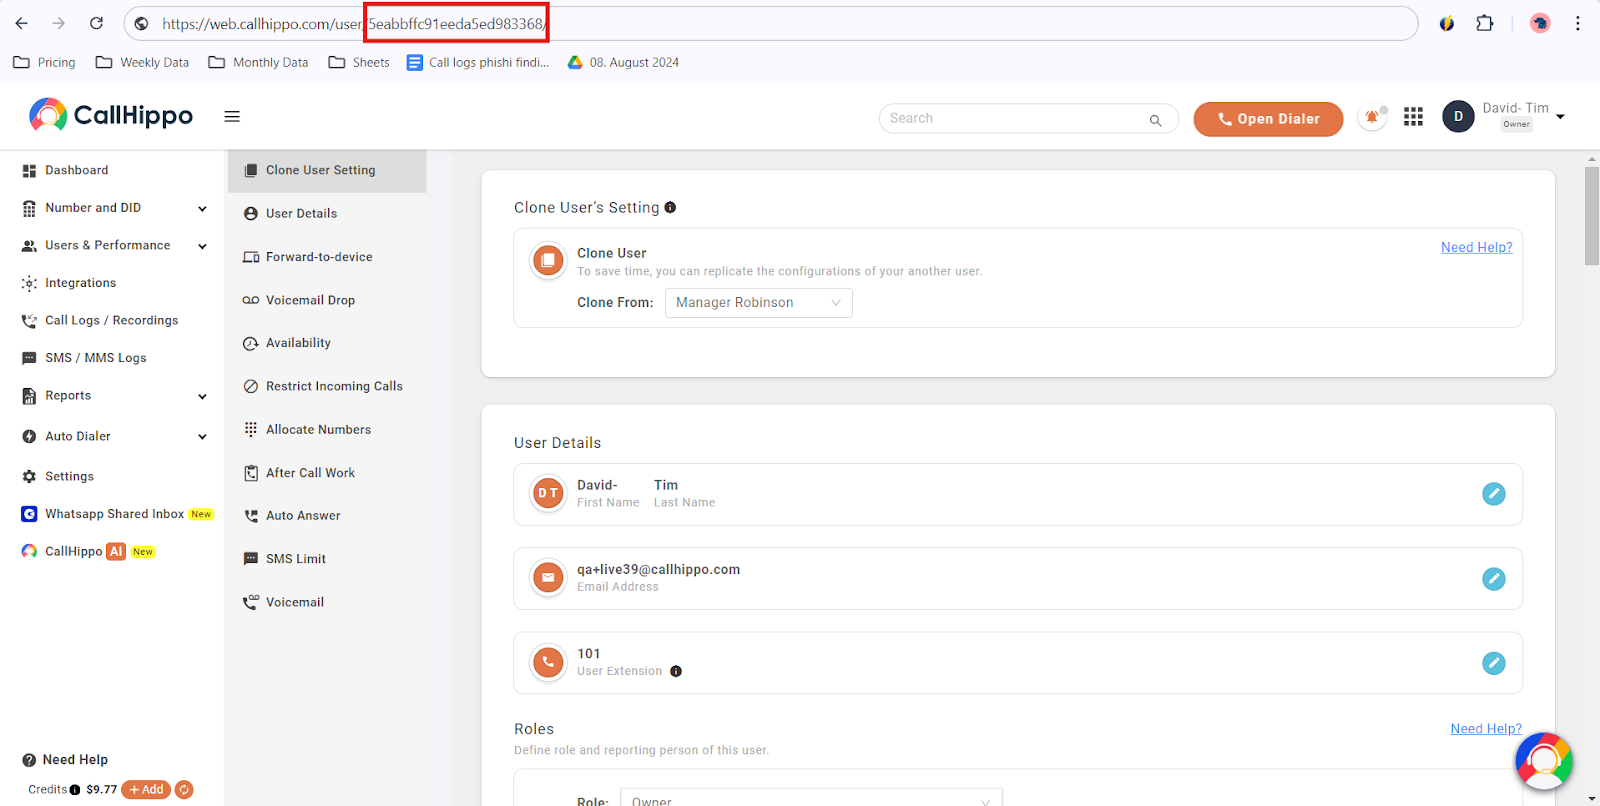
- Get your CallHippo user ID. Find it under Profile > Additional Settings — the ID appears in the page URL.
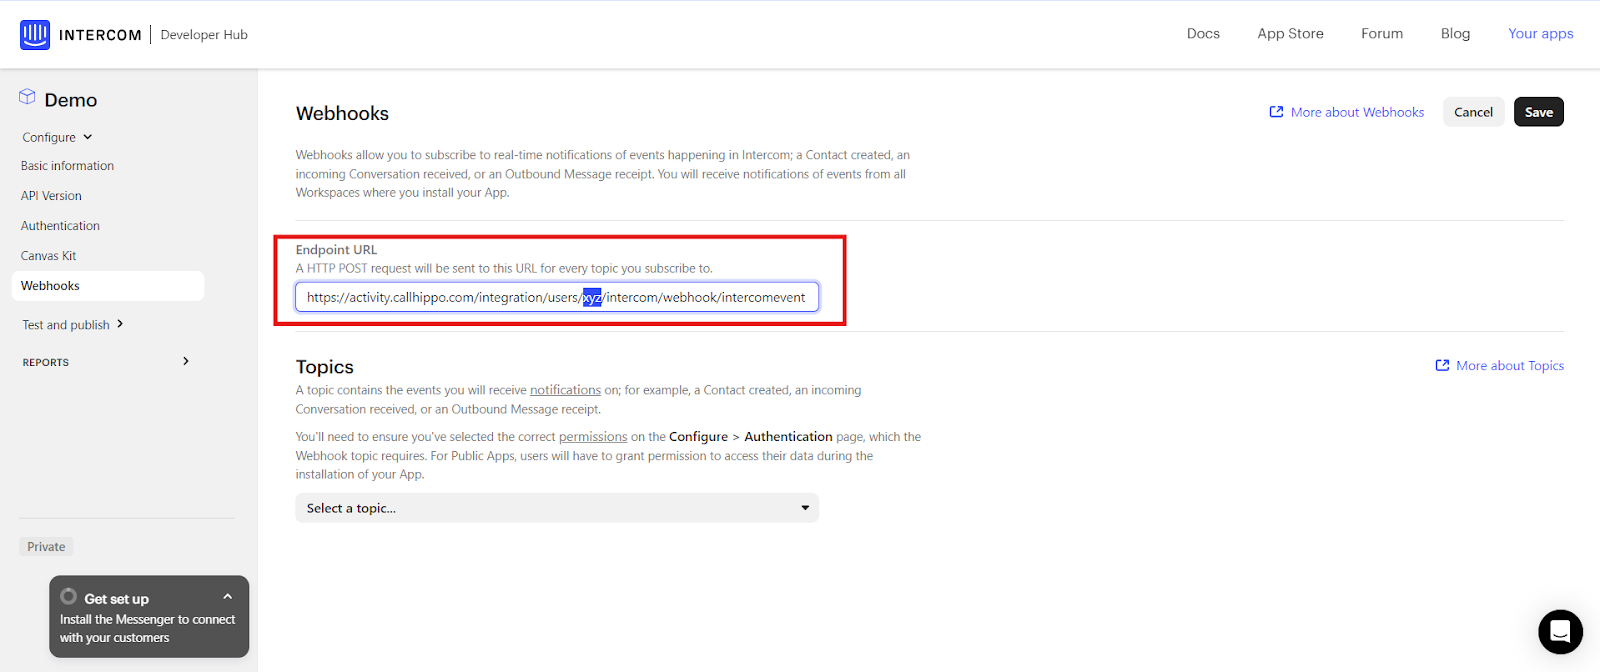
- Enter the endpoint URL. Use https://activity.callhippo.com/integration/users/xyz/intercom/webhook/intercomevent and replace
xyzwith your CallHippo user ID.
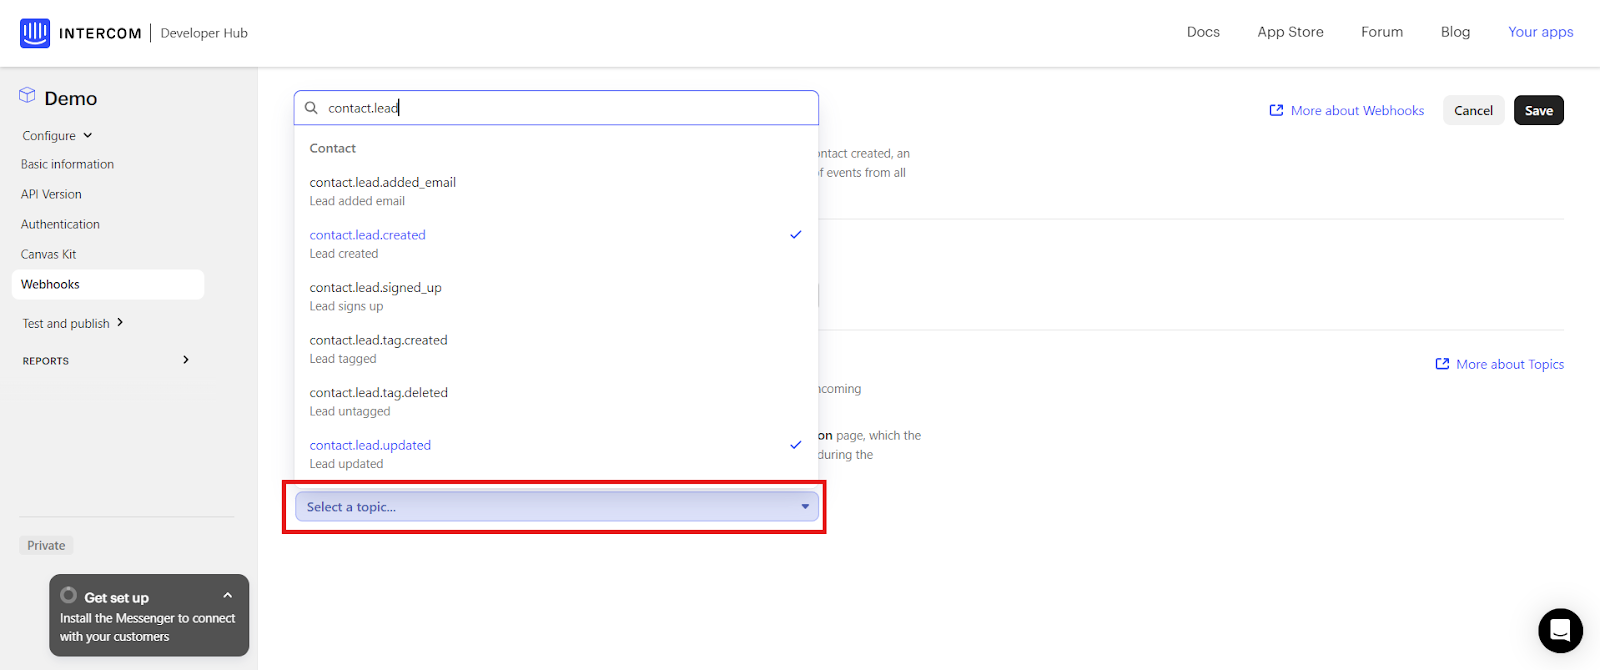
- Select the webhook topics. Subscribe to the following events:
- contact.lead.created
- contact.lead.updated
- contact.user.created
- contact.user.updated
- contact.deleted
- conversation.admin.single.created
- conversation.user.created
- Save the configuration. Click Save to finish the webhook setup.
What the integration does
- Contact sync: New Intercom contacts sync to CallHippo once a Click to Call action is performed on that contact — they appear in the CallHippo dialer’s Contacts tab. Existing Intercom contacts sync the moment the number is dialed via Click to Call.
- Outbound calls: Place calls directly from Intercom using the CallHippo Click to Call extension.
- Call and SMS logs: Every call and SMS tied to a contact is logged back in Intercom.
Activity passed to Intercom
CallHippo pushes both call and SMS activity into an Intercom contact’s Recent events. A logged call includes details such as call type, status, duration, start time, recording URL, notes, the agent, and the from/to numbers. A logged SMS includes the SMS type, sent time, sender, from/to numbers, and message content.
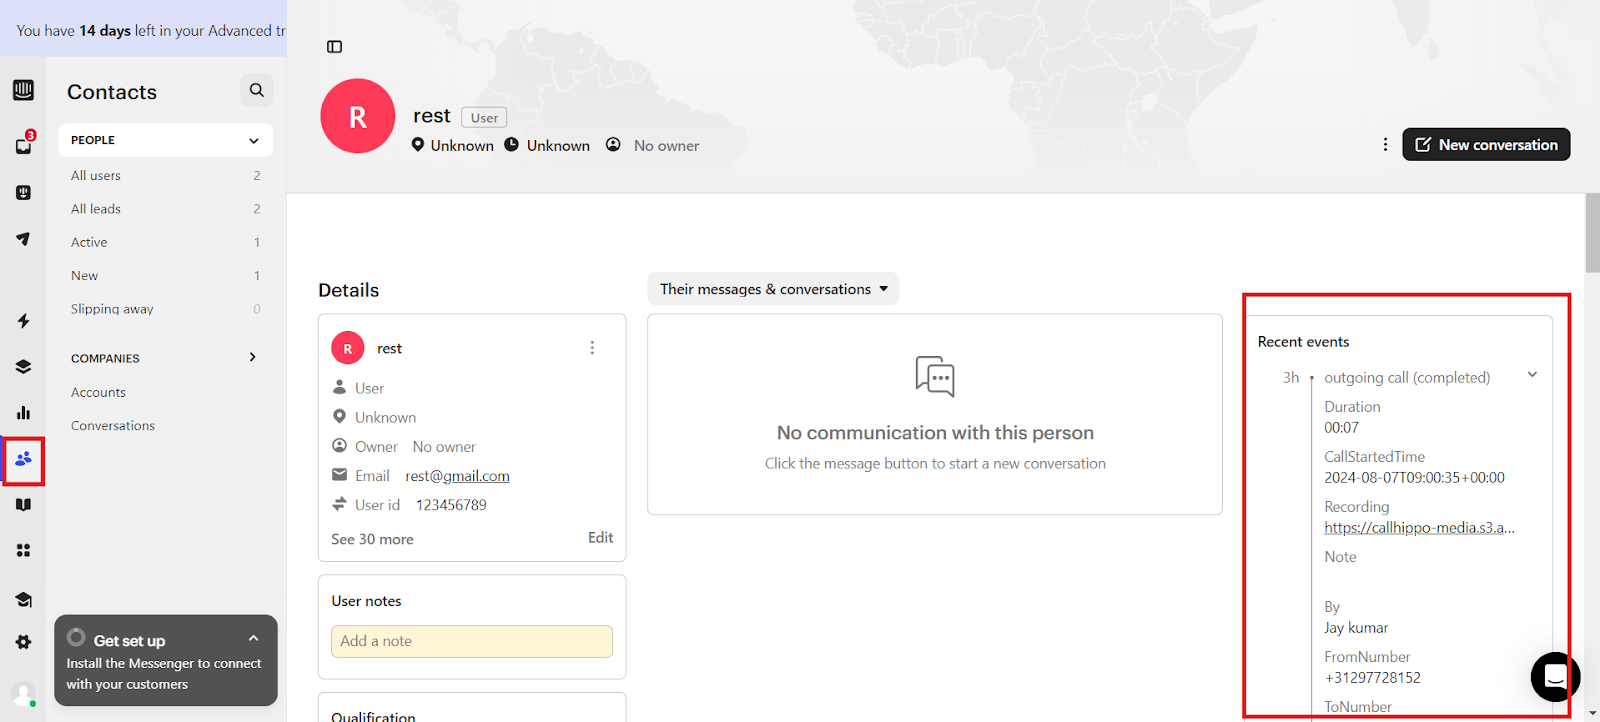
These activities appear under the saved contact in Intercom.
After Call Work activity: If your plan includes CallHippo’s call tags and disposition service and it is enabled, the activity pushed to Intercom also carries the tags and disposition added on the After Call Work screen. This only syncs when the tags and disposition are added on the After Call Work screen — tags or dispositions added later from call logs or another feed will not sync to Intercom.
To make calls from within Intercom, install the CallHippo Virtual Phone System extension from the Chrome Web Store.
Frequently asked questions
Do existing Intercom contacts sync automatically?
Existing contacts sync to CallHippo once you place a call to them through Click to Call. New contacts sync as soon as a Click to Call action is performed on them.
Why isn’t my tag and disposition data showing in Intercom?
Tags and dispositions only sync when they are added on the After Call Work screen. If they are added later from the call logs or another feed, they will not push to Intercom.
Who can set up the Intercom integration?
You need owner access on both CallHippo and Intercom, with OAuth and webhook permissions enabled and full access to settings in Intercom.