
Connecting LeadSquared with CallHippo syncs your leads into the dialer and pushes every call and SMS back to the lead’s activity history, so your sales team keeps a complete record without manual logging. This guide covers getting your LeadSquared API credentials, connecting them in CallHippo, and setting up SMS activity logging and call routing.
Before you begin
Make sure you have the following ready:
- Admin access to your LeadSquared account.
- An active CallHippo account with access to the Integrations tab.
- The Google Chrome browser, if you want to use click-to-call.
Get your LeadSquared API credentials
- Log in to your LeadSquared account.
- Go to User Settings > API and Webhooks > API Access Keys. Copy and note your API Host, then click Generate Key.
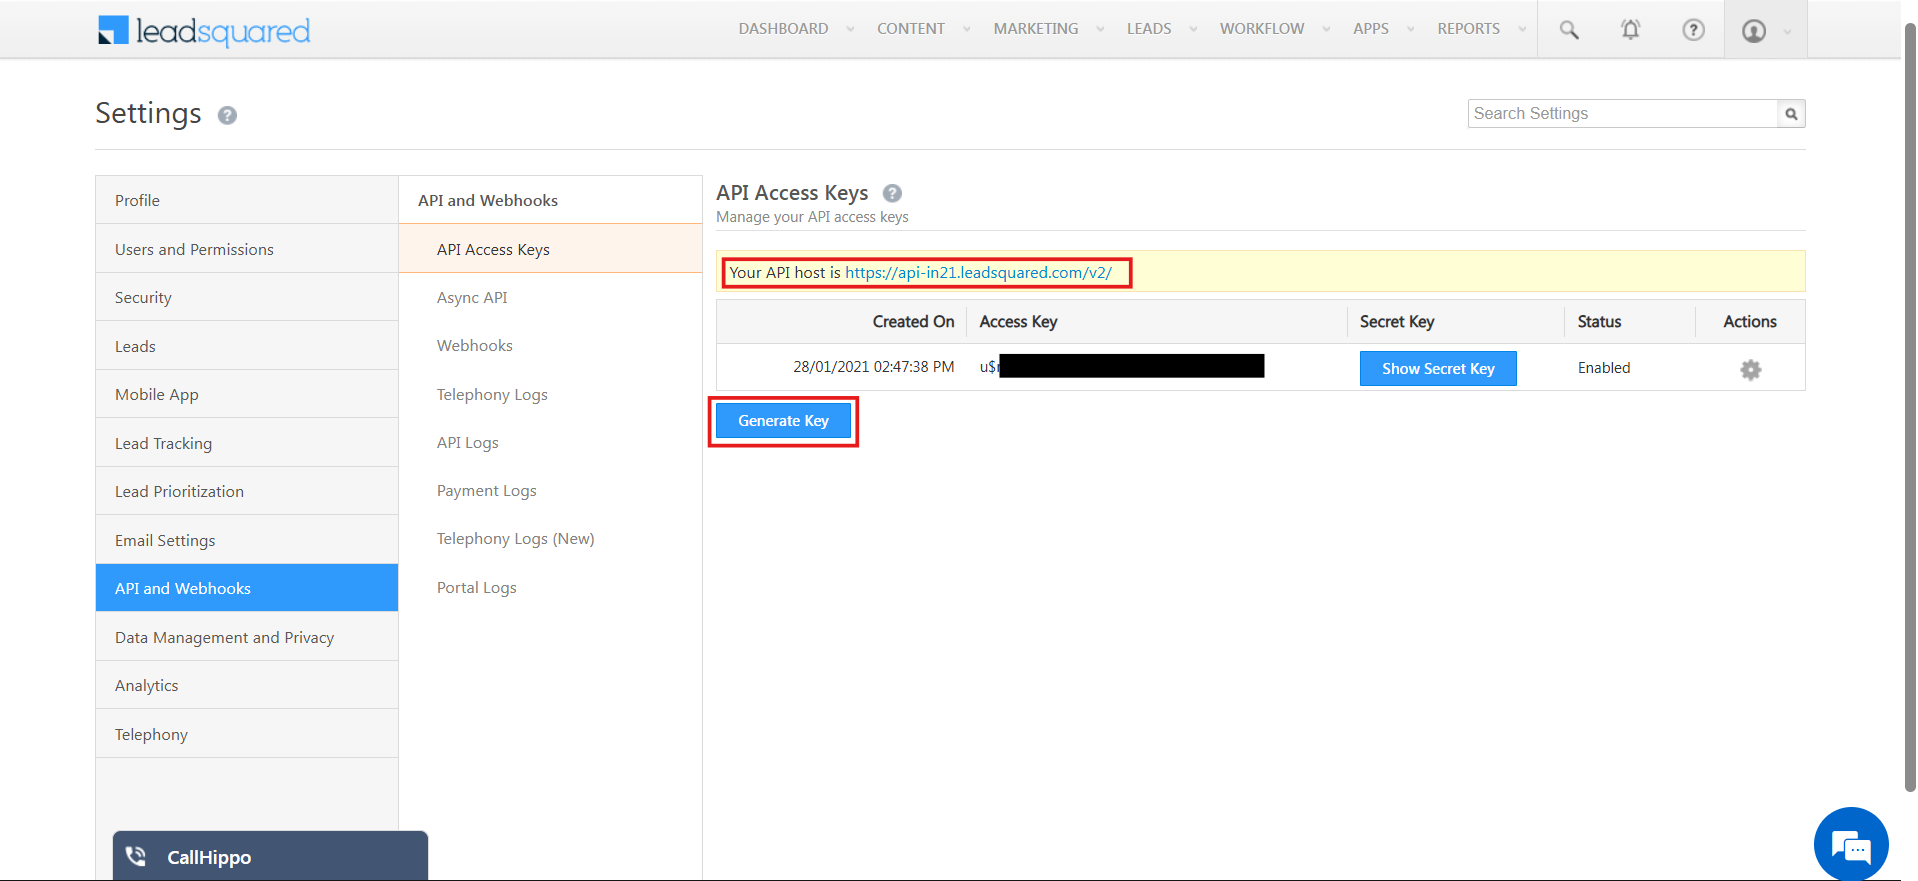
- If you already generated a key, click Show Secret Key. Note down both the Access Id and the Secret Key.
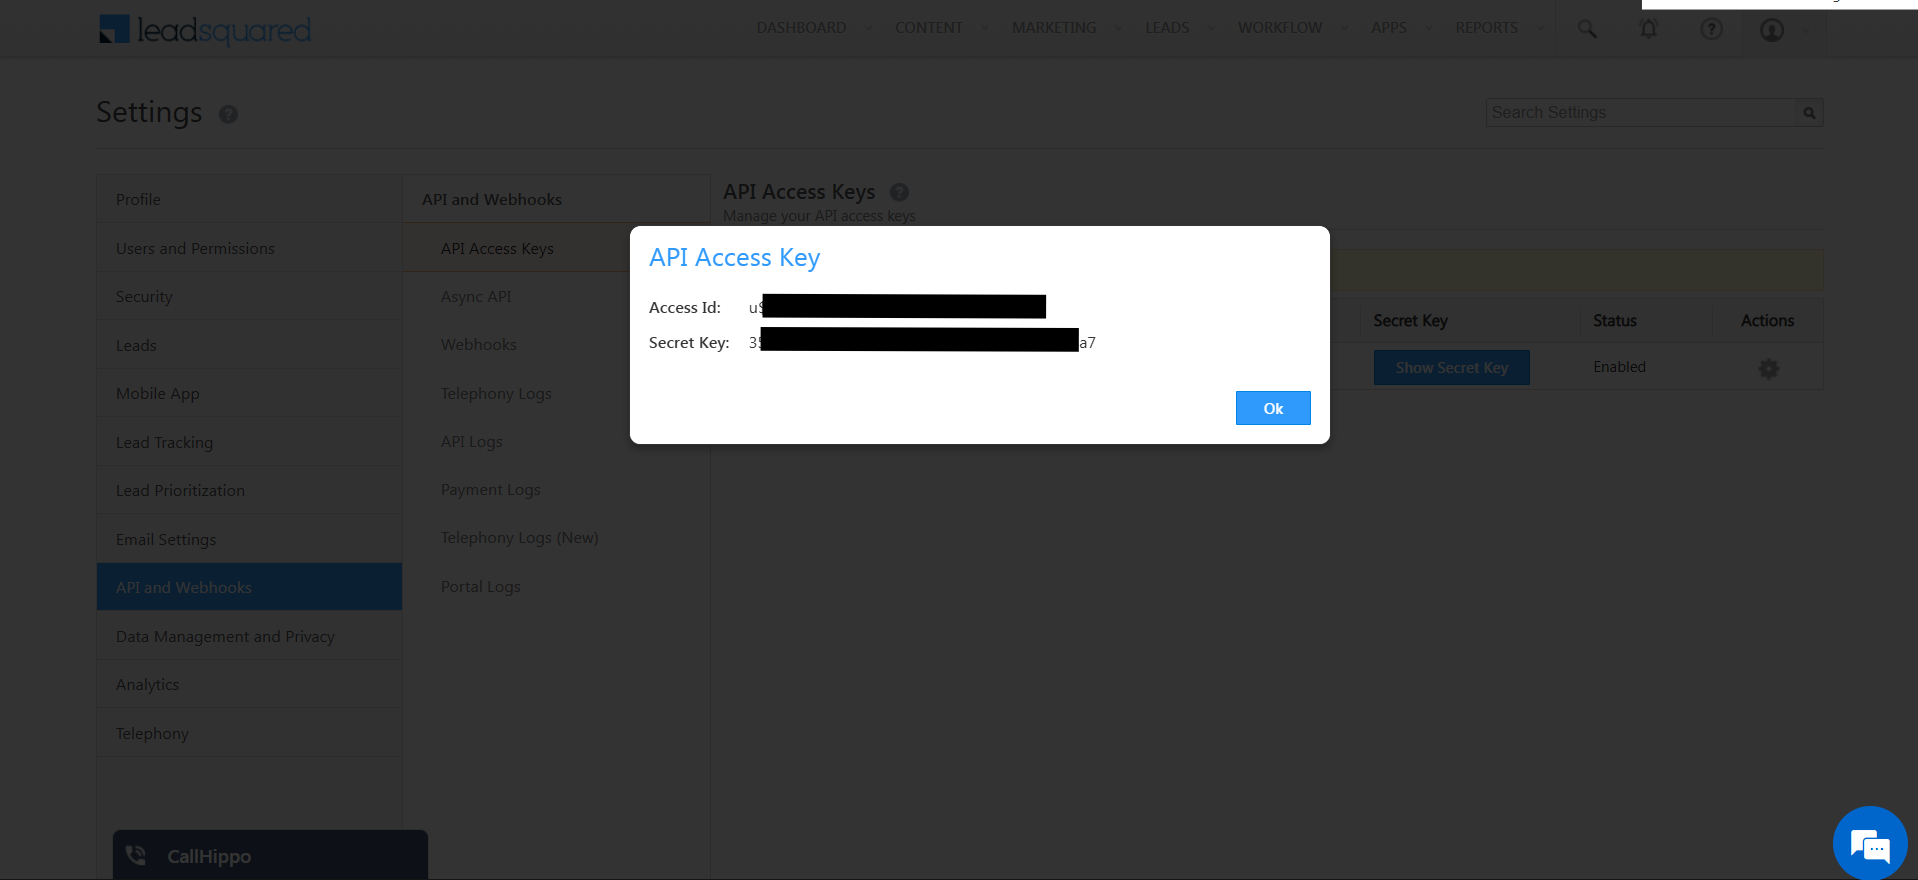
You now have the three values the integration needs: API Host, Access Id, and Secret Key.
Connect LeadSquared in CallHippo
- Log in to your CallHippo account and click Integrations in the left sidebar.
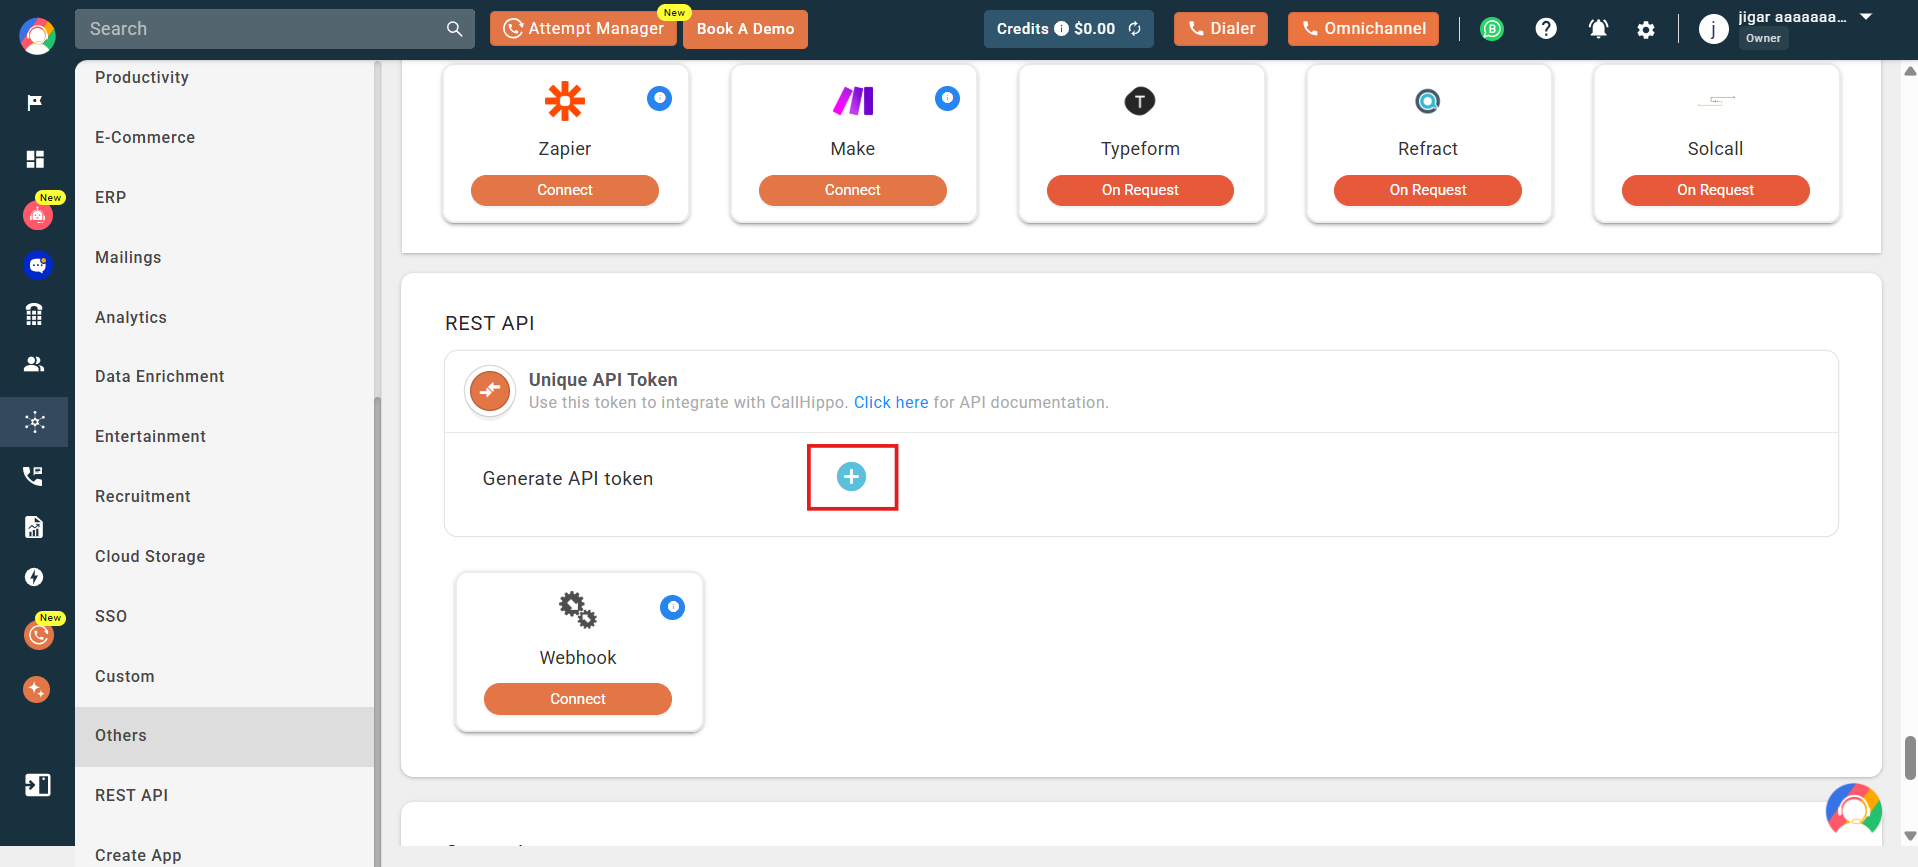
- Go to the REST API section. If no API token exists, generate one by clicking the + icon.
- Find and select LeadSquared and click Connect.
- In the Integration Setup popup, enter your LeadSquared API Host, Secret Key, and Access Id, then click Connect Now.
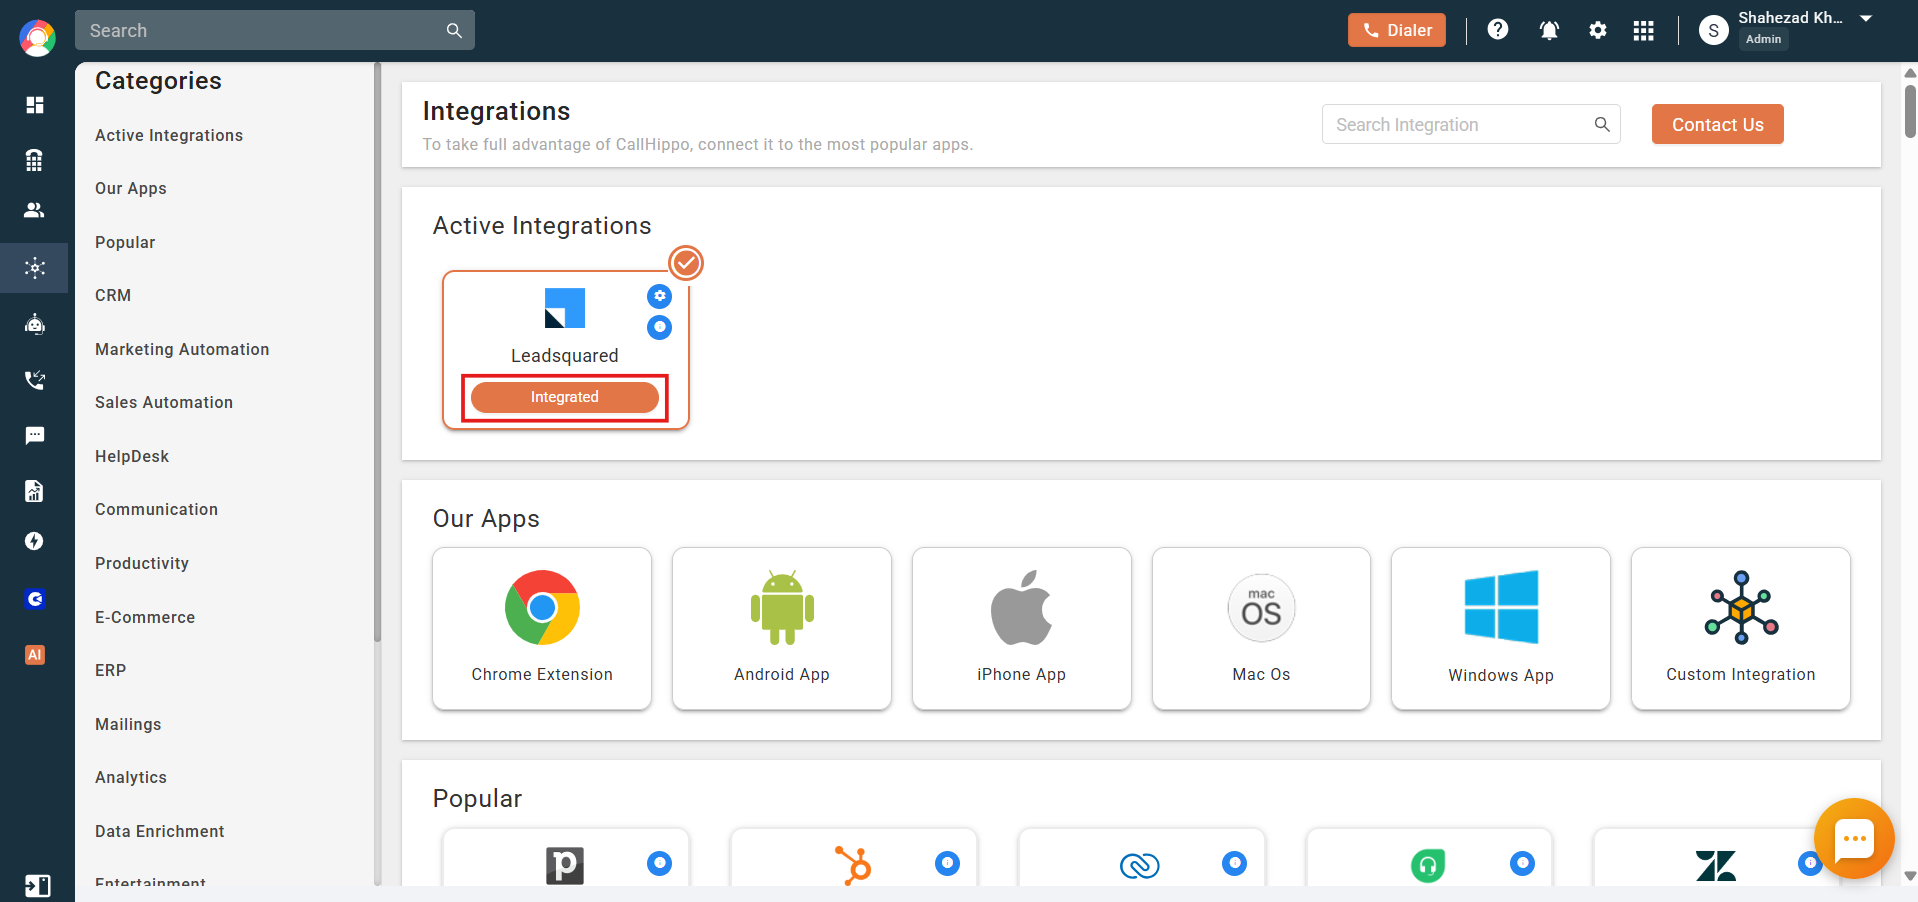
- Once connected, the integration status shows Integrated.
Set up the SMS activity event
To log SMS activity in LeadSquared, first create a custom activity type there:
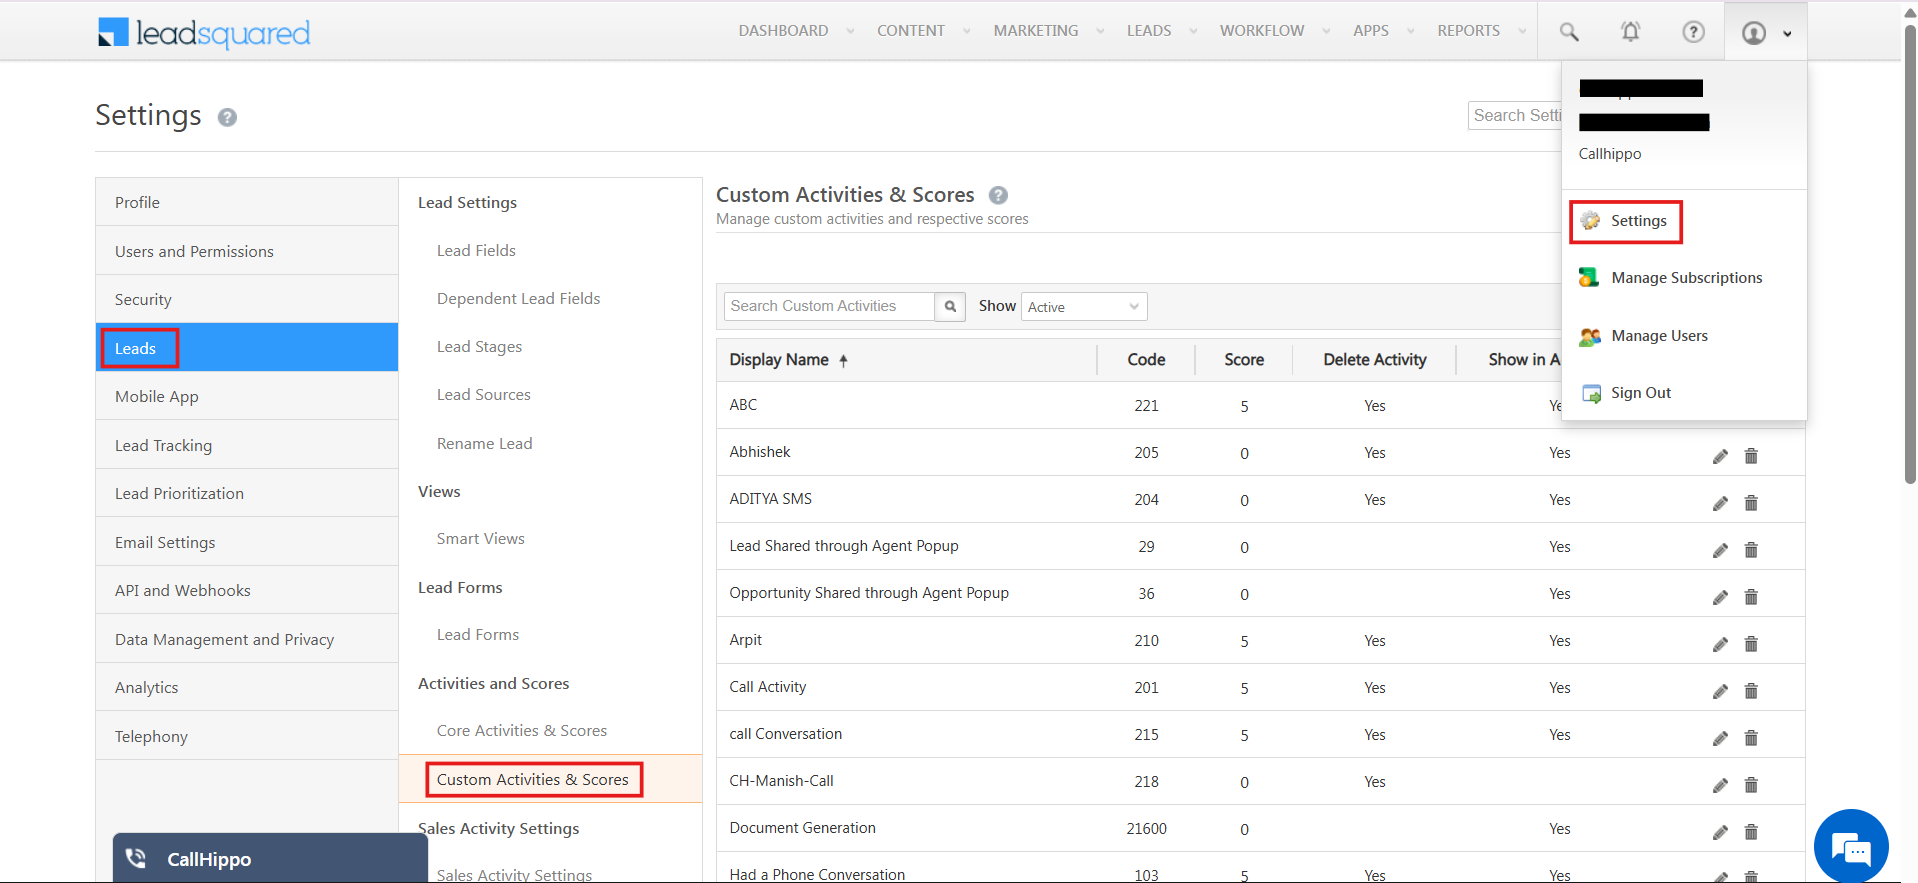
- Log in to LeadSquared, click the user icon at the top right, and go to Settings > Leads > Custom Activities & Scores.
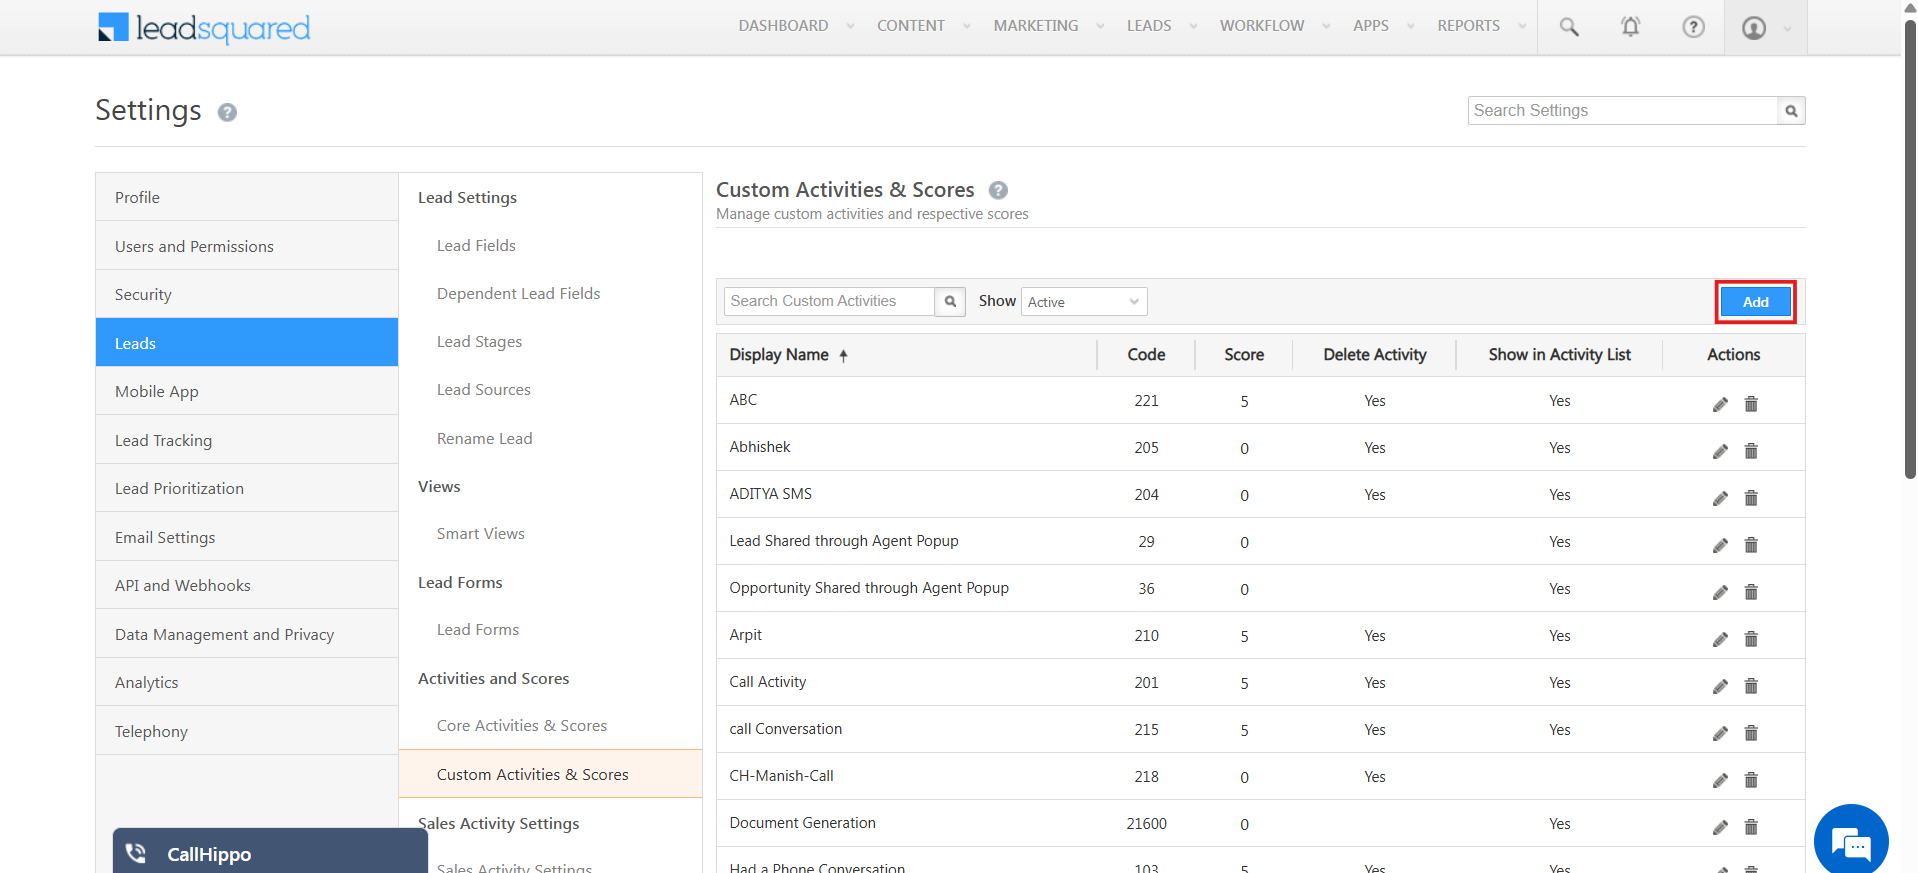
- Click Add to open the activity setup.
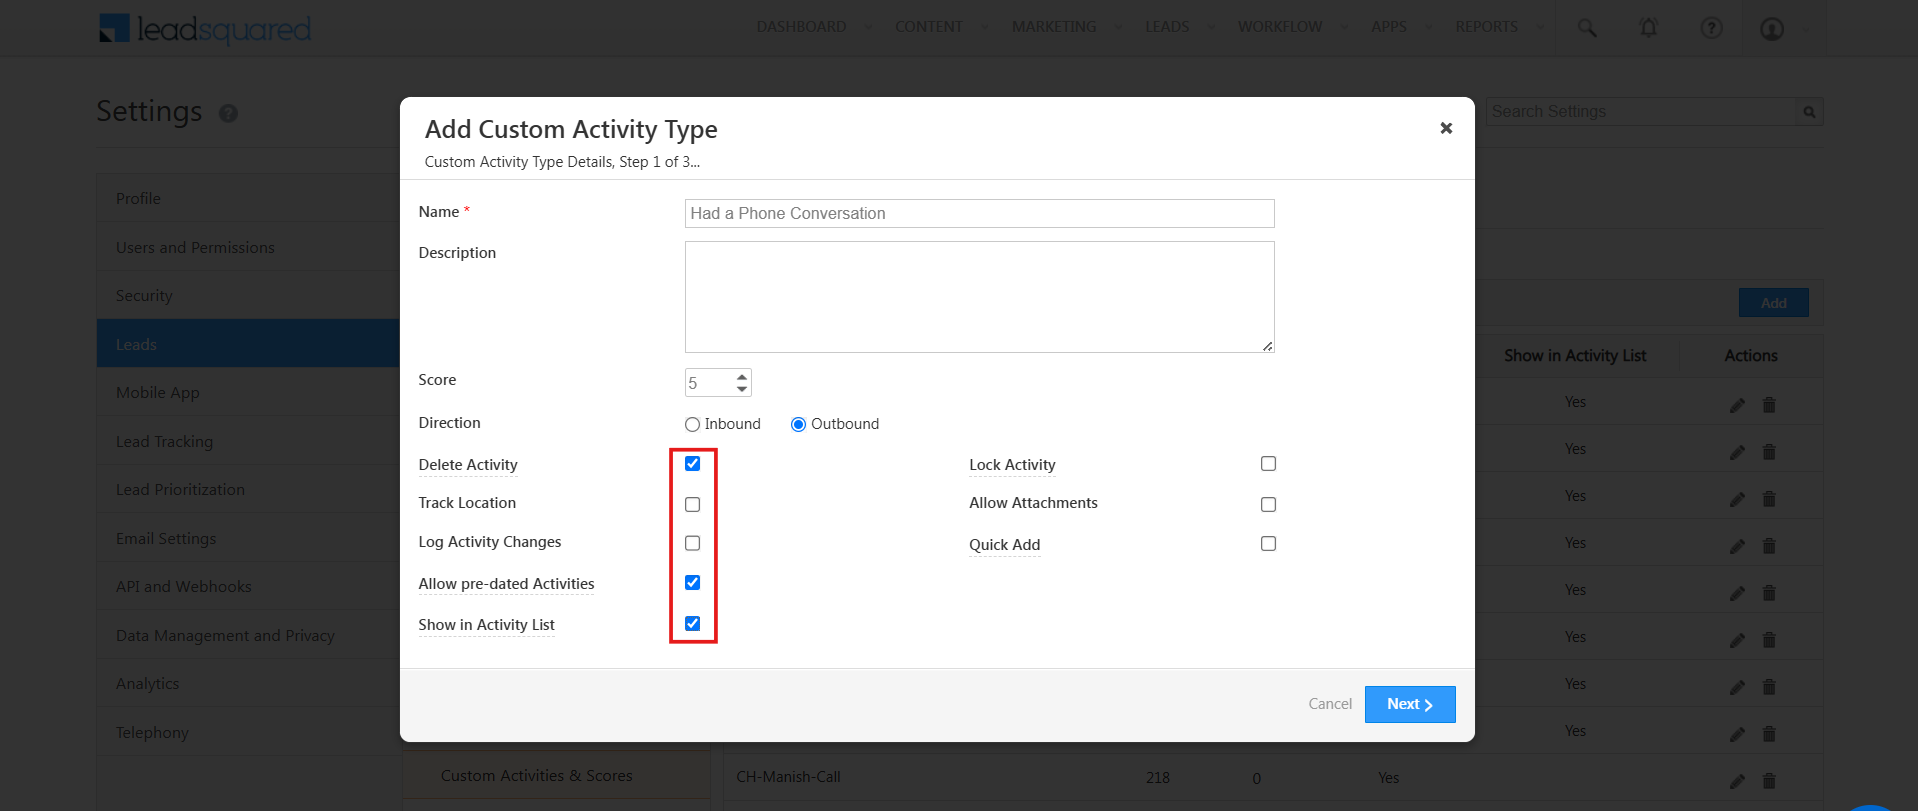
- Add a name, select the options shown, and click Next.
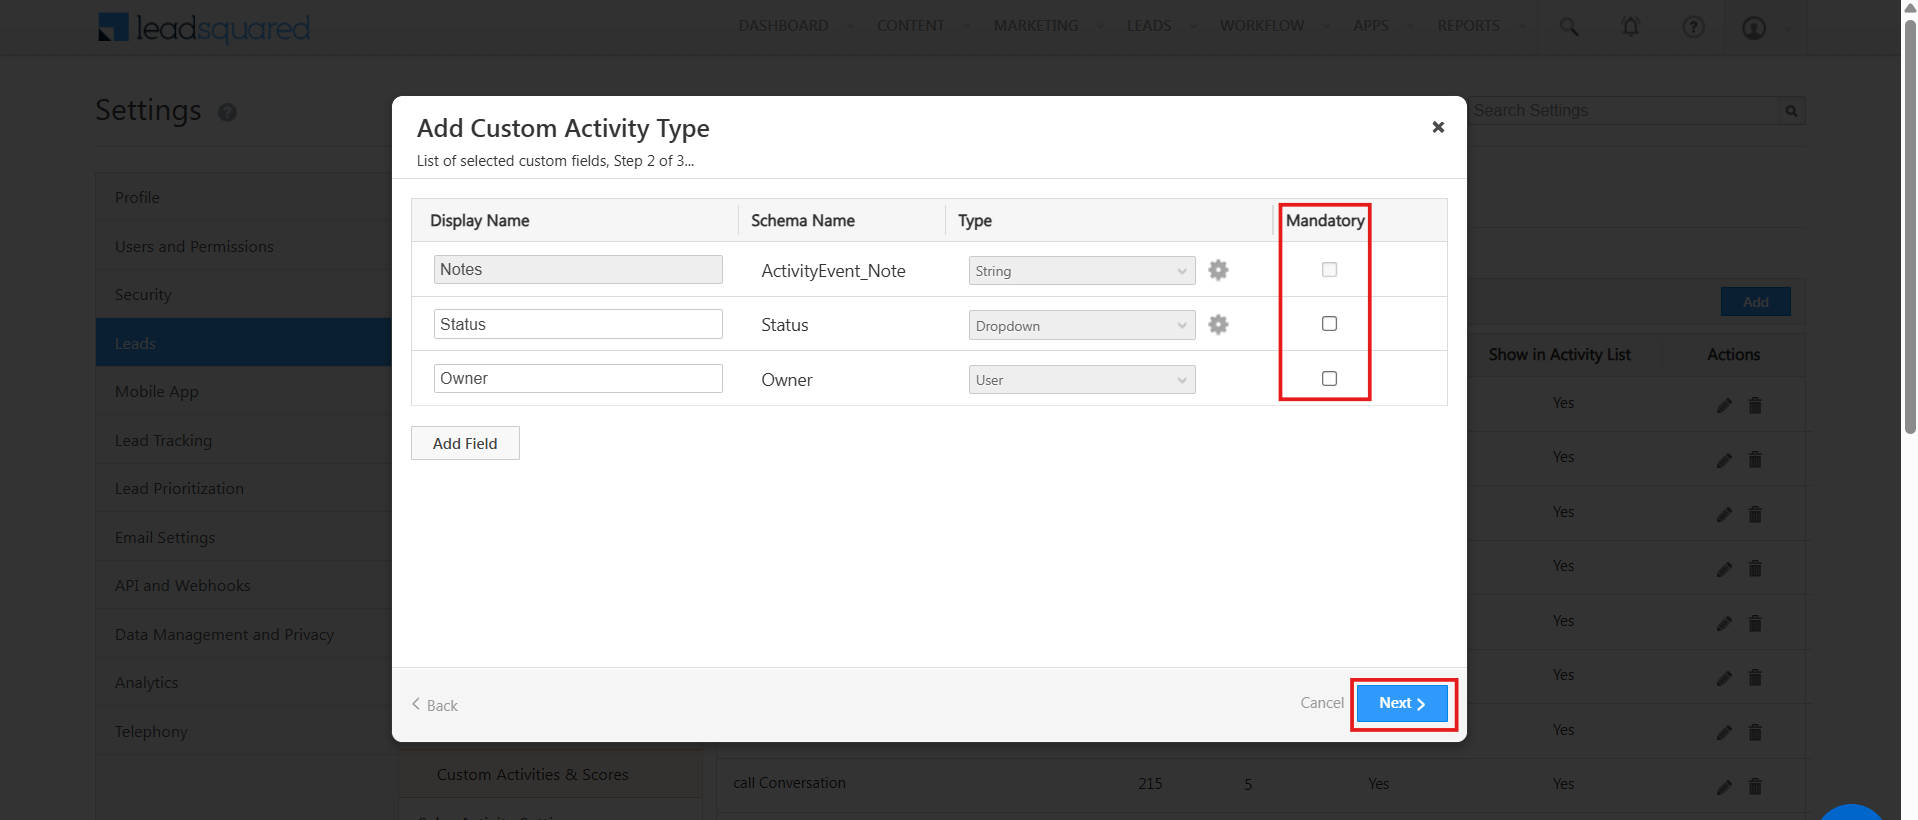
- Set all fields to optional by unchecking every box in the Mandatory column, then click Next.
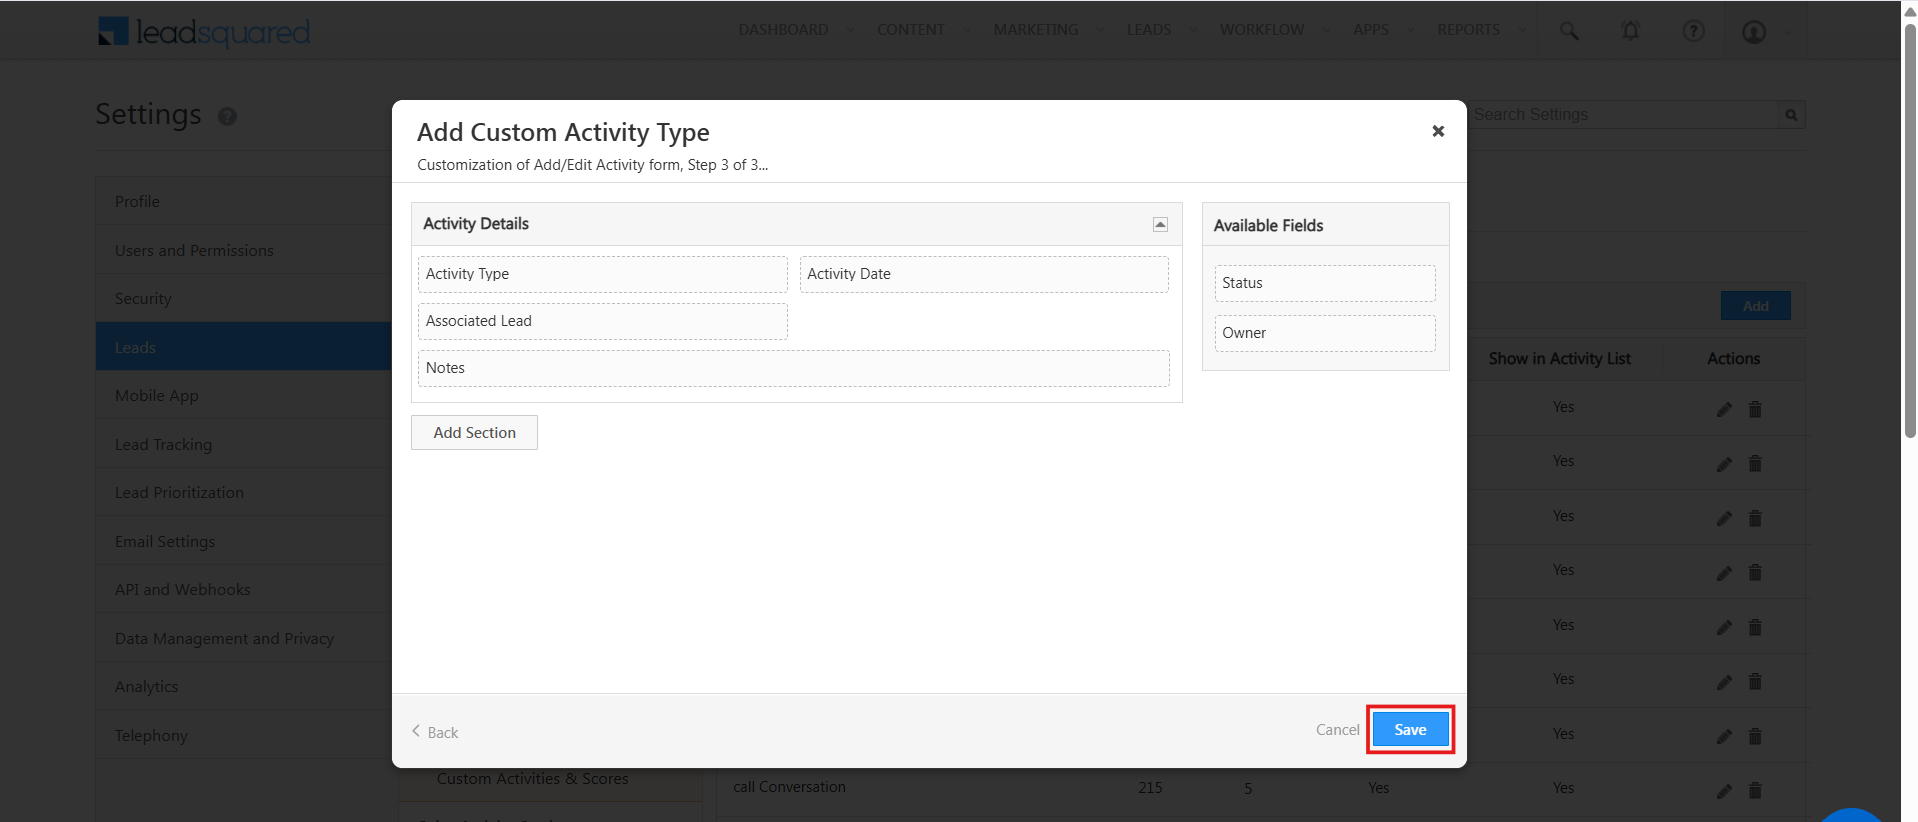
- Review the activity details and click Save.
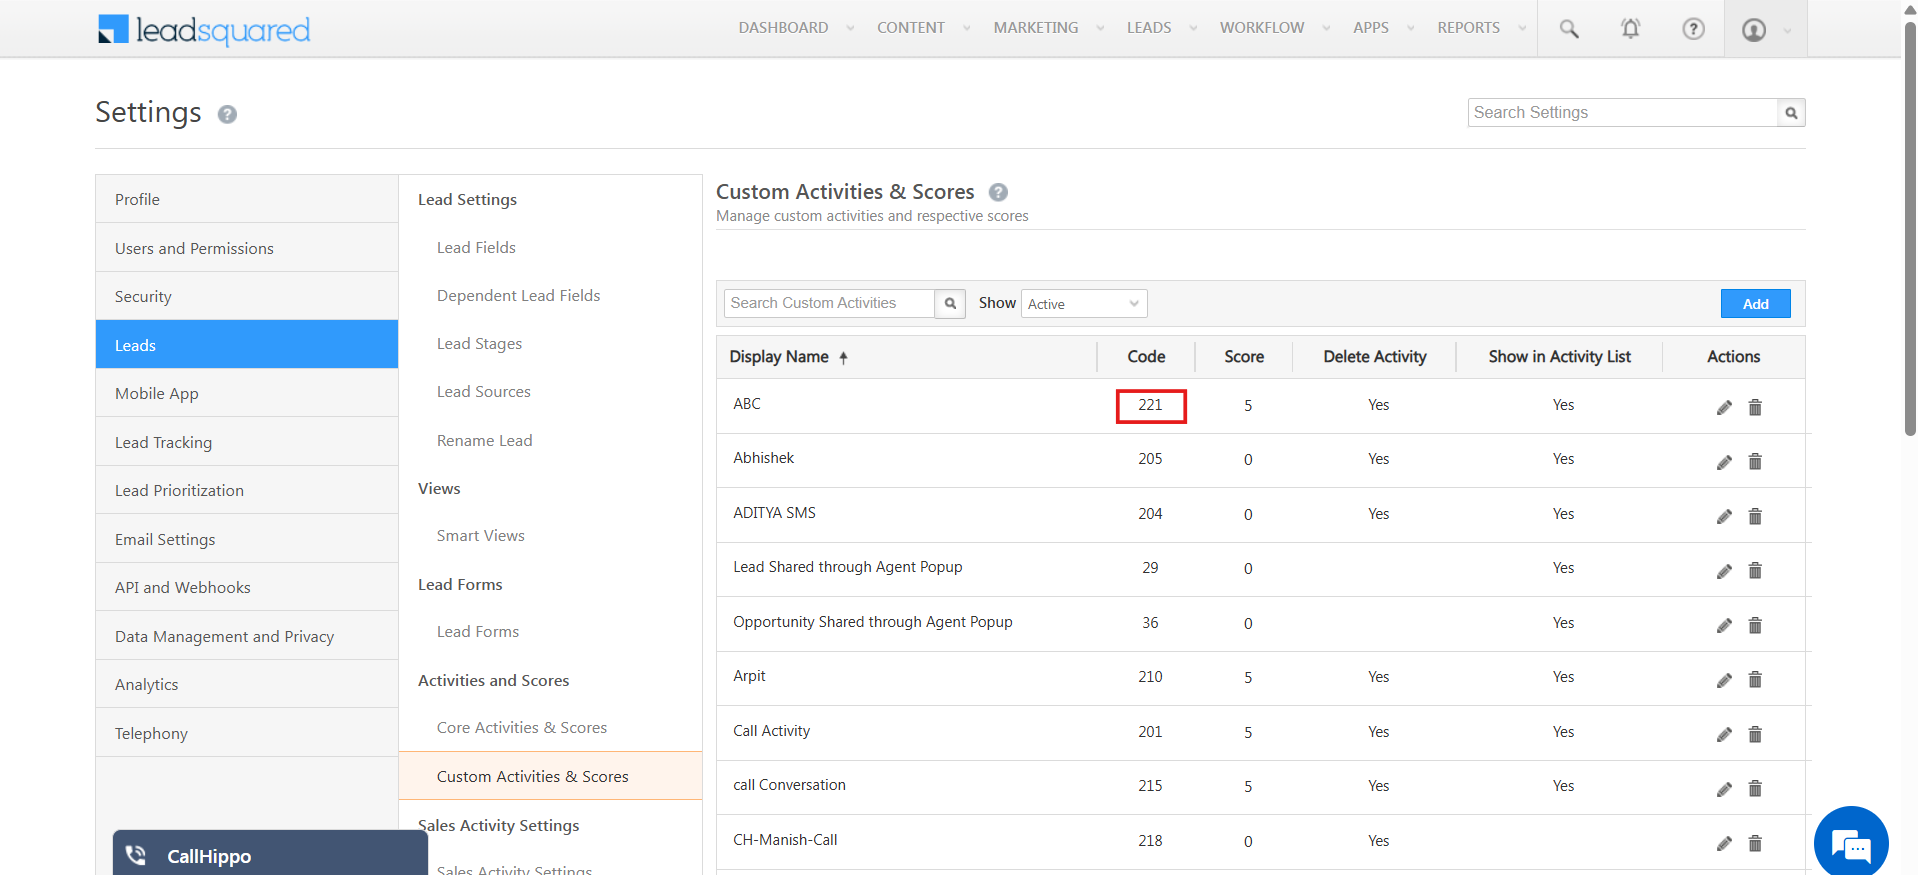
- Once the activity is created, note down its Activity Code.
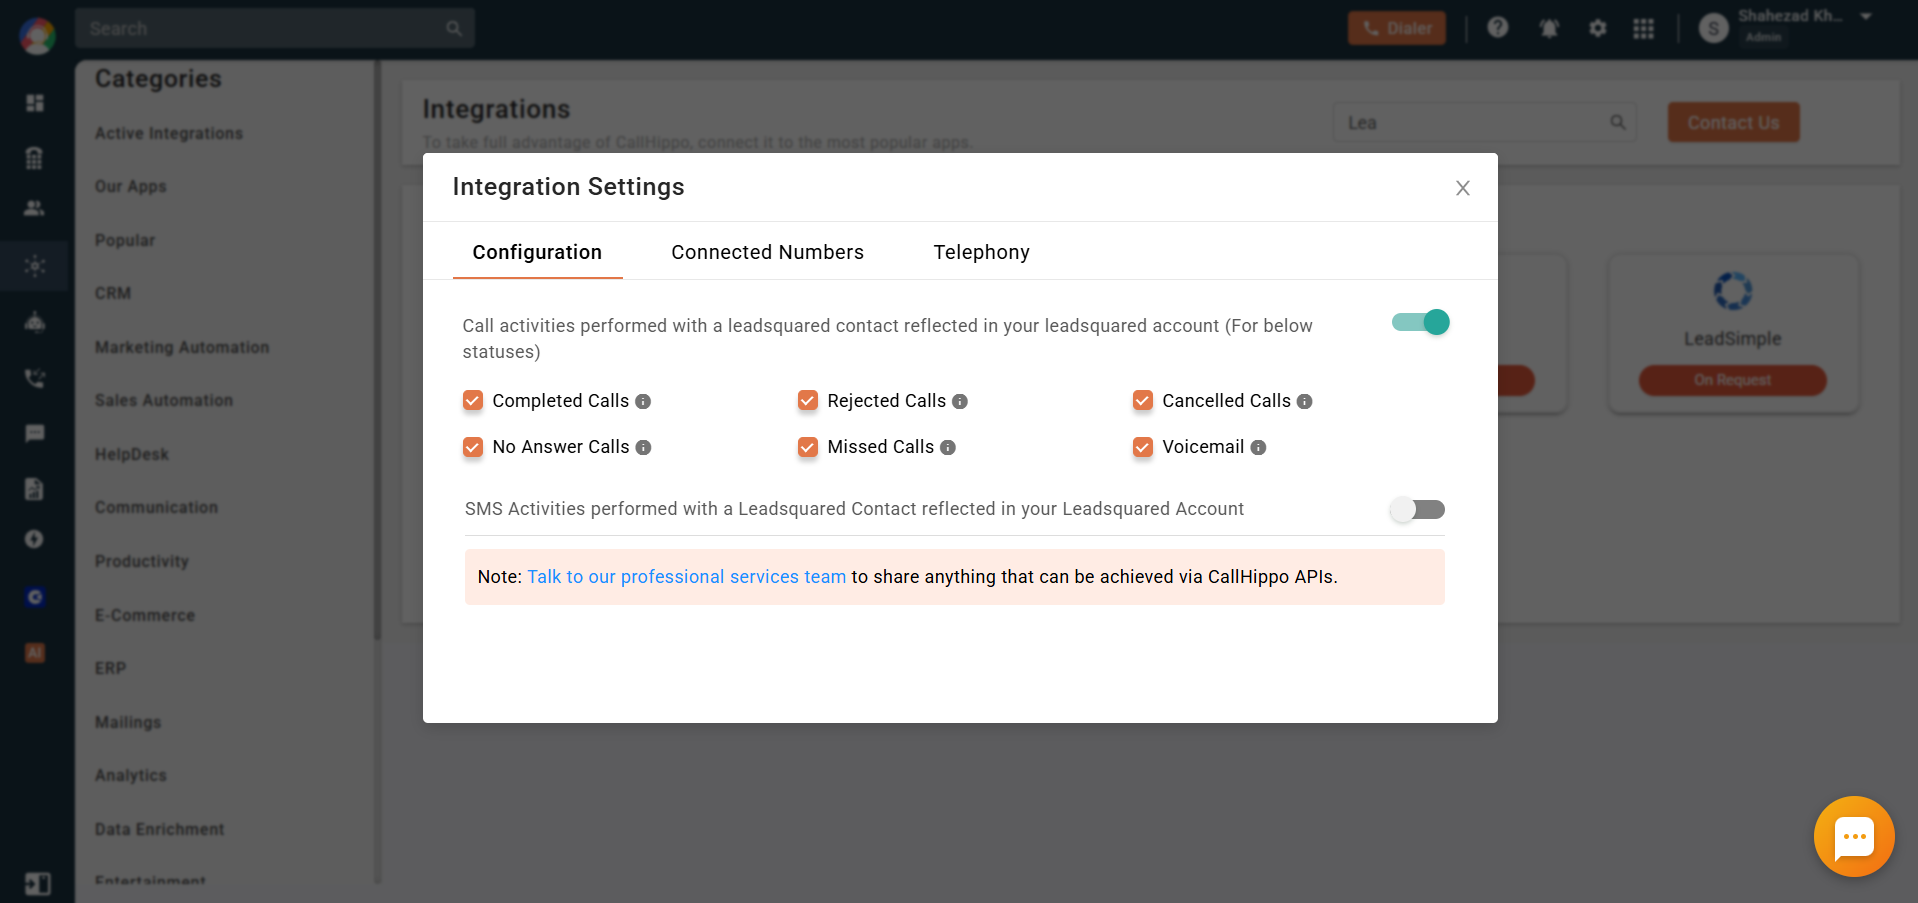
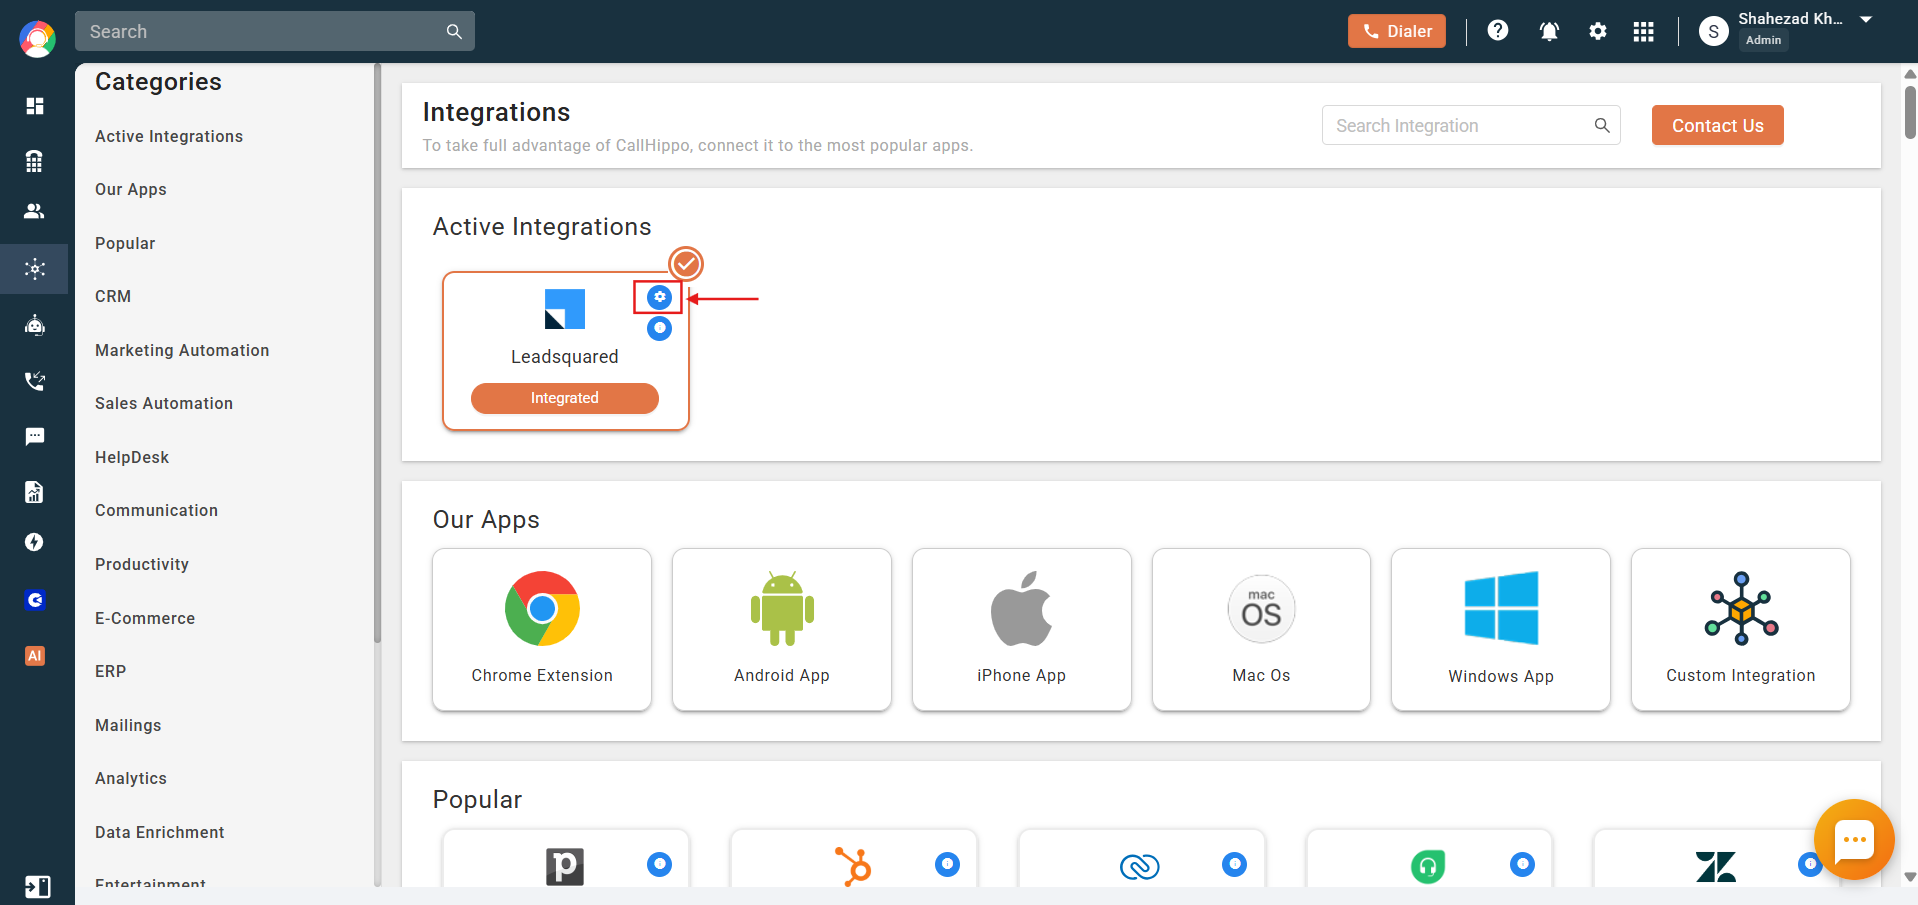
- Back in CallHippo, go to the Integrations page and click the LeadSquared integration settings icon to open Integration Settings.
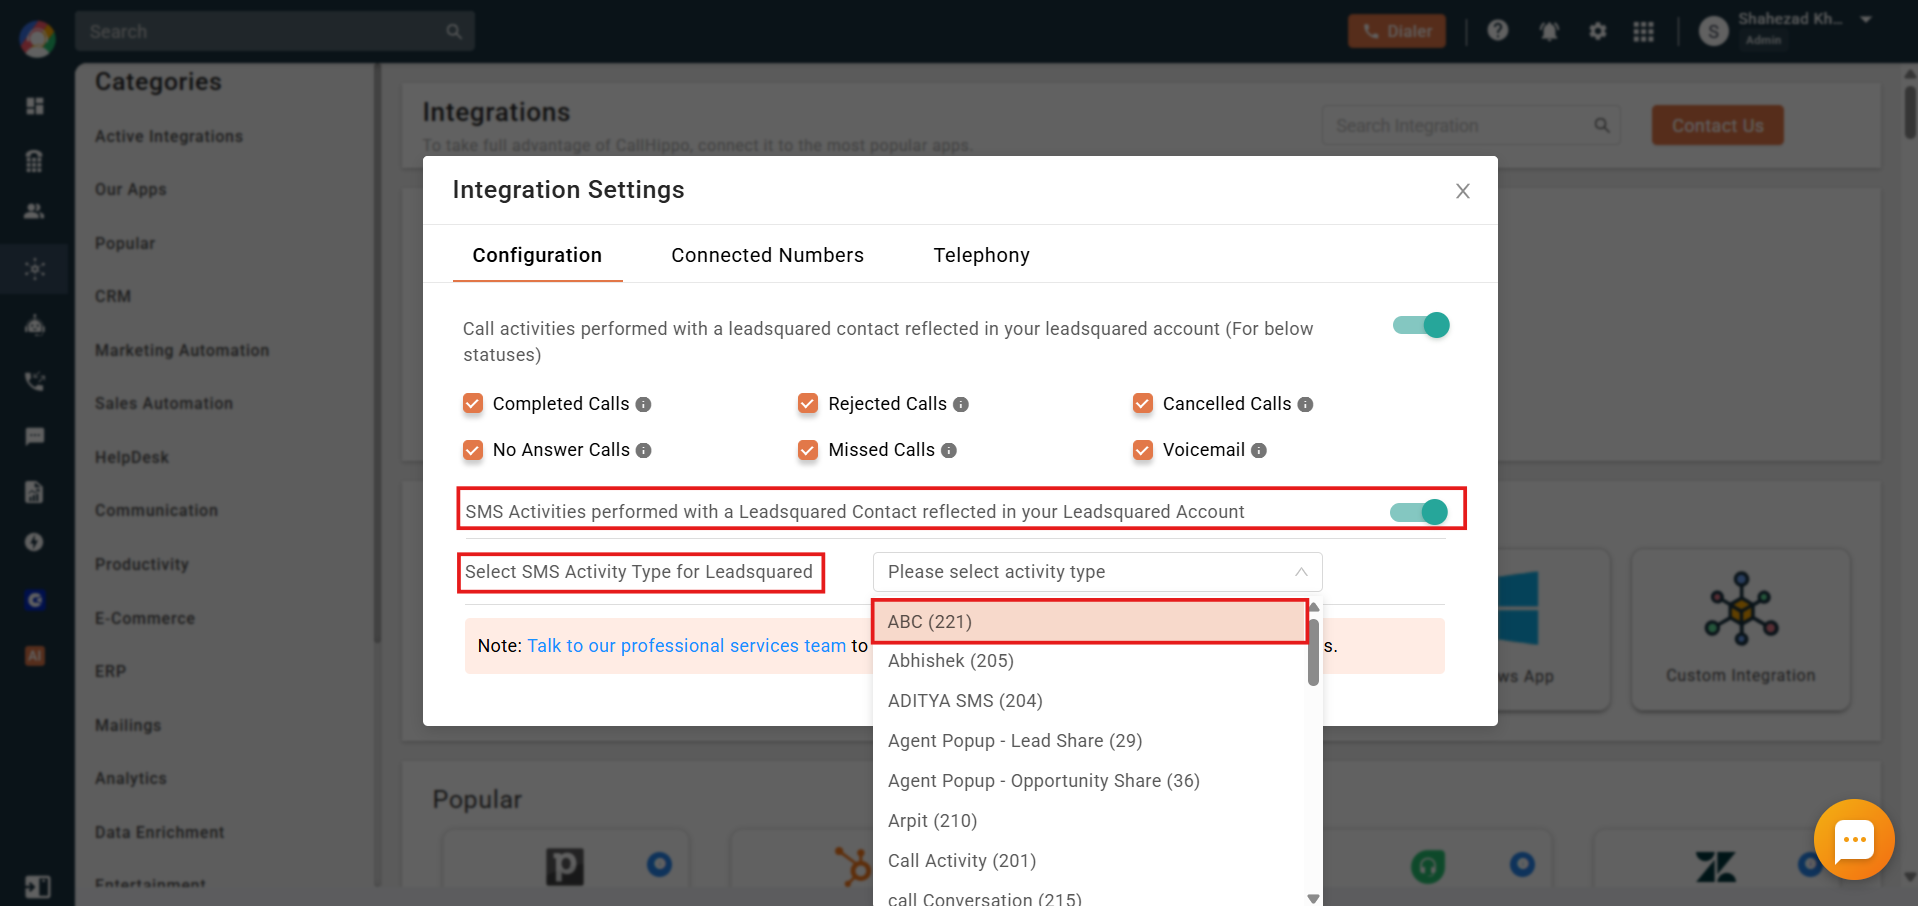
- Turn on the SMS activity toggle, then choose the custom activity you created from the Select SMS Activity Type for LeadSquared dropdown.
Route incoming calls by lead owner
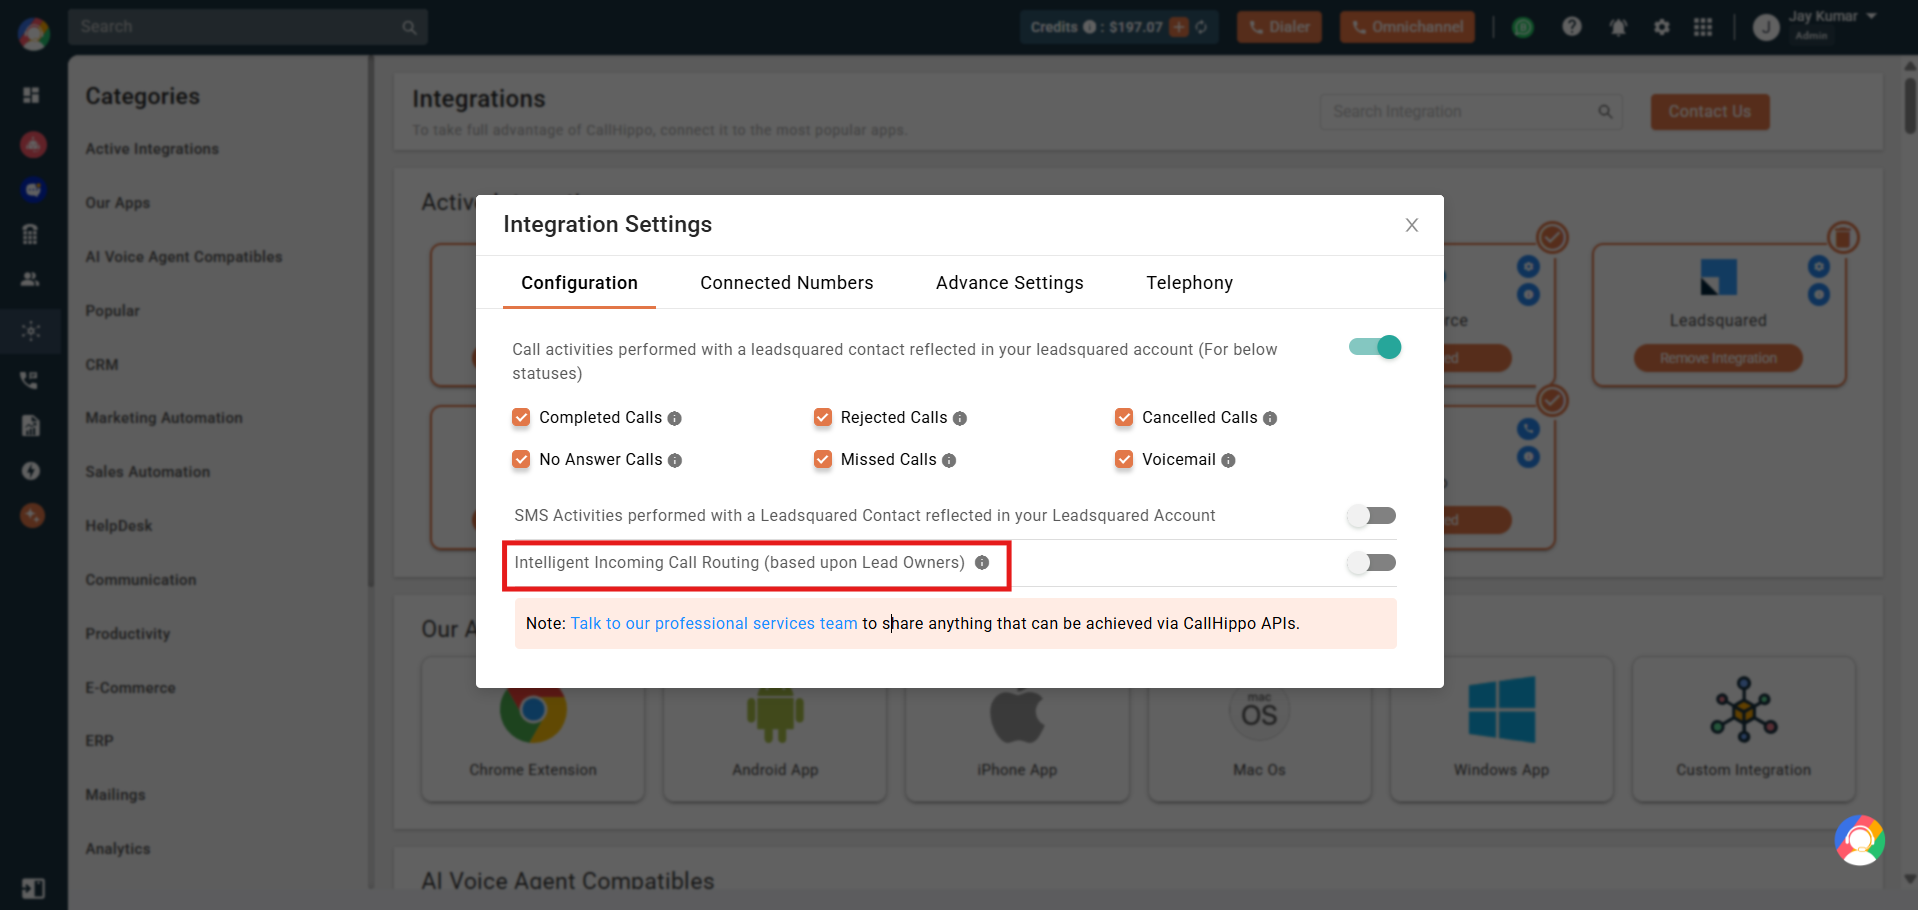
In the LeadSquared Integration Settings, enable Intelligent Incoming Call Routing (based upon Lead Owners) to automatically route inbound calls to the lead owner mapped in LeadSquared. This connects callers to the right person faster and applies to all numbers on the integration with no per-number setup.
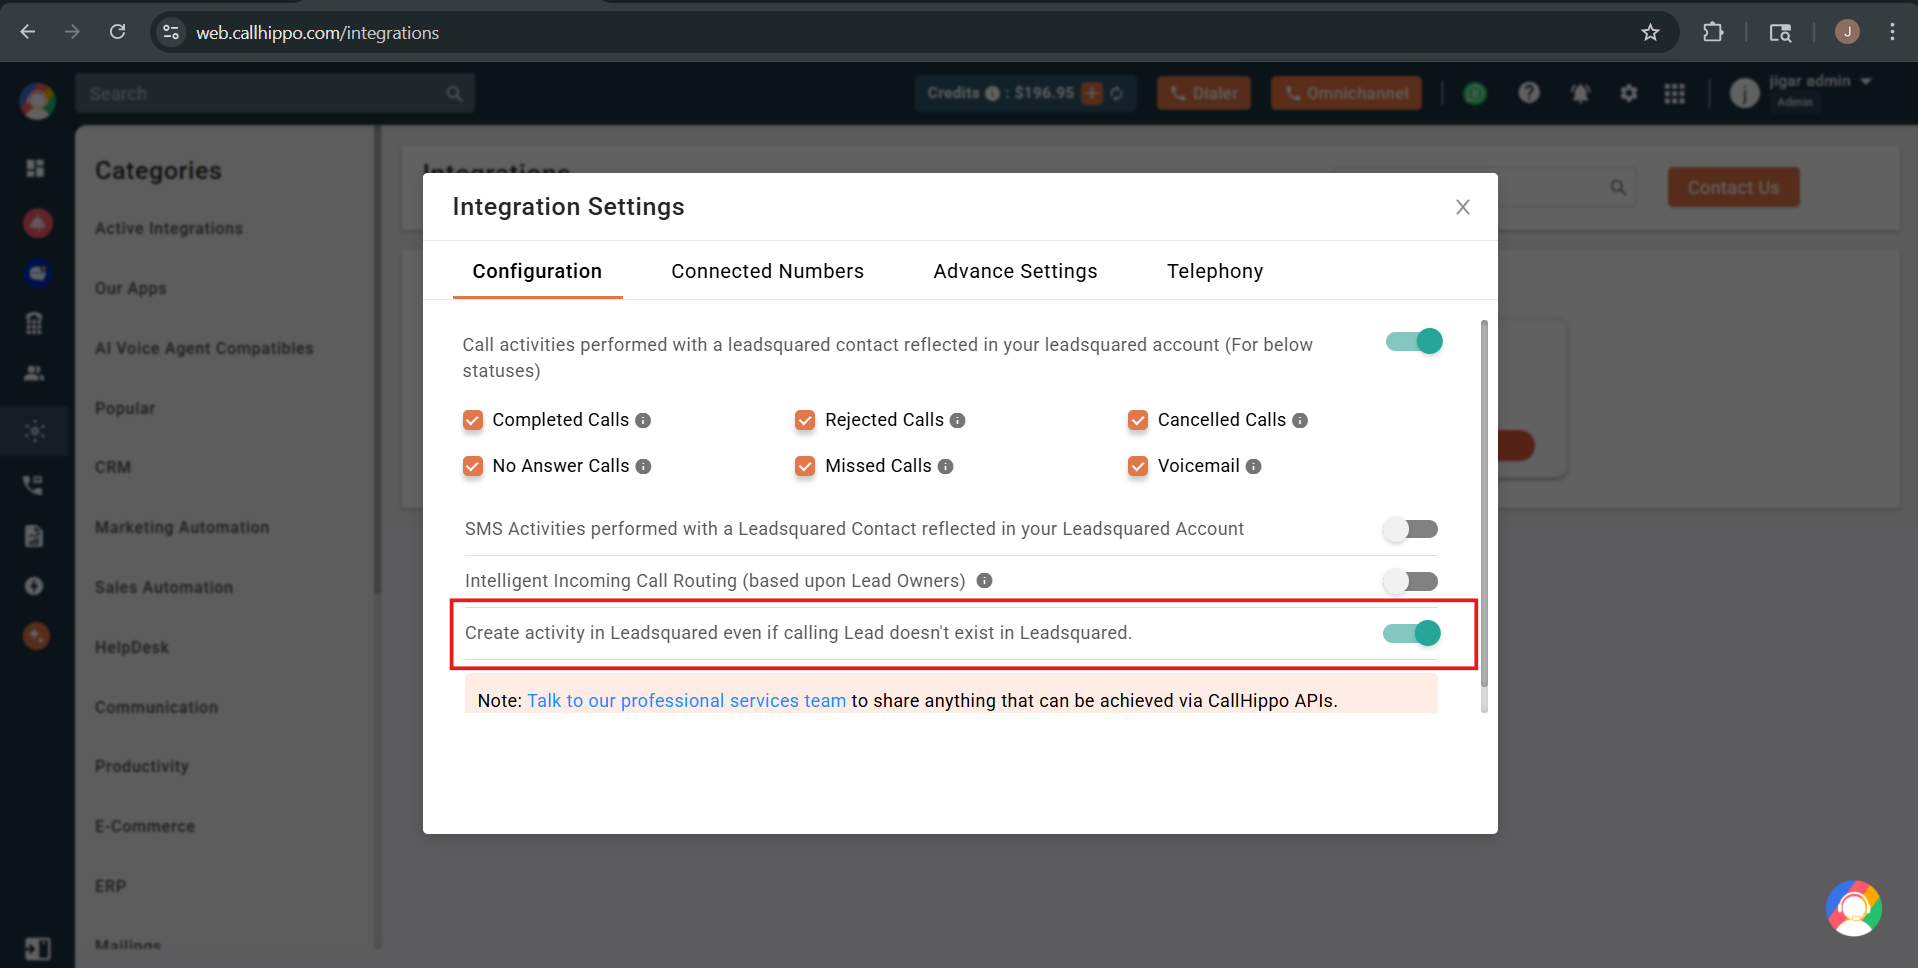
Enable the Create activity in LeadSquared even if the calling lead doesn’t exist toggle if you want CallHippo to log activity for callers who are not yet leads in LeadSquared.
How the LeadSquared sync works
- Your LeadSquared leads sync into the CallHippo dialer as contacts once a click-to-call takes place.
- When you add, update, or delete a lead in LeadSquared, the change syncs to CallHippo on the next click-to-call.
- Call logs for any call made to or received from a LeadSquared contact appear in the CallHippo dialer.
- SMS activity for any text sent to or received from a LeadSquared contact appears in the CallHippo dialer.
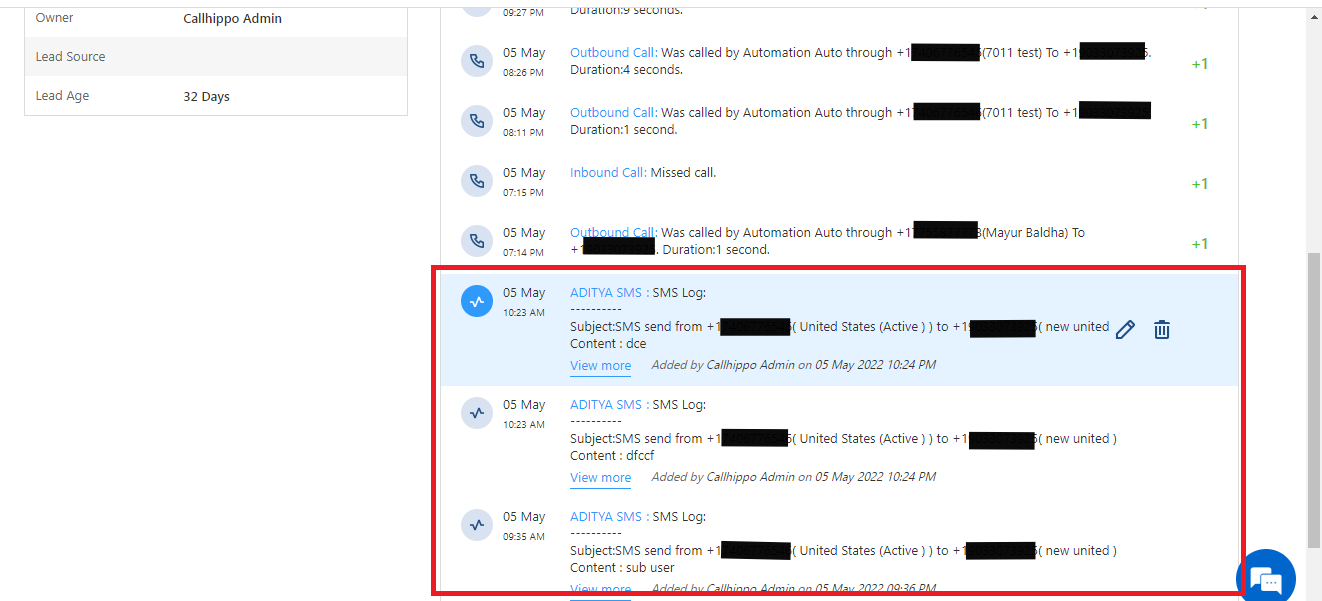
- Call and SMS activity are displayed in the LeadSquared lead’s activity history.
Call activity appears under Dashboard > Leads > Manage Leads > (open the lead) > Activity History.
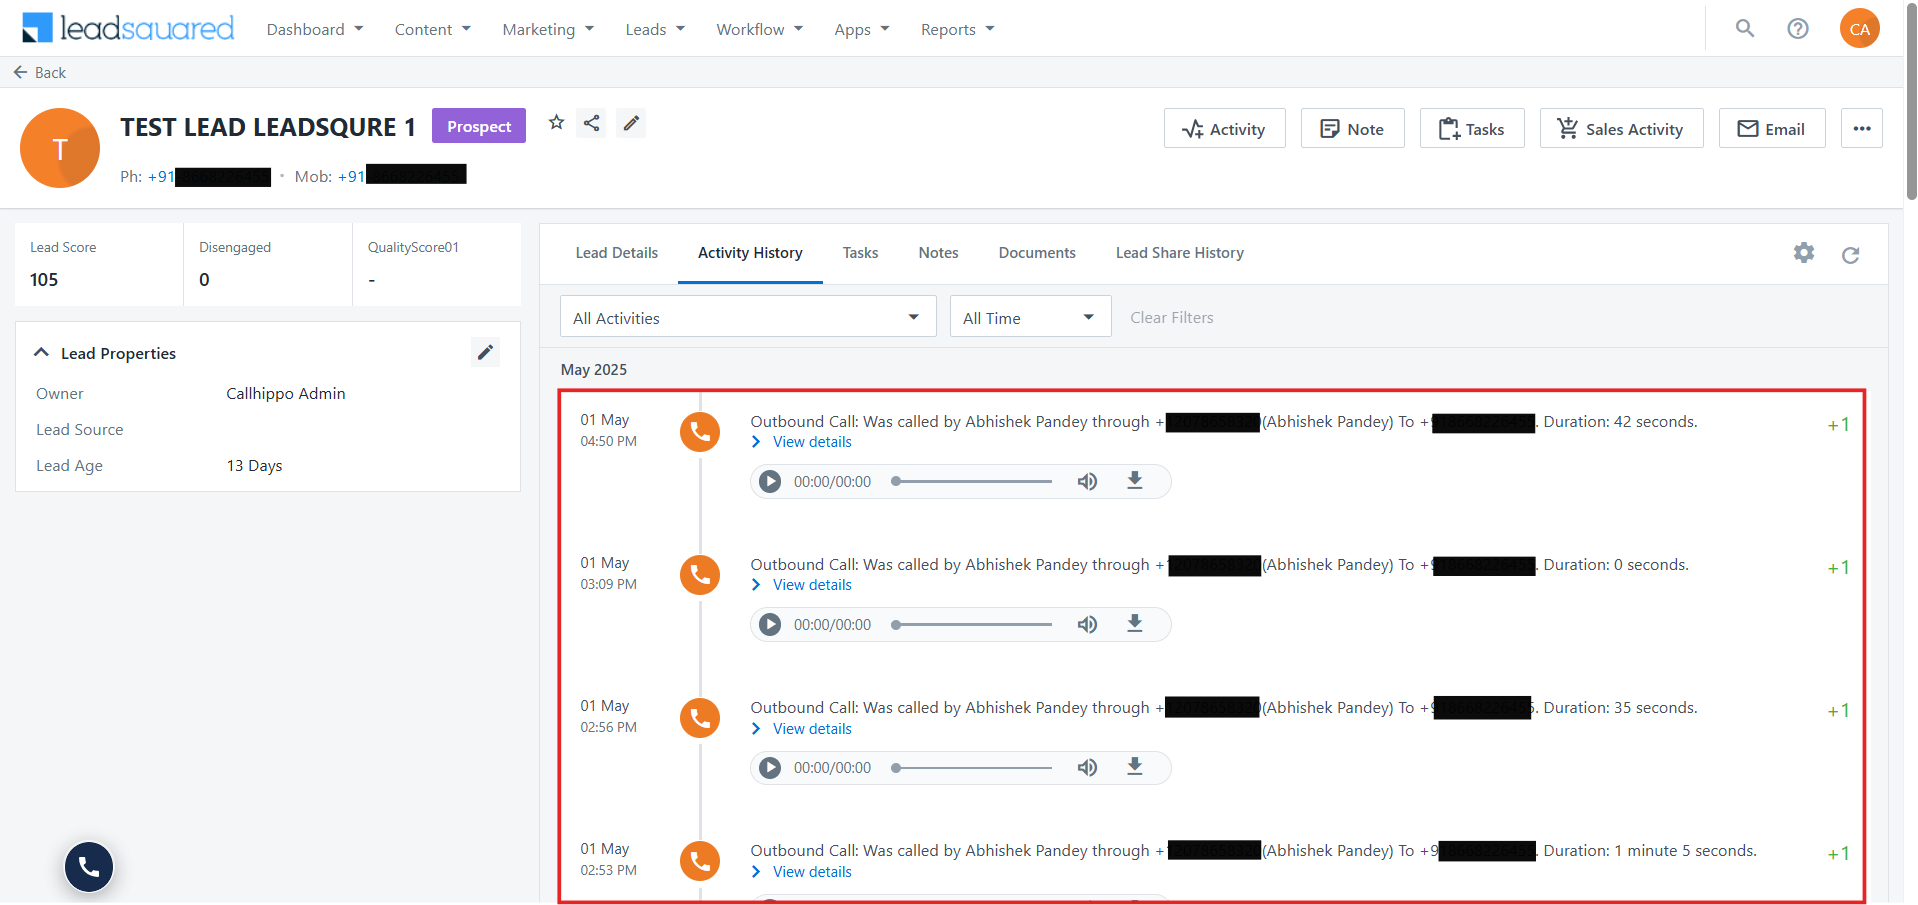
SMS activity appears in the same Activity History view.
After Call Work data in LeadSquared
If your plan includes CallHippo’s call tags and disposition service and it is enabled, the activity pushed to LeadSquared includes the tags and disposition you add on the After Call Work (ACW) screen.
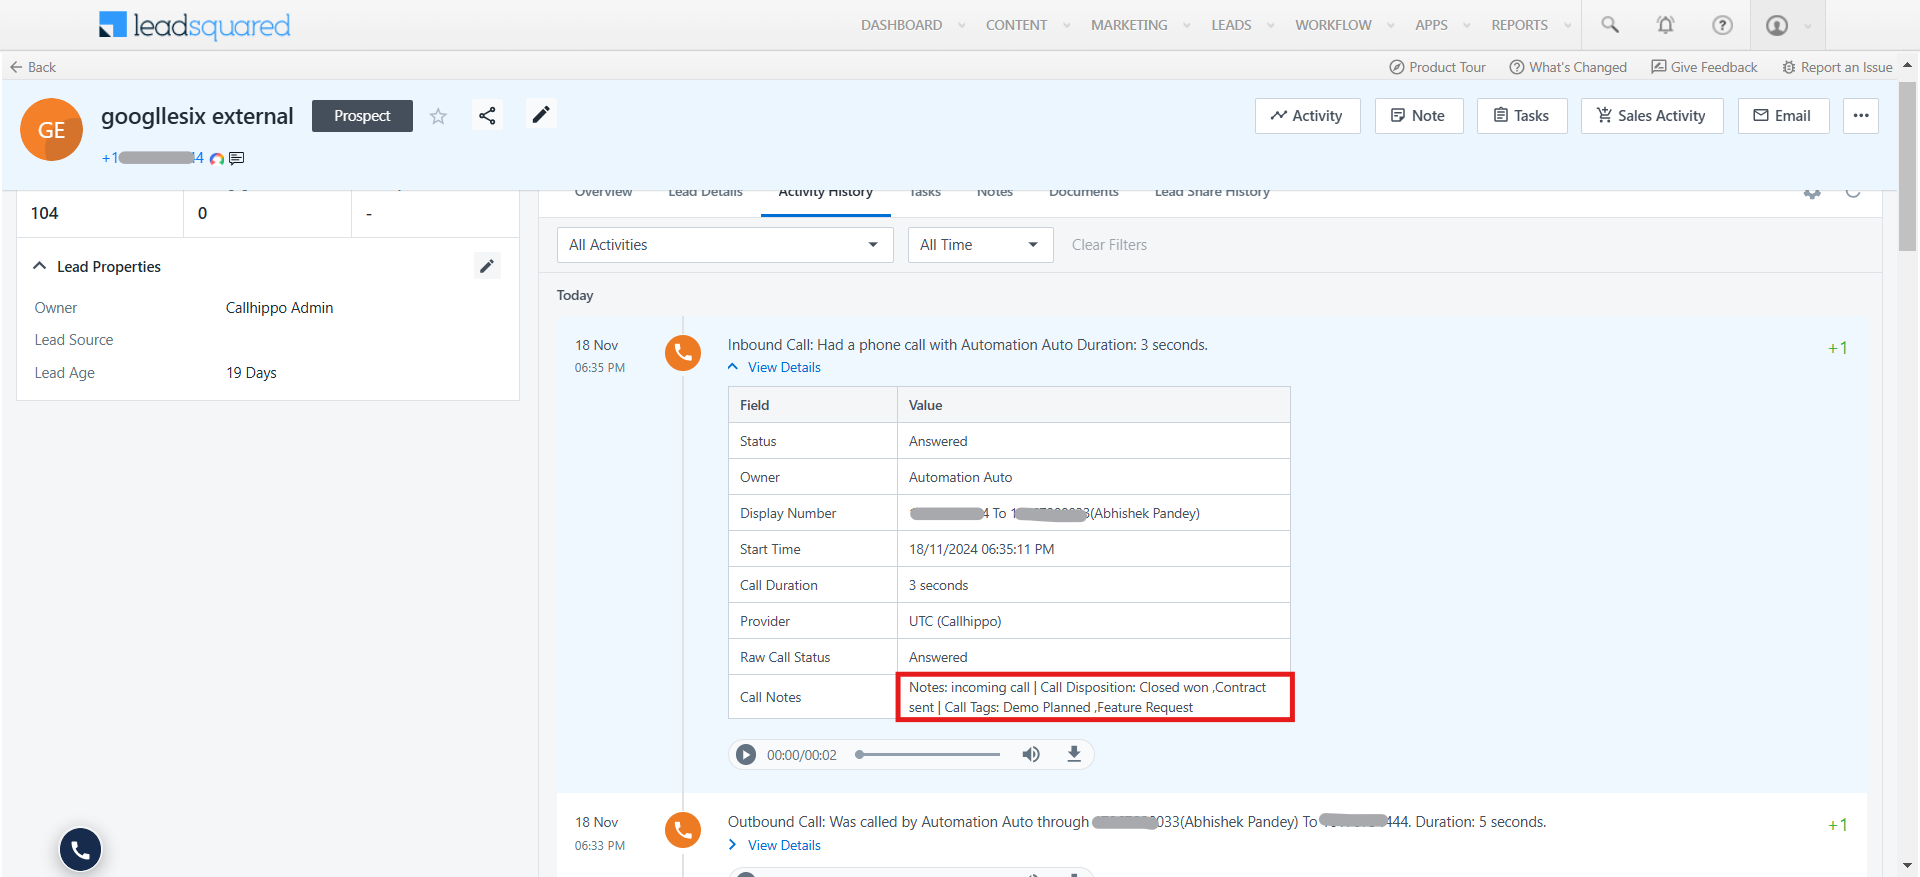
Note: This syncs only when the tags and disposition are added on the After Call Work screen. Tags or dispositions added later from the call logs or another feed will not sync to LeadSquared.
Enable click-to-call with the Chrome extension
Install the CallHippo Click-to-Call Chrome extension to dial LeadSquared leads in one click. If you use CallHippo’s native telephony inside LeadSquared, refer to the CallHippo LeadSquared telephony setup guide for step-by-step configuration.
Still need help? Reach us at [email protected].