
The Lists module is your central hub for managing every contact list in CallHippo, so you can reuse the same list across any auto dialer without uploading it again.
What Is the Lists Module?
The Lists module is a centralized place to manage all your contact lists. Instead of uploading a separate list for each auto dialer, you upload once and use the same list across any dialer: Power, Parallel, Speed to Dial, or Progressive Dialer.
How to Access the Lists Module
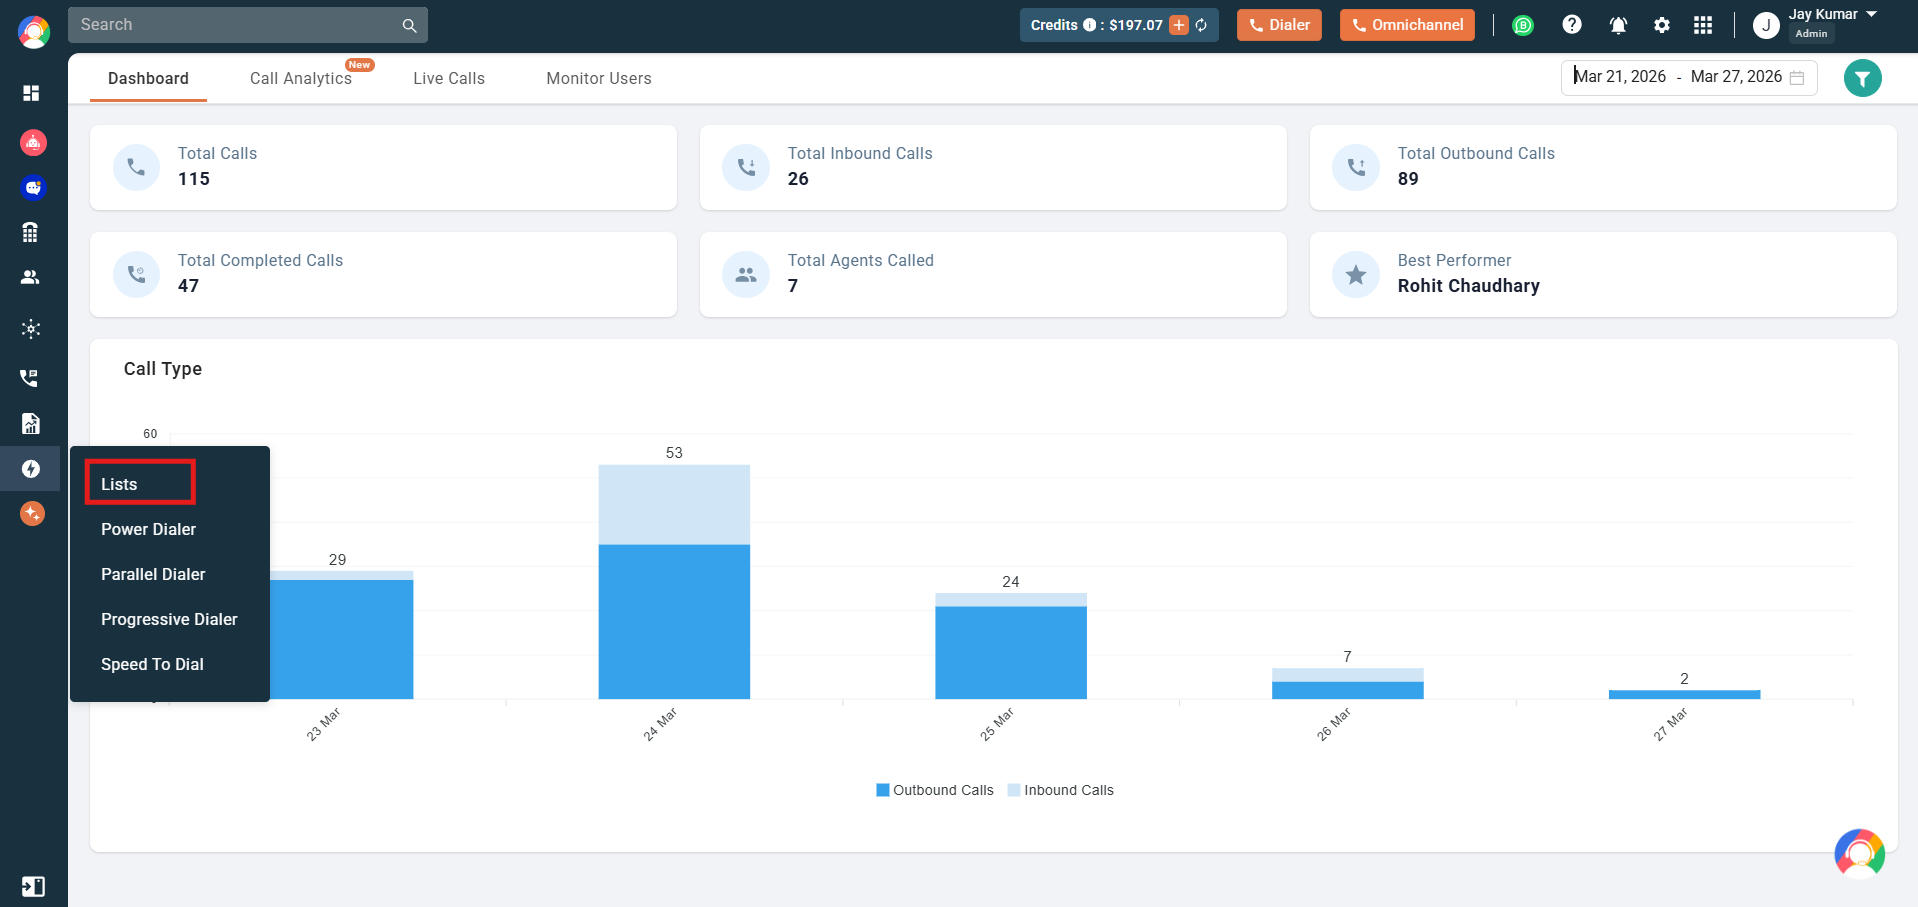
- Click the Auto Dialer icon on the left sidebar.
- In the dropdown menu, click Lists.
The Lists Page
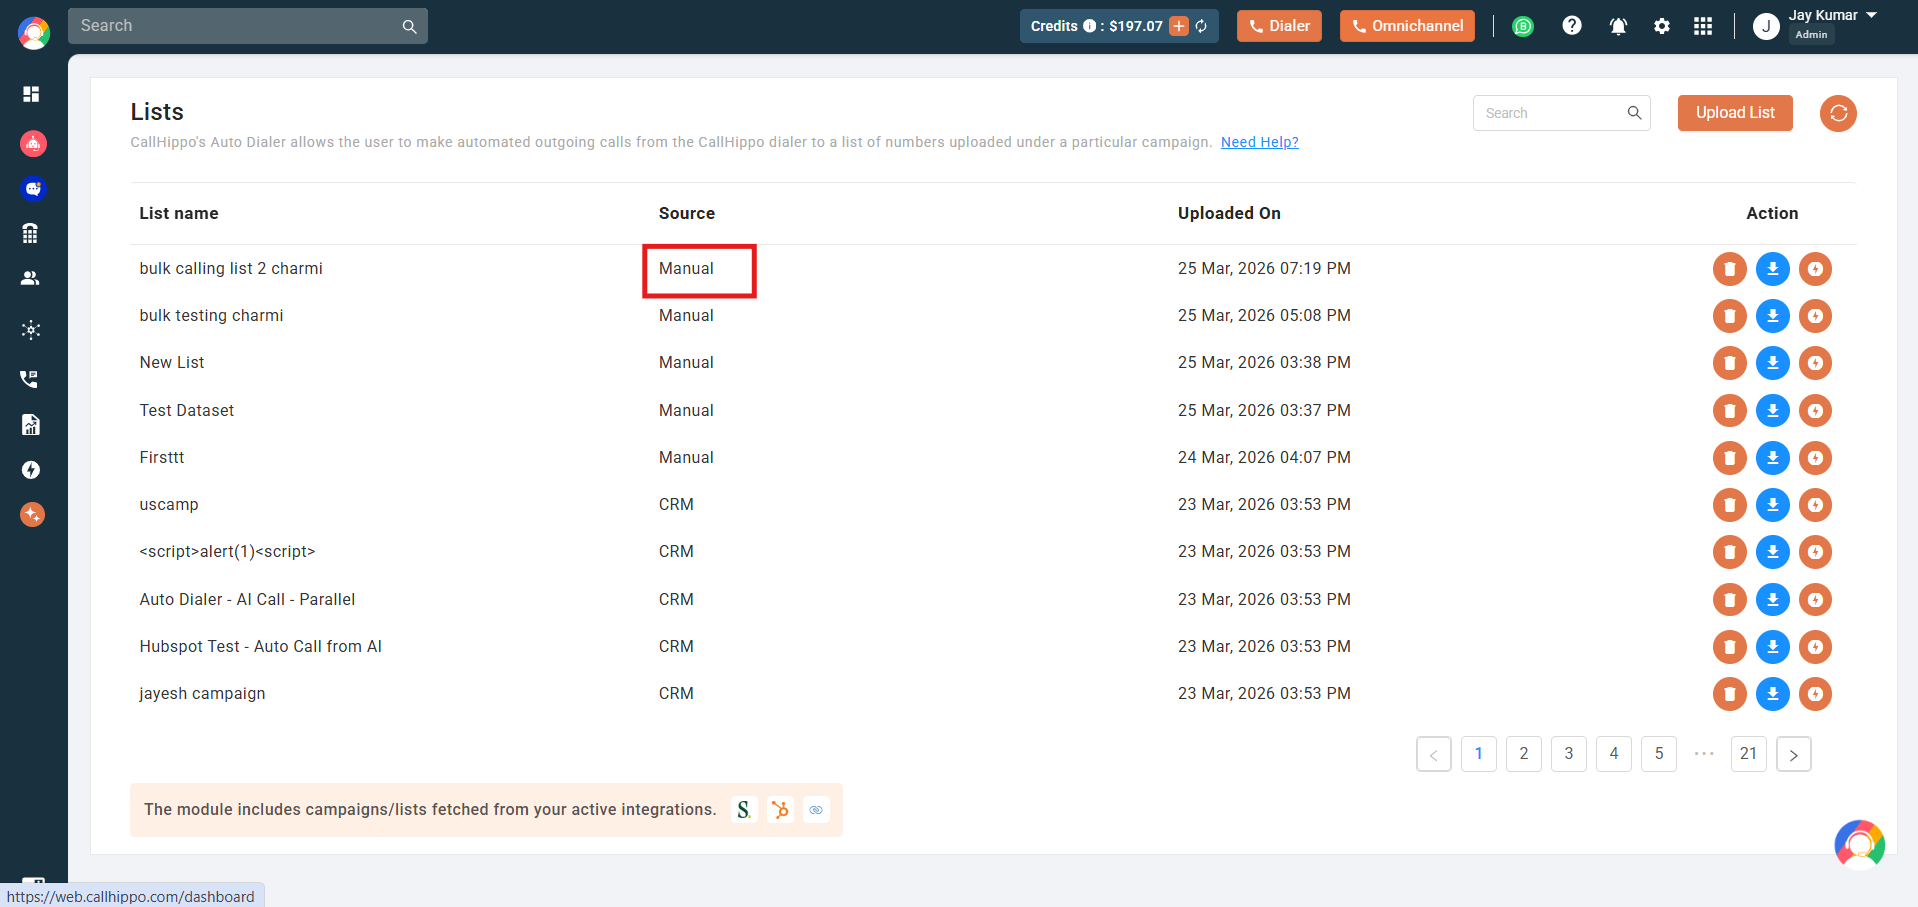
Once you open the module, you will see a table of all your uploaded contact lists.
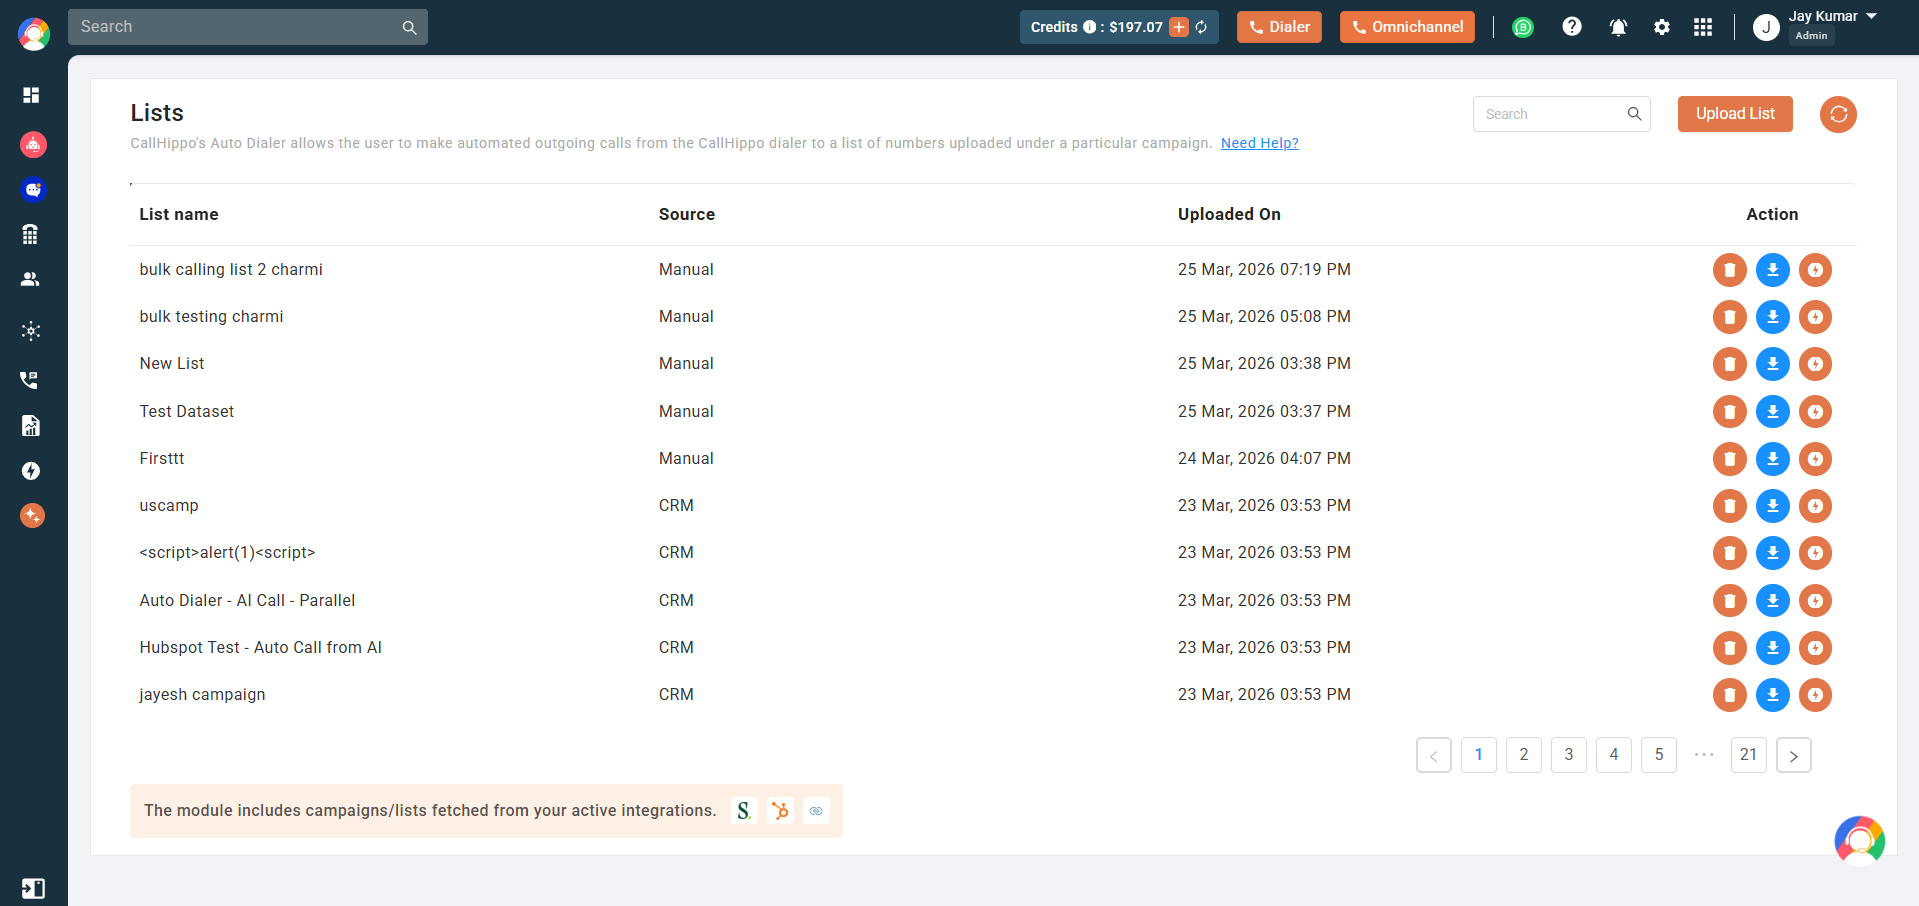
Each list shows:
- List Name – the name given when the list was uploaded.
- Source – where the list came from (Manual or CRM name).
- Uploaded On – the date and time it was added.
- Action – buttons to delete, download, run a campaign, or sync the list.
You can search for a specific list using the search bar at the top right, and click the sync icon next to the Upload List button to refresh all list data.
Step 1: Upload a New List
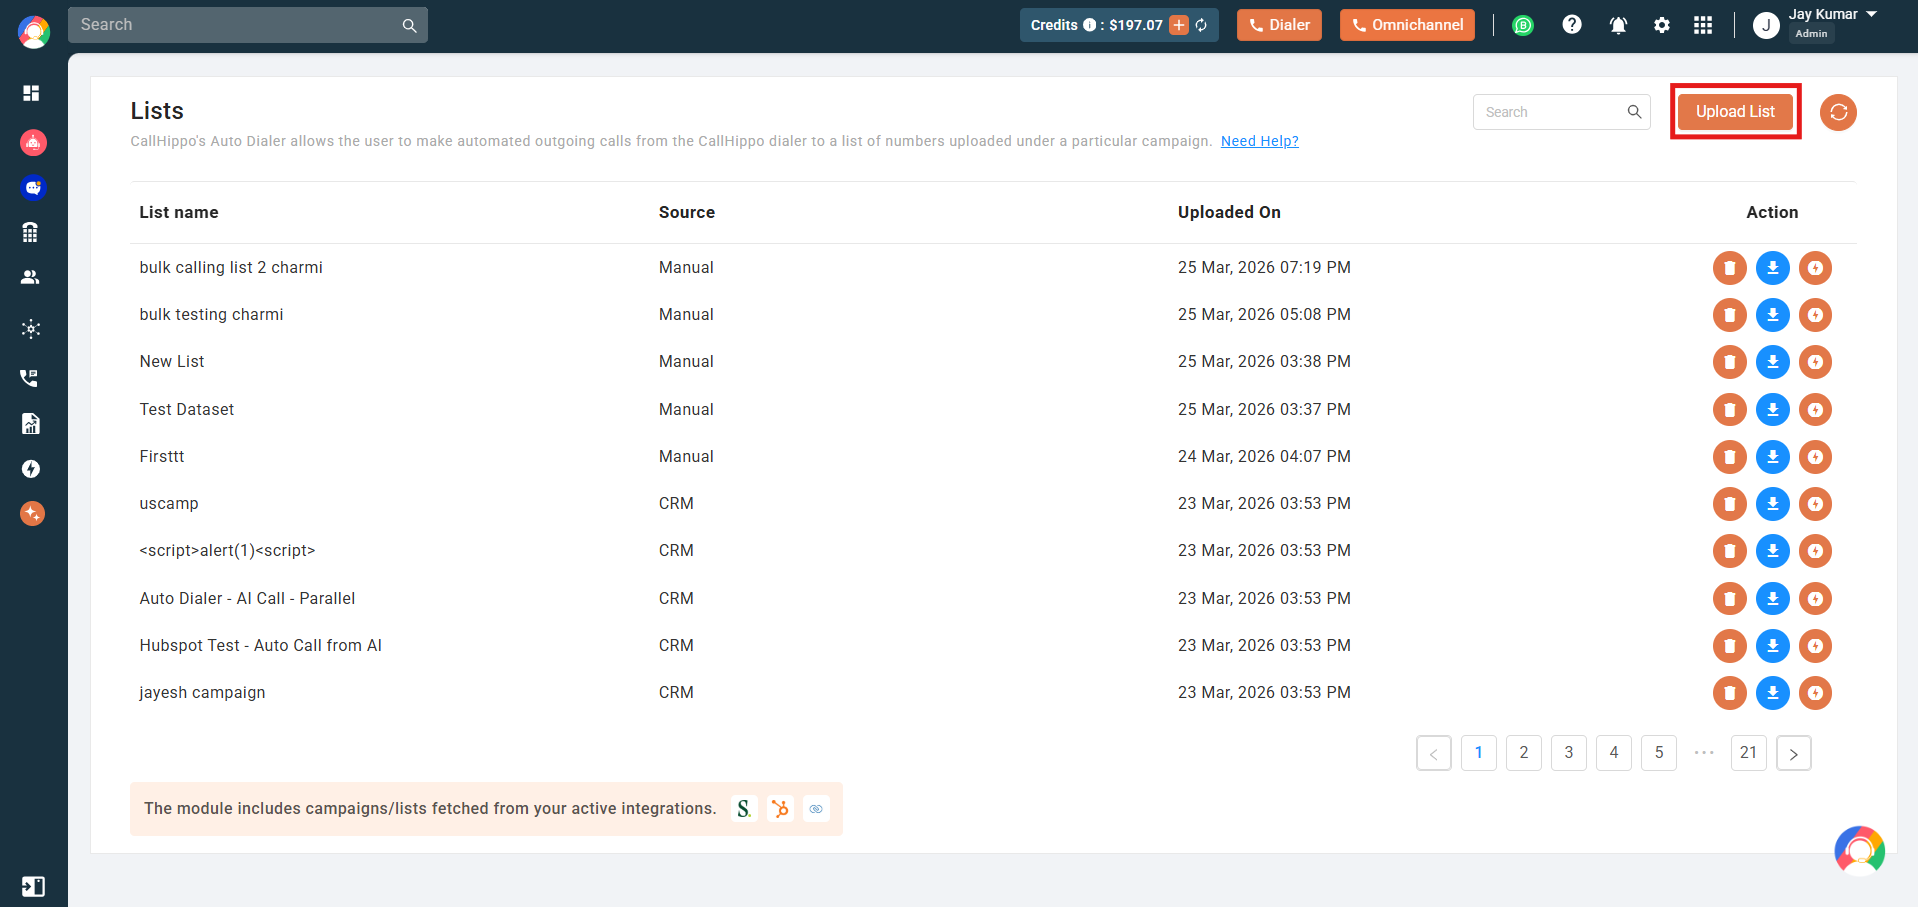
Click the Upload List button at the top right. A popup appears with two options: Manually or Integration.
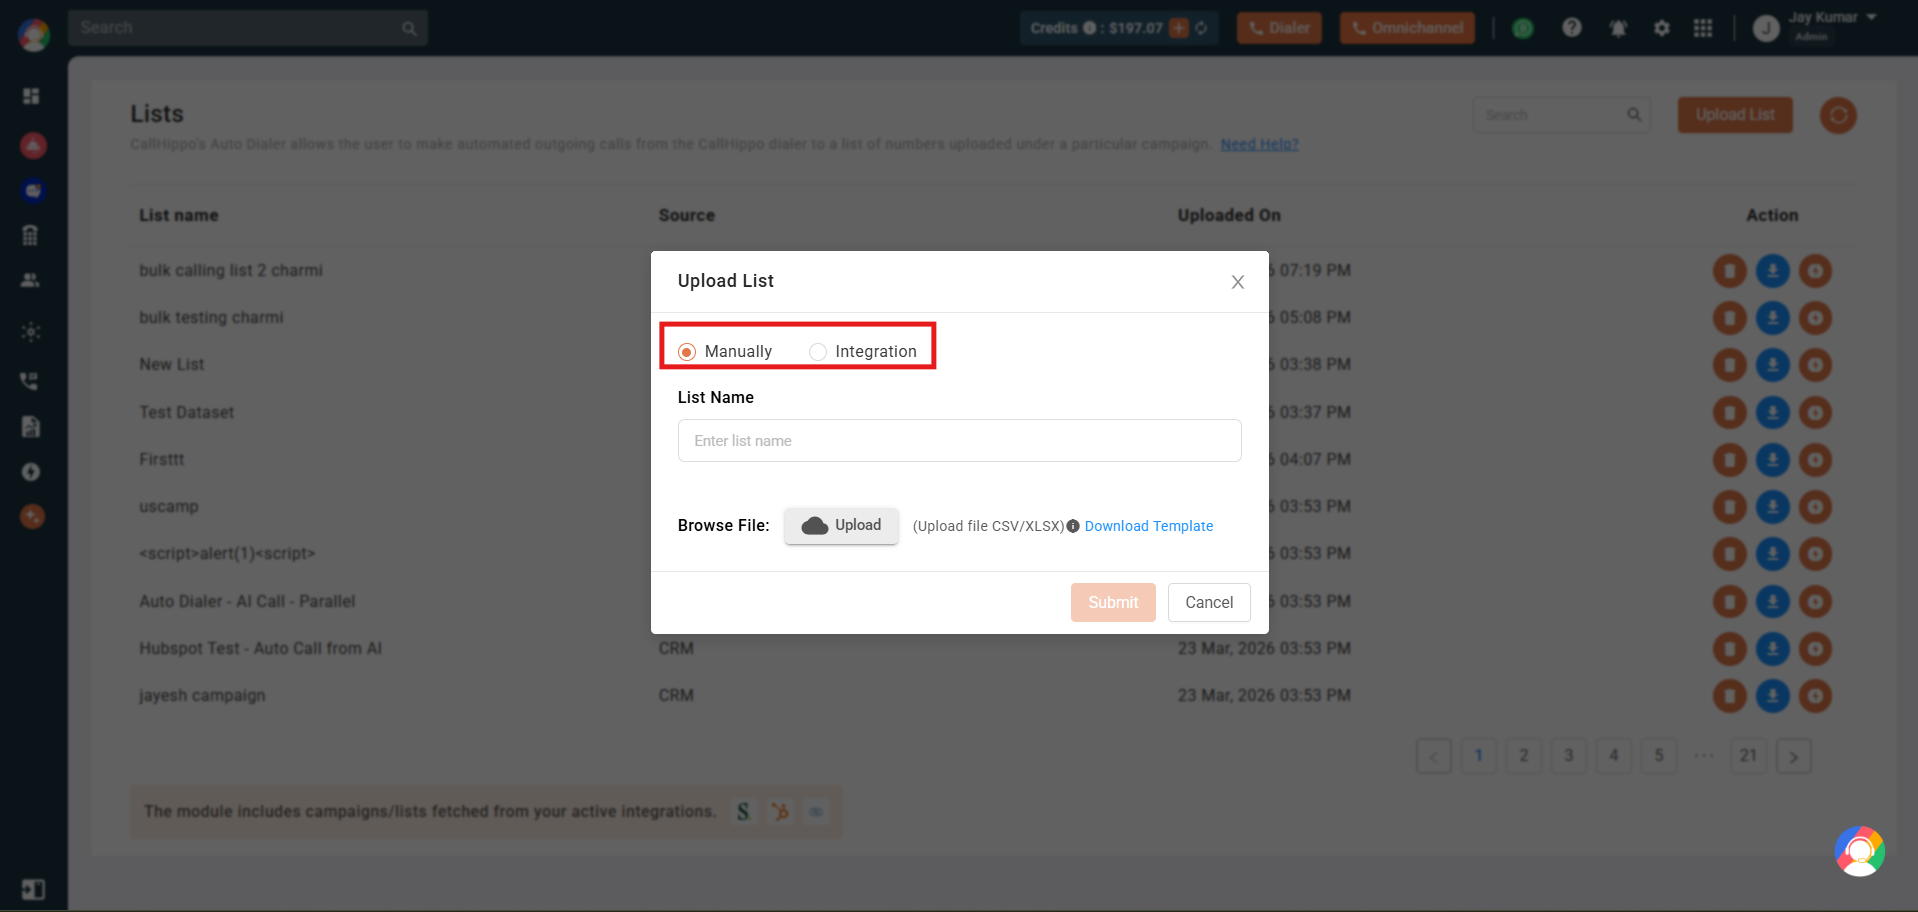
Option A: Upload Manually
Use this when you have a ready CSV or XLSX file of contacts.
- Select Manually.
- Enter a List Name. This must be unique; no two lists can share the same name.
- Click Upload under Browse File and select your CSV or XLSX file. If you do not have a file ready, click Download Template to get the correct format.
- Click Submit.
Your list now appears in the table with Manual as the source.
Option B: Upload via Integration
Use this when you want to pull contacts directly from your connected CRM.
- Select Integration.
- Enter a List Name.
- Under Active Integrations, select the CRM to pull from (for example Salesforce, HubSpot, Zoho CRM, or Leadsquared).
- Choose how contacts should be added:
- Trigger based – contacts are added automatically when a specific event happens in your CRM (Contact Creation, Contact Update, Lead Creation, or Lead Update).
- Fetch from List – contacts are pulled from an existing active list in your CRM (for example, a static HubSpot list).
- Click Submit.
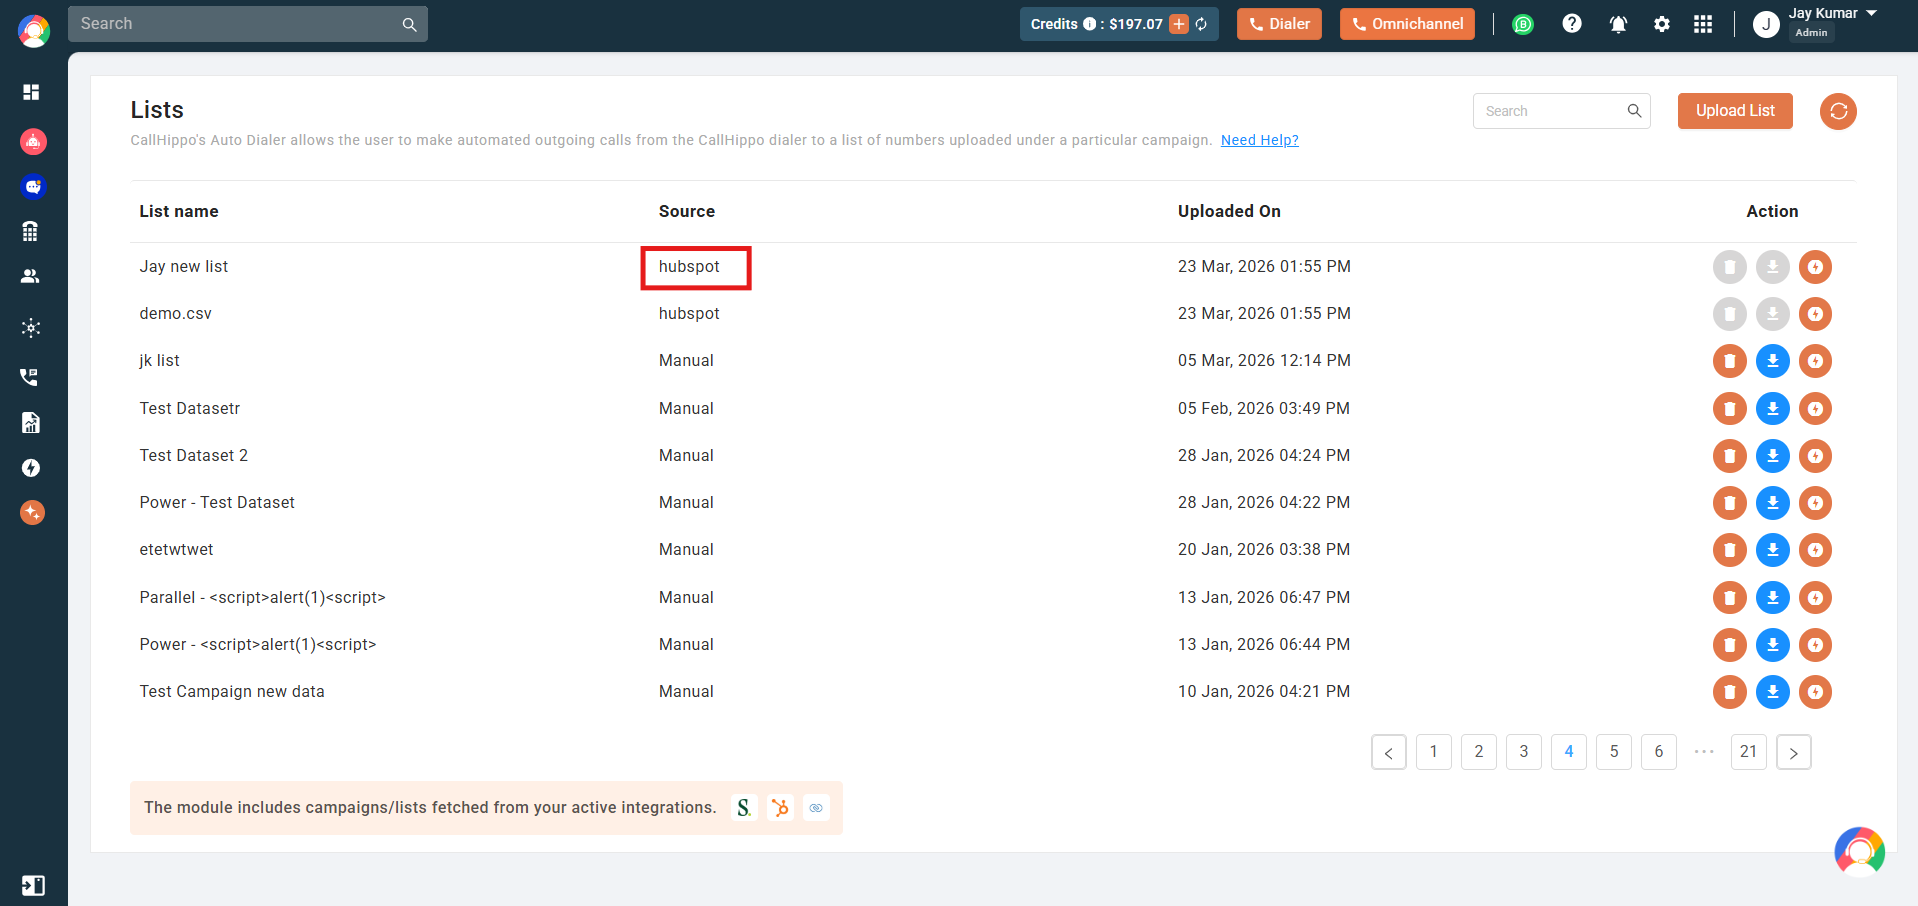
Your list appears in the table with the CRM name as the source.
Note: If no CRM is connected yet, the Active Integrations section shows “No active integrations found. Please connect a CRM integration first.” You can connect a CRM from your CallHippo integrations settings.
Step 2: Using a List with a Dialer
Once a list is uploaded, you can start a campaign in any supported dialer directly from the Lists page.
- Find the list you want to use.
- Click the Run / Start icon (the orange play button) in the Action column.
- In the dropdown, select the dialer you want, for example Progressive Dialer, Parallel Dialer, or Speed to Dial.
- You are taken to that dialer’s campaign creation page with the list and campaign name already filled in.
- Complete the remaining campaign details and submit.
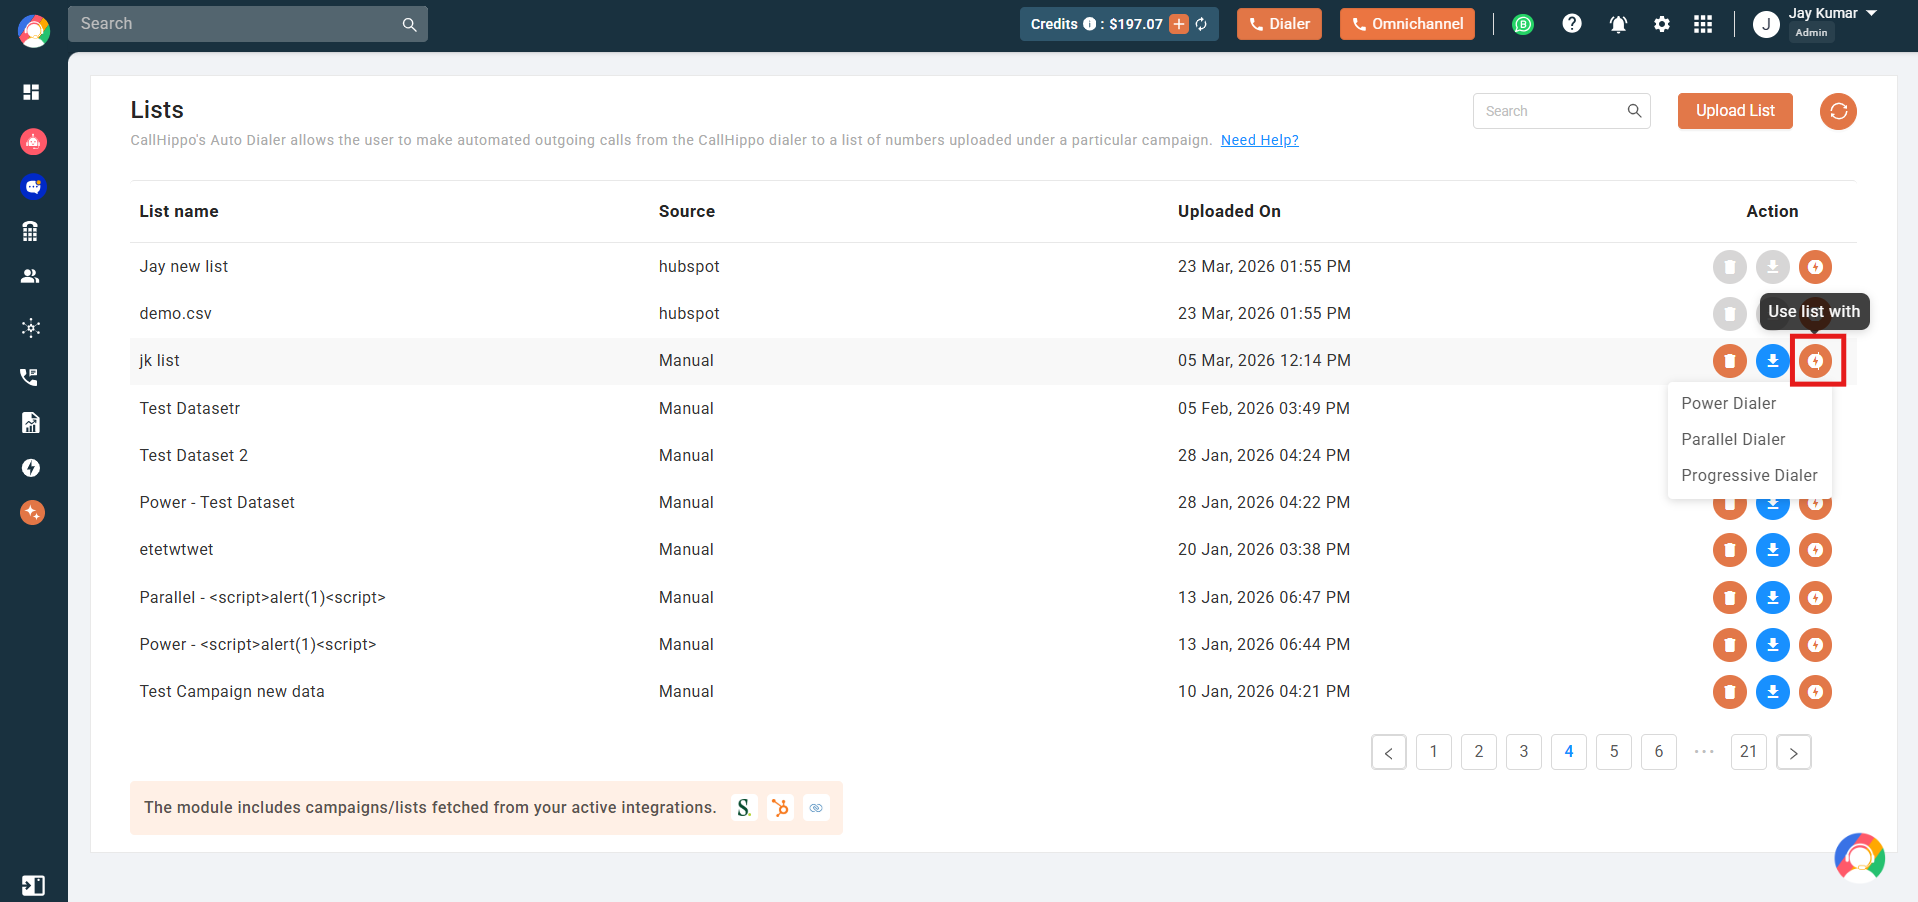
Note: The dialers shown depend on the list’s source type. For example, a HubSpot static list shows Parallel Dialer and Progressive Dialer as options.
Step 3: Other Actions on a List
Each list in the table has these action buttons:
- Delete (red icon): permanently removes the list from the module. Use with caution; this cannot be undone.
- Download (blue icon): downloads the list as a file so you can view or edit the contacts locally.
- Run / Start (orange icon): opens the dialer selection dropdown to start a campaign, as covered in Step 2.
- Sync (orange circular arrow, top right): refreshes all list data to pull the latest contacts, especially useful for integration-based lists.
Please note:
- When uploading a new list, the name must be unique. A name that already exists will not be accepted.
- A list fetched from a connected integration cannot be downloaded or deleted from the module. Both action buttons appear in a disabled state.