
Connecting Odoo with CallHippo lets you place calls straight from your Odoo records, automatically sync contacts and applicants, and log every call and SMS as an activity on the right record.
Set up your Odoo account
Before you connect, make sure the Odoo user you plan to use has the right access. If you would rather not fine-tune permissions, simply integrate using your admin user.
- Open user management. Log in to Odoo with an admin account, go to Settings and click Manage Users.
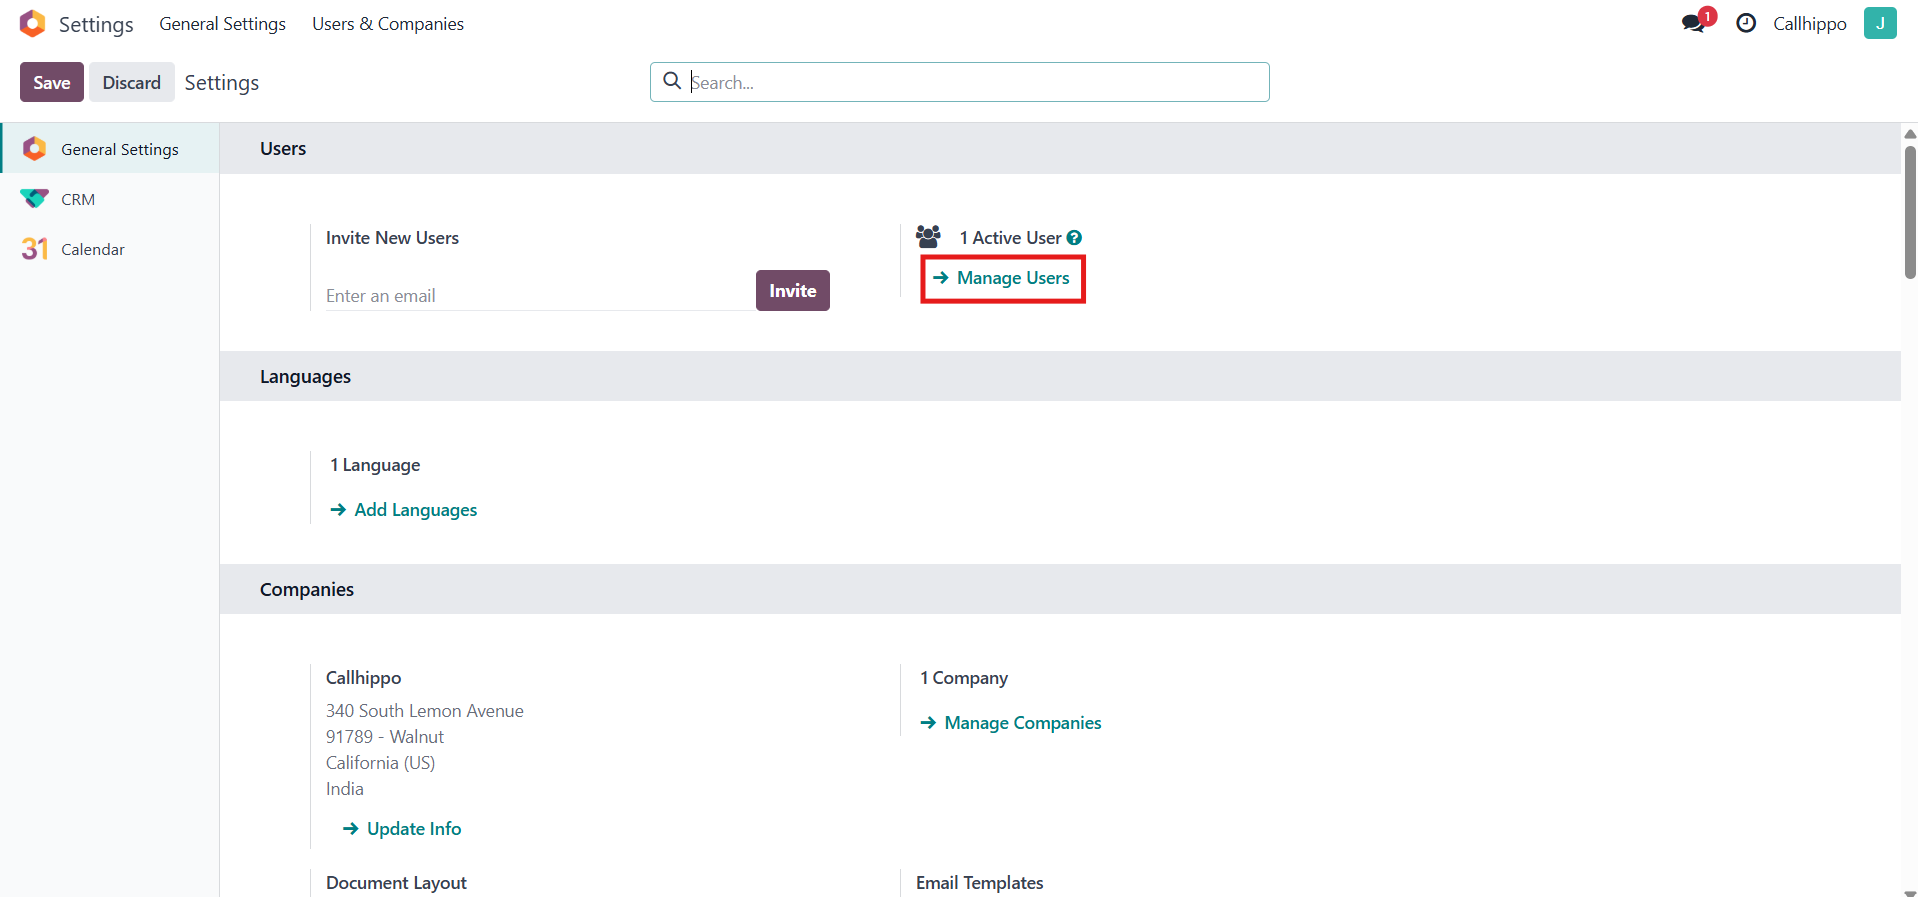
- Select the user you want to use for the integration.
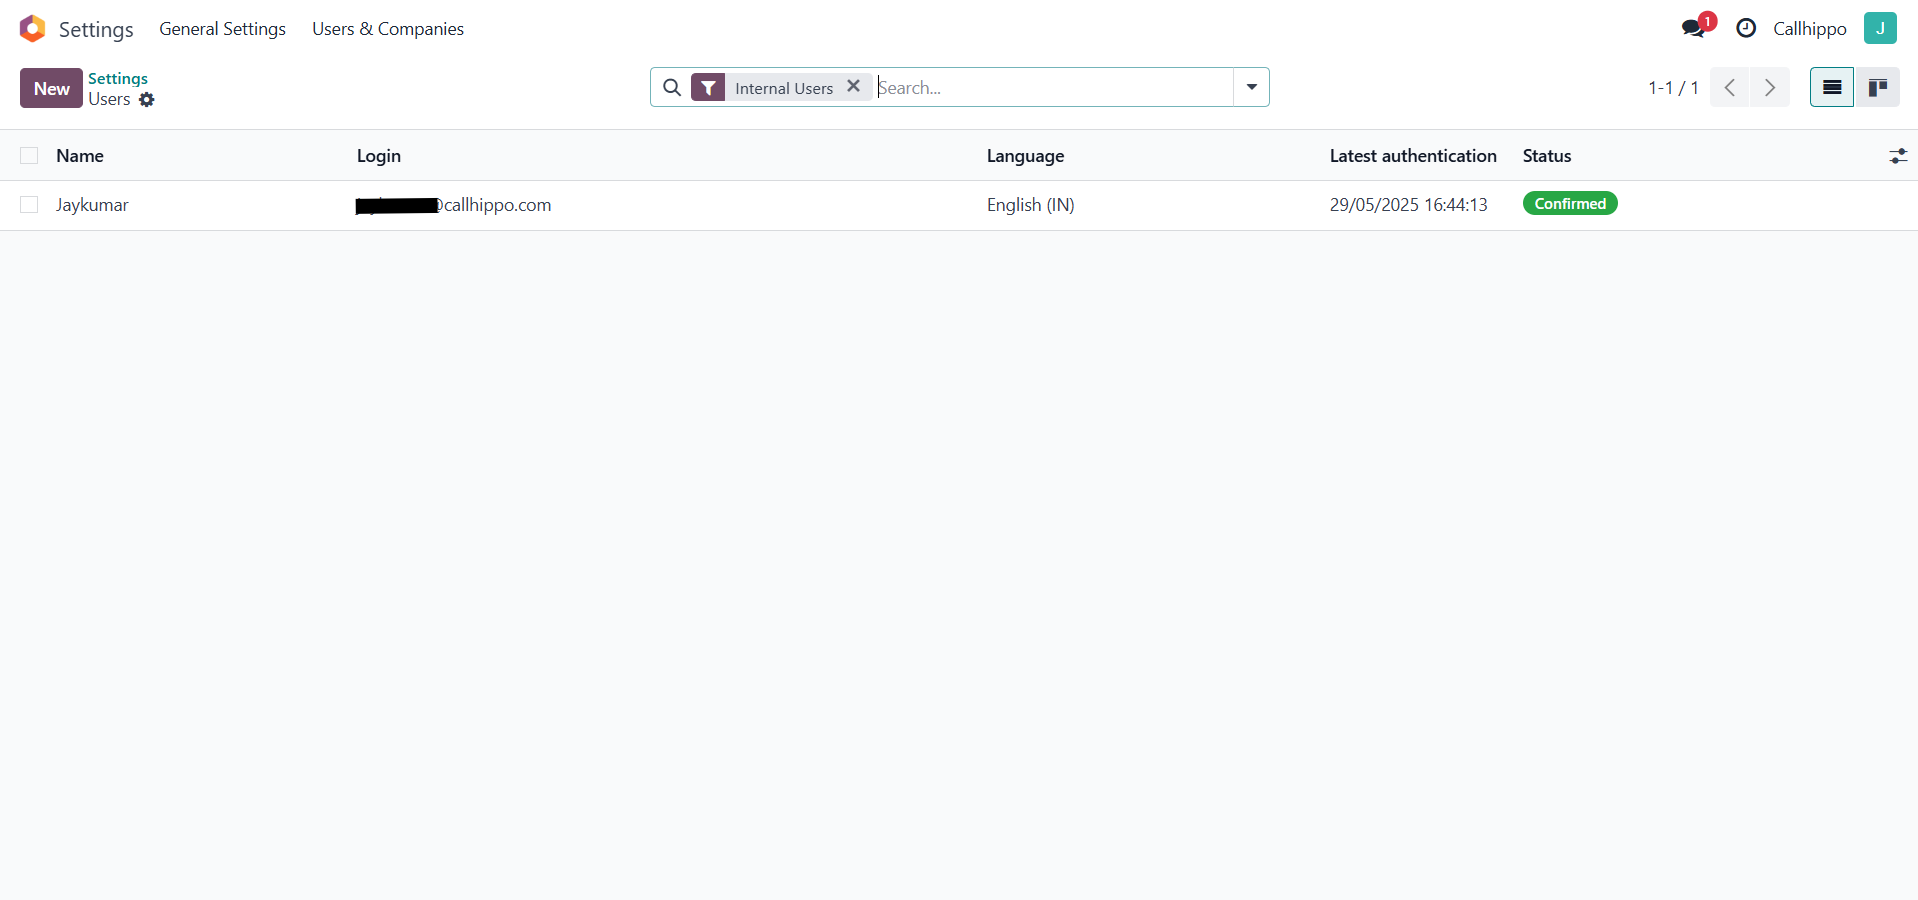
- Assign access rights. Open the Access Rights tab and give the user Administrator rights for every module you want to integrate (CallHippo currently supports the CRM and Recruitment modules). Under Administration, set the Settings right. These rights are mandatory for the integration to work correctly.
Connect Odoo in CallHippo
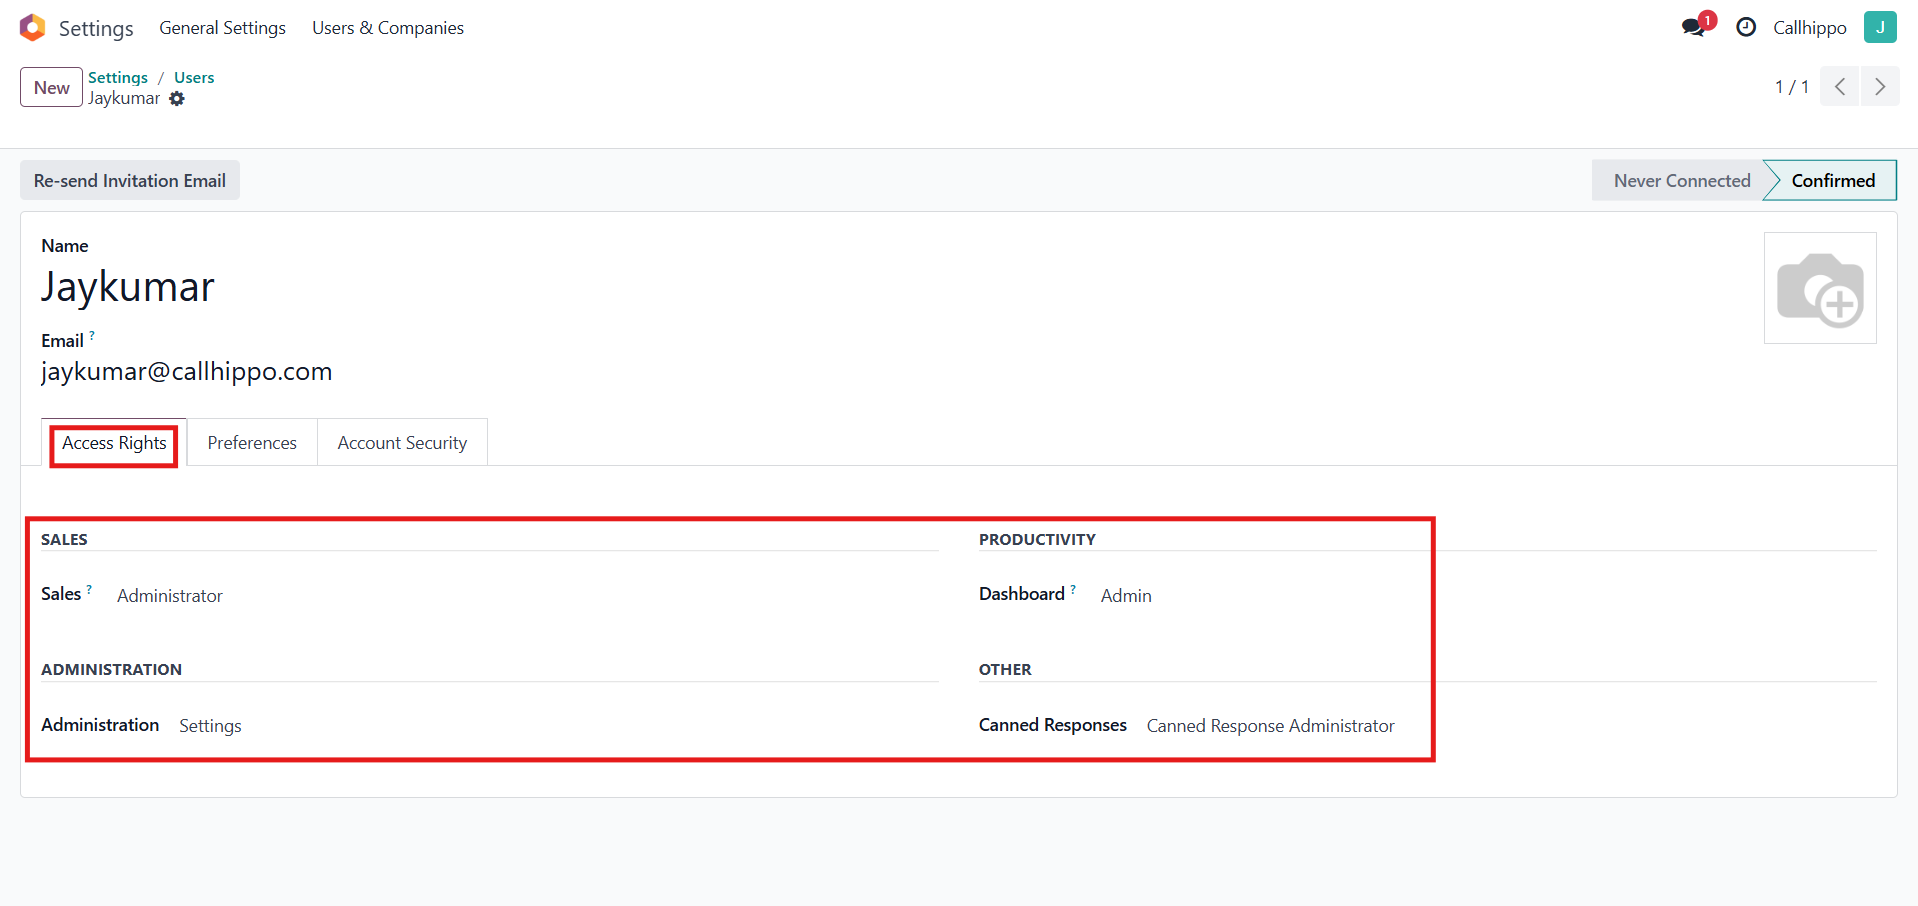
- Open Integrations. Log in to your CallHippo account, click Integrations in the left sidebar, search for Odoo and click Connect. A setup form with several fields appears.
- Copy your Odoo URL. Switch to your Odoo account and copy the URL shown in your browser’s address bar.
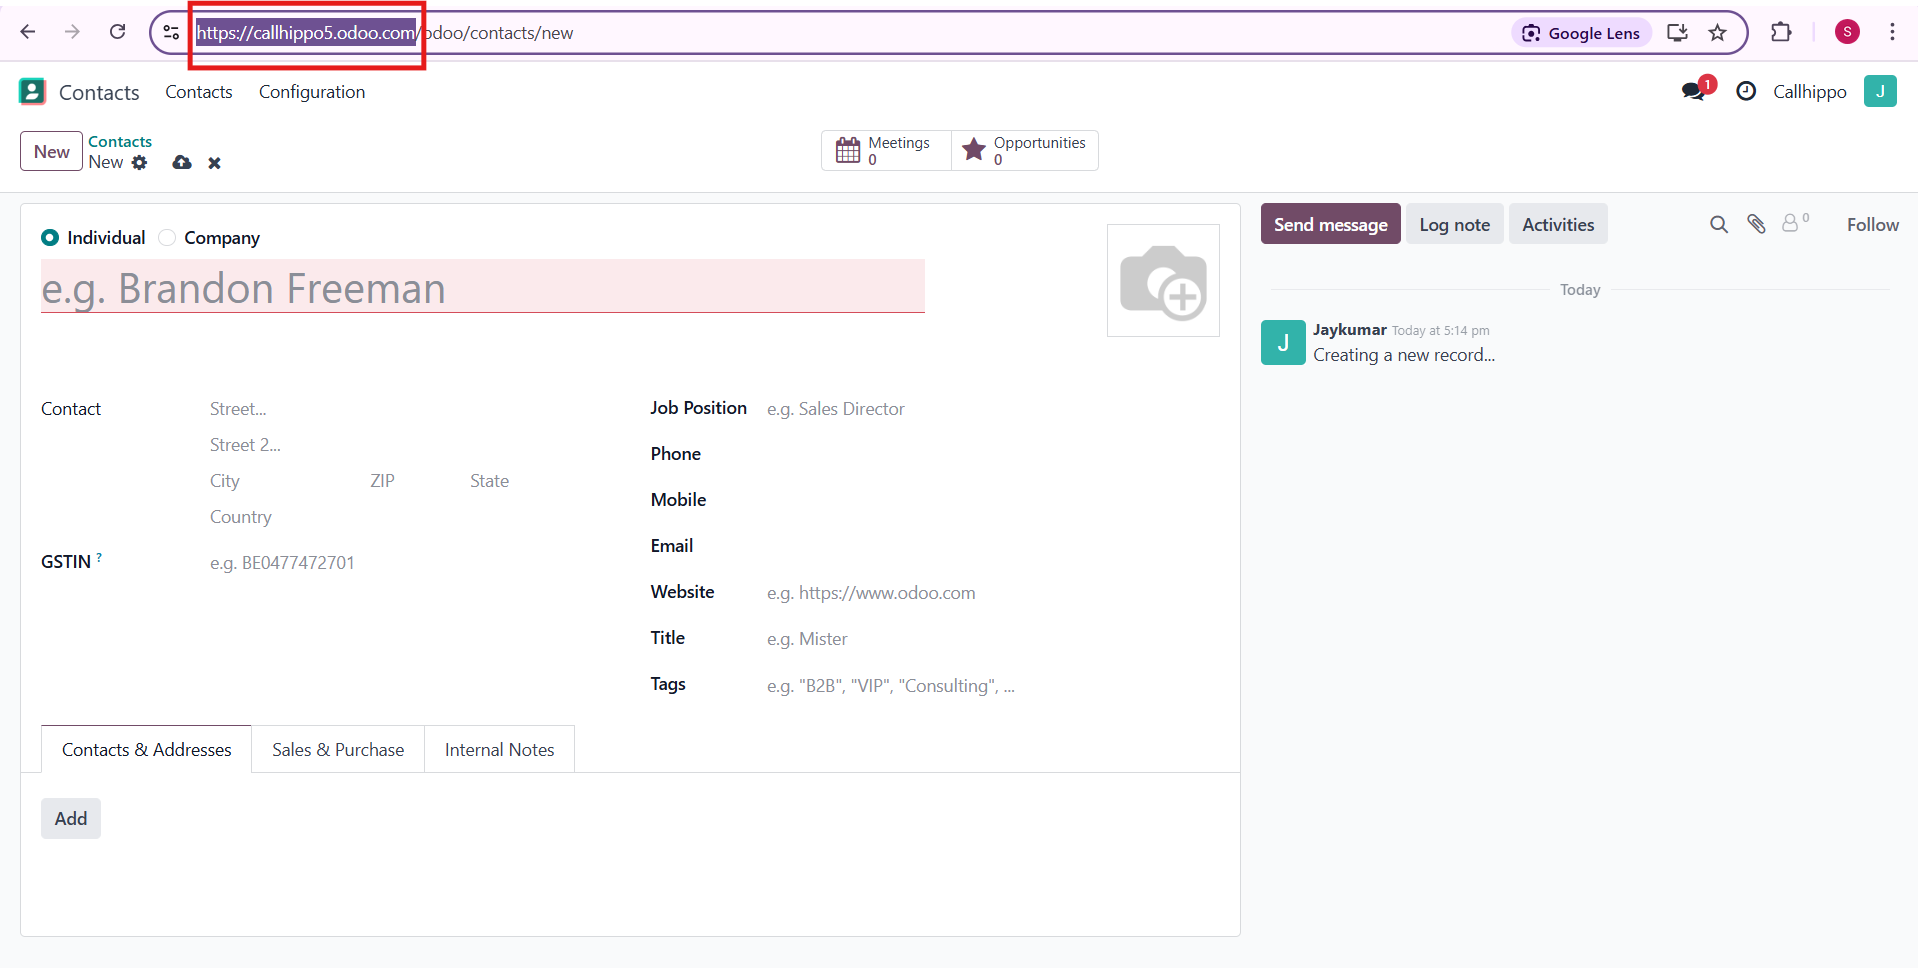
- Fill in the setup form. Back in CallHippo, paste the URL you copied and enter your Odoo API key. For the database name, take your URL and remove
https://and.odoo.com— for example, the database name forhttps://self-employee.odoo.comisself-employee. - Choose your modules (you can select both CRM and Recruitment) and click Connect Now.
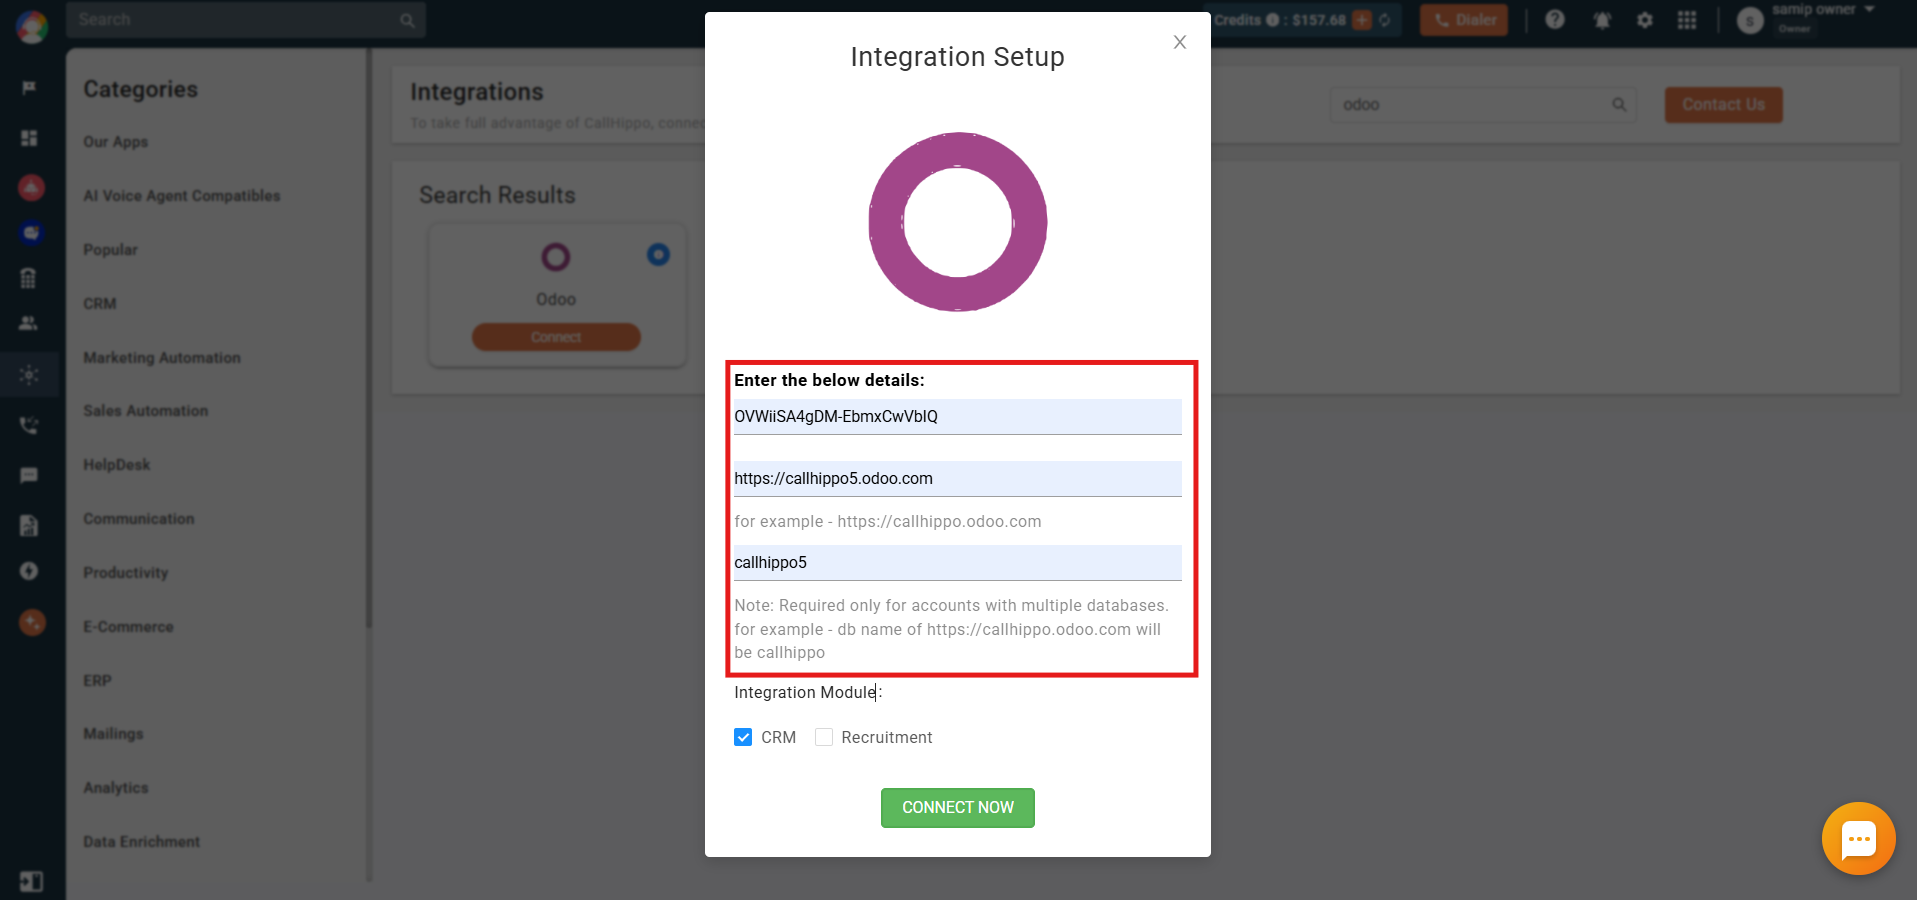
Tip: To generate an Odoo API key, log in to Odoo and go to your profile icon → My Preferences → Security → Add API Key.
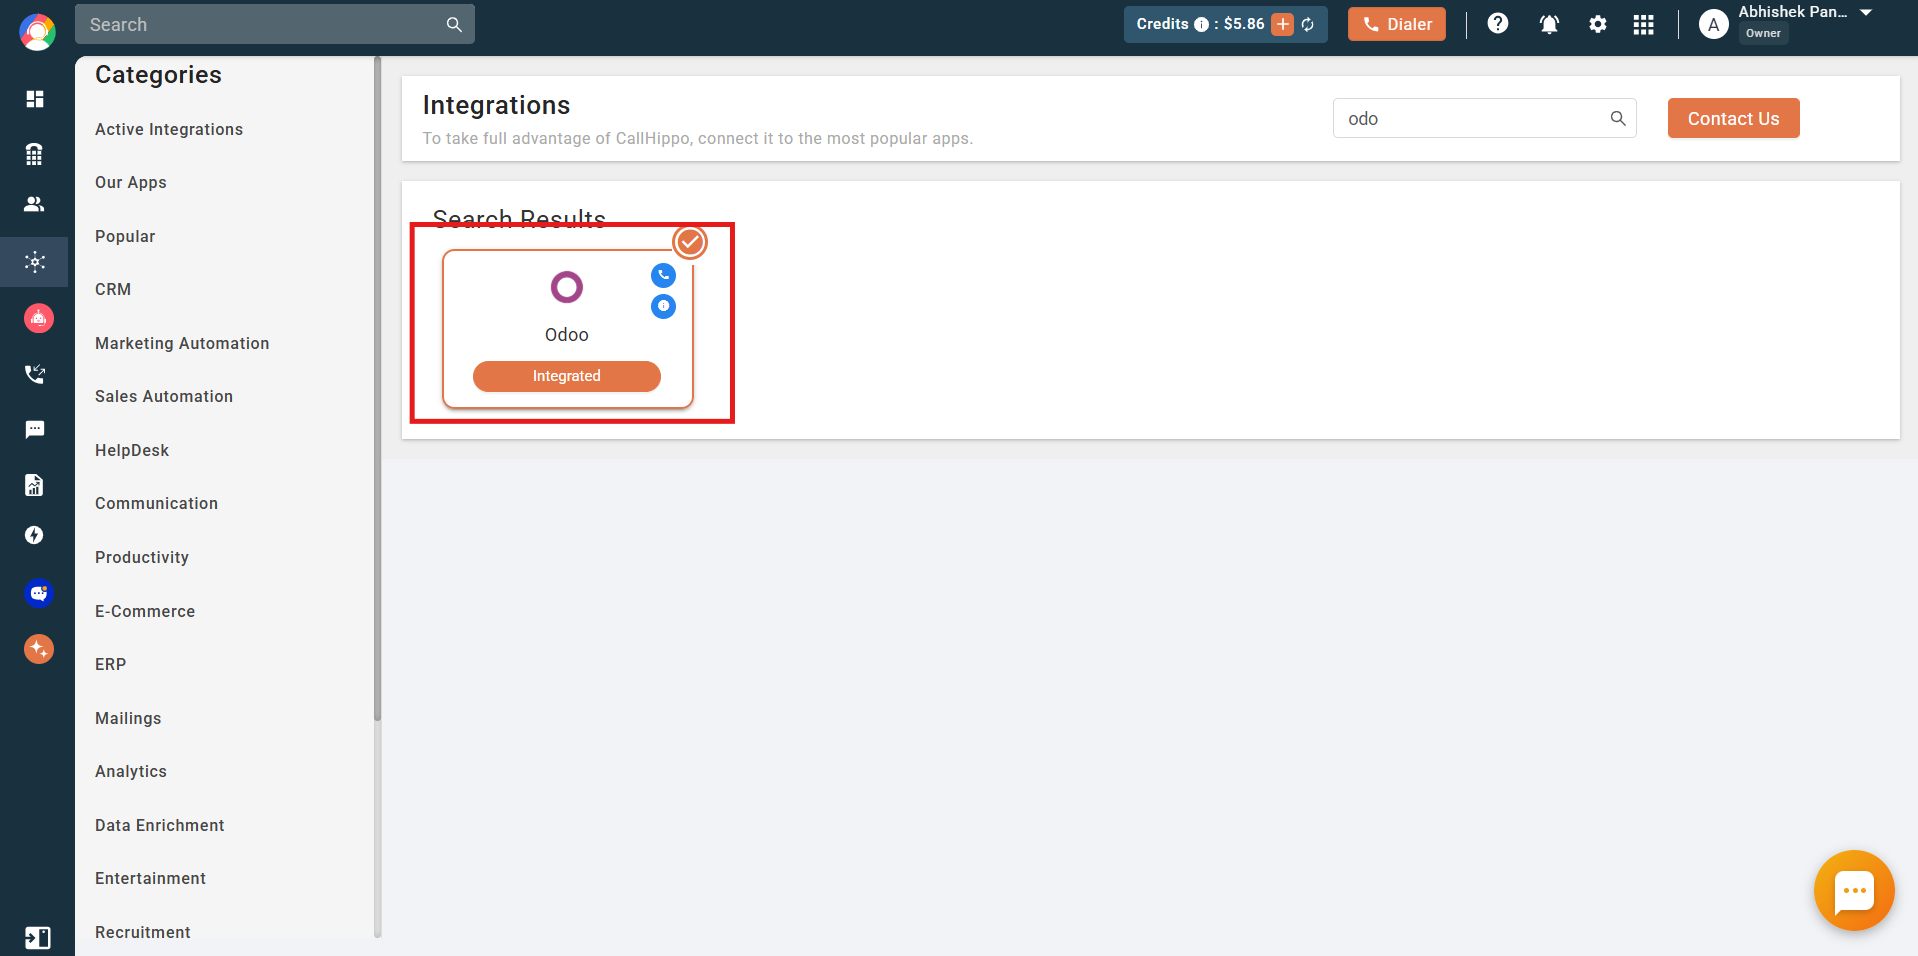
That’s it — Odoo now shows as Integrated in CallHippo.
Enable Click to Call
Install the CallHippo Click-to-Call Chrome extension to dial directly from your Odoo records:
What the Odoo integration does
- Contact sync. Existing contacts and applicants in Odoo that have a phone or mobile number are synced to CallHippo the first time you Click to Call that record.
- Call and SMS activity. Every call or SMS made through the CallHippo dialer creates a scheduled activity (marked done) on the matching contact or applicant in Odoo.
- Tags and disposition. If your plan includes Call Tags and Disposition and it is enabled, the activity pushed to Odoo also carries the tags and disposition you add on the After Call Work screen.
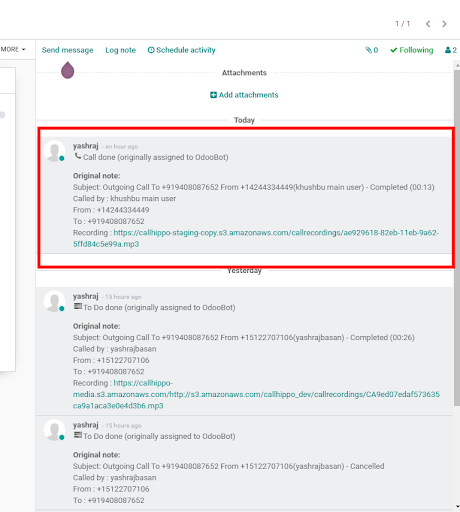
Note: Tags and disposition sync only when they are added on the After Call Work screen. If you add them later from the Call Logs or another feed, they will not sync to Odoo.
How activity is routed by module
- CRM module. If a contact has an active pipeline opportunity (excluding won or lost), the activity is sent to all of that contact’s active opportunities. If there is no active pipeline, the call activity is added to the contact’s detail page instead.
- Recruitment module. Call and SMS activity is always sent to the applicant’s details page.
Frequently asked questions
Which Odoo modules does CallHippo support?
CallHippo currently integrates with the CRM and Recruitment modules. You can enable one or both during setup.
Where do I find my Odoo API key?
In Odoo, click your profile icon and go to My Preferences → Security → Add API Key.
Why isn’t my tag and disposition data showing in Odoo?
Tags and disposition only sync when added on the After Call Work screen. Anything added afterwards from the Call Logs or another feed will not push to Odoo.