
CallHippo’s Attempt Manager powers your progressive-dialing workflow, letting agents work through a contact list one call at a time while every attempt is tracked automatically.
What Is the Attempt Manager?
The Attempt Manager tracks every call attempt made to a contact. It shows which contacts have been dialed, how many times, and what happened on each attempt, so no lead is ever missed or over-called.
Note: The Attempt Manager is available only if your CallHippo plan includes the Auto Dialer feature. Contact your account manager if you do not see it.
How to Access the Attempt Manager
There are two quick ways to open it:
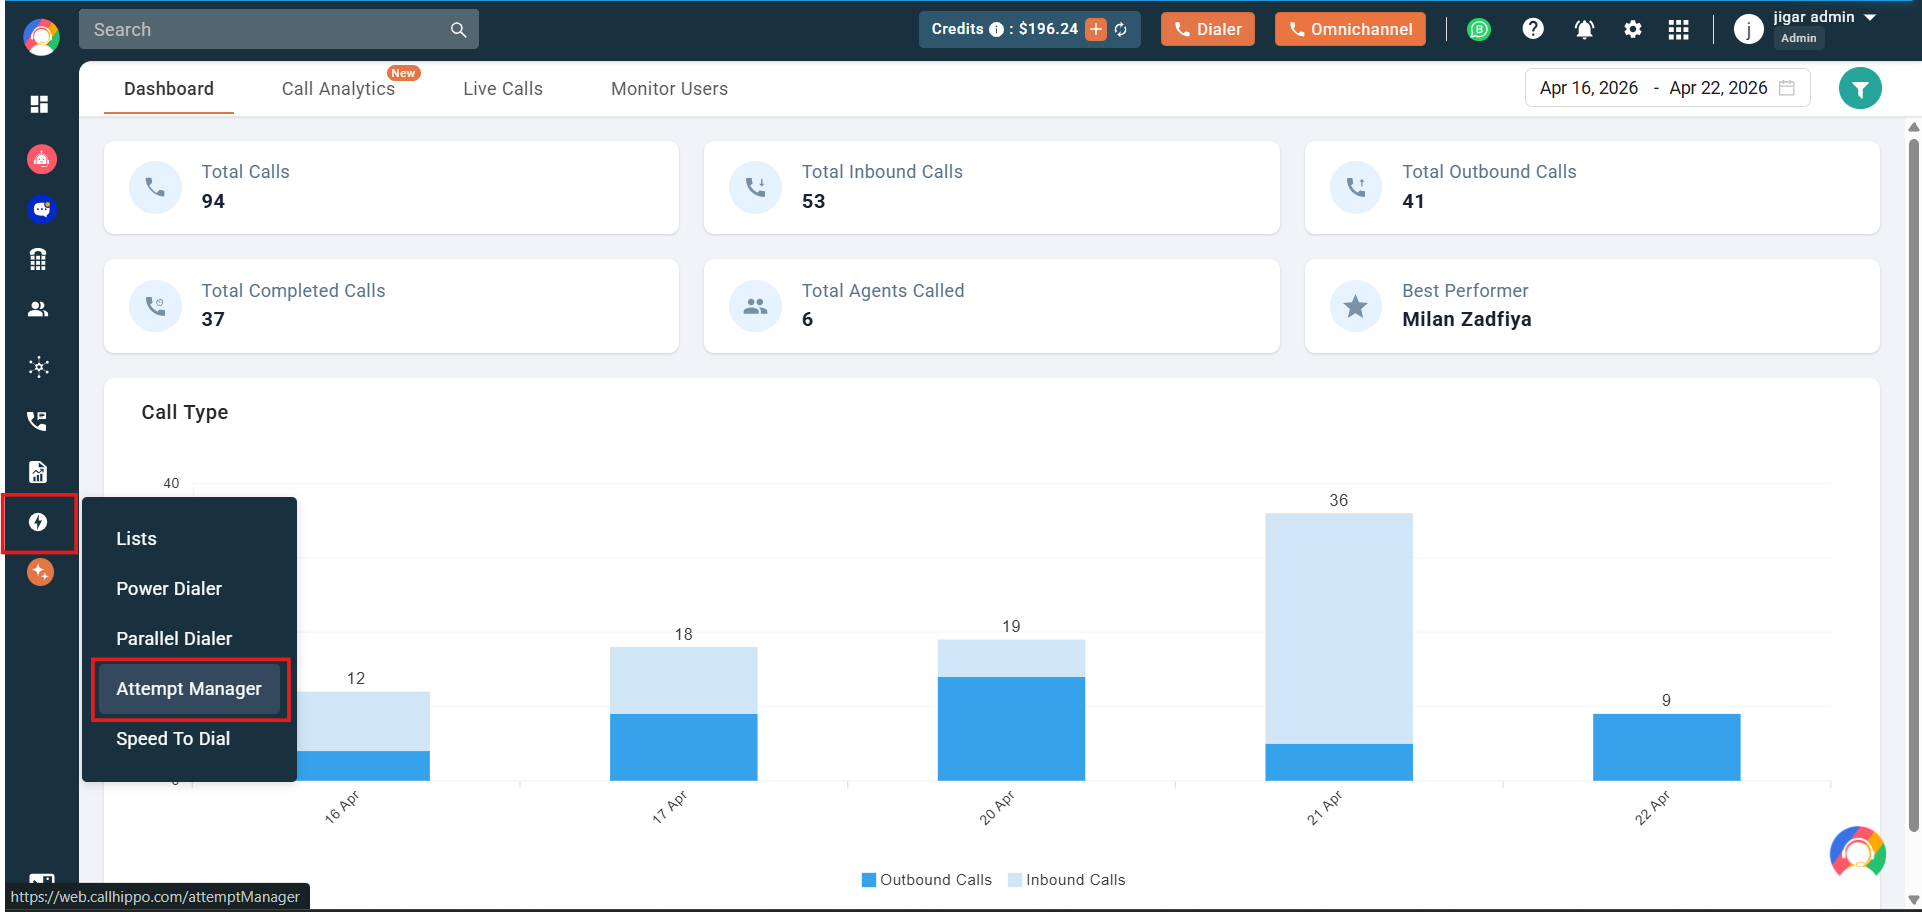
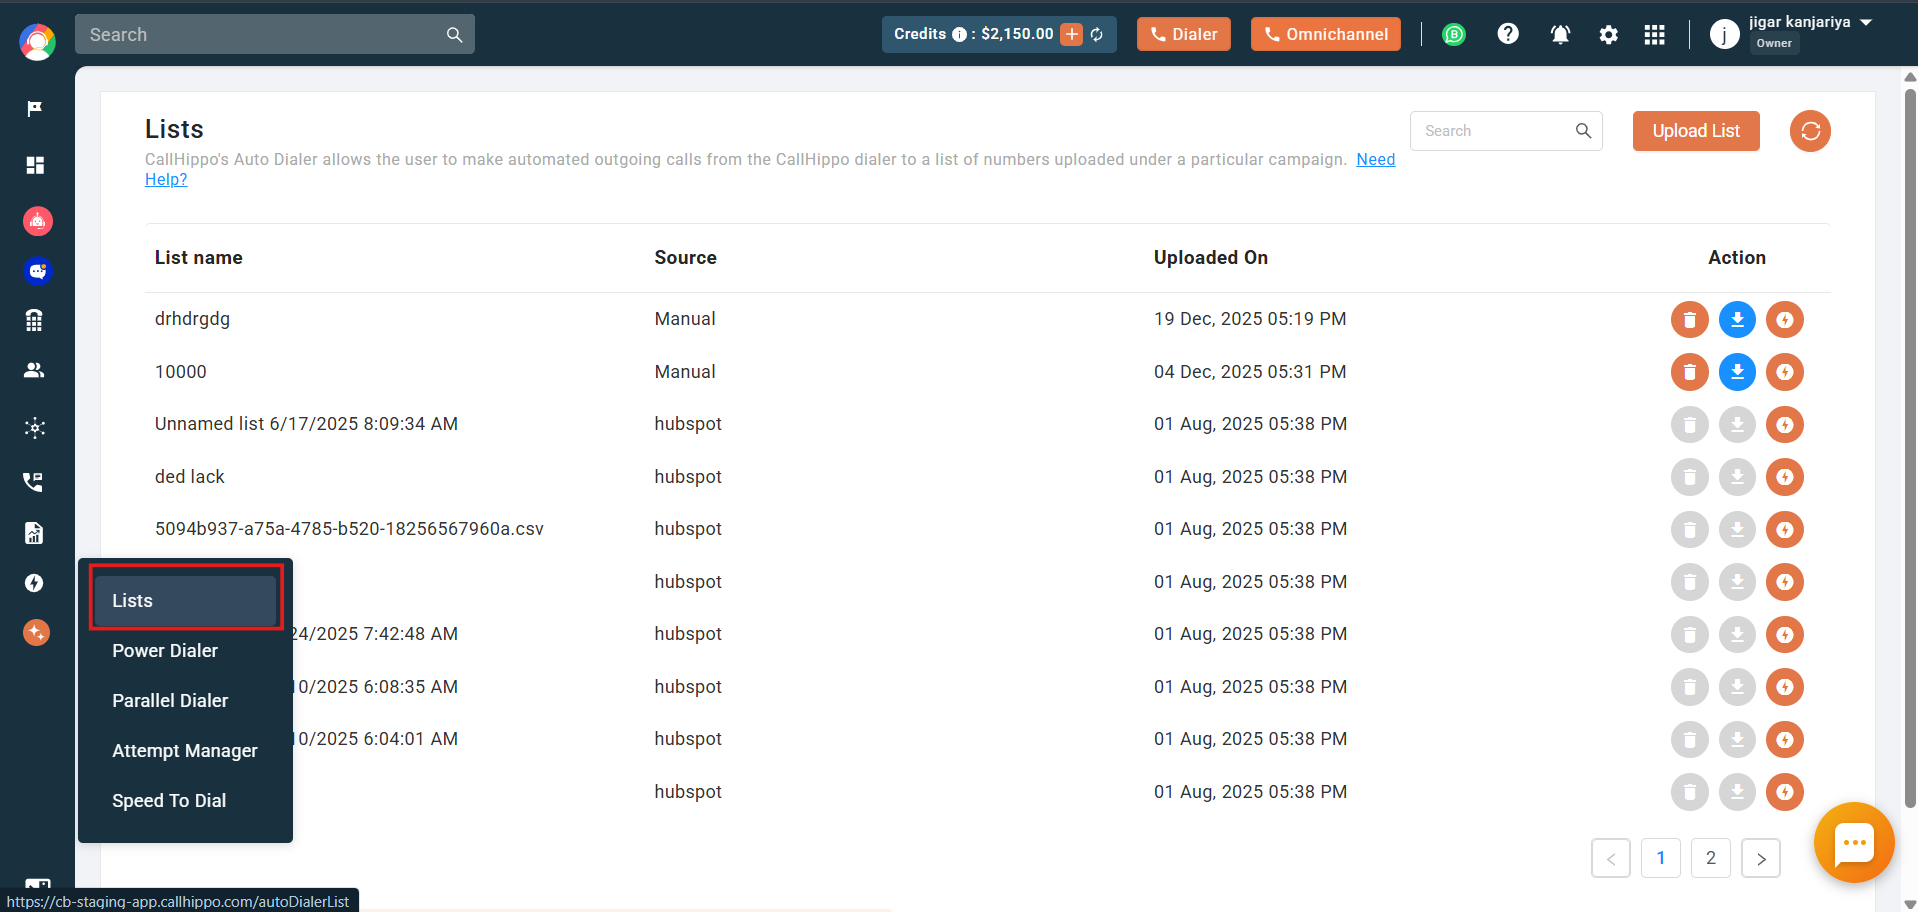
- From the sidebar: click the Auto Dialer icon on the left sidebar, then choose Attempt Manager from the dropdown.
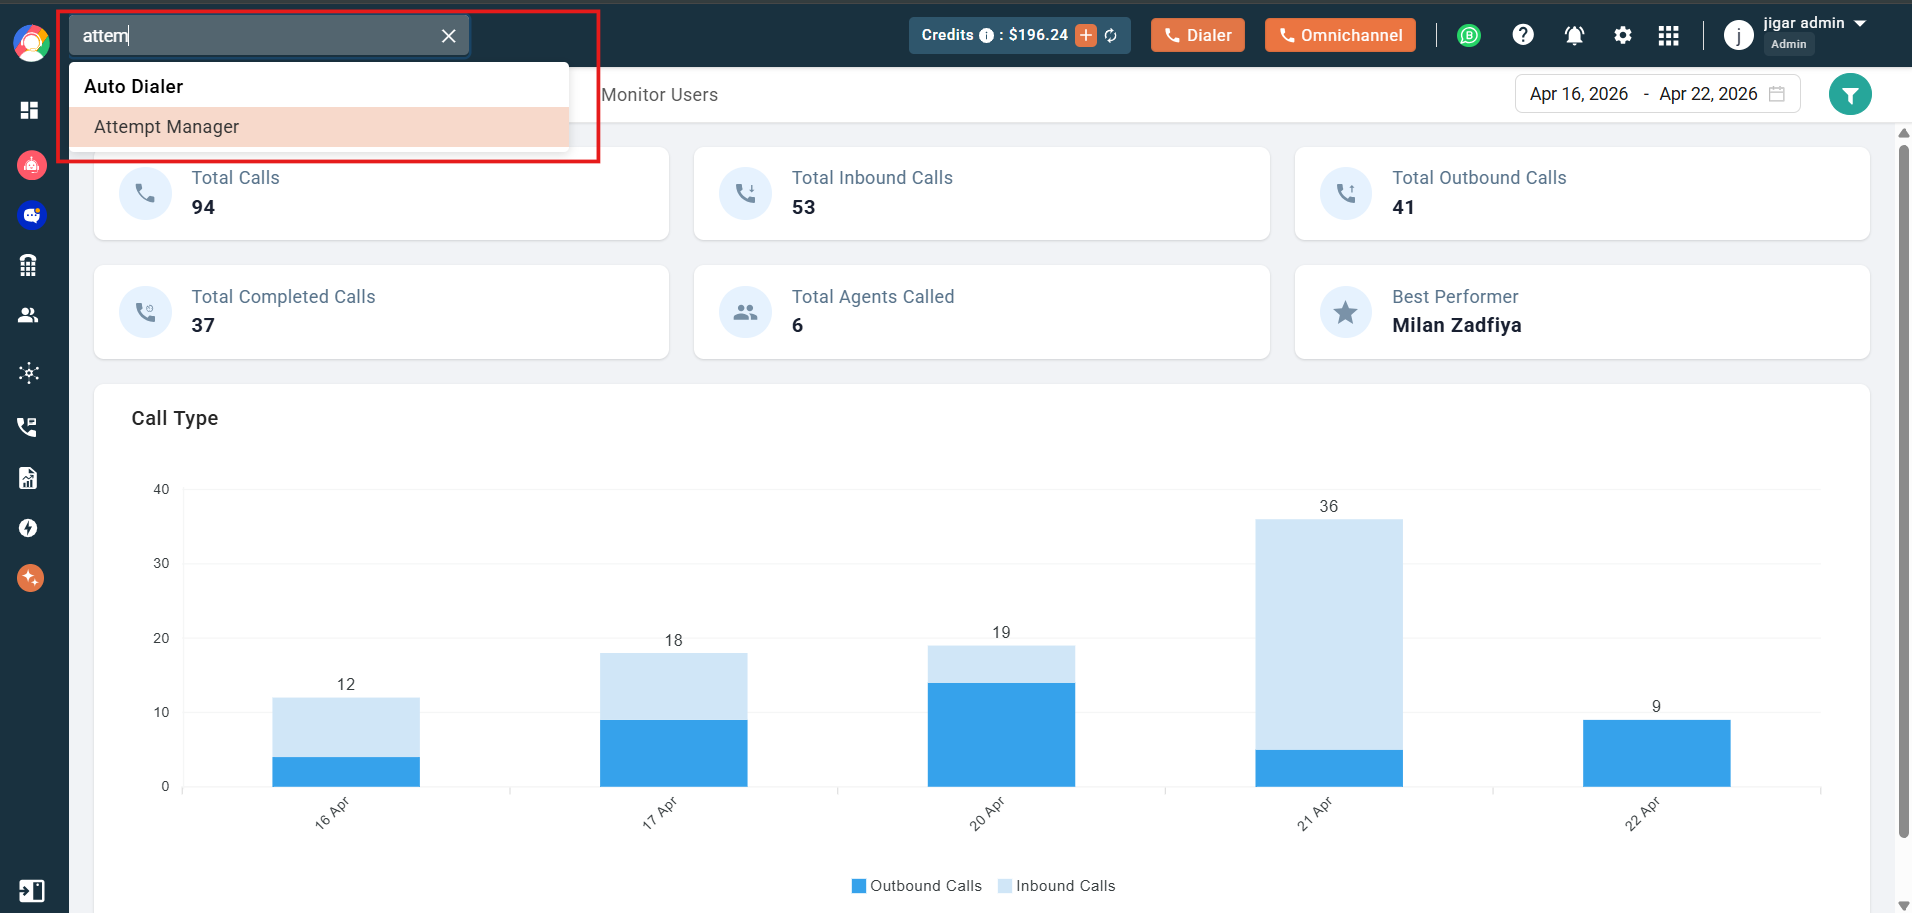
- From the search bar: click the search bar at the top of the page, type “Attempt Manager”, and select it from the results under Auto Dialer.
Step 1: Add a Campaign List
Before you can start dialing, load a contact list into the Attempt Manager. There are two ways to do this.
Option A – From the Attempt Manager page
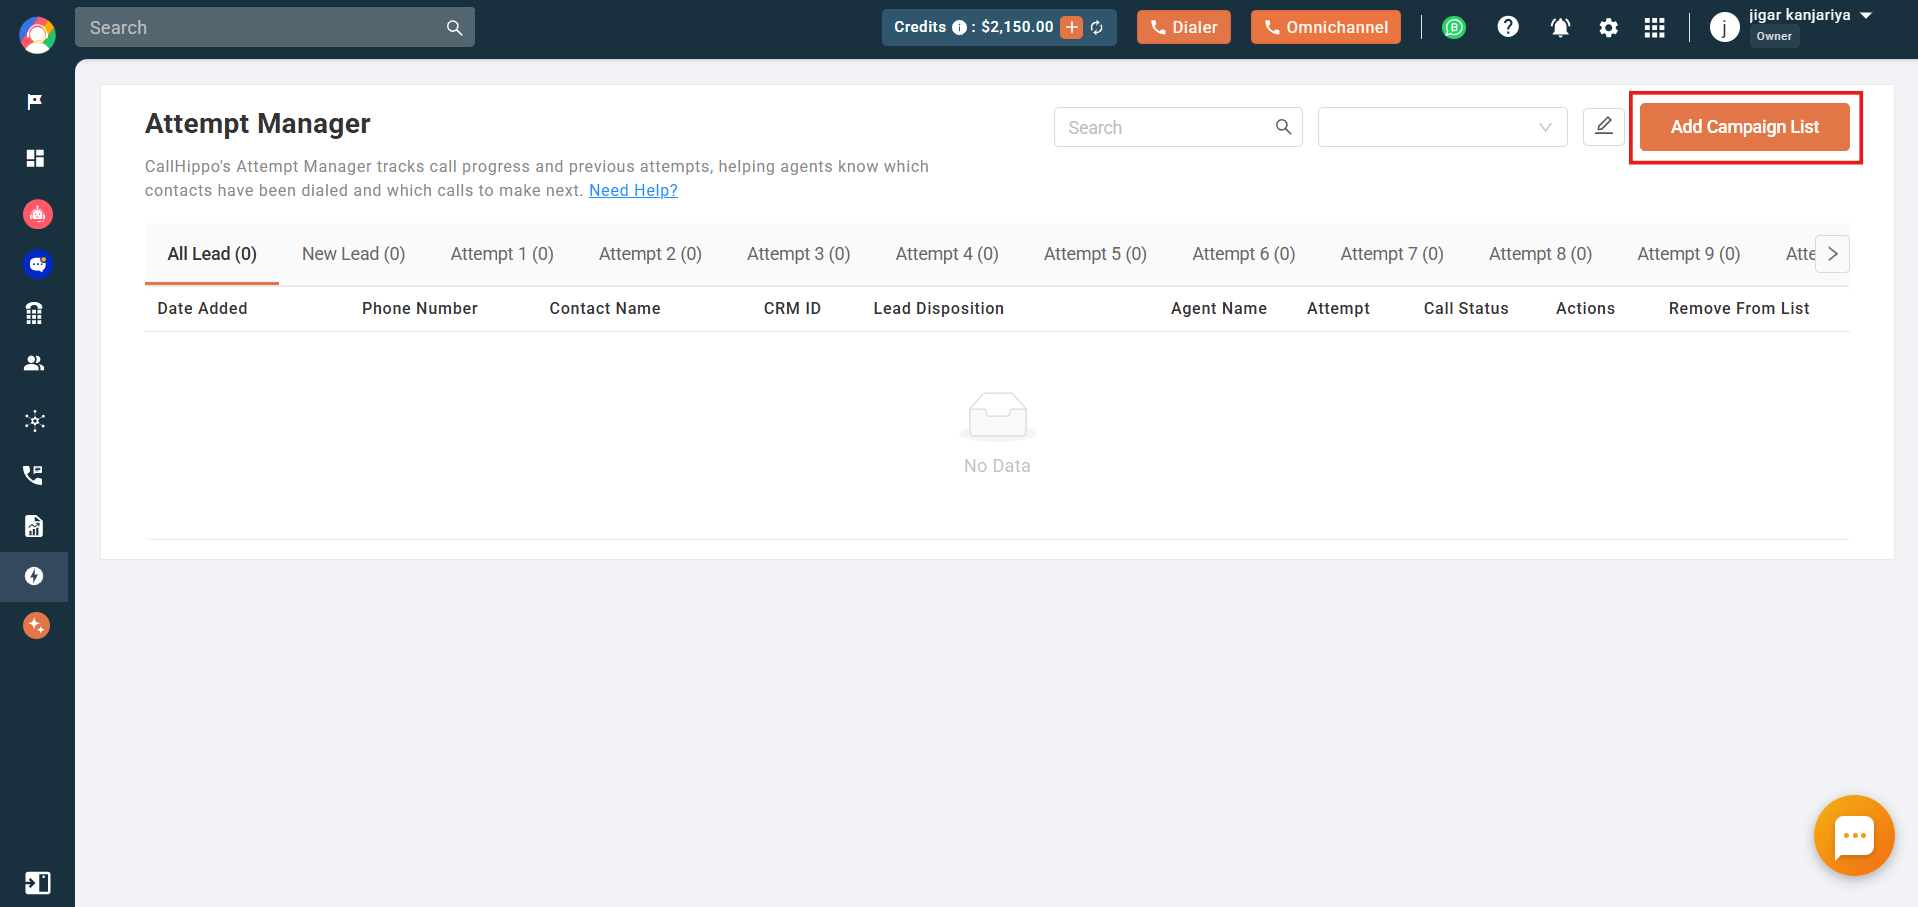
- Click Add Campaign List at the top right.
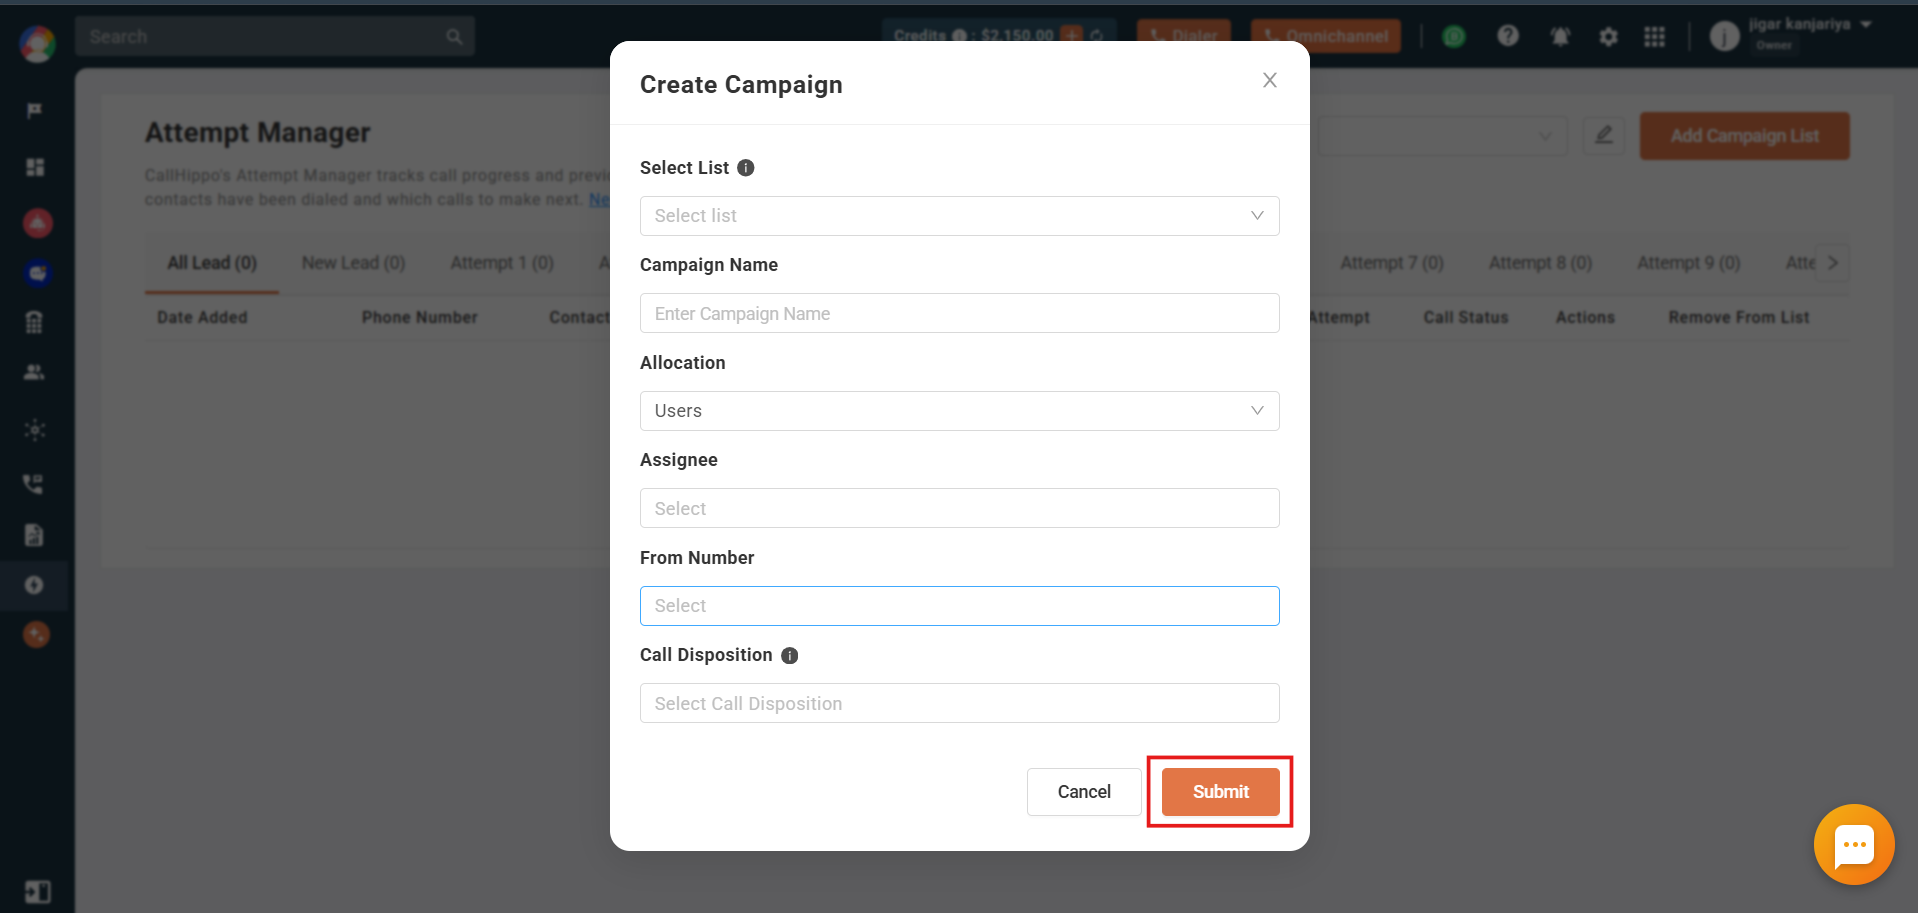
- In the popup, fill in: Select List (searchable dropdown), Campaign Name, Allocation (Users or Teams), Assignee, From Number, and an optional Call Disposition for agents to use.
- Click Submit.
Option B – From the Lists module
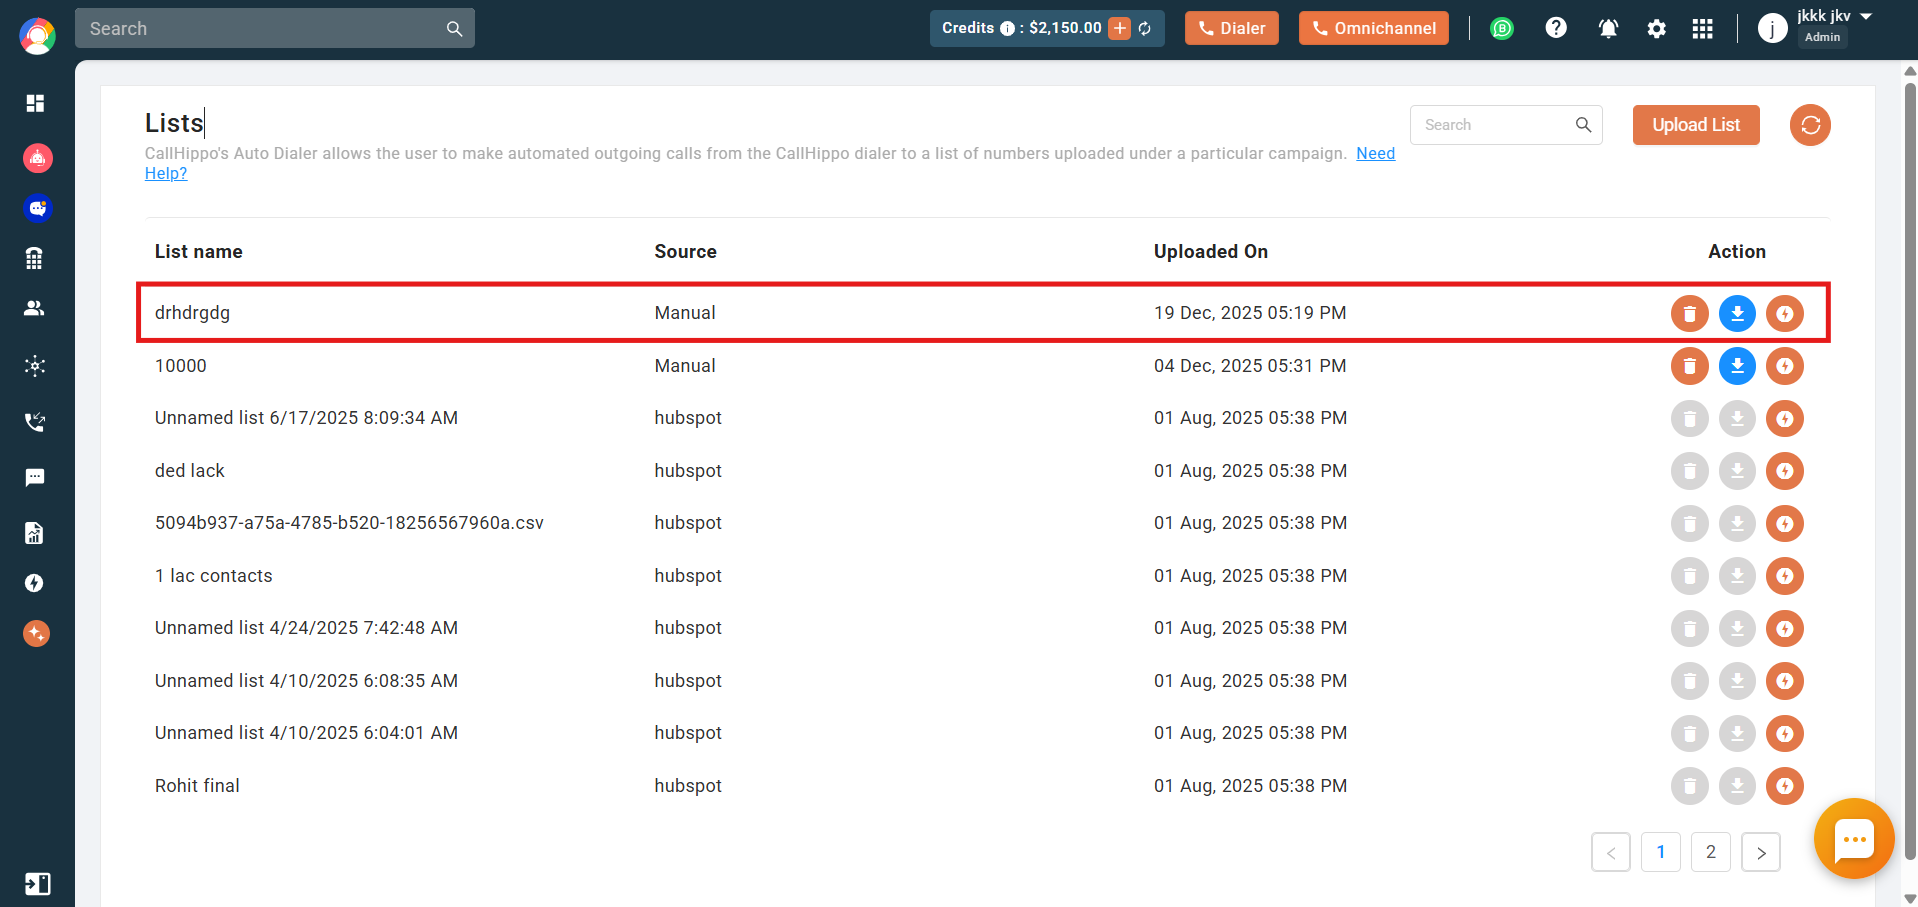
- Go to Auto Dialer → Lists.
- Find the list you want to use.
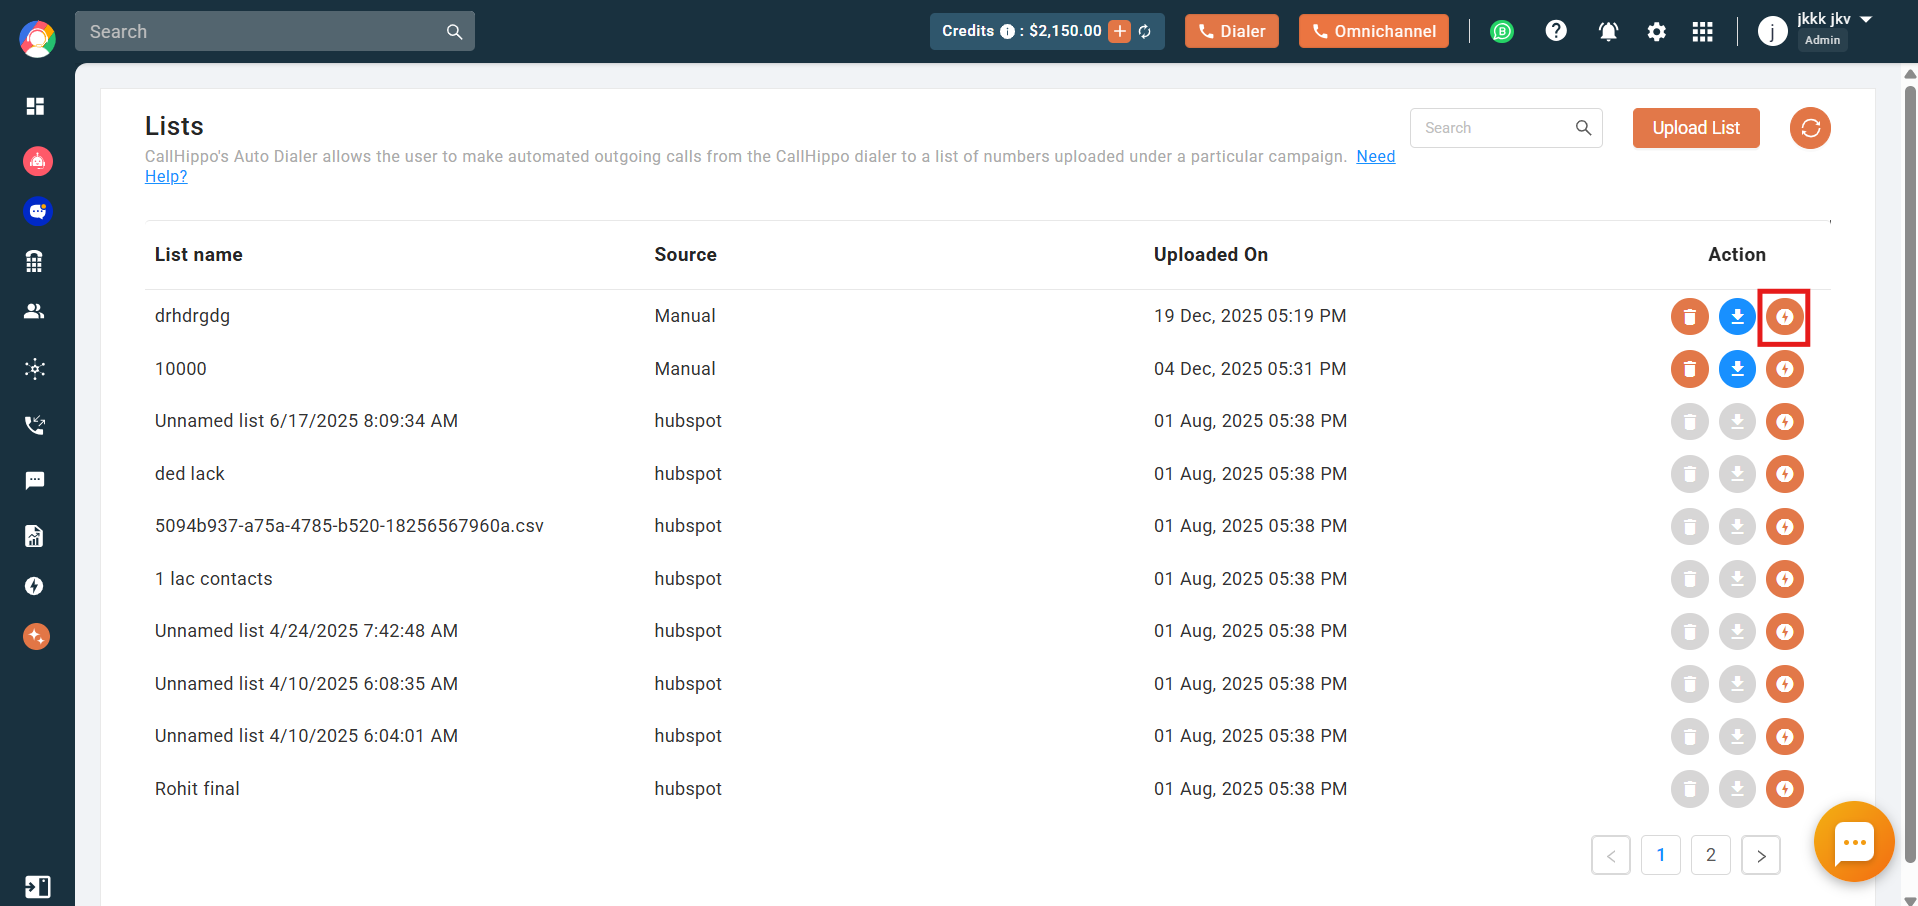
- Click the Run / Start action button.
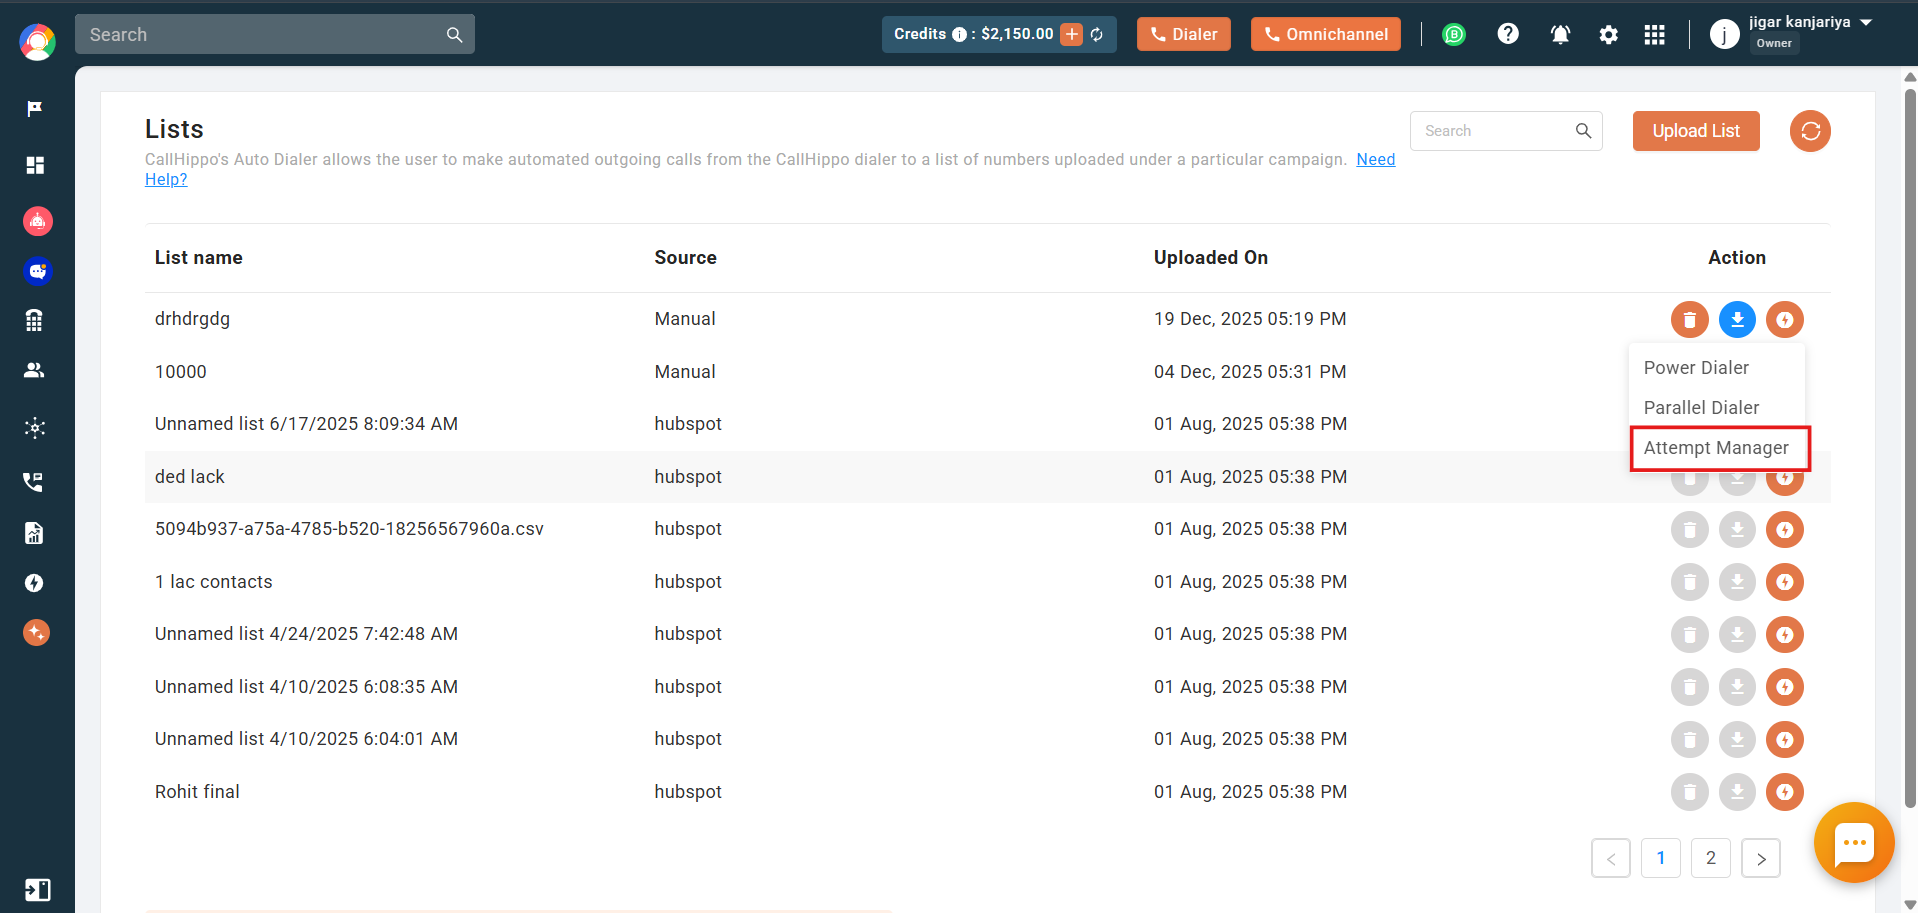
- Select Attempt Manager from the options, then complete the campaign details and submit.
Note: When a new list is loaded, all contacts start fresh as New Lead. Any previously loaded list is not deleted; you can switch back to it anytime using the filter.
Step 2: Understanding the Attempt Manager View
Once your list is loaded, you will see a table of all your contacts.
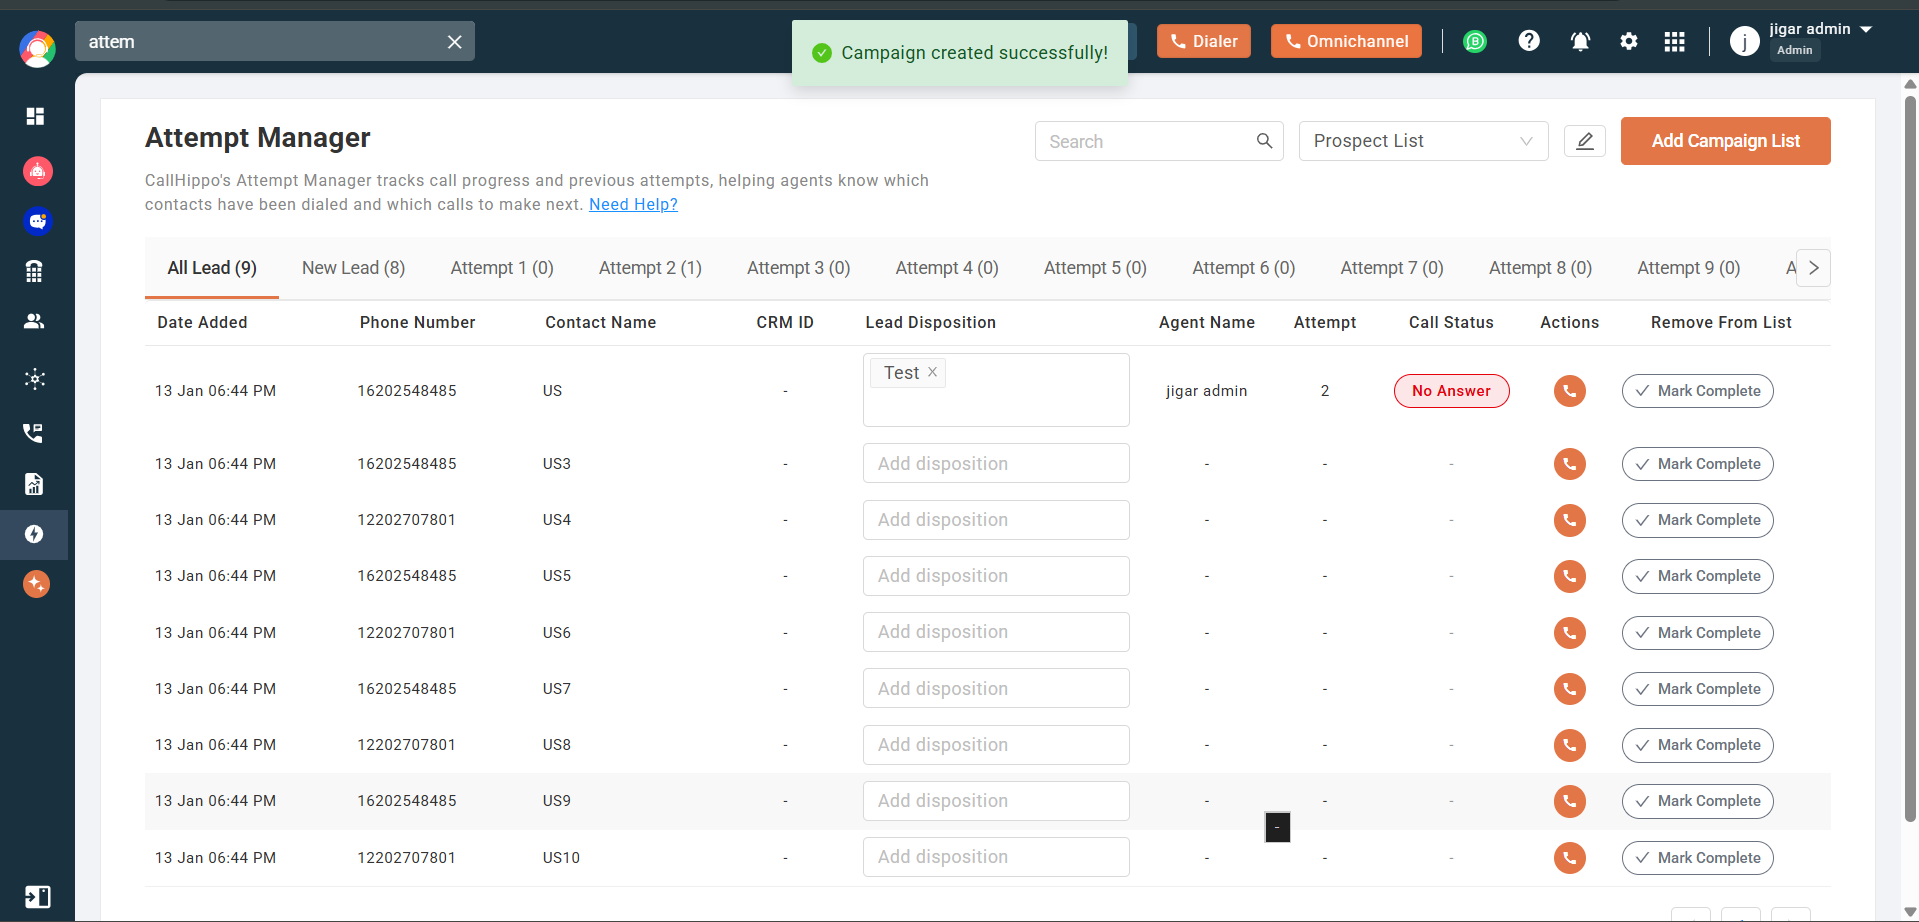
Here is what each column shows:
- Date Added – when the contact was added to the list.
- Phone Number – the number that will be dialed.
- Contact Name – name of the contact.
- CRM ID – links to the contact in your CRM (shown for CRM uploads).
- Lead Disposition – disposition tagged on the last call.
- Agent Name – agent who last called this contact.
- Call Status – status of the last call, or In Progress if a call is live.
- Attempt – the current attempt stage (visible in the All Leads tab).
- Actions – the call icon to place a call instantly.
- Remove From List – the Mark Complete button.
Step 3: Understanding the Attempt Tabs
At the top you will see a row of tabs: All Leads → New Lead → Attempt 1 → Attempt 2 → … → Attempt 10.
- All Leads – shows every contact across all stages. This is your master view.
- New Lead – contacts that have been added but not called yet.
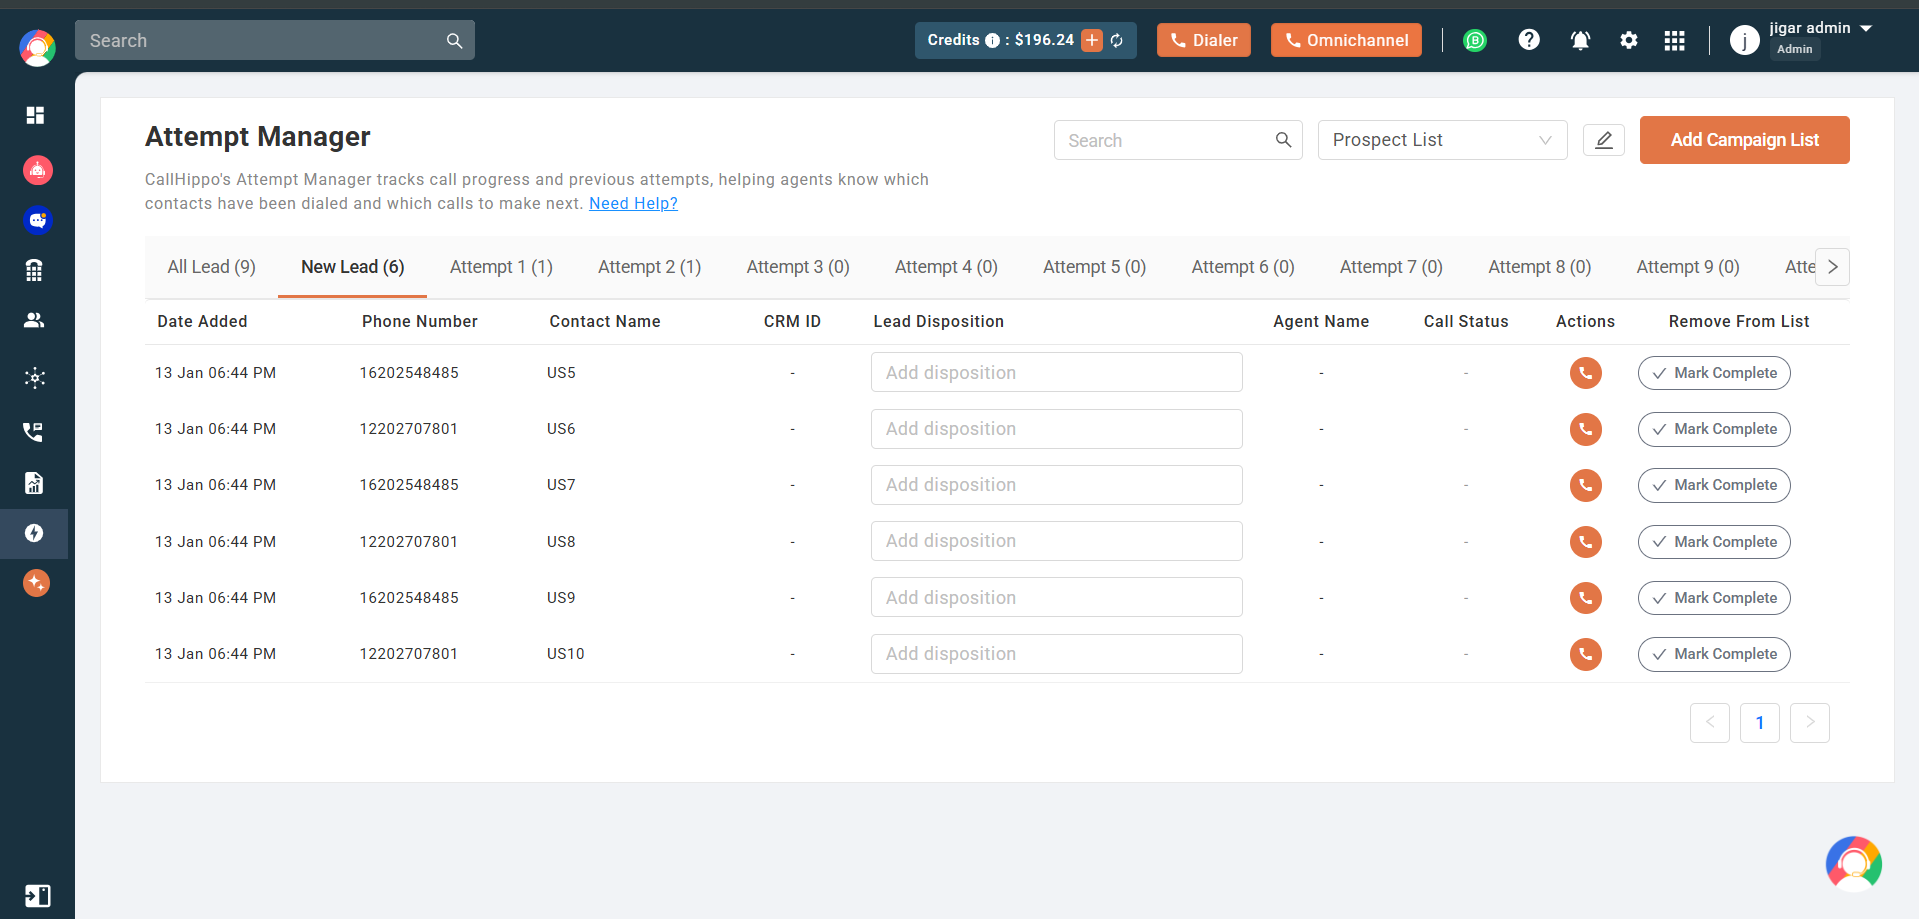
- Attempt 1 to Attempt 10 – a contact moves to the next attempt tab each time a call is placed to their number from the Attempt Manager.
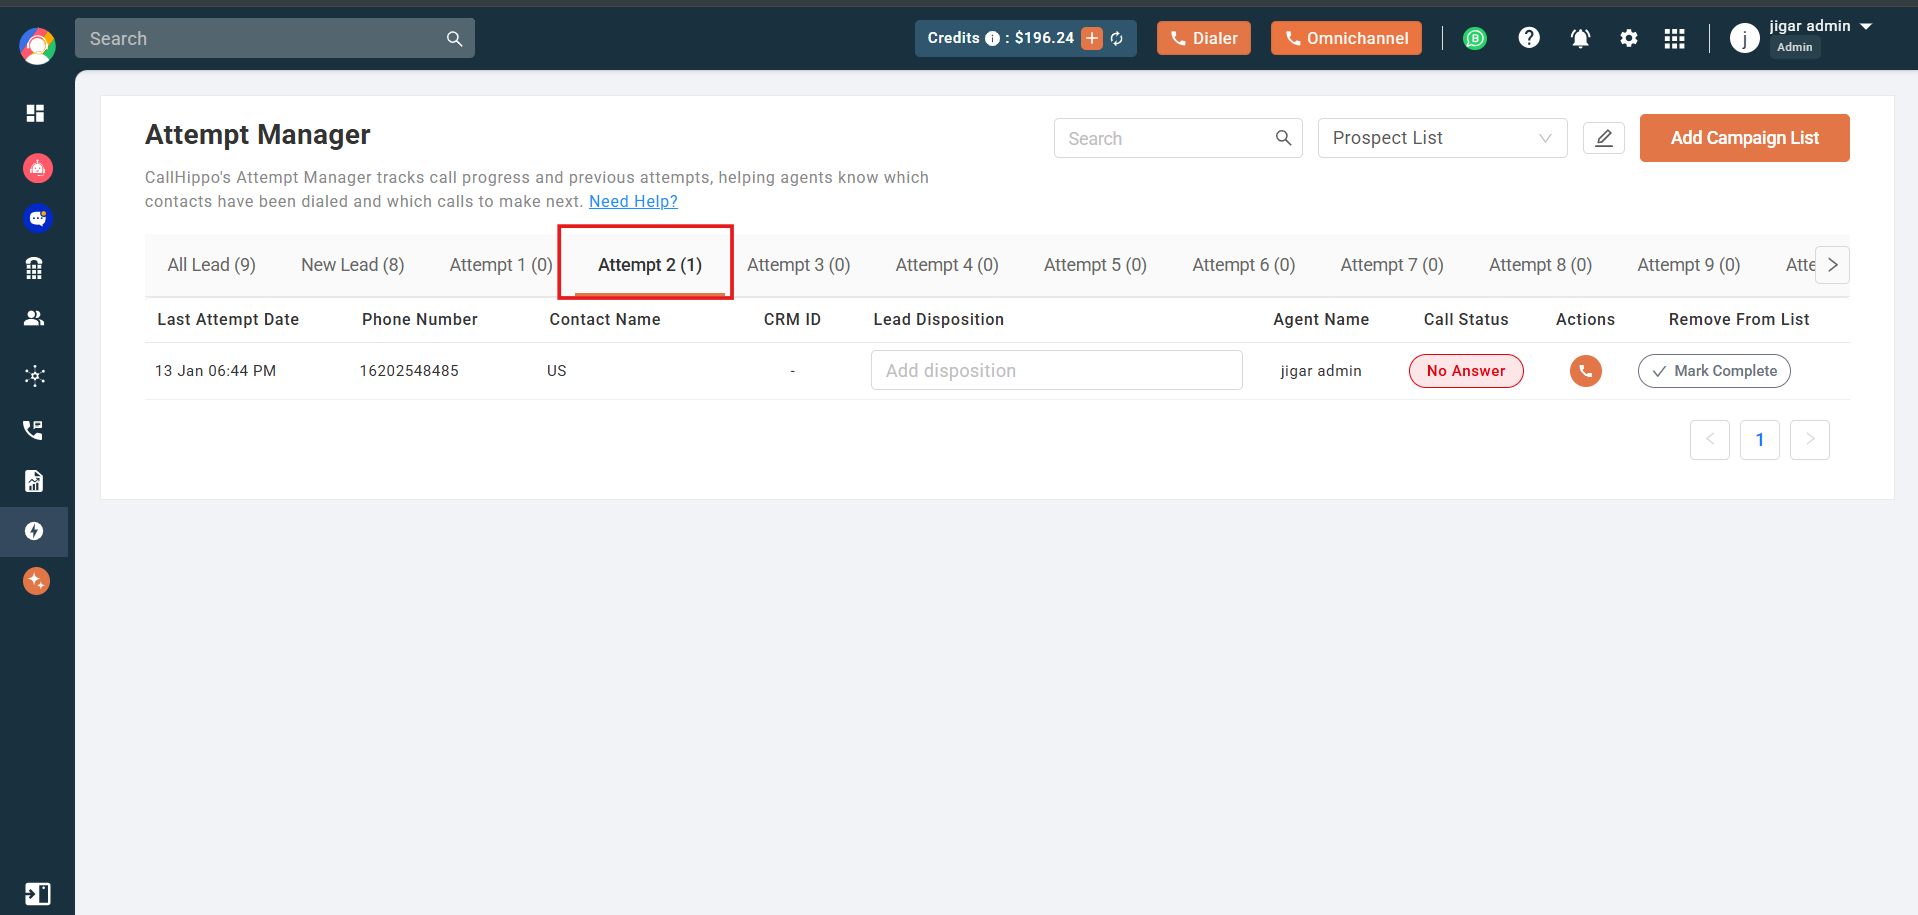
Important: The tabs do not update in real time. After a call is placed, refresh the page to see the contact move to the next attempt stage.
Step 4: Placing a Call
- Find the contact you want to call in the table.
- Click the call icon in the Actions column.
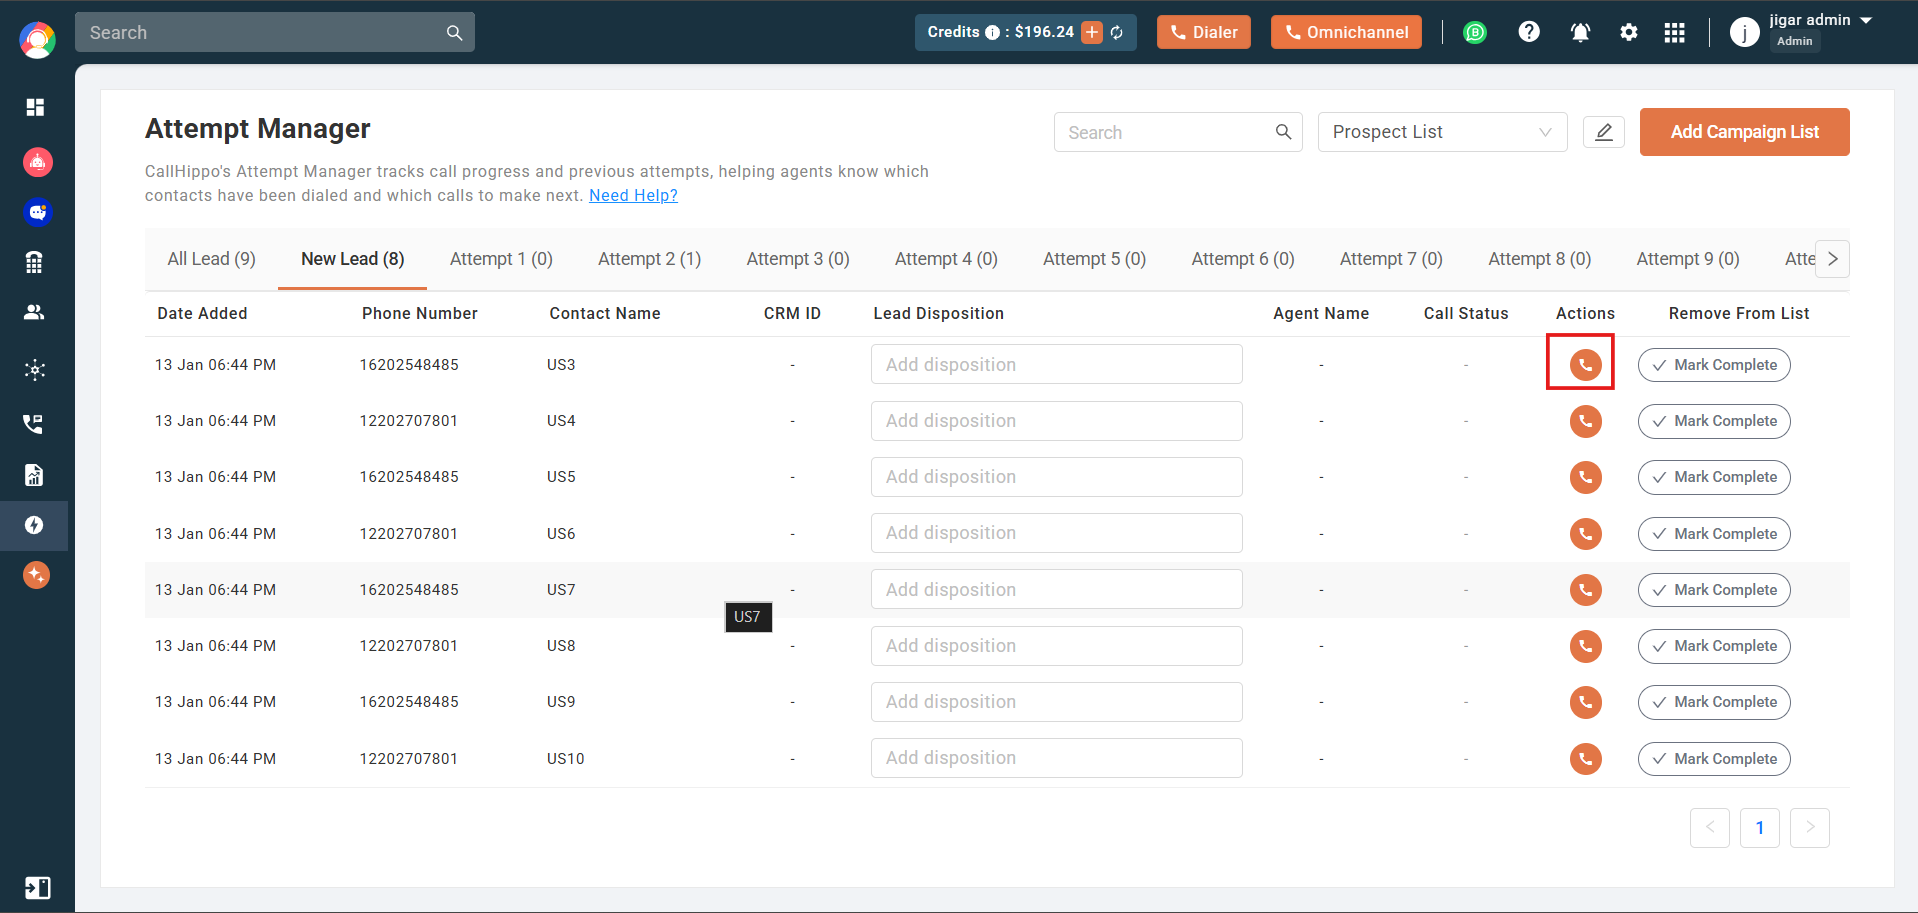
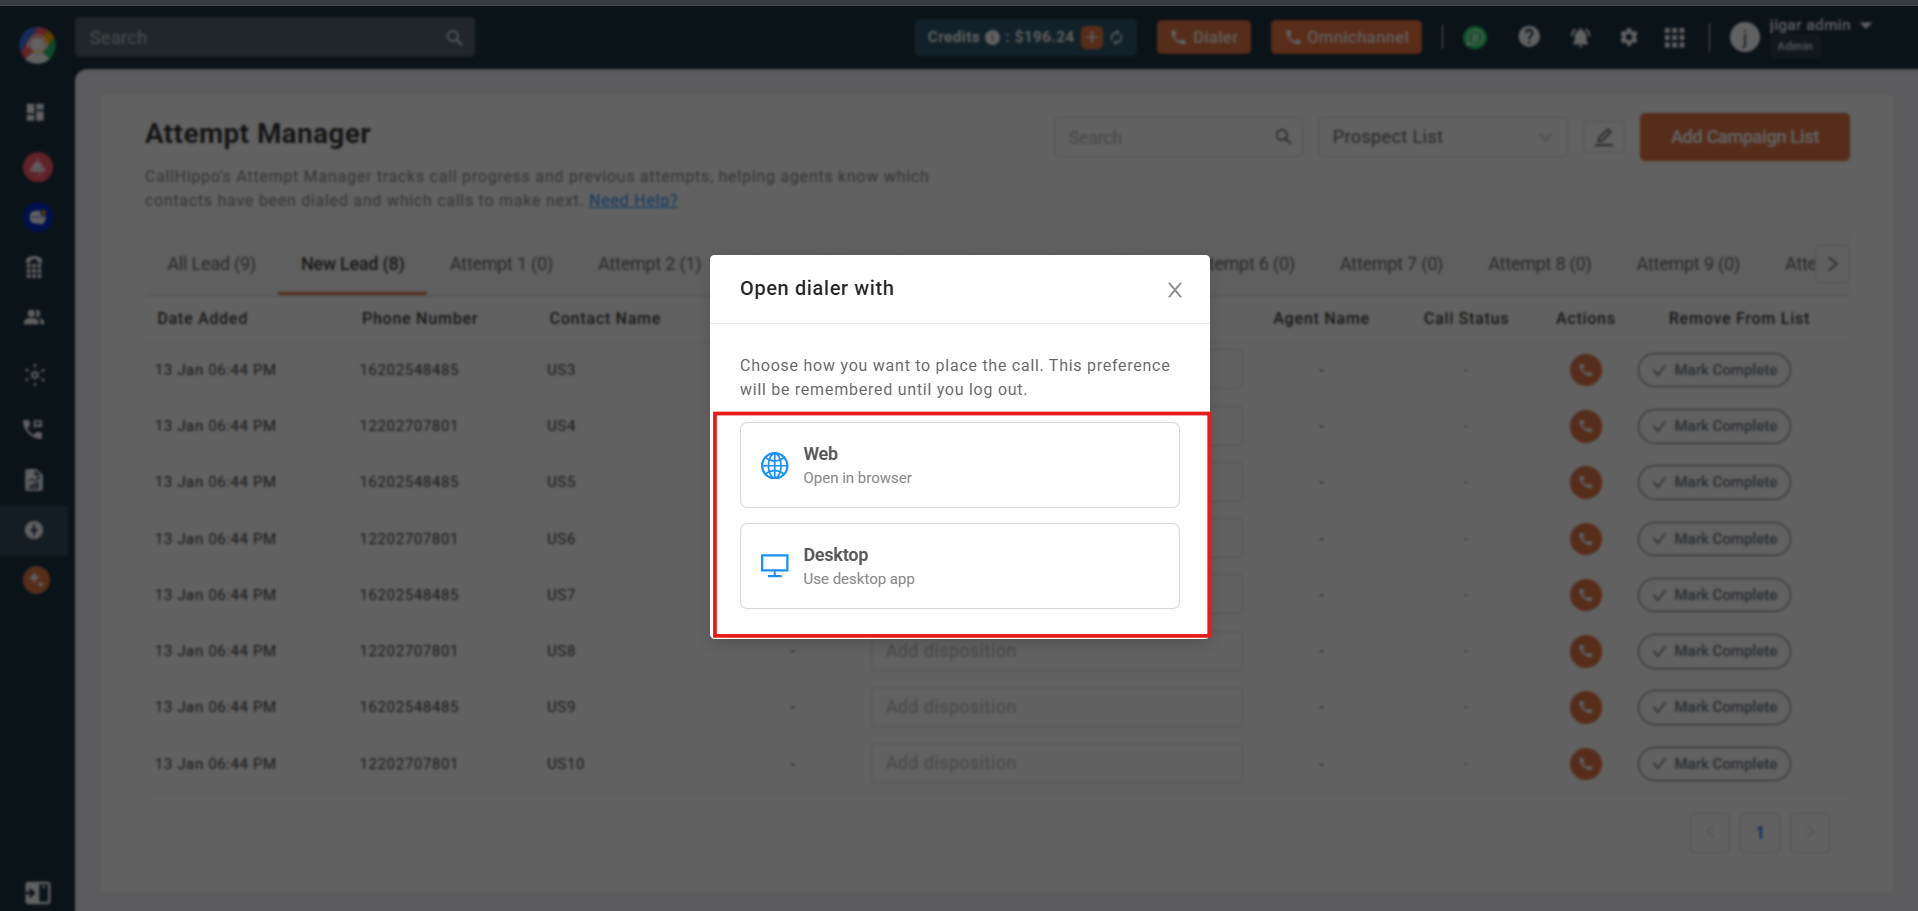
- On your first call, choose how to place it: Web Dialer (opens in a new tab) or Desktop App. CallHippo remembers your choice for future calls.
A few important rules about attempts:
- Attempts only update when you use the call icon in the Attempt Manager (click-to-call).
- Manually dialing the number from the dialer will not move the contact to the next attempt stage.
- Incoming calls do not count as an attempt. Only outbound calls placed via the call icon are tracked.
- If a call is already active, you will see “There’s already an active call. Please hang up before starting a new one.” End the current call before placing a new one.
Step 5: Marking a Contact as Complete
When you are done with a contact, mark them as complete to remove them from all Attempt Manager lists they appear in. You can do this three ways.
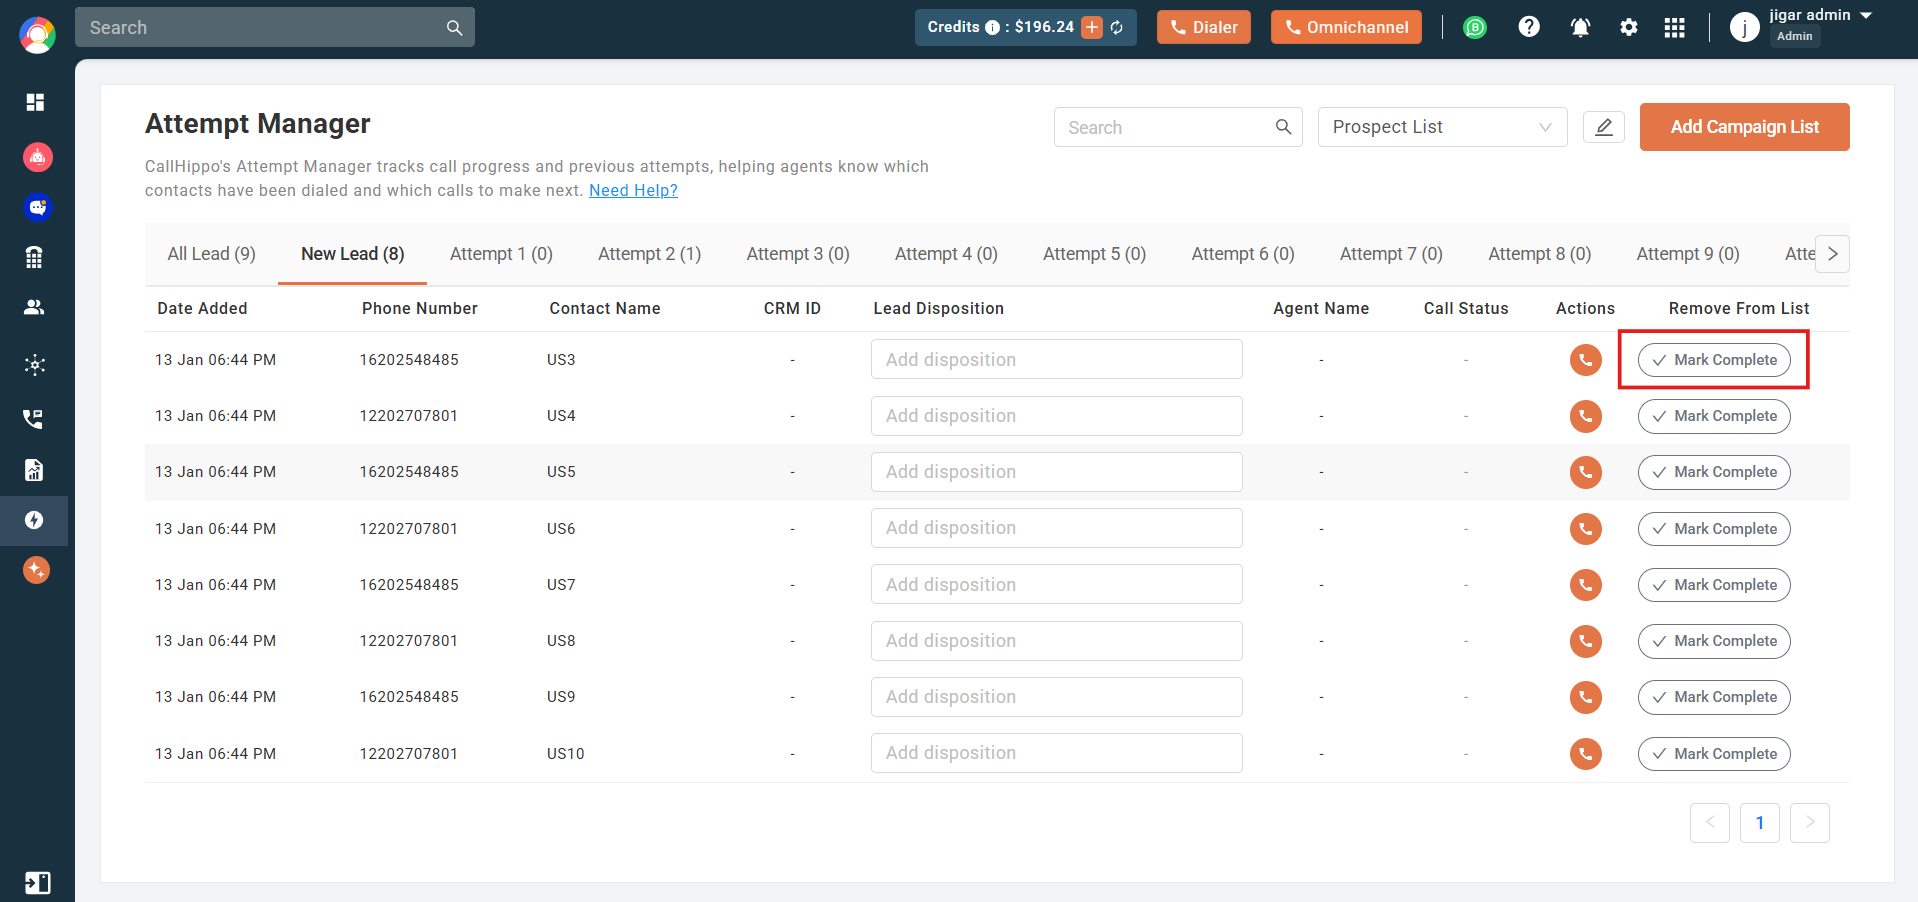
Way 1 – Directly from the table
Click the Mark Complete button in the contact’s row.
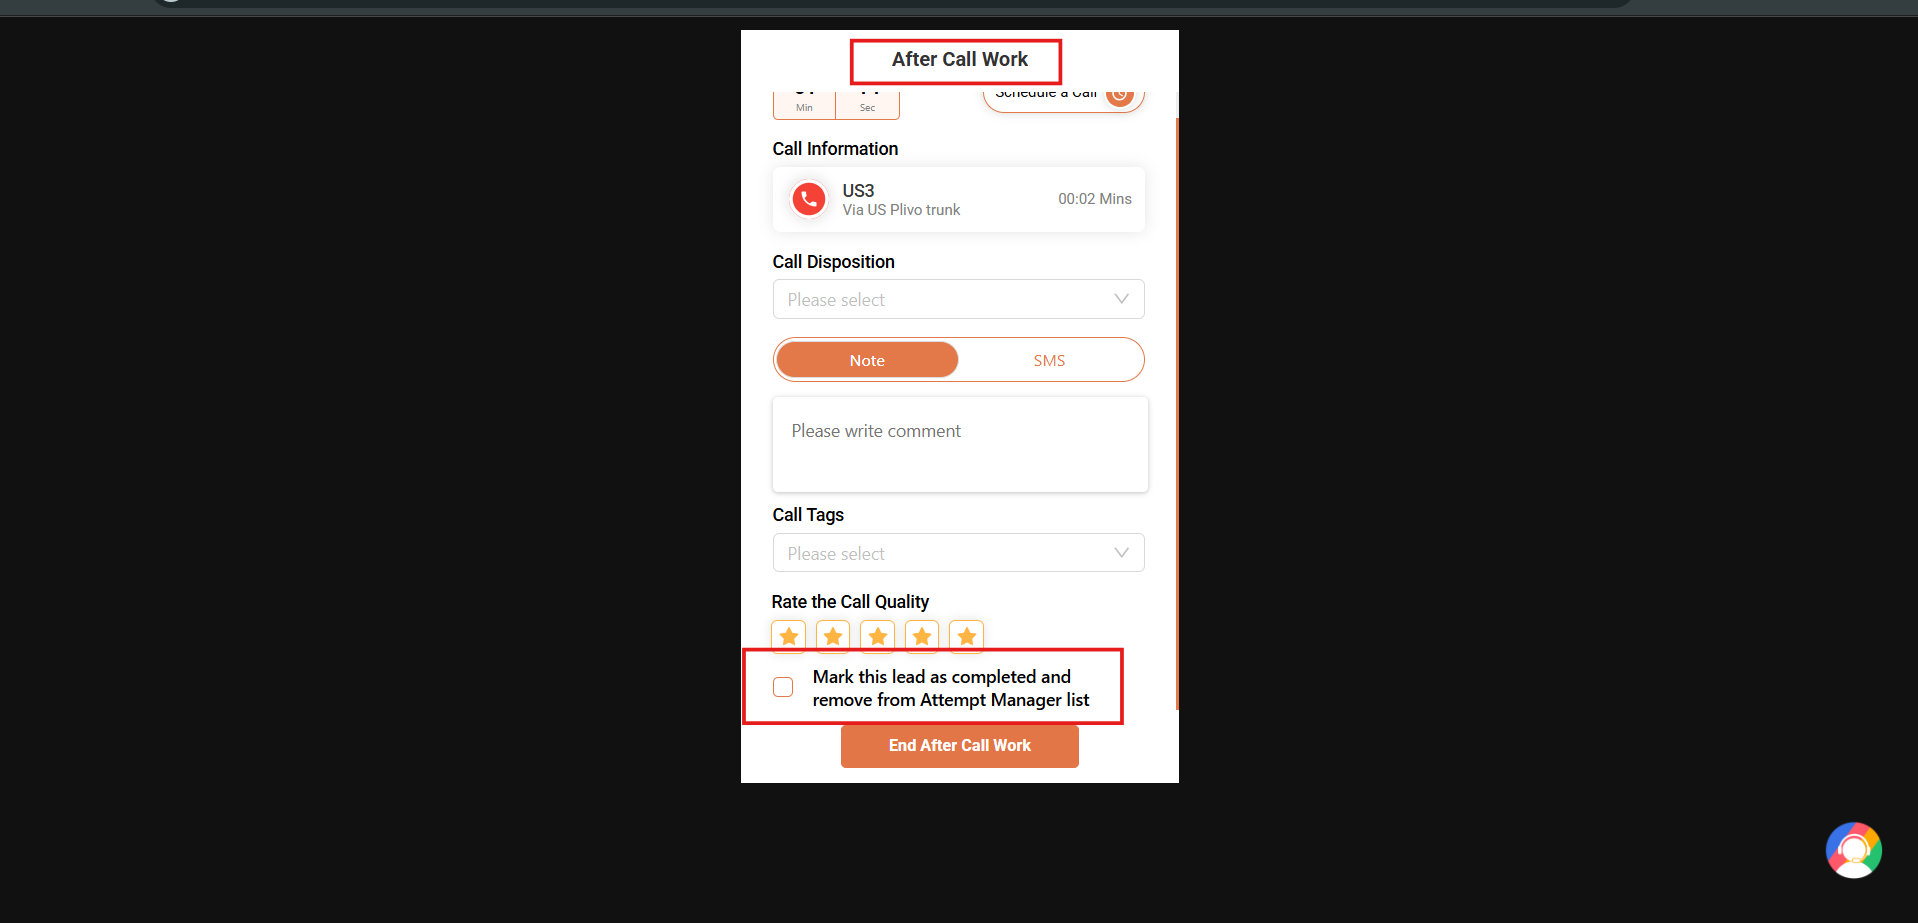
Way 2 – After a call, if ACW is ON
When the call ends, the After Call Work screen shows a checkbox. Tick Mark this lead as completed and remove from Attempt Manager list.
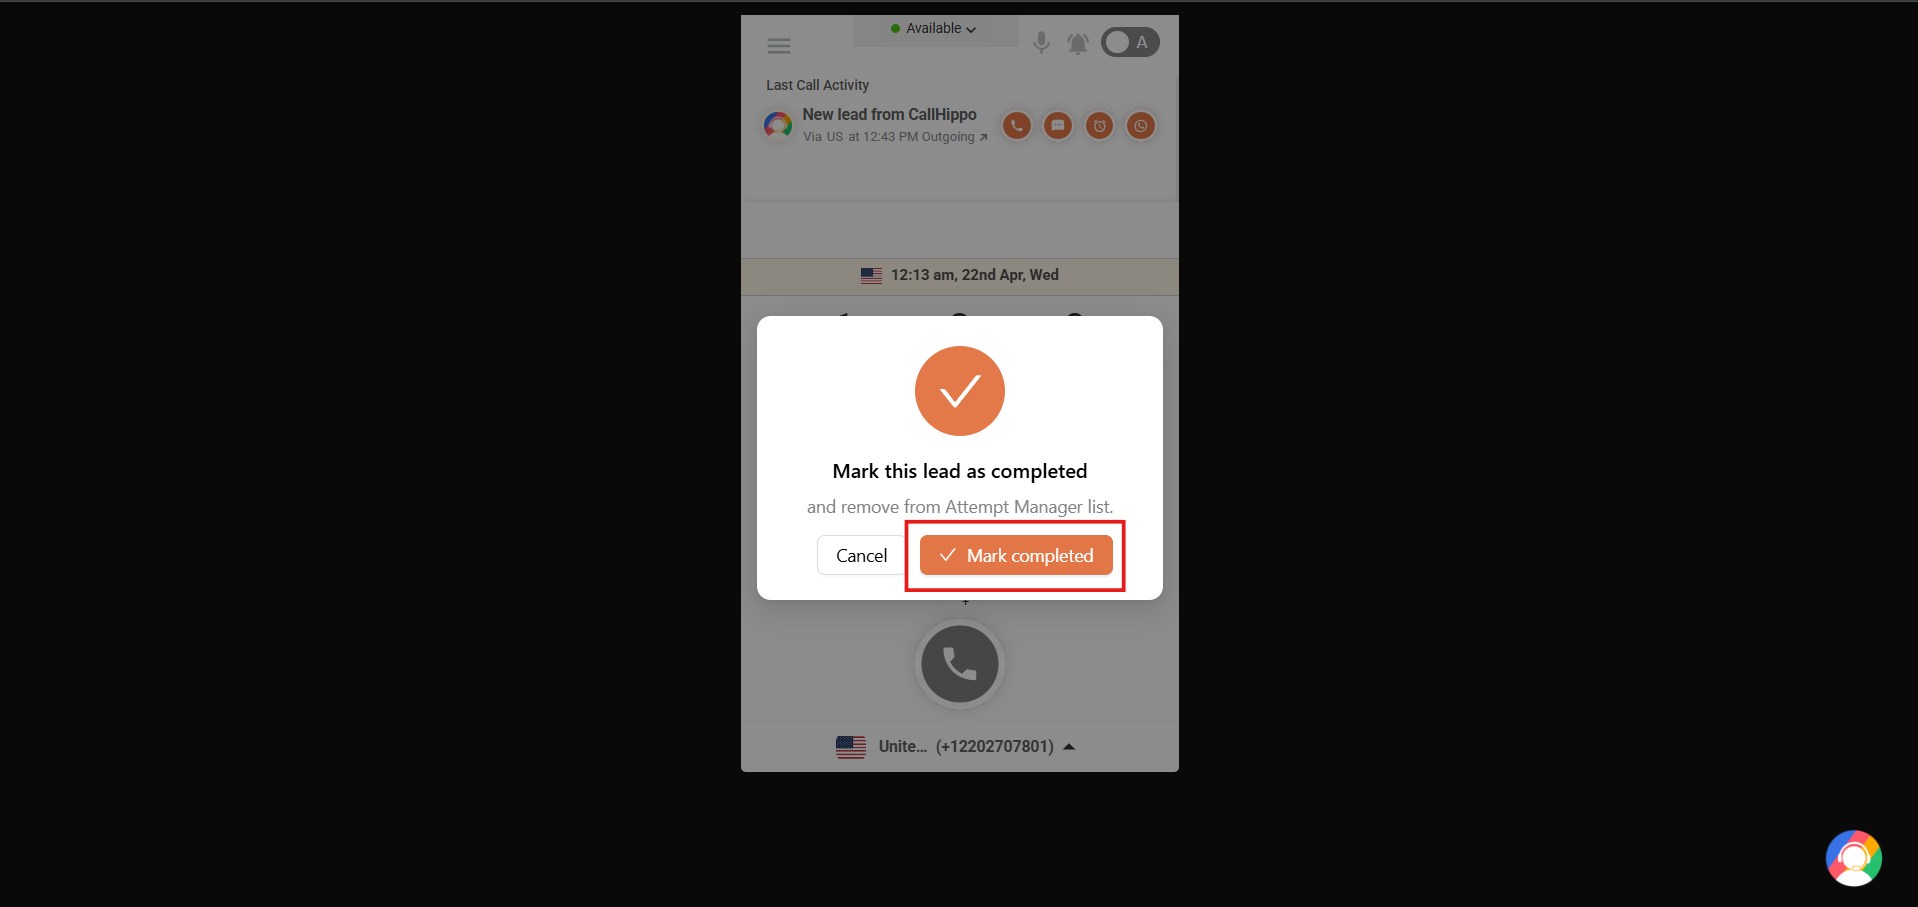
Way 3 – After a call, if ACW is OFF
The option appears on the post-call rating screen. Confirm with Mark completed to remove the contact.
Note: If the same phone number exists in two different lists, marking it complete removes it from both.
Step 6: Switching Between Lists
If you have multiple lists loaded, you can switch between them at any time.
- Click the campaign filter dropdown at the top of the page.
- Select the list you want to view. The table updates to show that list’s contacts and their attempt stages.
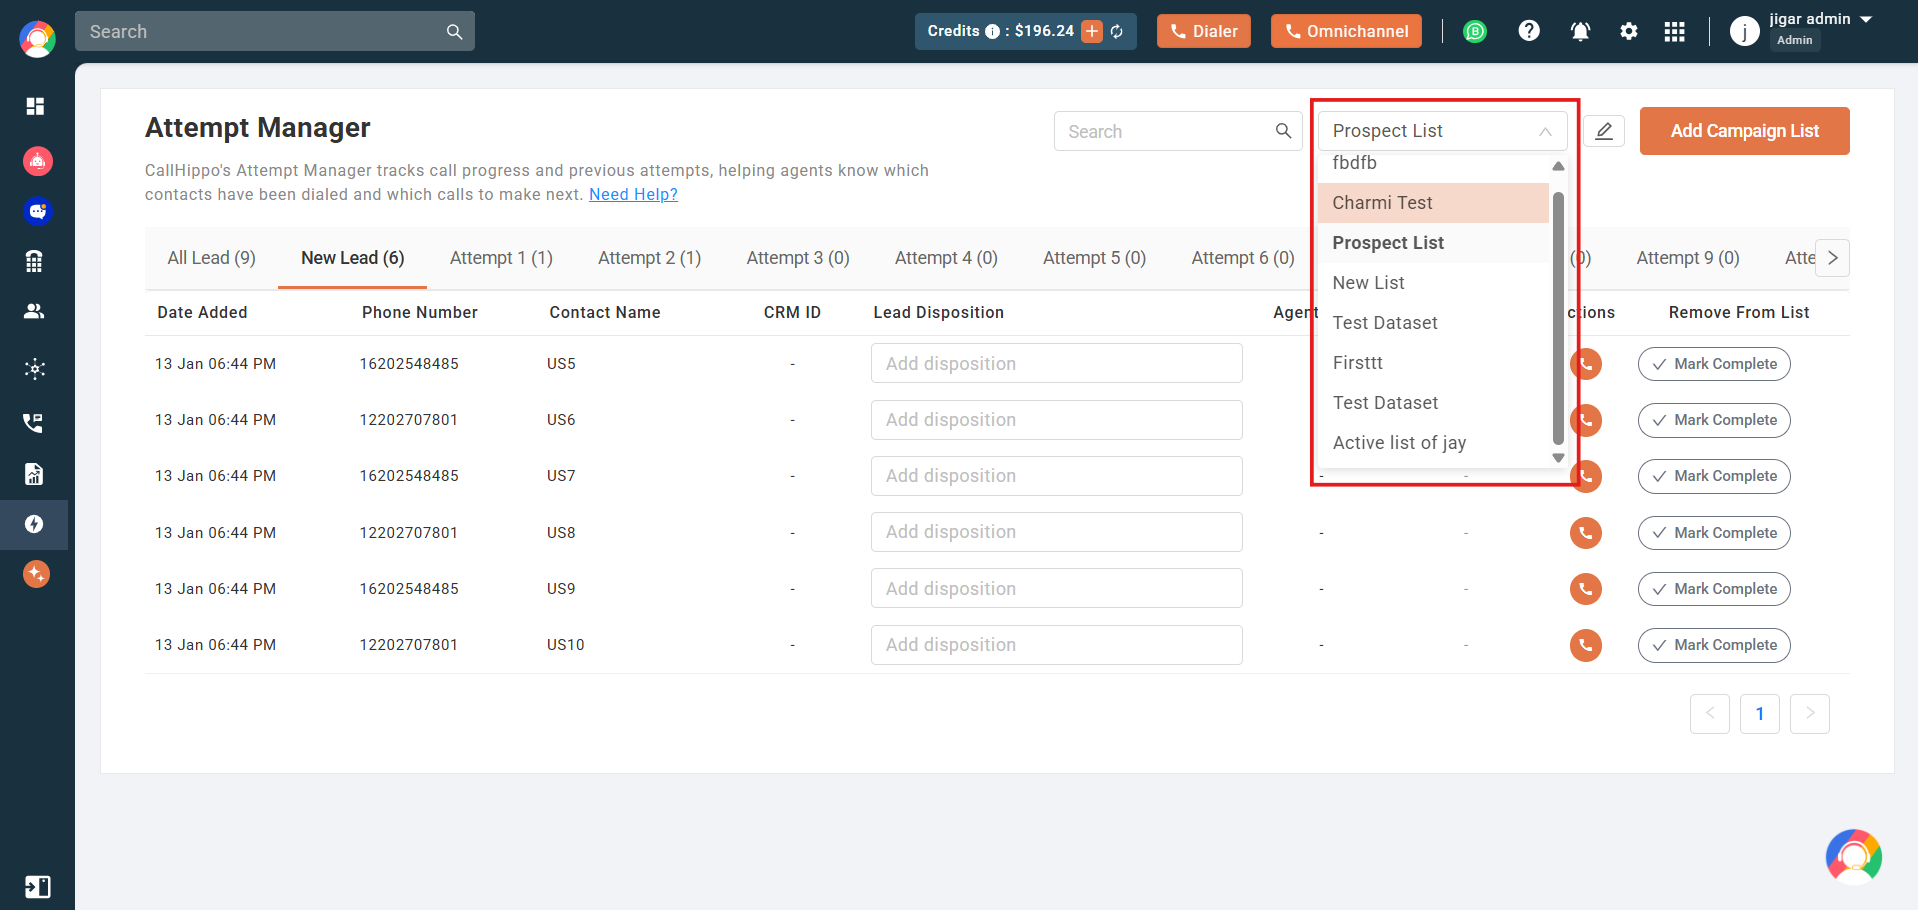
Your progress on each list is saved independently, so switching lists does not affect the others.
Tips and Things to Know
- Duplicate numbers across lists – if the same number appears in two lists and a call is placed, both entries move to the next attempt stage automatically.
- CRM ID – if the list came from HubSpot, Salesforce, or another supported CRM, clicking the CRM ID takes you directly to that contact in your CRM.
- Lead Dispositions – the dispositions shown here are the same ones configured in your CallHippo Global Settings.
- Search – use the search bar on the All Leads tab to find a specific contact by name or number.
- Edit / Update Campaign – edit a created campaign anytime by clicking the pencil icon at the top of the Attempt Manager page.