
Setting up CallHippo telephony in Salesforce lets your reps make and receive calls, log activity, and use click-to-dial without ever leaving your CRM.
Before you begin: Make sure you already have an active Salesforce integration with the CallHippo app before starting the telephony setup below.
Download the Call Center Configuration File
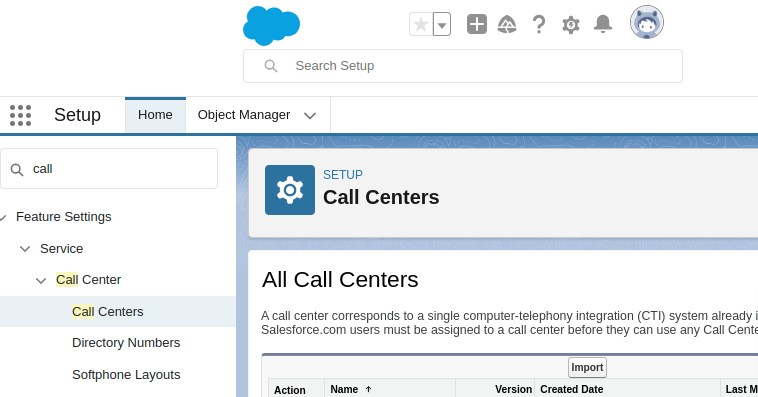
- In Salesforce, go to Setup, search for Call Center in the left-side menu, and click Call Centers.
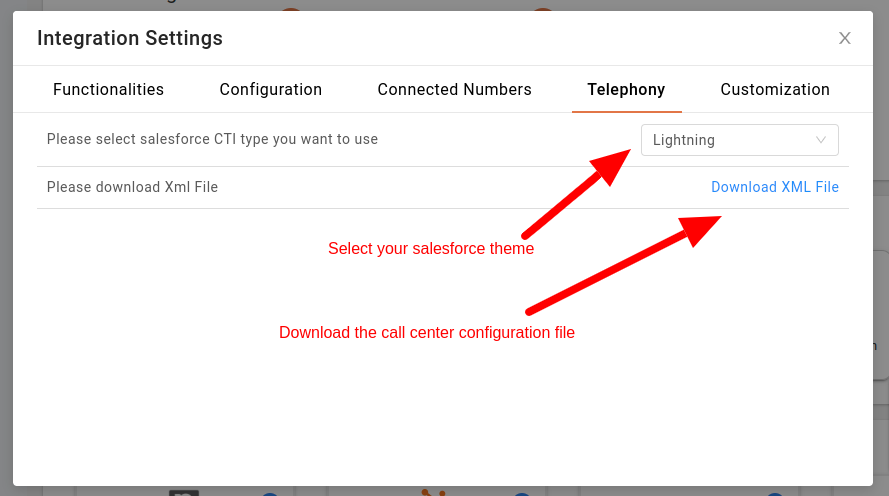
- In CallHippo, go to Integrations > Salesforce > Telephony tab. Select your Salesforce theme (CTI type), then click Download XML File to get the configuration file.
Import the Configuration into Salesforce
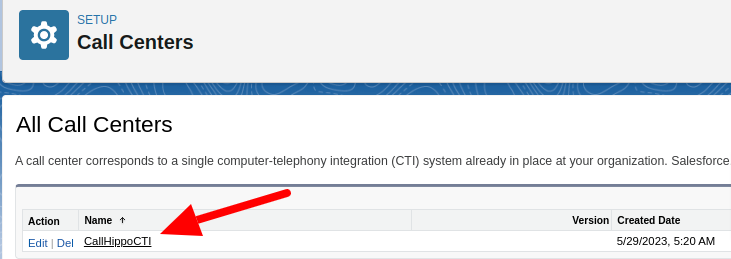
- Import the XML file into your Salesforce Call Center. Once imported, a new call center entry appears in the list. Click the name of the call center.
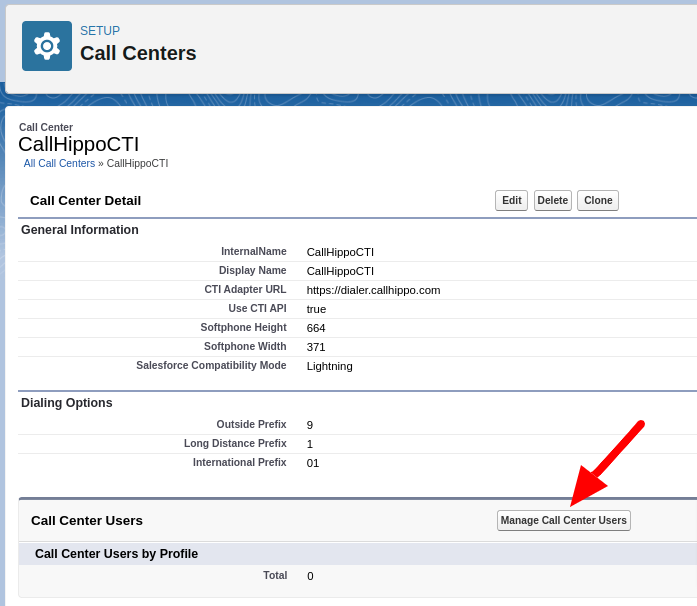
- On the Call Center Detail page, confirm the details match those shown below, then click Manage Call Center Users.
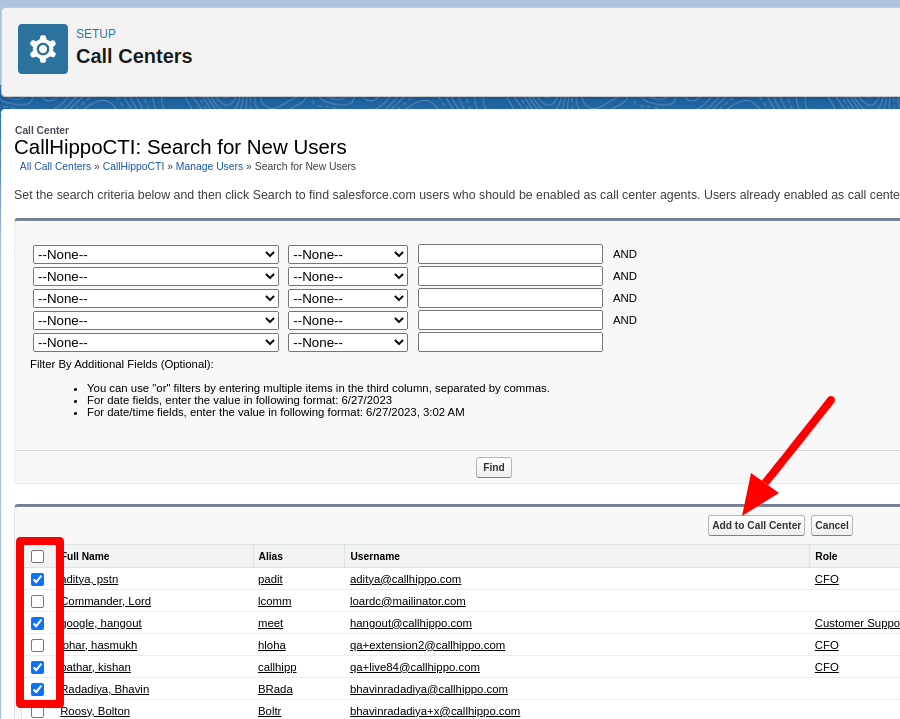
- Click Add More Users, select the Salesforce users who should have telephony access, then click Add to Call Center.
Configure the Softphone Layout
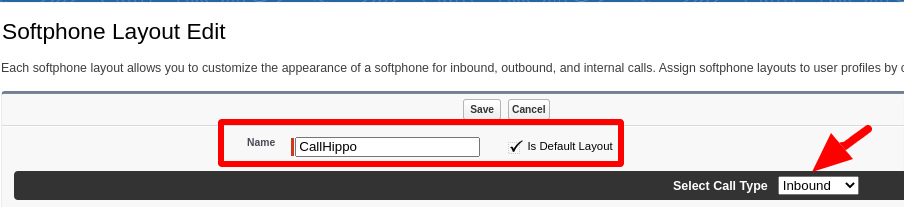
- Go to Call Center > Softphone Layouts and click New. Give the layout a name and check Is Default Layout.
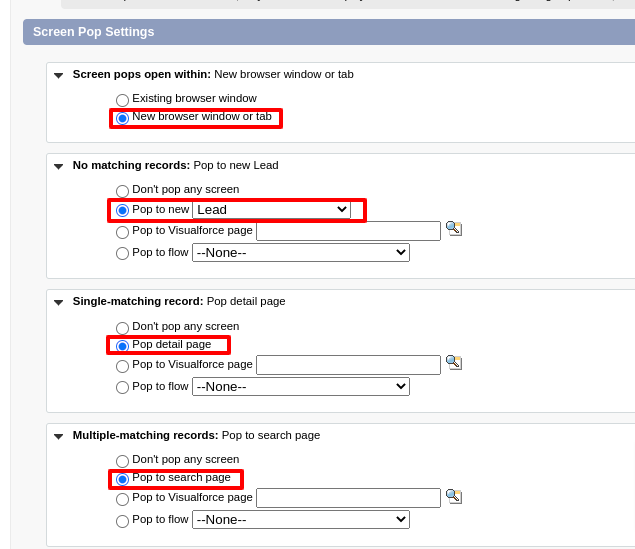
- Adjust the Screen Pop Settings as shown below, then save the layout.
Enable the Softphone in Your App
Your call center setup is done. Next, enable telephony in the module you use (Sales Console, Service Console, etc.).
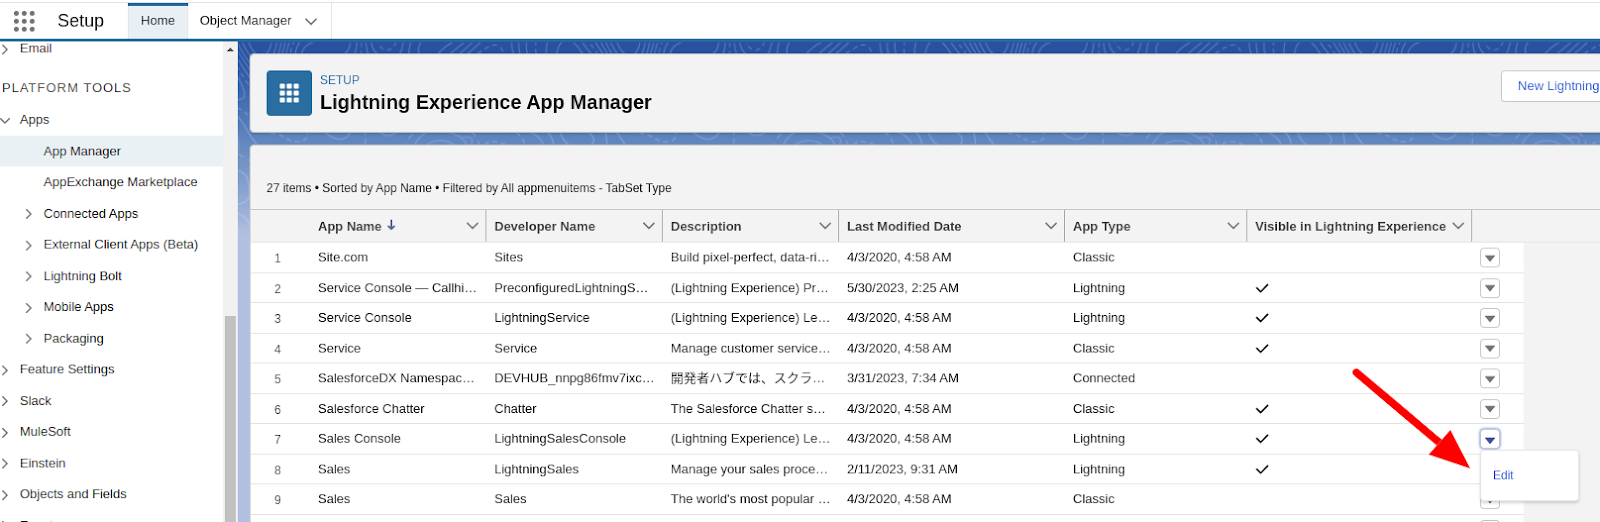
- Go to App Manager, select your app (for example, Sales Console), and click Edit.
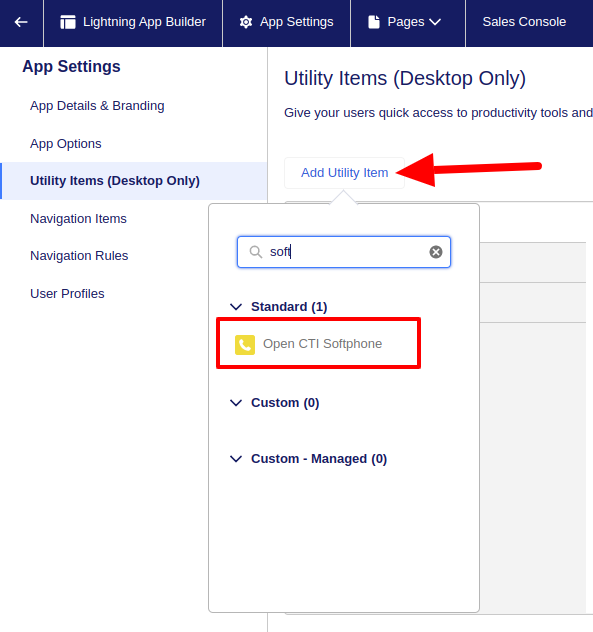
- Select Utility Items from the left menu, click Add Utility Item, search for Softphone, and choose Open CTI Softphone. This adds a Phone option to your app’s utility menu.
Make and Receive Calls
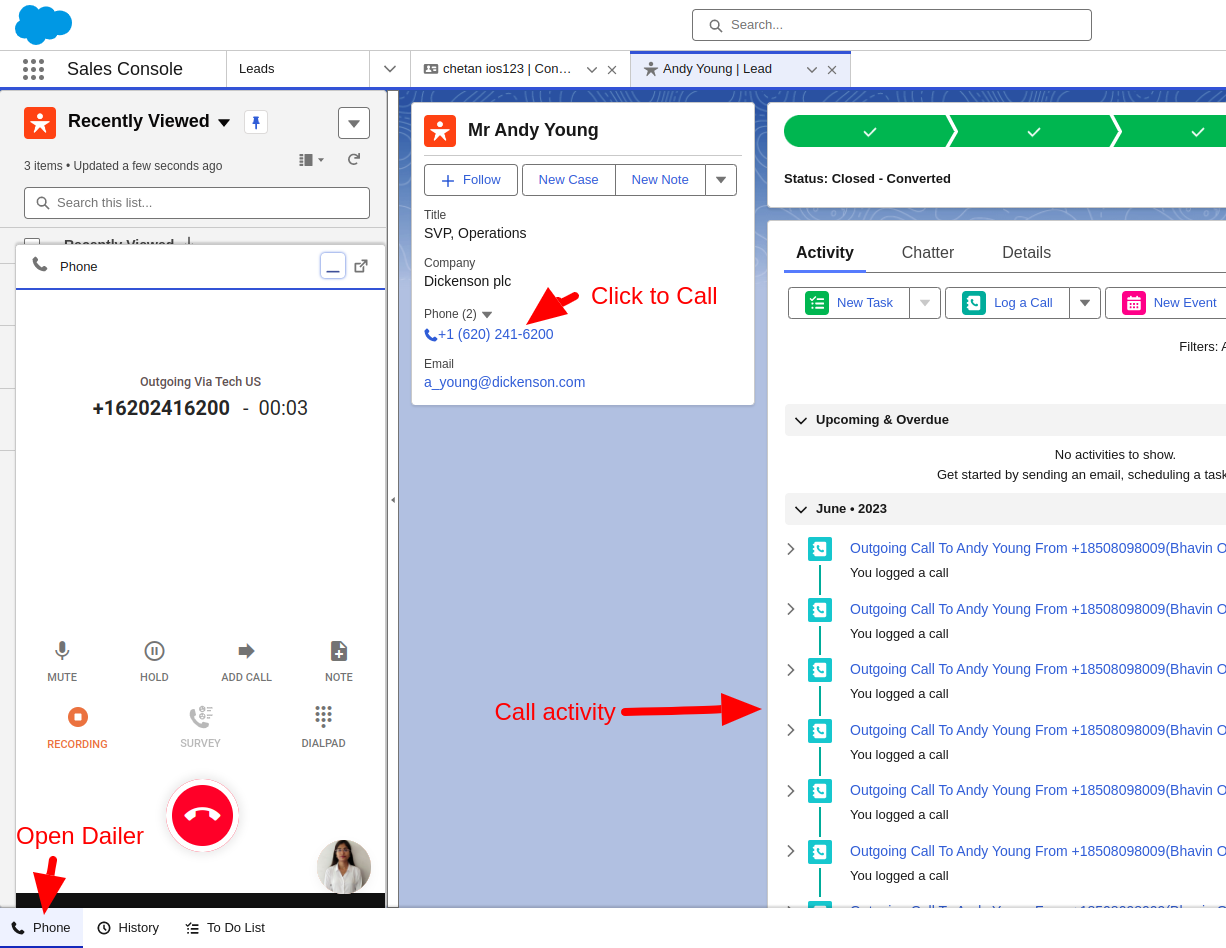
Your Salesforce CTI setup is complete. Open your Sales app to make and receive calls with CallHippo, use click-to-call from contact records, and see call activity logged automatically — all without leaving Salesforce.
FAQ
Do I need the Salesforce integration before setting up telephony?
Yes. You must have an active CallHippo <> Salesforce integration in place before you begin the telephony configuration.
Can I enable the softphone in more than one Salesforce app?
Yes. Repeat the Utility Items step for each app (Sales Console, Service Console, etc.) where you want the CallHippo phone available.