
Connect CallHippo with Zendesk to log every call and SMS as a ticket, place click-to-call calls straight from a Zendesk contact, and keep your support records in sync automatically.
Before You Begin
A few things to know before setting up the integration:
- Who can integrate: Any CallHippo user with Owner or Admin access.
- Permissions needed: Admin rights on both your CallHippo and Zendesk accounts.
- Time to sync data: Existing contacts sync immediately once you connect. New activity syncs after you set up the webhook and triggers described below.
- Pre-requisites: An active Zendesk account and your Zendesk subdomain.
Modules included in the integration: Views and Customers.
Activity passed to Zendesk:
- Contacts syncing: Contacts (end users) from Zendesk sync into CallHippo.
- Call activity: Incoming and outgoing calls to any Zendesk contact create a ticket in Zendesk with the call log.
- SMS activity: SMS sent or received from Zendesk contacts are logged as activity on a Zendesk ticket.
Details You’ll Need During Setup
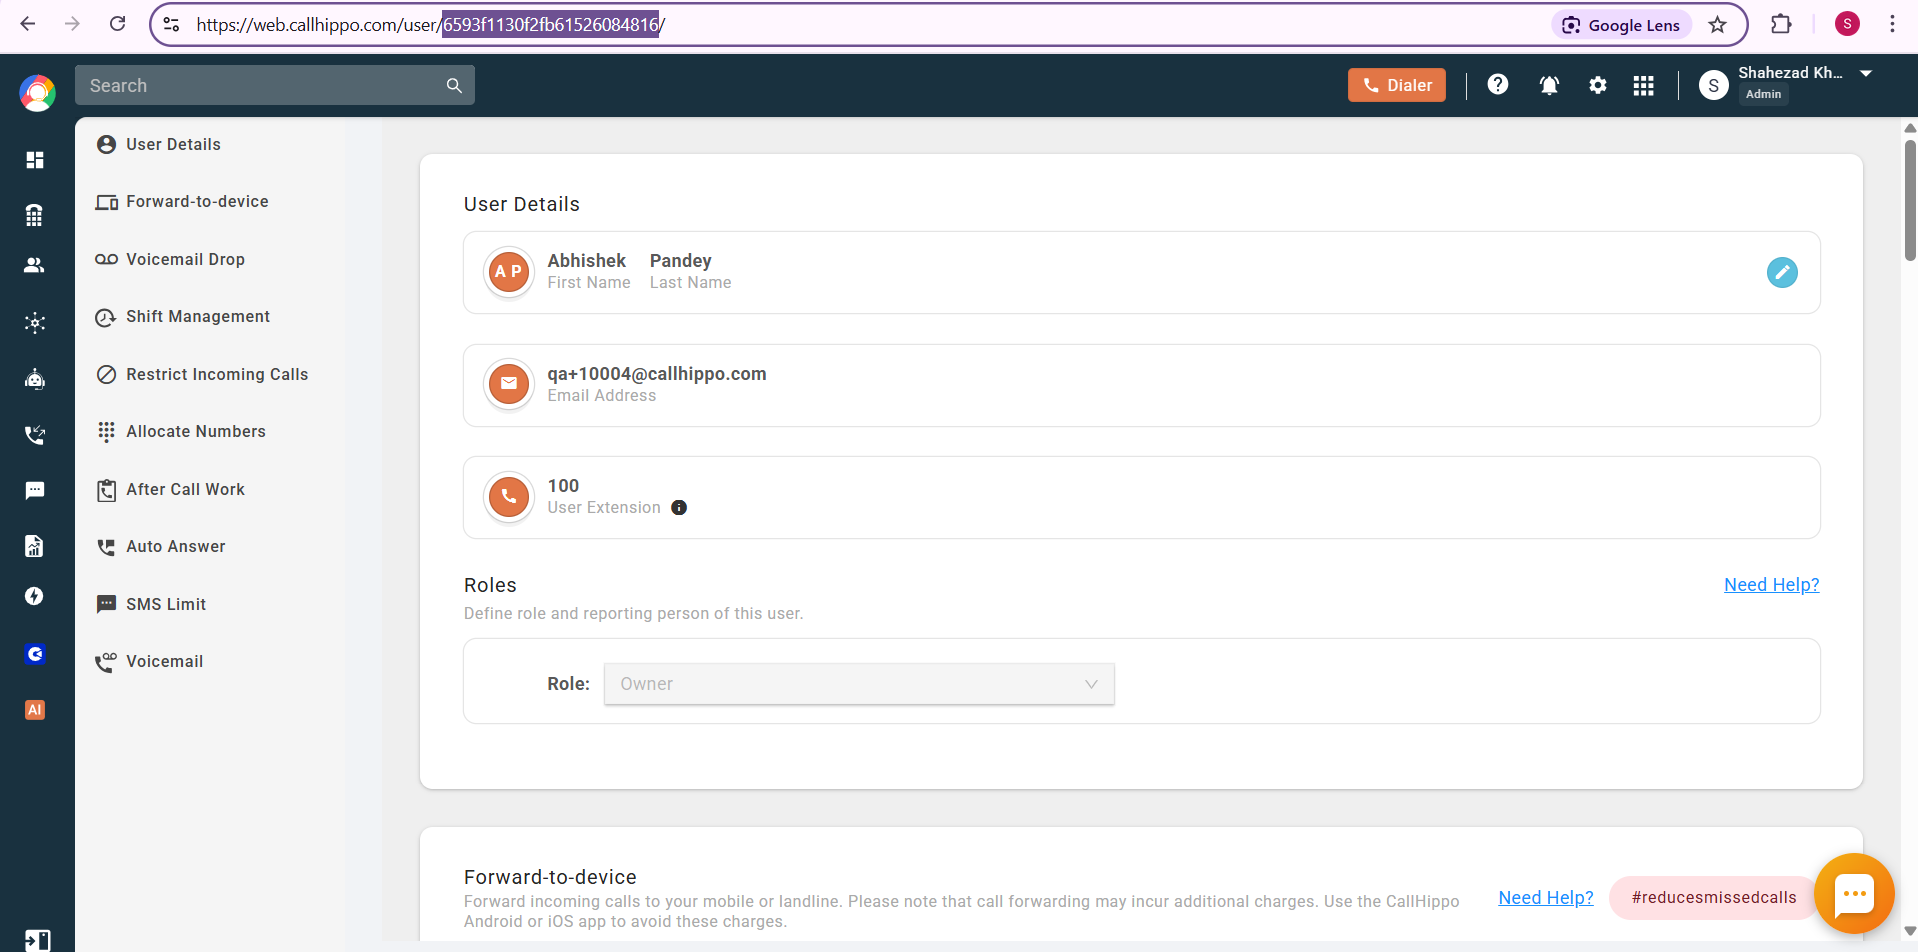
CallHippo User ID: In CallHippo, go to Users, open the Owner user, and copy the highlighted portion from the browser URL.
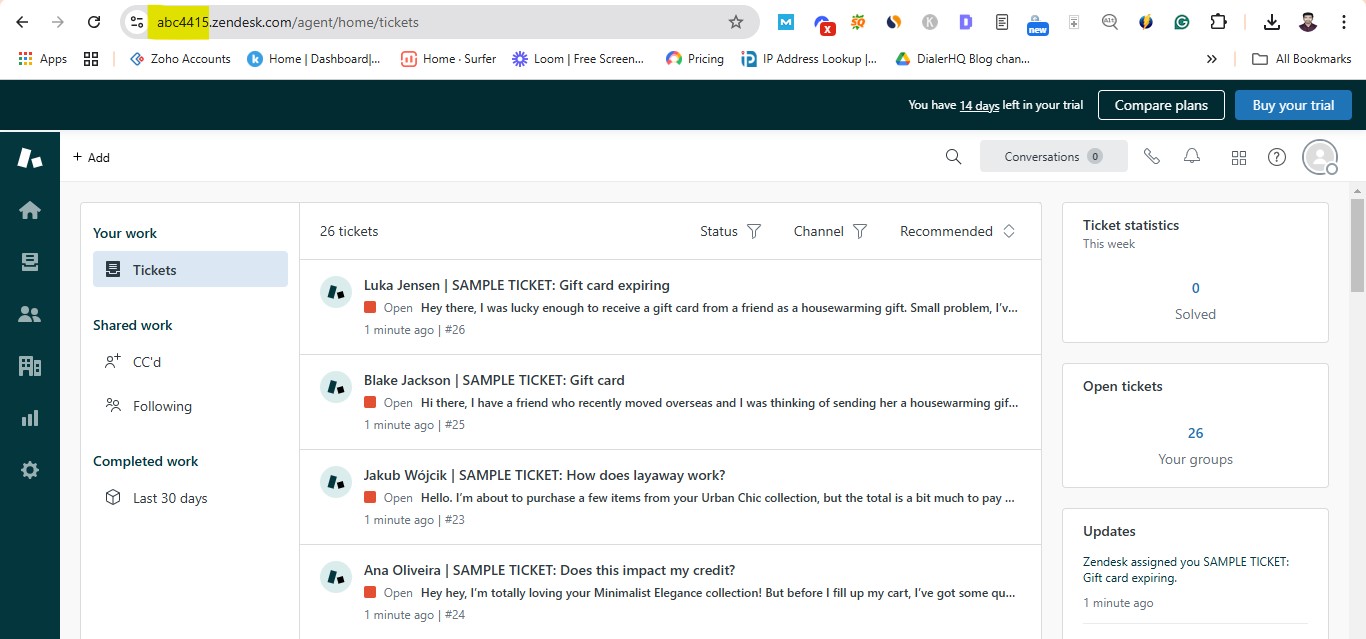
Zendesk subdomain: Log in to Zendesk and copy the highlighted portion from the browser URL (for example, in https://abc4415.zendesk.com/ the subdomain is abc4415).
Steps to Complete in CallHippo
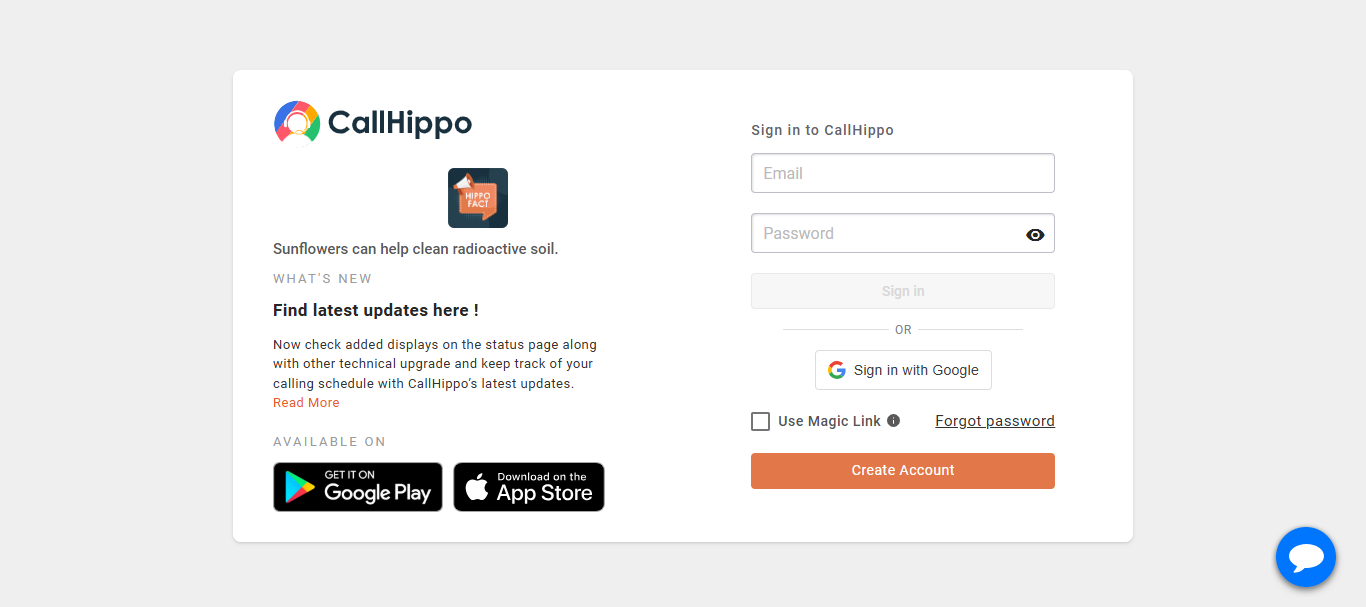
- Log in to your CallHippo account.
- Open Integrations from the left sidebar.
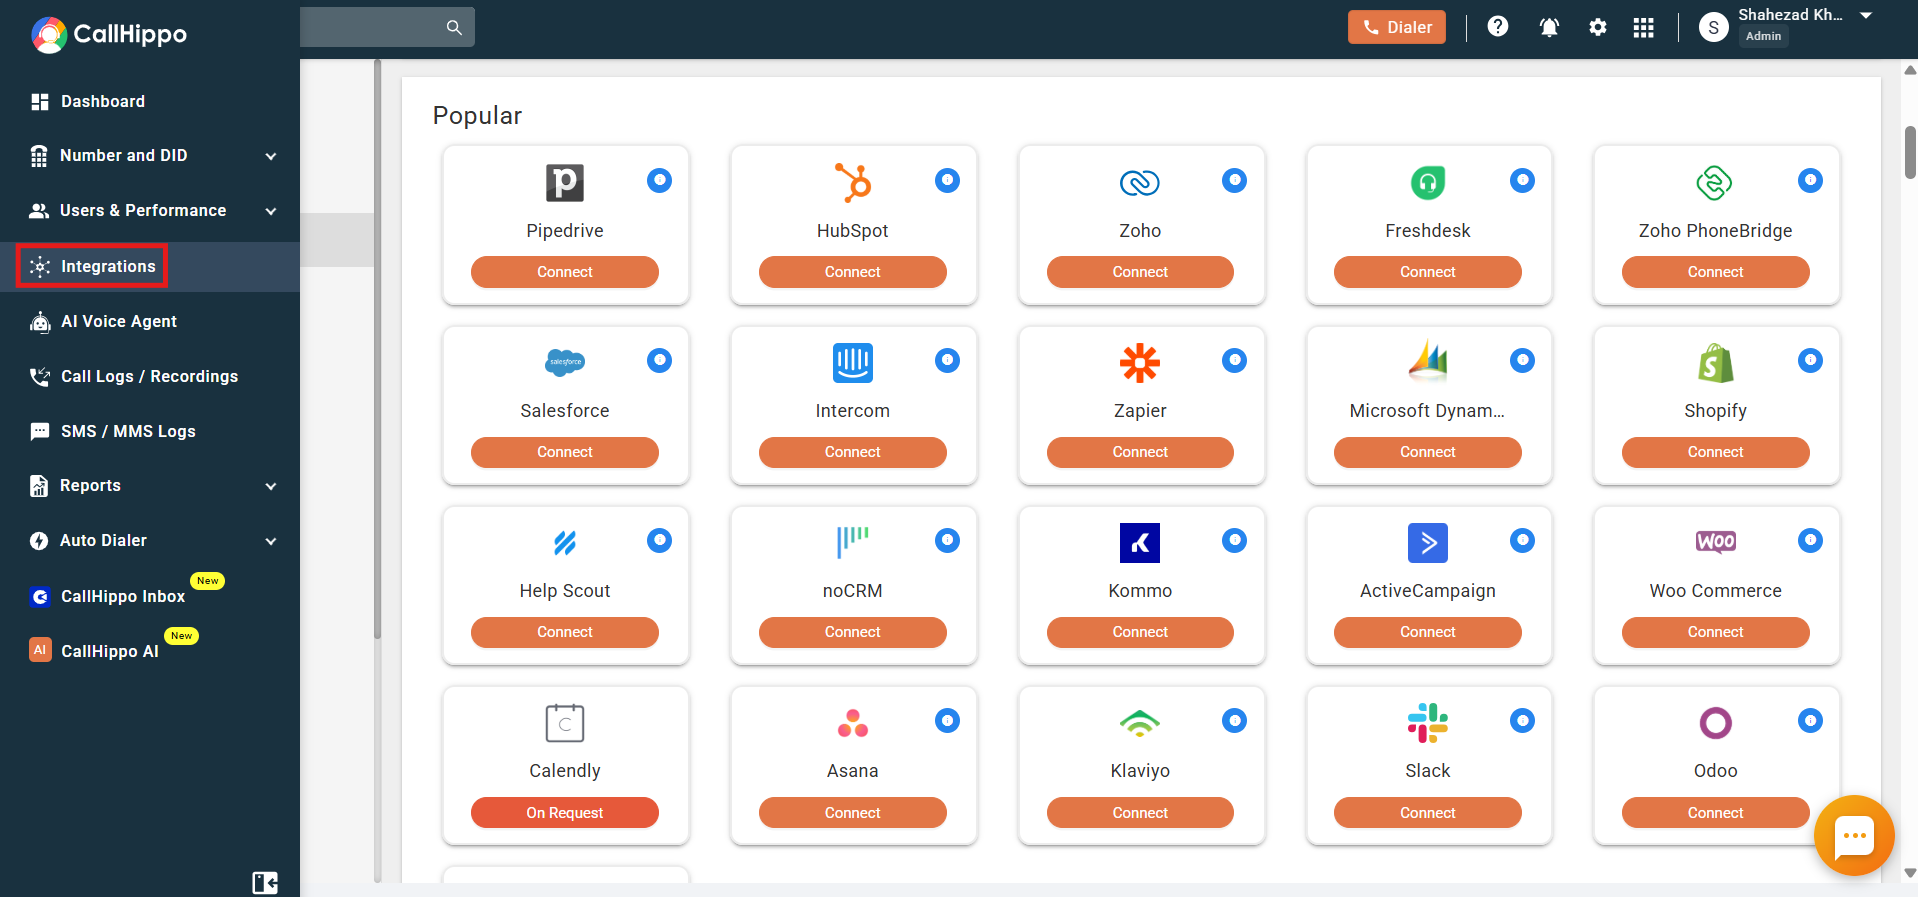
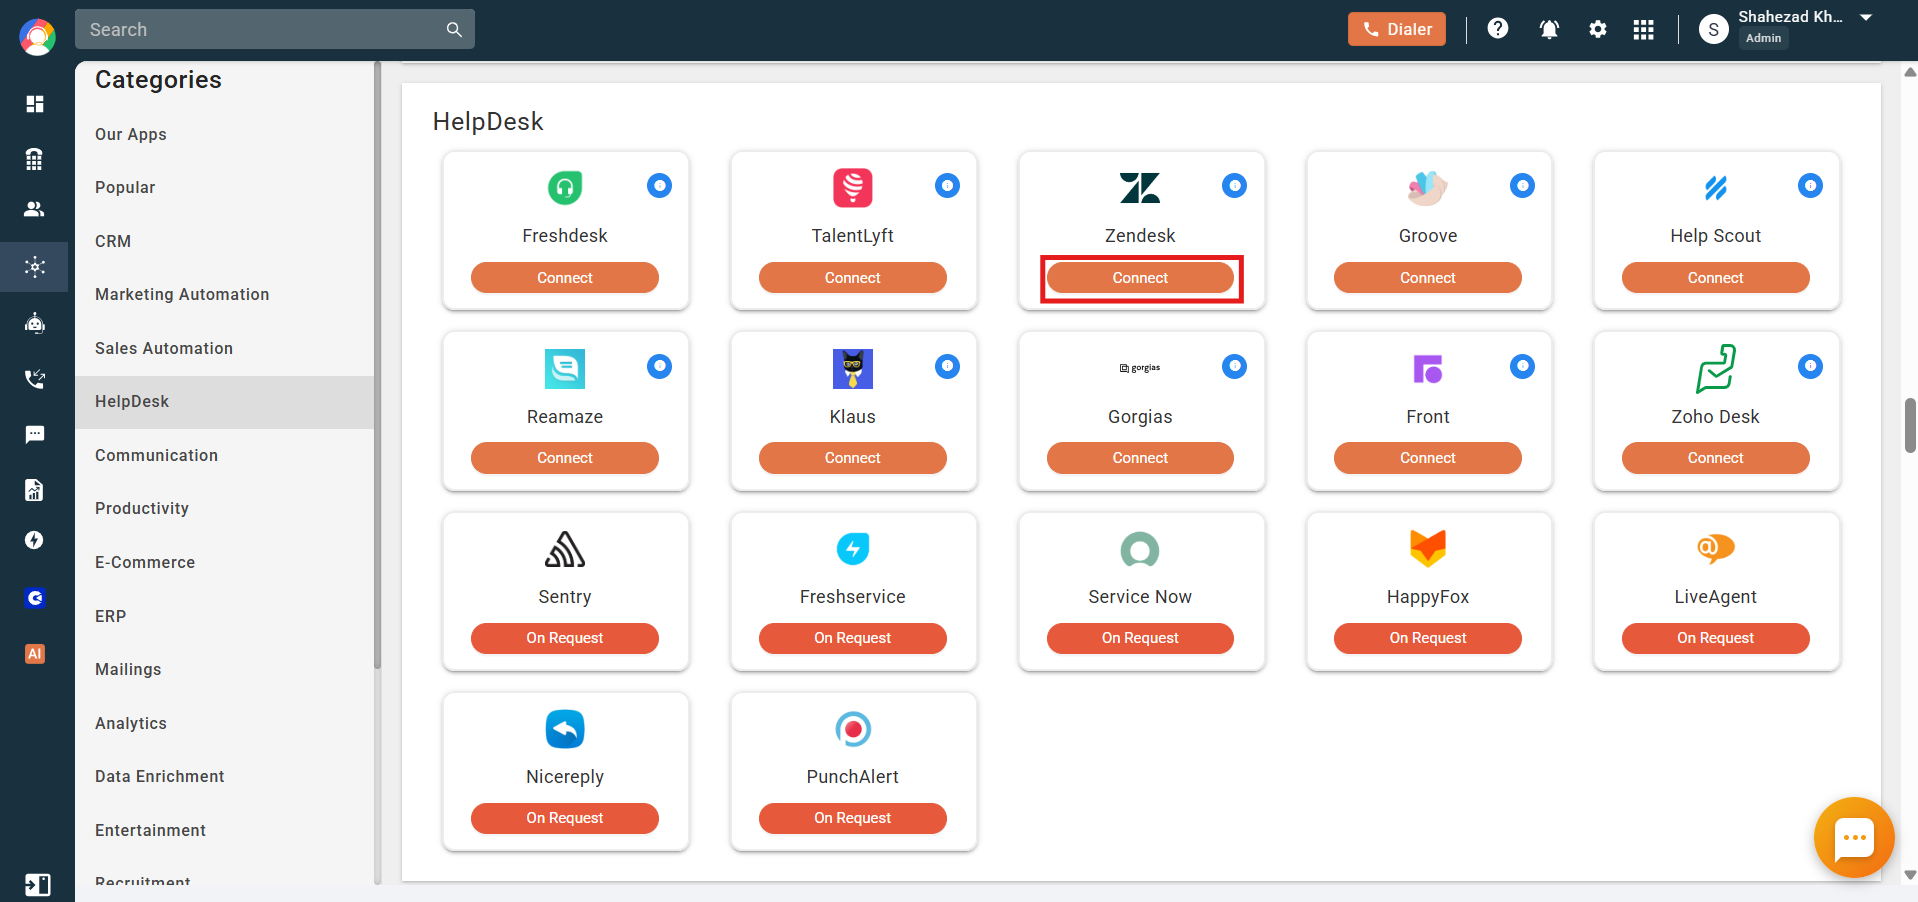
- Find Zendesk and click the Connect button on its card.
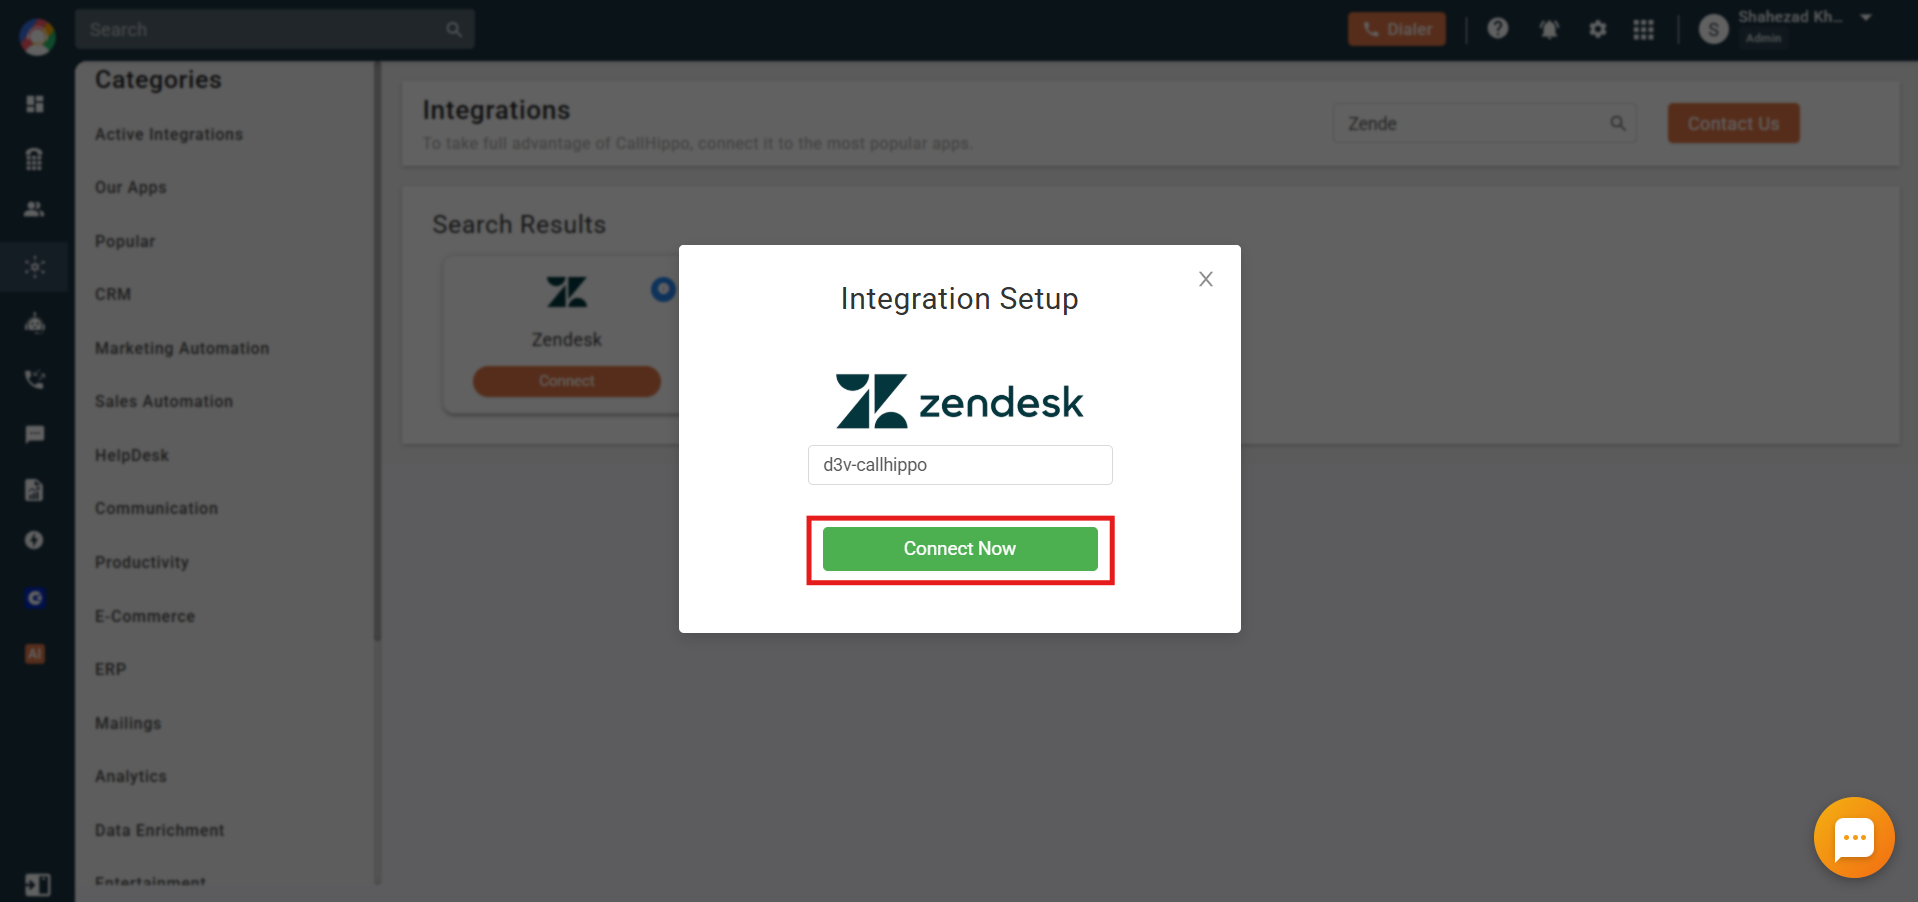
- Enter your Zendesk subdomain and click Connect Now.
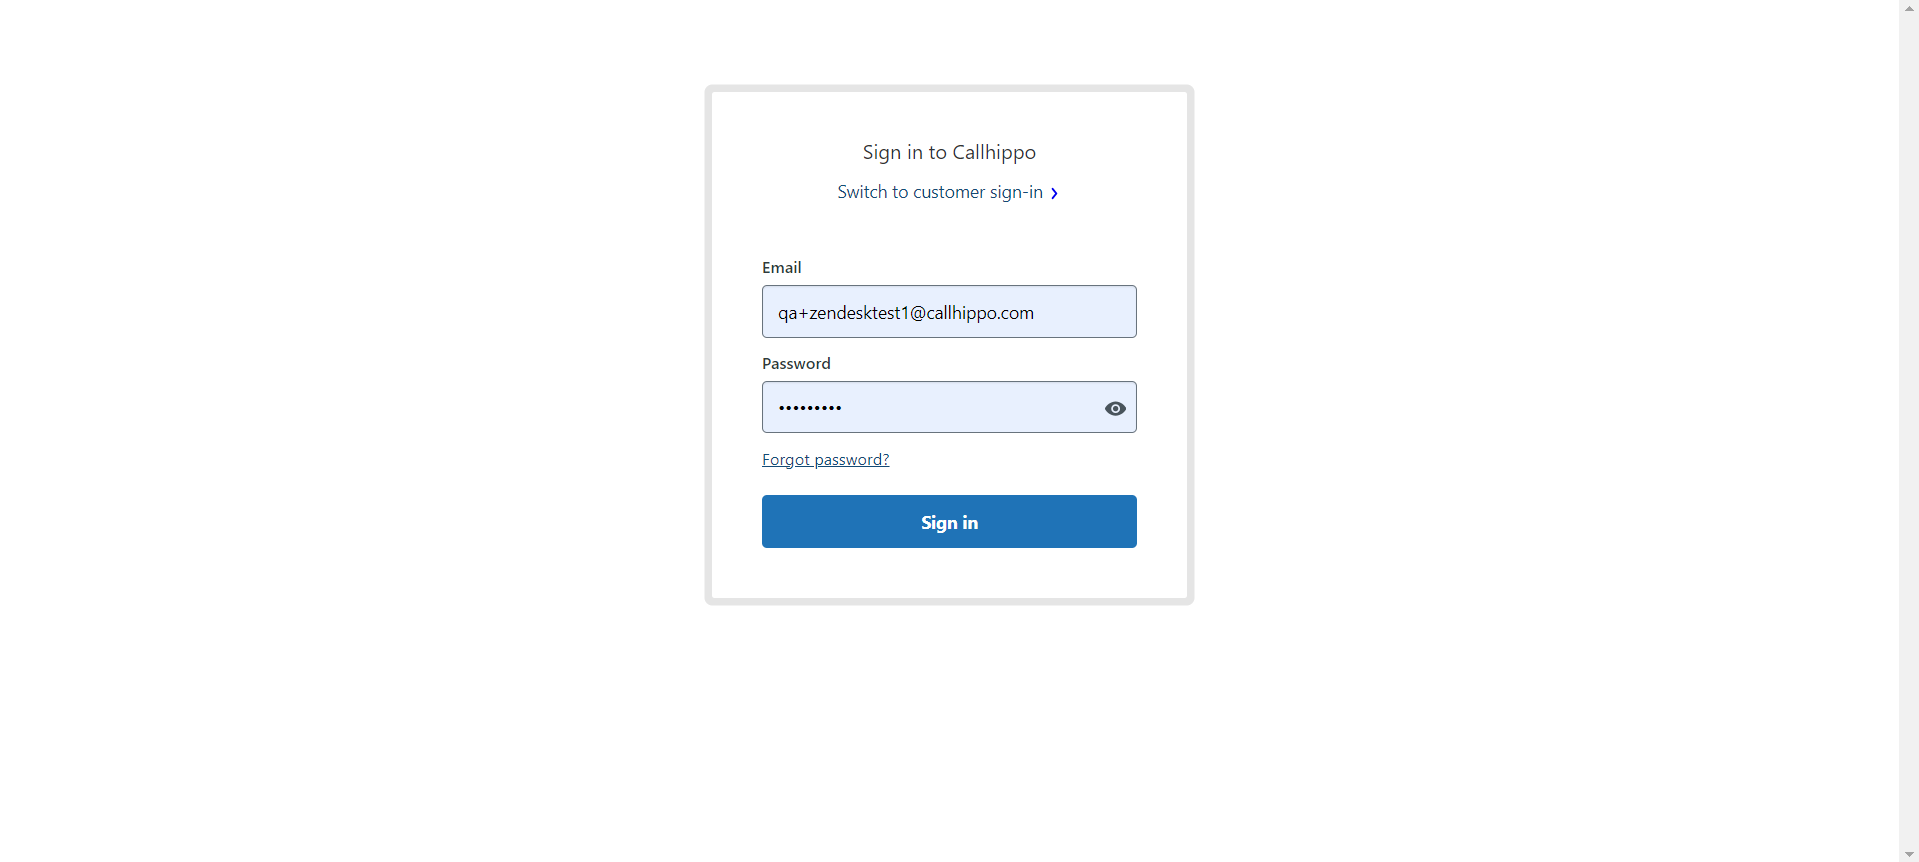
- Sign in to Zendesk if you aren’t already logged in.
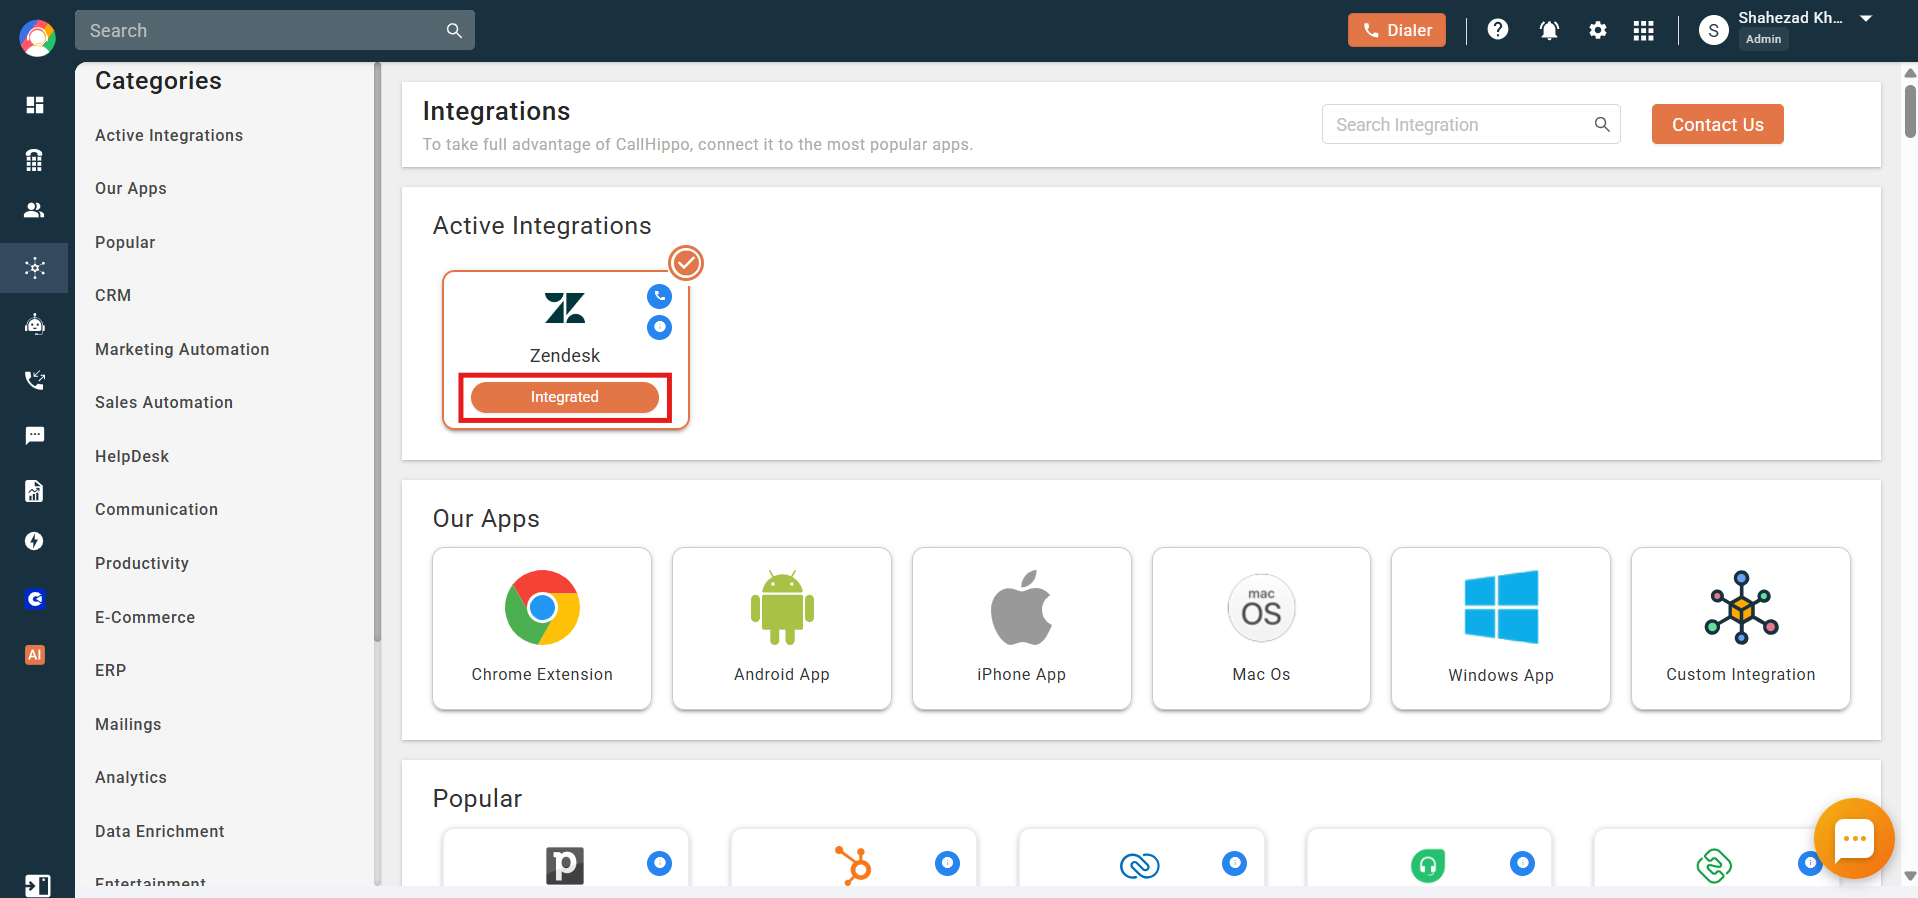
- You’re done. Once signed in, you’re returned to CallHippo and the integration status shows as Integrated.
Post-Integration Setup in Zendesk
To sync new contacts and create tickets for each call or SMS, you need to add a webhook and two triggers inside Zendesk.
1. Create a Webhook in Zendesk
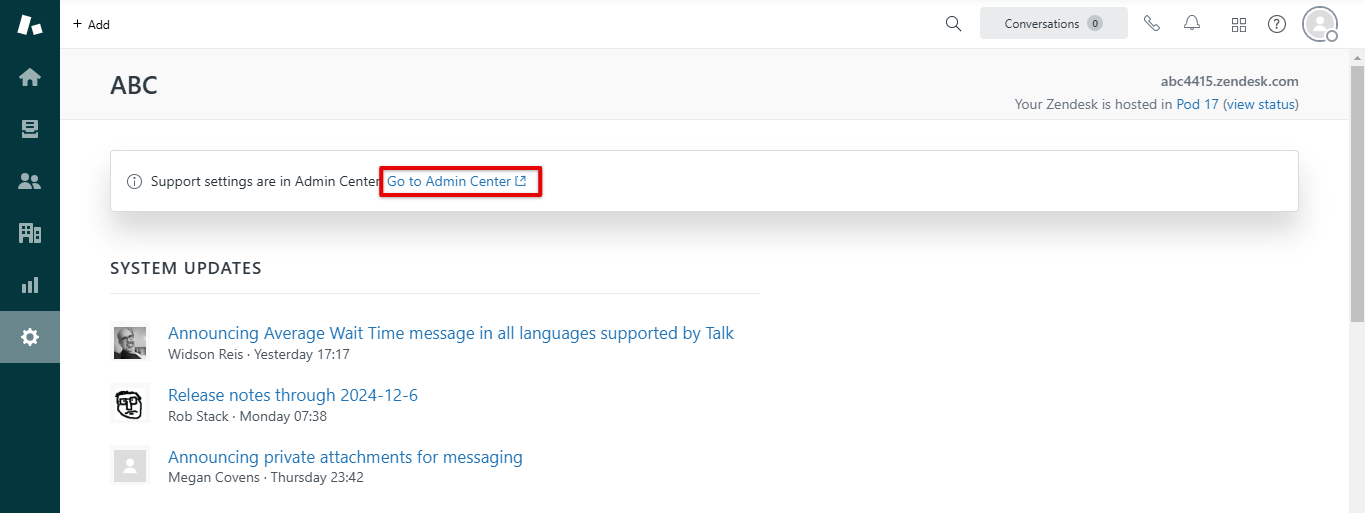
- Log in to Zendesk, open Settings, then click Go to Admin Center.
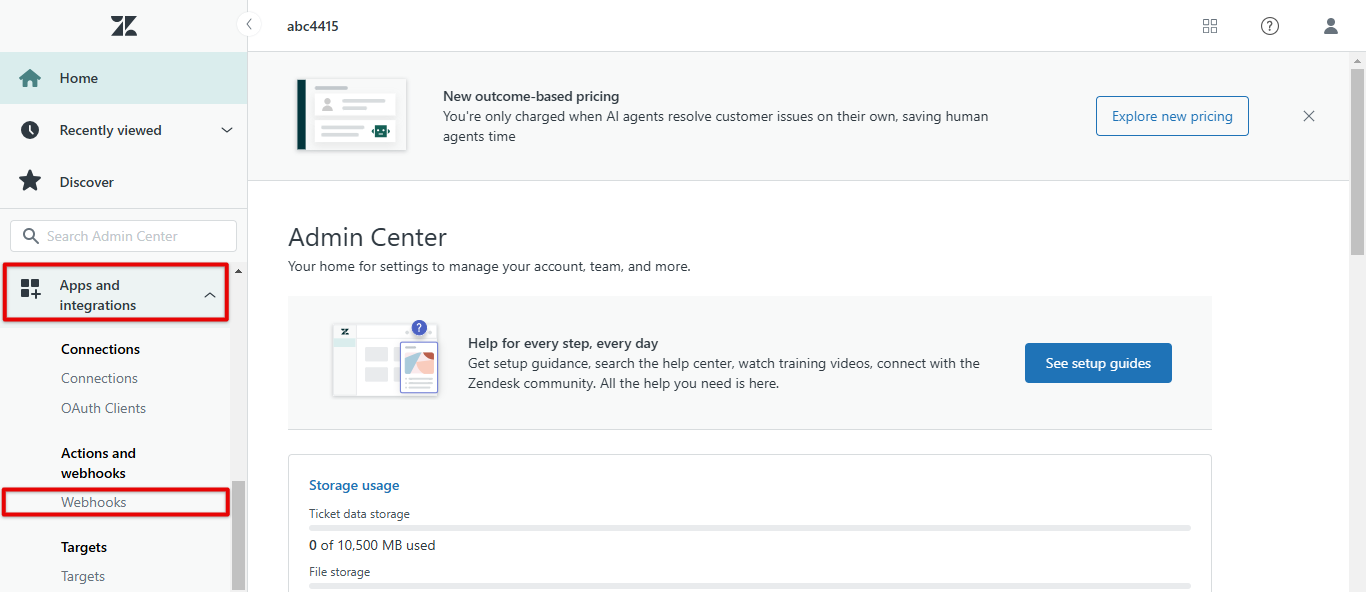
- Go to Apps and integrations > Webhooks > Create Webhook.
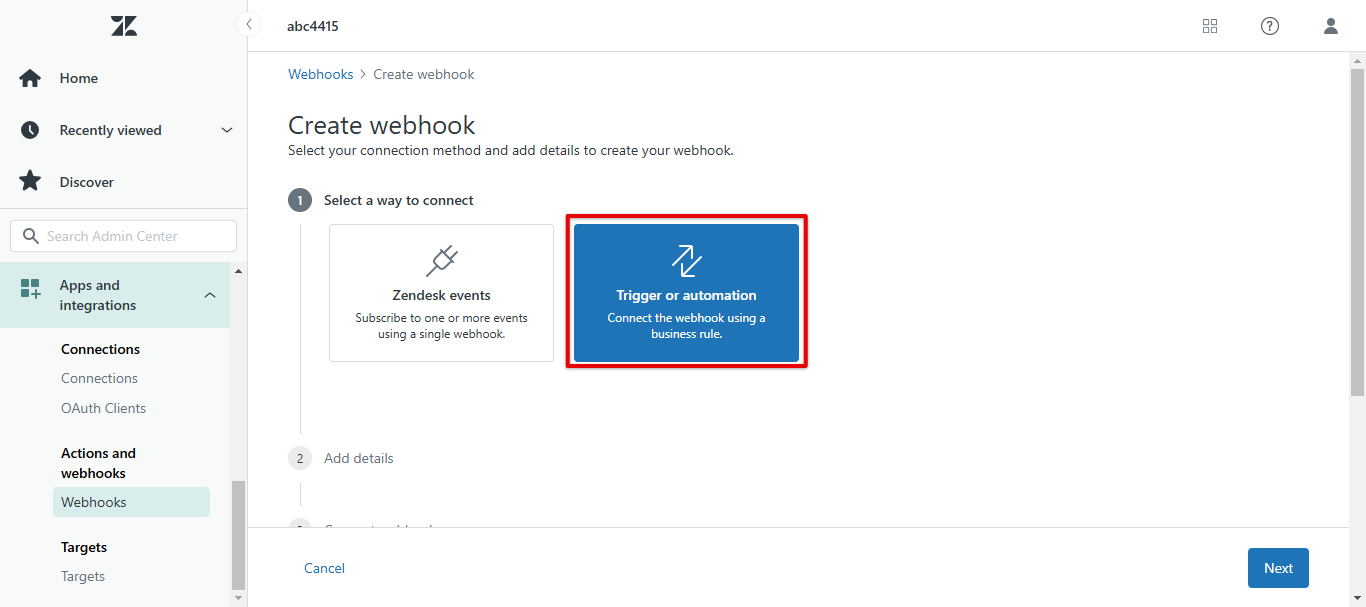
- Choose Trigger or automation and click Next.
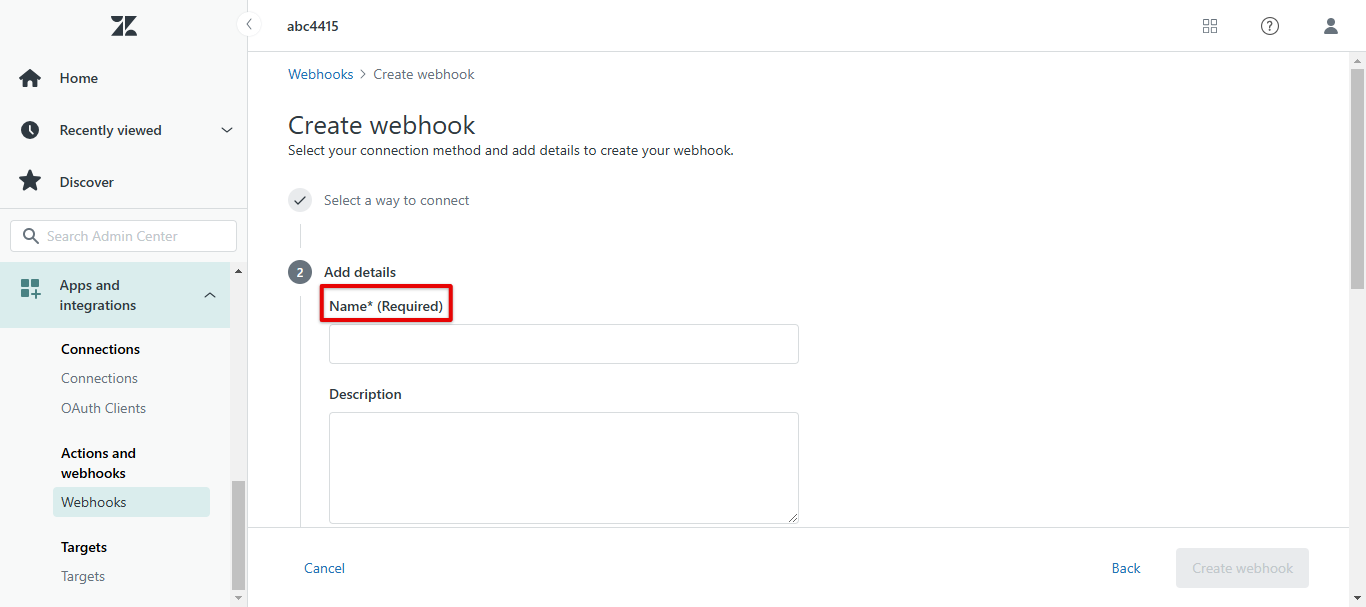
- Give the webhook a Name (and an optional description).
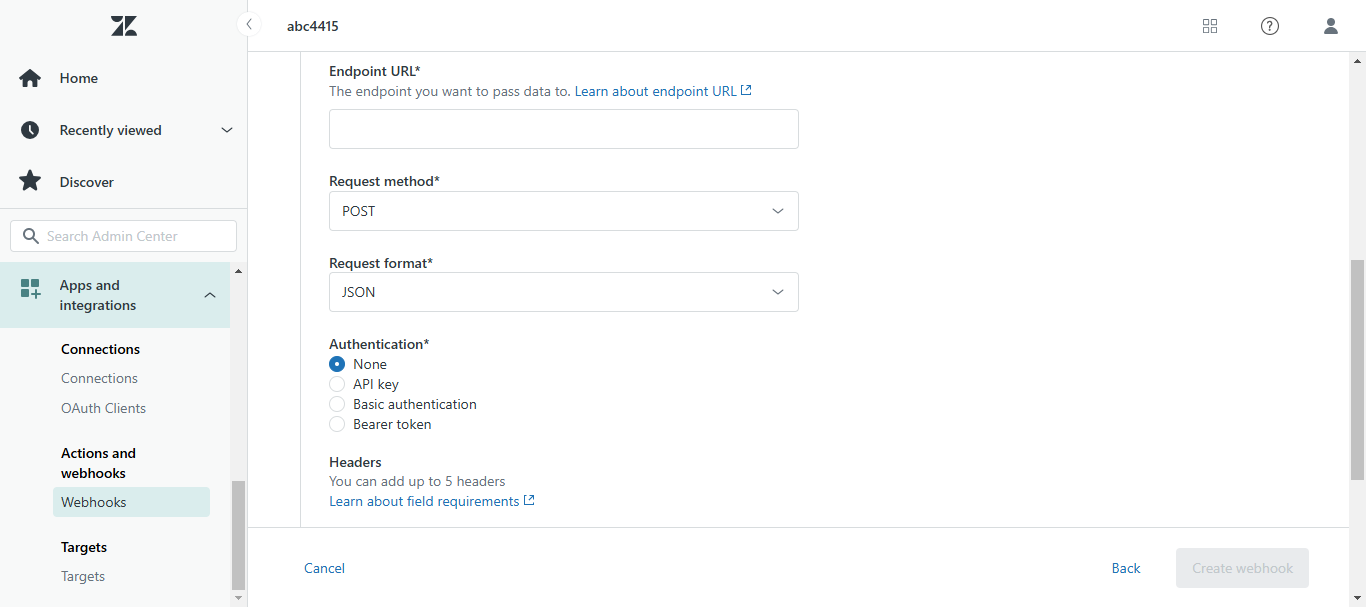
- Fill in the connection details:
- Endpoint URL:
https://activity.callhippo.com/integration/users/{your_user_id}/zendesk/webhook/addticket— replace{your_user_id}with your CallHippo User ID. - Request method: POST
- Request format: JSON
- Authentication: None
- Endpoint URL:
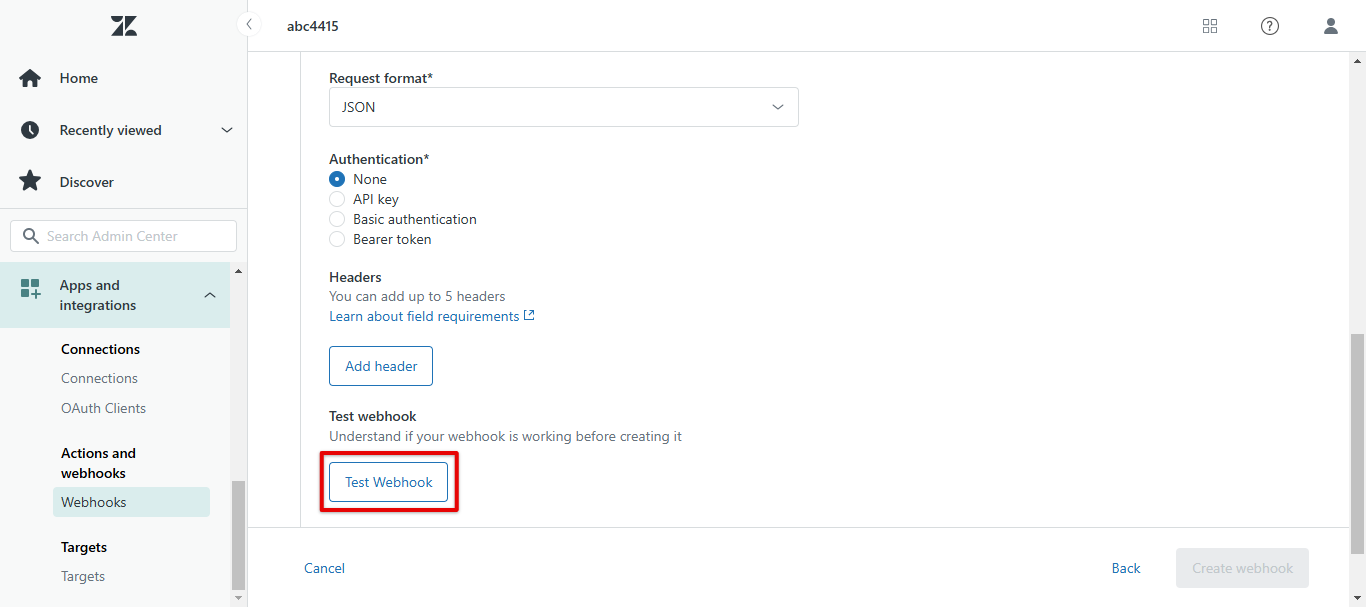
- Optionally click Test Webhook to confirm it’s working before you save.
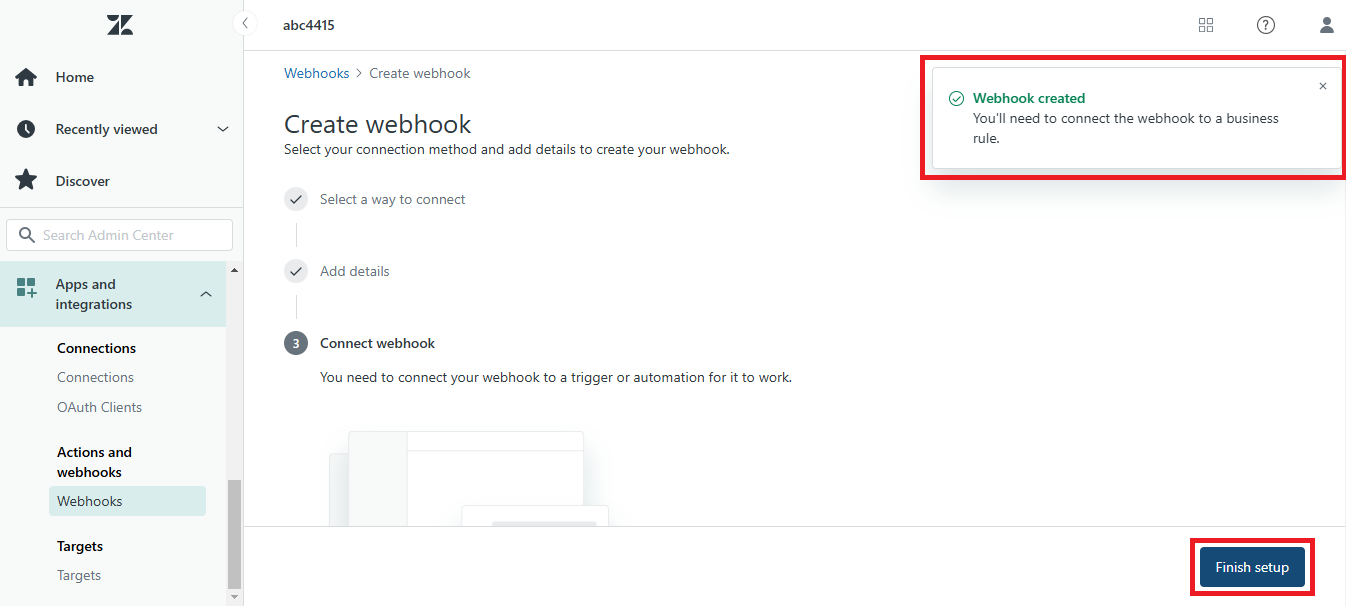
- Click Create Webhook, then Finish setup.
2. Create the Add Ticket Trigger
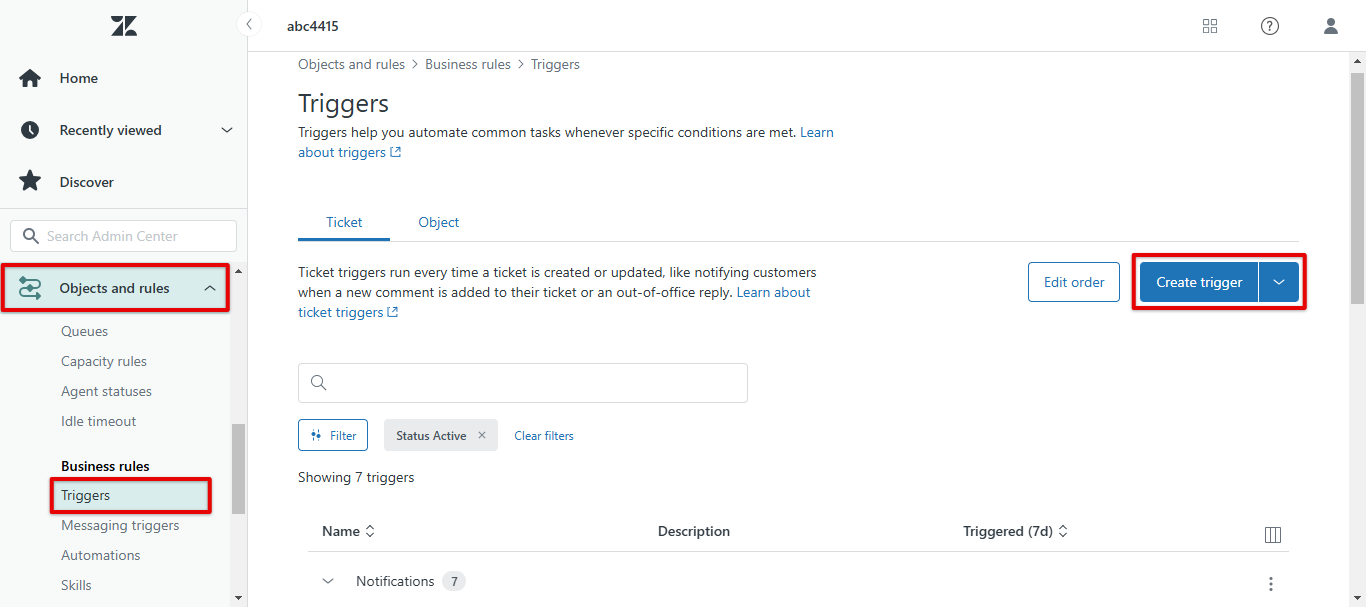
- Go to Objects and Rules > Triggers > Create Trigger.
- Set a Trigger Name (for example, Add Ticket Trigger) and add a new category, naming it as you like.
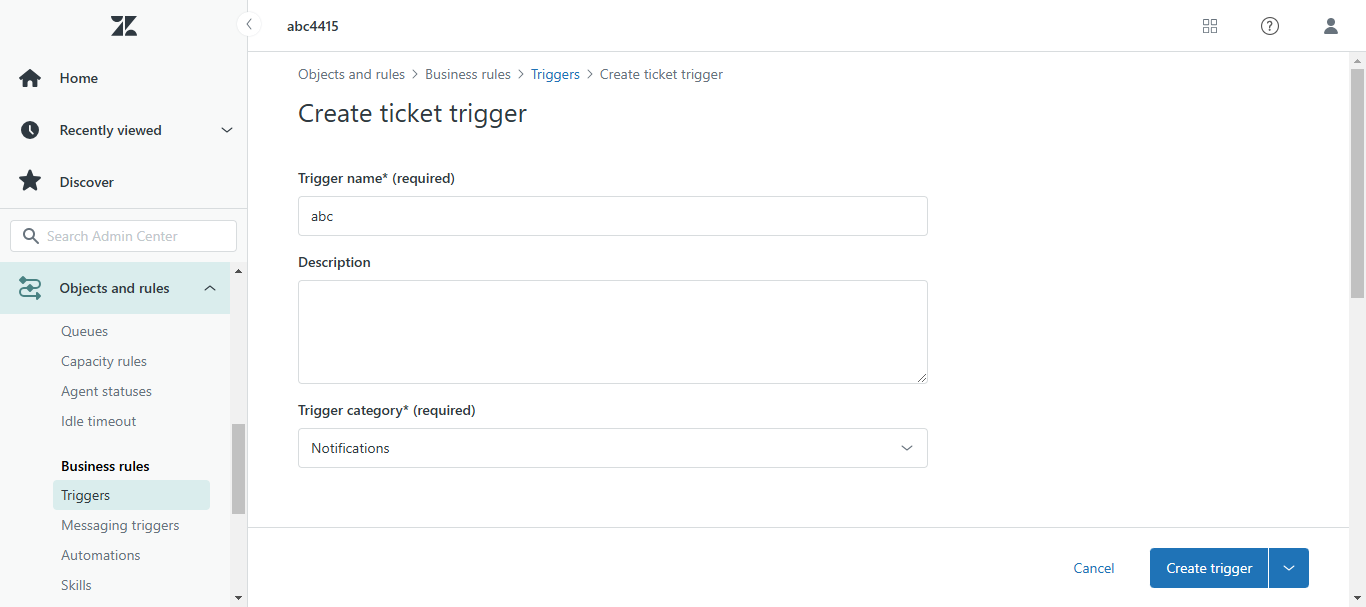
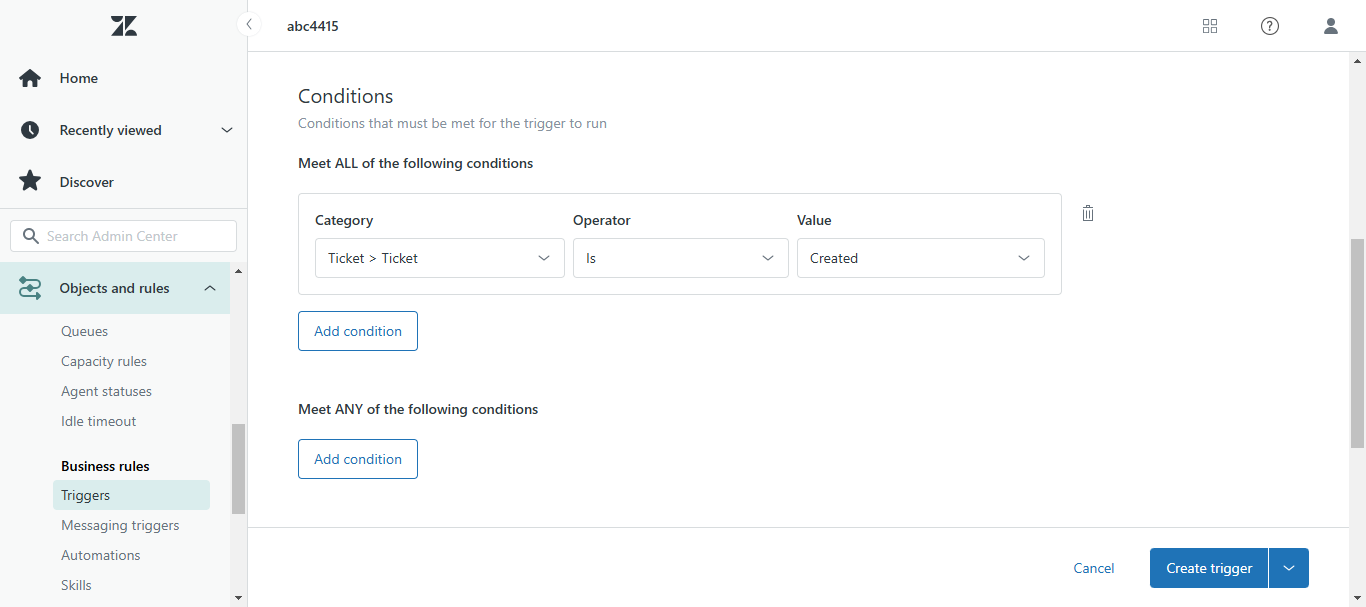
- Under Conditions, add: Ticket > Ticket > Is > Created.
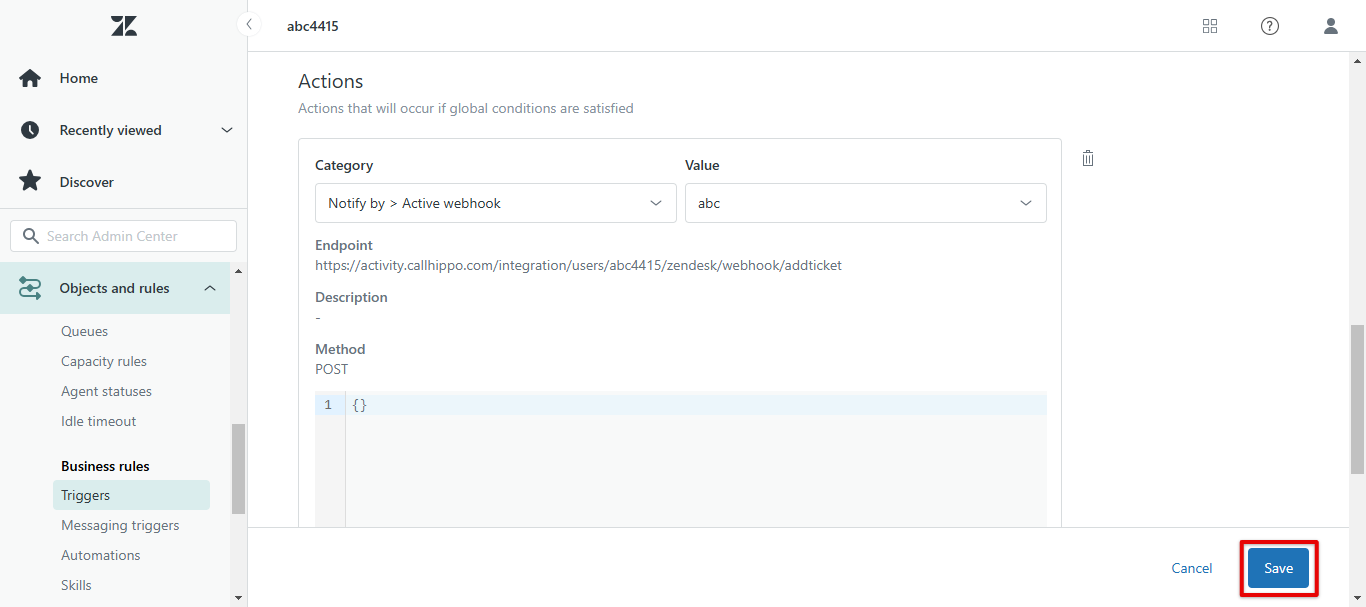
- Under Actions, choose Notify by > Active webhooks and select the webhook you created. In the JSON body, enter
{"ticketId":"{{ticket.id}}"}, then click Save.
3. Create the Update Ticket Trigger
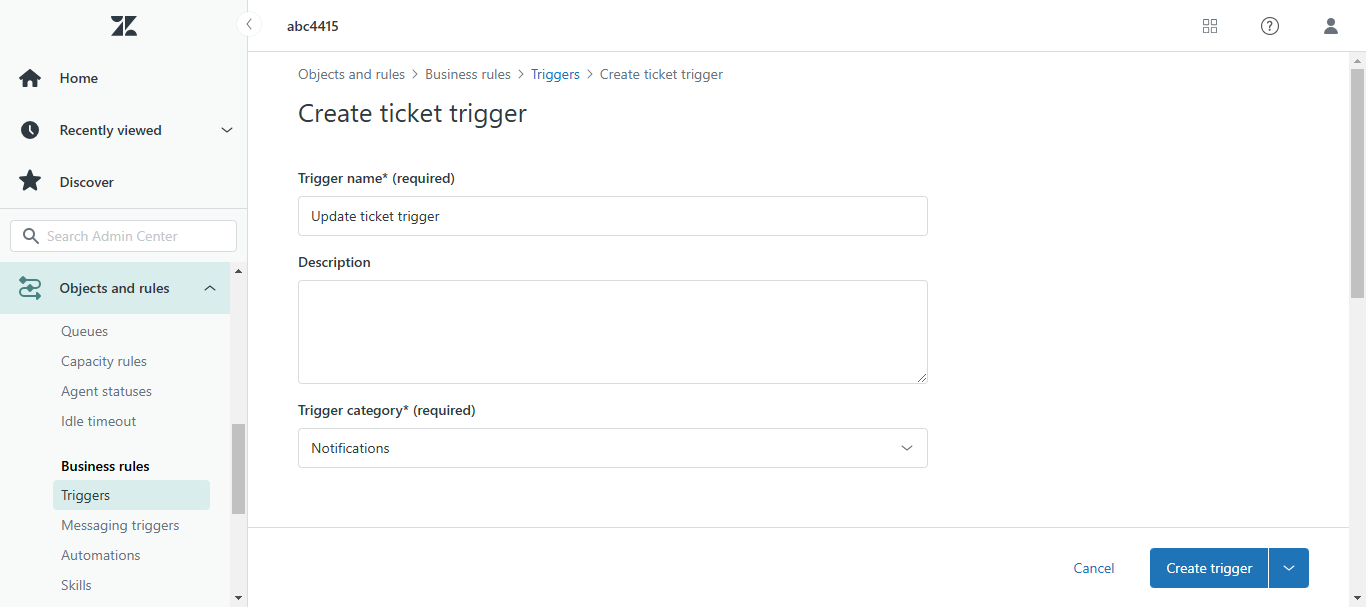
- Go to Objects and Rules > Triggers > Create Trigger again.
- Set the Trigger Name (for example, Update Ticket Trigger) and select the category you created earlier.
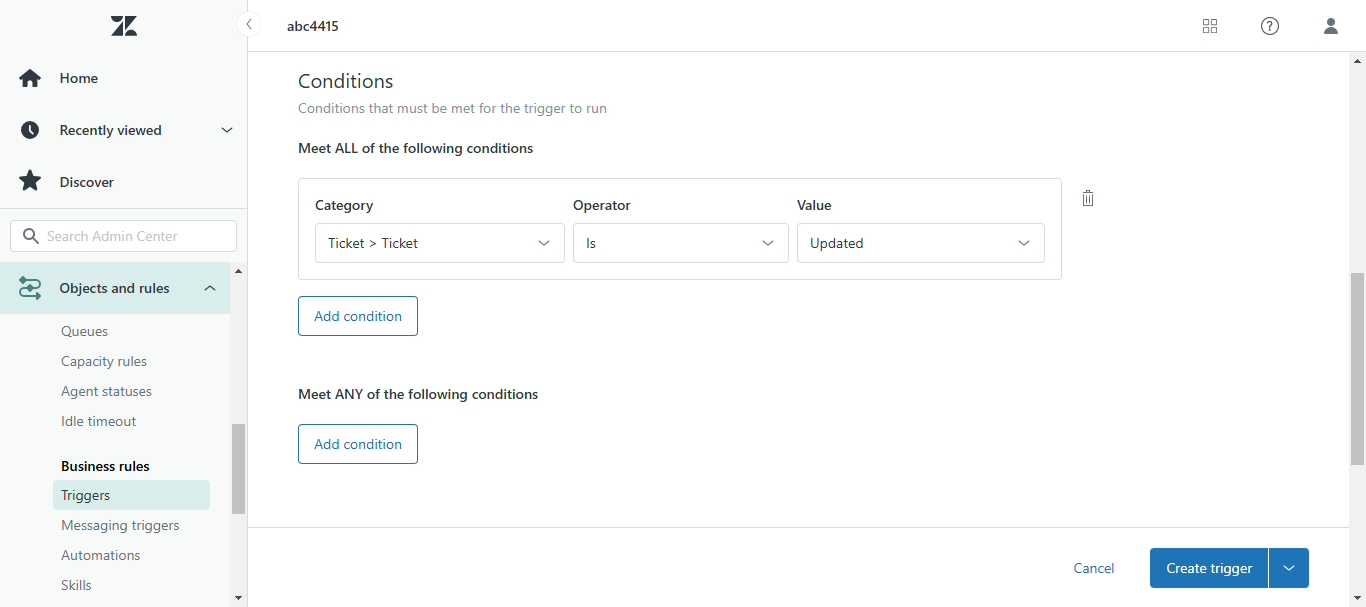
- Under Conditions, add: Ticket > Ticket > Is > Updated.
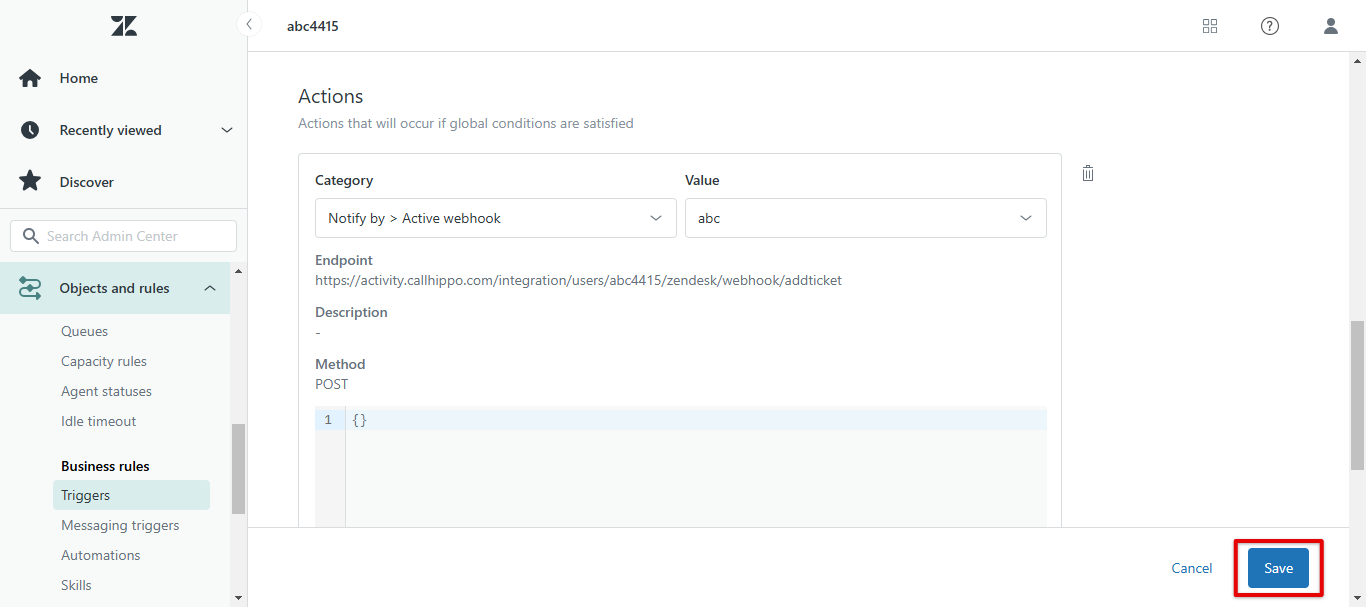
- Under Actions, choose Notify by > Active webhooks and select your webhook. Enter
{"ticketId":"{{ticket.id}}"}in the JSON body, then click Save.
What the Integration Does
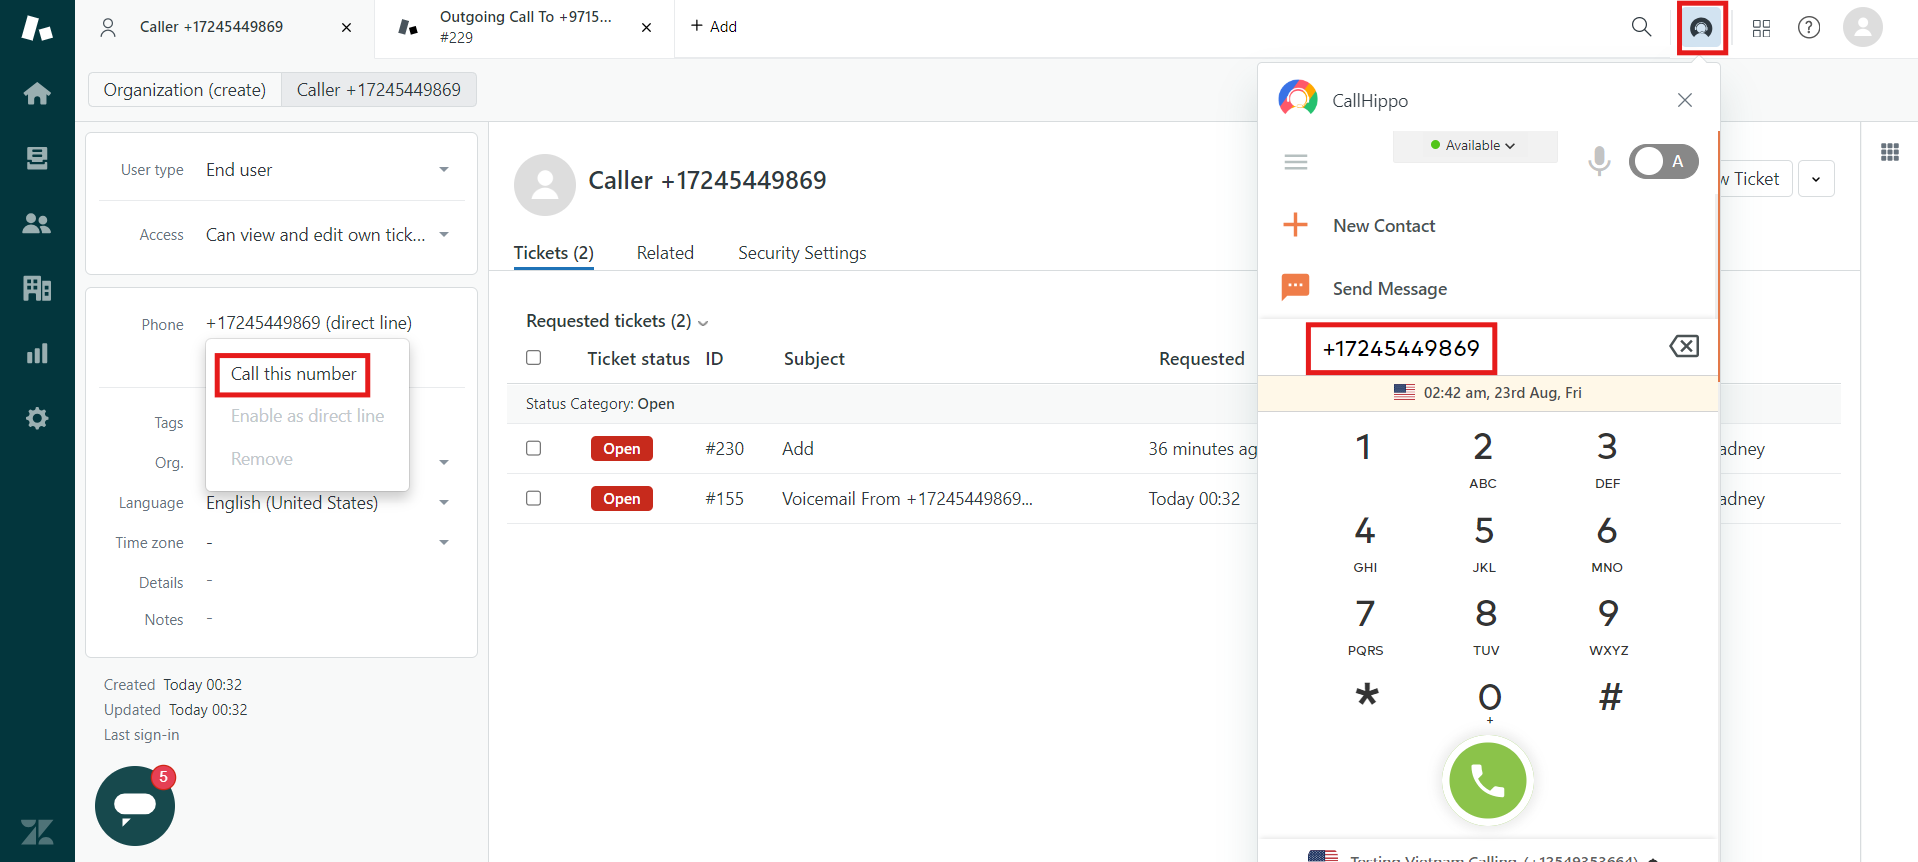
- Click-to-call inside Zendesk: Make outbound calls to customers without leaving Zendesk. Install the CallHippo telephony app from the Zendesk marketplace.
- All existing contacts (end users with a phone number) sync to CallHippo.
- When you add or update a contact, it syncs to CallHippo as soon as a new ticket is created in Zendesk for that contact.
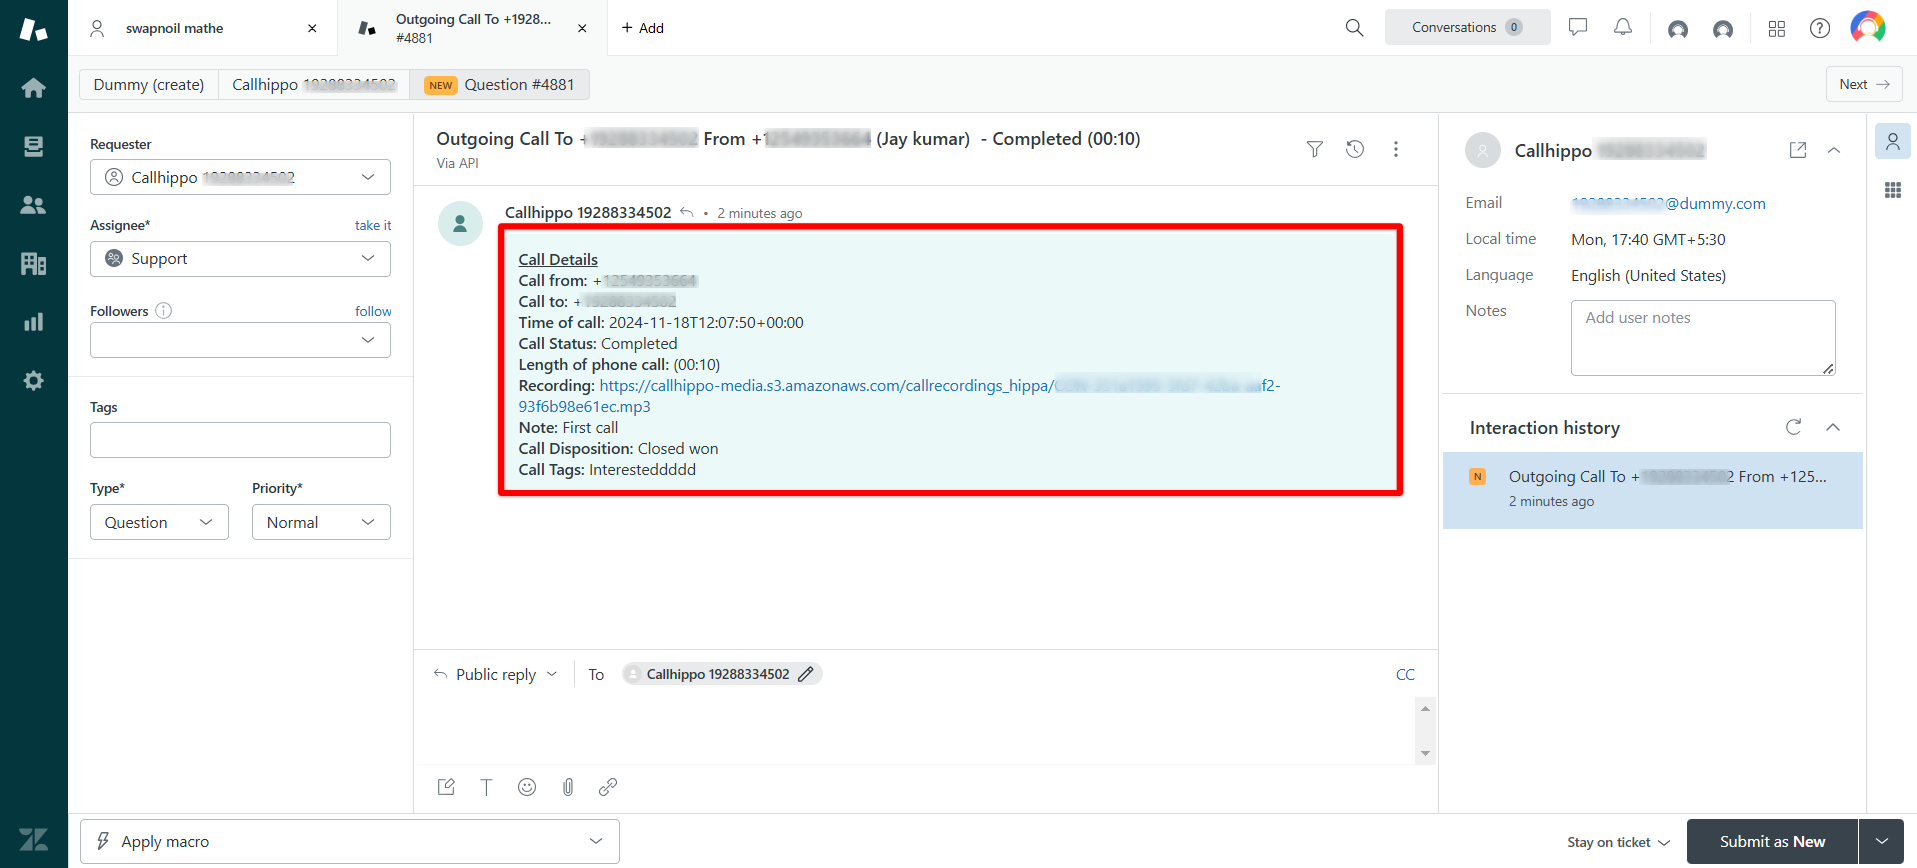
- Every call made with the CallHippo dialer creates a Zendesk ticket with the call log.
After Call Work activity in Zendesk: If your plan includes CallHippo’s call tags and disposition service and it’s enabled, the activity pushed to Zendesk includes the tags and disposition added on the After Call Work screen.
Note: This only syncs when the tags and disposition are added on the After Call Work screen. Tags or dispositions added later from the call logs or other feeds won’t sync to Zendesk.
- Every SMS sent with the CallHippo dialer creates a Zendesk ticket with the SMS log.
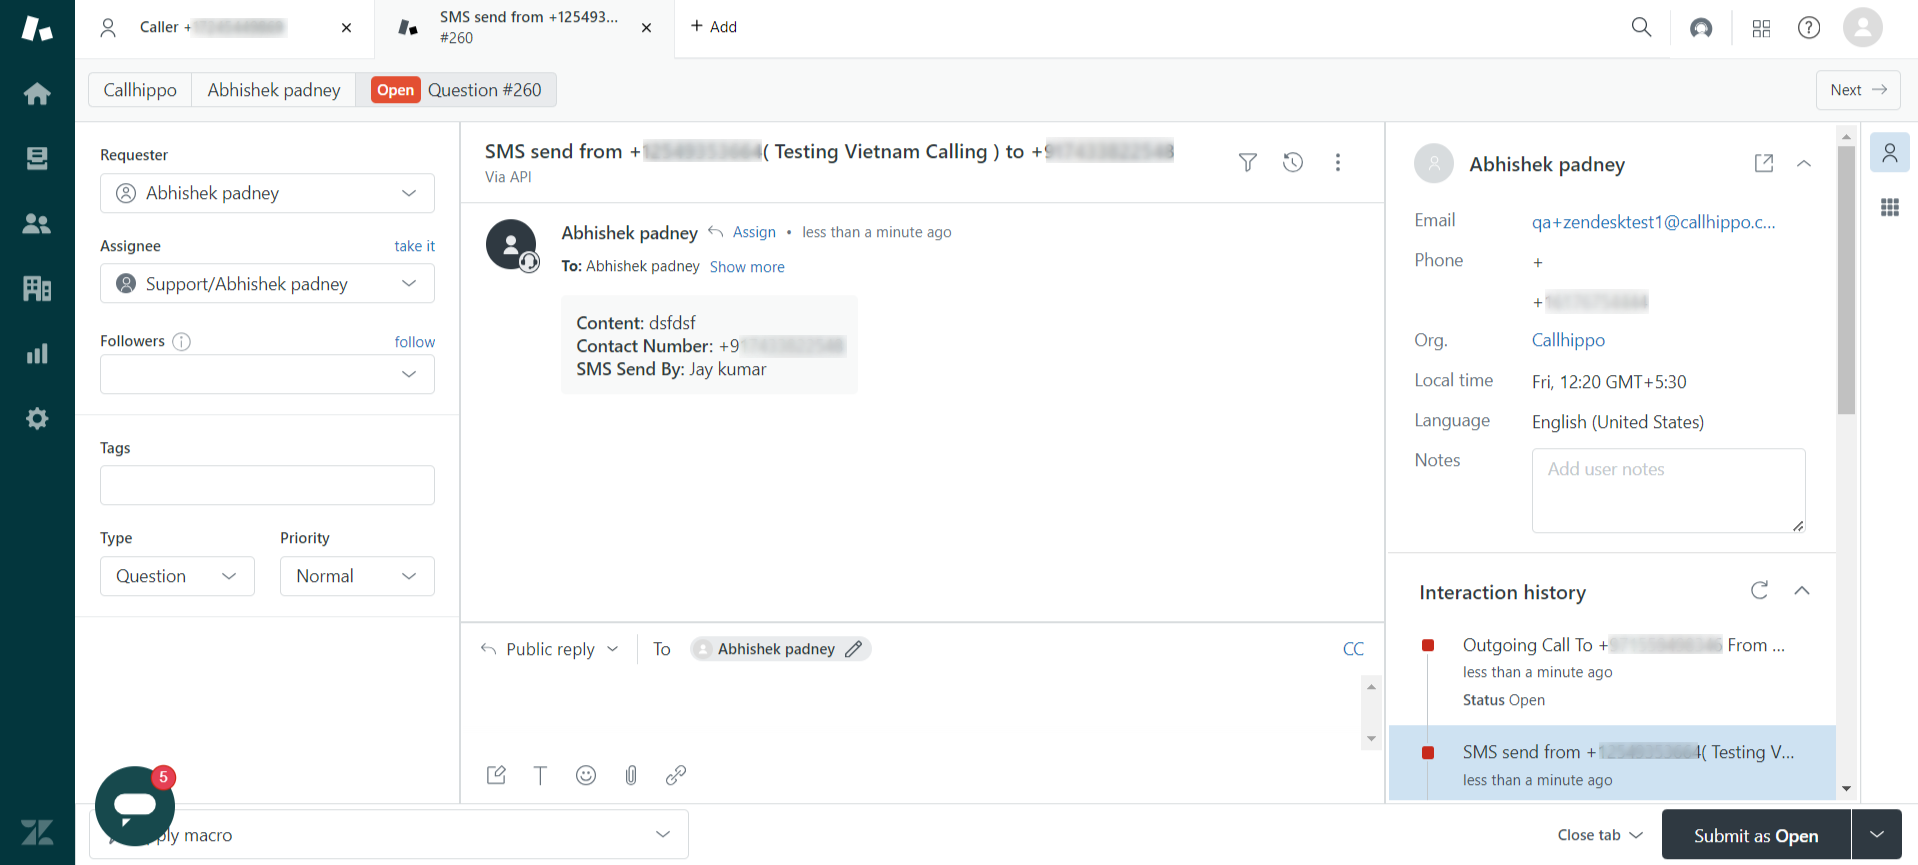
How Call Tickets Are Created
- Incoming or outgoing call to an existing Zendesk contact (requester) → a new ticket is created against that contact.
- Contact saved in CallHippo, then called → a ticket is created and a new requester is added with the CallHippo details (name, email, phone number).
- Incoming call from an unknown number → a ticket is created and a new requester is added with the caller’s phone number.
- Incoming call that goes to voicemail → a voice ticket is created in Zendesk.
Enable Click-to-Call
- Install the CallHippo Click-to-Call Chrome extension from here. Once installed, click-to-call is available directly inside Zendesk.
- To learn how click-to-call works, see this FAQ.
Limitations
- Multiple numbers: If a Zendesk contact has more than one phone number, only the first number syncs, due to Zendesk API limitations.
- Trigger-dependent syncing: Contacts only sync when a new ticket is created or an existing ticket is updated.
- Deletion: Deleting a contact in Zendesk does not automatically delete it from CallHippo.
Note: Outgoing calls are fully integrated with Zendesk. Incoming calls are functional, though a few advanced features may be limited.
Do I have to set up the webhook and triggers, or is connecting enough?
Connecting from CallHippo syncs your existing contacts, but the webhook and both triggers are required for new calls, SMS, and contact updates to create tickets in Zendesk.
Why isn’t a contact’s second phone number syncing?
Zendesk’s API only exposes the first phone number on a contact, so only that number syncs to CallHippo.